
Trail centres are the ideal place to pick up skills for proper off-road mountain biking, but sometimes they can assume a little too much knowledge from those not in the know. There’s never anything that tells you the best way to ride a wallride, or whether there are more berms coming up ahead of you…
Last month we looked at drops and North Shore ladders, this month we’ll be helping you learn how to deal with berms and wallrides. When you take these techniques out to the trail, remember that practice makes perfect. If you’re lucky enough to have a purpose-built trail network near to you, get out there and ride it as much as you can. You’ll soon build up your skills and before you know it you’ll be hitting wallrides and carving berms like a pro.
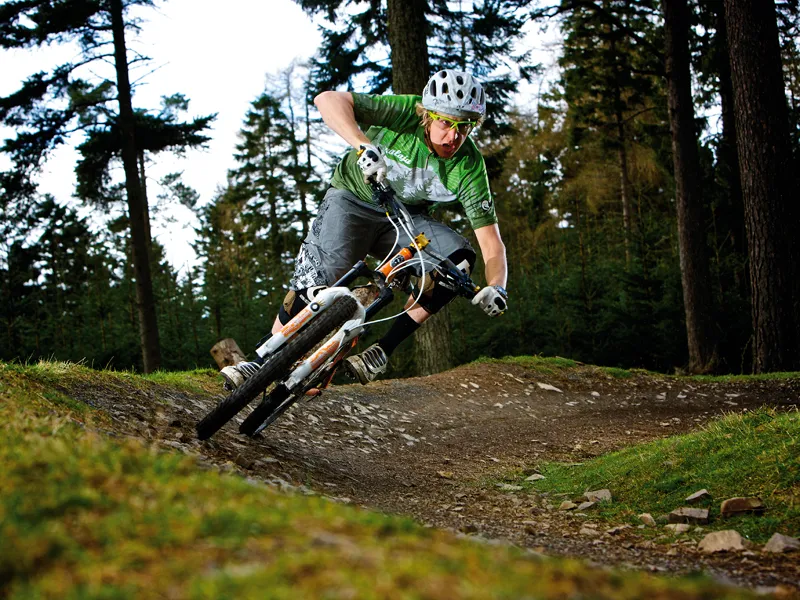
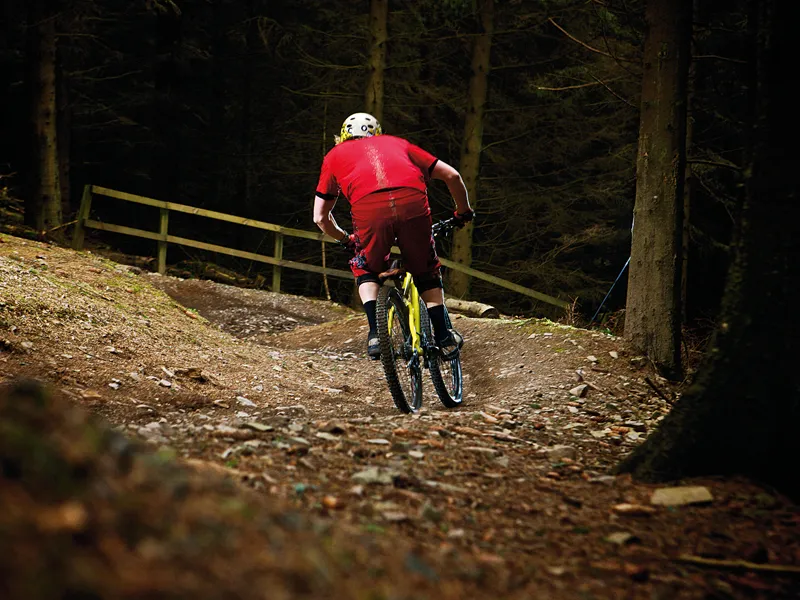
Berms
Berms are banked turns, and they allow you to carry more speed through a corner. You’ll often see them used to speed-up tight corners or as ‘catch berms’ on fast sections of trails – where you drift and the berm catches and supports you, firing you out on the trail.
Good line choice is key to riding berms, but the true secret is commitment. If you enter the turn with the correct frame of mind, ready to hit the turn hard, you’ll get more out of it. You have to learn to trust your tyres to carry you through. With practice, you can hit berms faster than you could possibly imagine. and fire out of them ready for the next section of trail.
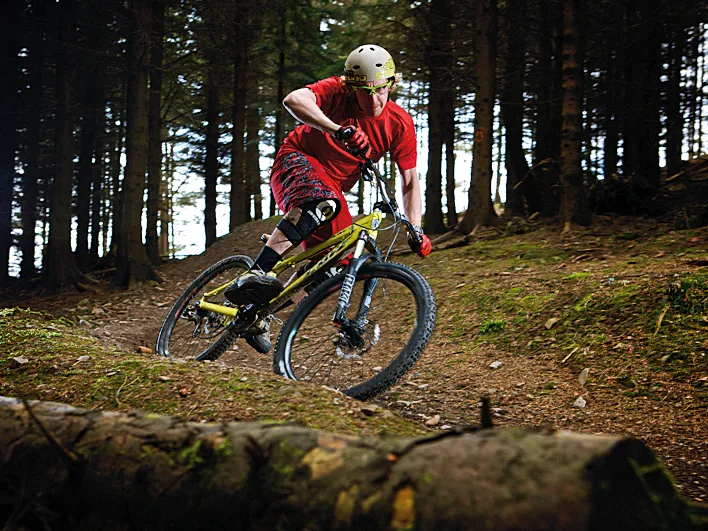
1 Pick your line
You need to enter at the correct point. Come in wide and cut down the berm towards the exit – coming in low can put you too far up the berm before you’ve finished turning, which forces you to brake.
2 Body position
Keep your weight central over the bike – too much weight on the front can force the wheel to tuck under and wash out, and too much over the back won’t give the front wheel any grip, leaving you in a bad position to pull the bike back in line if the front end washes out.
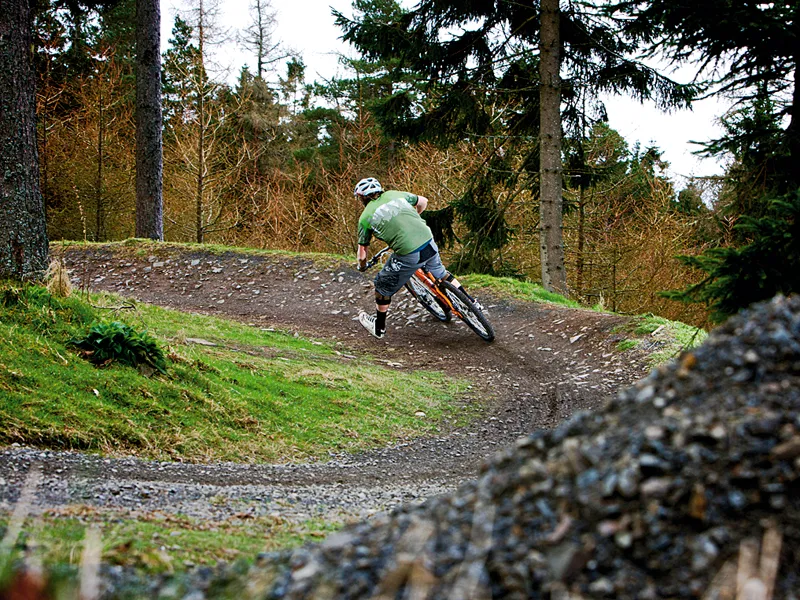
3 Braking
Do all your speed control before the berm, rather than braking once you’re onto it. How fast or slow you need to go depends on the type of berm and how well you can control the bike at speed. Start slower, then work on building speed.
4 Outrigger
On some berms, your bike can slide around a bit, but you can keep it upright by using your leg as an outrigger in order to weight the bike. Look at the angle of the bike in relation to the berm rather than the ground – typically, when riding with your feet up, you’ll actually corner with the bars lower.
5 Weighting the pedals
If you’re dealing with a fast, shallow angled berm, get your outside pedal down and push all your weight onto that foot. This gets the weight low on the bike and forces the tyres to fight for grip. If the berm is tighter and slower, keeping your cranks horizontal works best.
6 Braking bumps
On steeper, faster trails, you may find bumps on the way into berms. These are known as braking bumps and are caused by repeated riders locking wheels up on bumpy terrain. To deal with them, stay off the brakes. This allows you to skip over the top of the bumps, without your wheel dropping into the holes.
7 Successive berms (S-berms)
Often you’ll find one berm quickly followed by another that turns the opposite way. In this instance, approach with less speed and use the first berm to set yourself up for the second. Approach a little slower, so you’ll carry speed through and be able to accelerate, rather than having to scrub speed off.
Top tips
- Avoid the obvious: Sometimes squaring off turns is better than going for the most obvious line. To do this, approach with good speed and come in low, aiming for the middle of the turn. Turn hard, let the rear end drift and push it into the berm to stop the drift and spit you out.
- Learn the turn: Speed is key for turns. Find a couple of berms you’re having difficulty with and session them, starting off slowly. You’ll soon build up speed as you start to ‘learn’ the turn. Then you can apply what you’ve learned to other turns.
- Under pressure: Tyre pressure can make a huge difference too. Again, try experimenting on a couple of berms with hard pressures and soft pressures and see what works for you. Softer pressure will grip better, but can make the bike wallow when you hit the turn hard. Harder pressure will keep the carcass of the tyre consistent, but you’ll have less grip.
- Kept in suspense: The final factor is suspension setup. Your front and rear suspension needs to be balanced so you can avoid having too much or too little grip from either of your wheels.
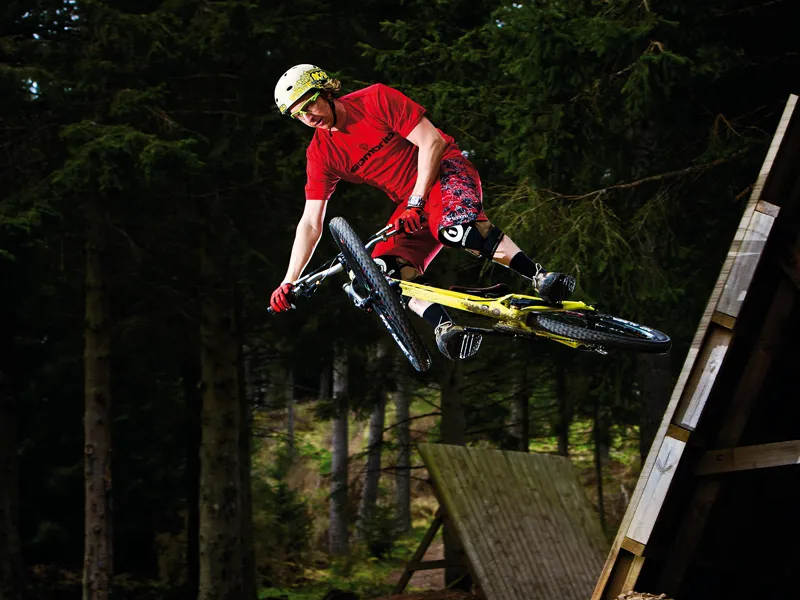
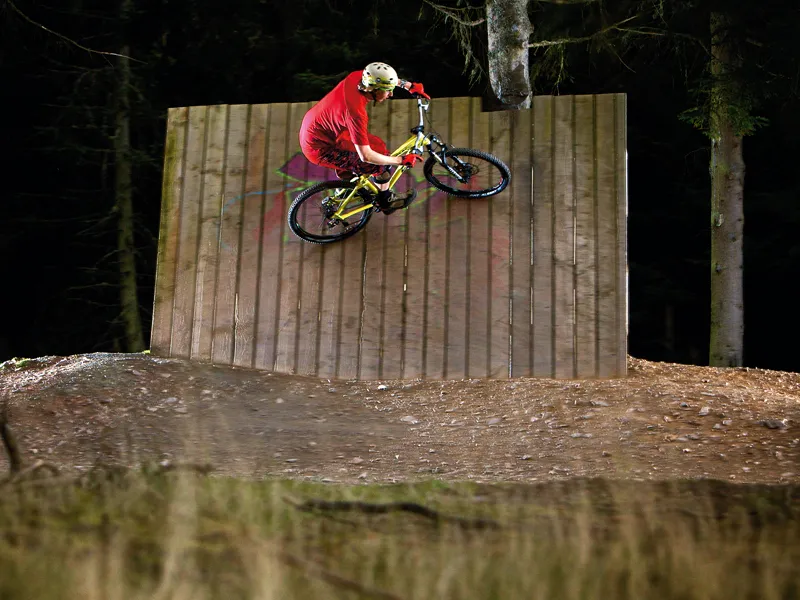
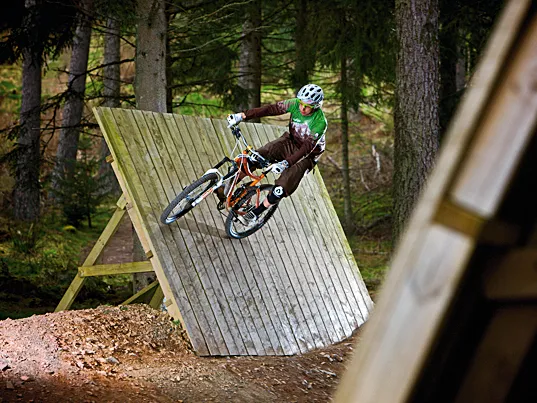
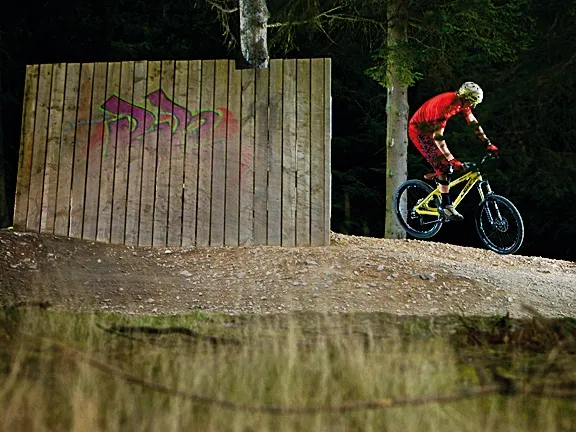
Wallrides
Wallrides are one of the more intimidating things to ride on a bike, but nonetheless, they’re becoming more and more popular at trail centres. They’re actually quite easy to master with the right advice – but equally easy to cock up if you don’t apply a few key points.
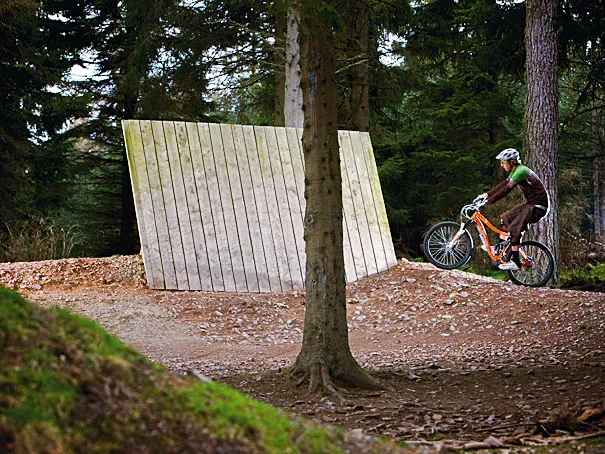
There are two types of wallride: the bigger type that you carve around, much like a giant berm, and the flatter, straight walls that involve getting the bike up on the wall and off again.
The two classic mistakes that people make are not pulling up enough when you hit the wall, and not approaching at enough of an angle for the tyres to grip it. Both are easy to iron out, and once you can estimate your angle of attack and pull up on to the wall, speed and inertia will keep you up there until you either jump off or roll down again. Mastering the wallride is a great skill to learn. It’s super fun and it will always impress your mates – so get practising!
1 Angle of attack
To get the bike firmly planted on the wall you need to hit the wall at the right angle. If you think of the wall as being 12 o’clock, you should hit it at a two o’clock or 10 o’clock angle, depending on which way you’re coming from. Too wide an angle will lead to problems staying on the wall; too narrow and you’ll be sliding along the wall on your shoulder and elbow.
2 Commit
Once you have your line sorted, it’s all about commitment. Get a positive mental attitude and you’ll breeze it.
3 The carve
That two or 10 o’clock angle is crucial on approach, but once you’re on target, you need to plan out your high point on the wall and where you plan on exiting. It can help to make a mark on the wall at the highest point you’ll reach, so you have something to aim for when you’re running in – you don’t want to go so high you go over the top of the wall and risk a massive crash!
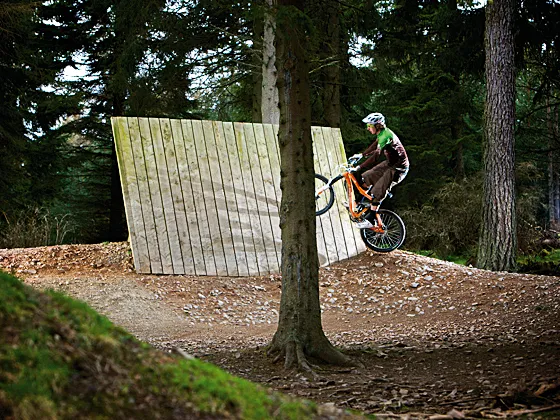
4 Off the wall
On bigger curved wallrides you can treat the exit like that of a berm, but on flat wallrides you have to actively pull up off the wall to avoid nosediving to flat. Once you have your carving angle sorted, you need to look at the landing to avoid hitting any debris.
5 Land smoothly
Jumping off wallrides can be tough on rear wheels because it’s easy to rotate slightly and land slightly sideways, which wreaks havoc on spoke tension.
When you’re in the air, extend your arms and legs, like a cat getting ready to land, and use your whole body to absorb the impact. From time to time you’ll have a skew on landing, but practice will keep these to a minimum.
Top tips
- Save your saddle: Lower your saddle for wallrides. Until you master them there’ll be some heavy landings!
- Try it both ways: If you ride right foot forwards, it will feel more natural to ride anti-clockwise wallrides, and clockwise will feel more natural if you ride left foot first. But don’t avoid riding wallrides the opposite way – it’ll make you a better all-round rider.
- Urban practice: Once you’ve mastered the flat style wallride that involves pulling up on to the wall, check out your town centre to find a few steep banks to practise on.
- Mix it up: Session wallrides until you have them dialled, then you can start having a little fun with jumping off the wall – try adding in a small table or something similar.