

First-time full suss riders often notice the obvious advantage over hardtail designs - greater comfort over rough terrain. But that sofa-like plush in the rough also means you can go faster before the pounding of the handlebars forces you to grab anchors. If speed is your thing, we've got the tips to help you keep the rubber side down and skipping along as fast as possible. Read on to find out how...
Choosing a line
Once riders new to full suss MTBs have got past the thrill of bouncing around the carpark on their new steed, they often make the mistake of aiming deliberately for the rockiest, rootiest sections of trail. There's certainly a perverse thrill in clattering unscathed through the kind of wheel-eating trail sections that would have a hardtail rider dismounting head-first into the weeds, but it can become a habit. And once you stop paying attention to where you're going, in the knowledge that your expensive pride and joy will do the hard work for you, you're in for a surprise: riding this way is slow. Really slow.
Here's the thing. A bike will always roll faster if you steer it down the path of least resistance. Suspension takes the sting out of trail hits, but rattling over every little bit of trail detritus in your path is only going to impede your forward progress.
Ride smart
The first step to riding faster is to ride smarter. Start paying attention to what's coming up in the next three or four seconds of trail
So, the first step to riding faster is to ride smarter. You need to do the thinking for your bike, and that means planning - and looking - ahead. Stop worrying about what's happening immediately under your front wheel, and start paying attention to what's coming up in the next three or four seconds of trail. That means looking a few feet ahead on, say, a slow, rooty climb - or several yards ahead on long and fast descent.
Look for the smoothest, grippiest line, avoiding rocks, roots, holes and mud anything that might slow you down if you can. Having found the line you want to take, shift your eyes further up the trail and look for the next smooth bit. By always looking where you want to go - and not where you don't want to go - your bike will naturally follow your line of vision. Sounds weird, but it works.
Use your momentum
Pedalling can be hard work, so it pays to do as little as you can get away with. Looked at another way, if you want to extract the maximum possible speed from your efforts in the pedalling engine room, momentum is your friend. Once your bike's rolling, you want to do everything you can to maintain that speed.
Confused? It's all about planning ahead. Here's an example: there's a sharp upward rise in the trail a few yards ahead, and it's too steep and too long to simply coast over. You could pedal like crazy at the bottom, shifting down through the gears as you go and creep over the top in a low gear. Or you could boost your speed before you hit the rise, stay in a higher gear and pedal out of the saddle to maintain your speed over the summit. No prizes for guessing which is faster, but the surprising part is that the faster approach is actually more energy effciient as well. By maintaining your speed you hit the next trail section faster, and that gives you more momentum to attack whatever's coming next, enabling you to carry your speed on and on.
There are two keys to using momentum effectively: looking well ahead, and pre-selecting the correct gear
Getting this approach right takes concentration and practice, but when you clear a fast section of singletrack this way you'll be able to feel it 'flow'.
There are two keys to using momentum effectively: looking well ahead, and pre-selecting the right gear. Finding yourself in the wrong gear wastes time, energy and forward momentum as you struggle to select the right one - and crunched gearshifts aren't great for your transmission's health either. Shift lightly when you're not putting the power down and shift early by pre-choosing your line and making decisions a few seconds before the trail changes again.
Fork set-up
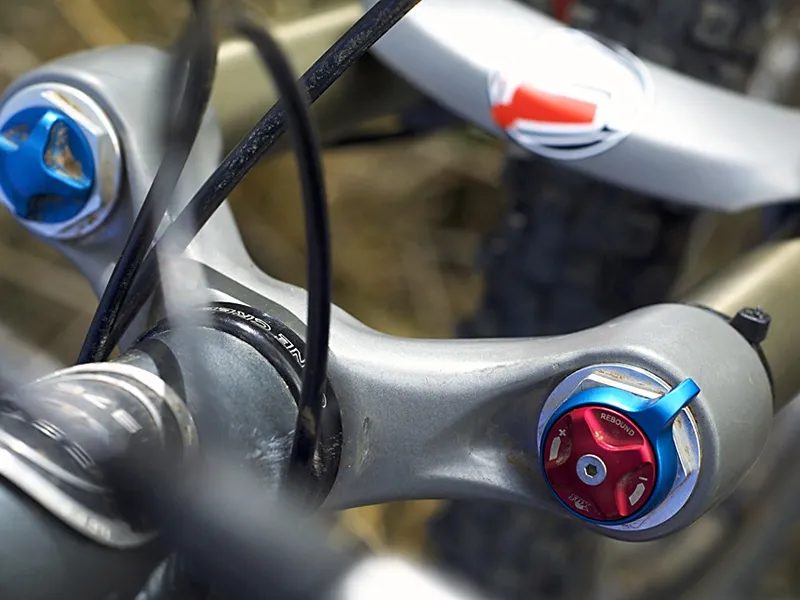
Setting your fork up right can make the difference between plush riding and clonky, sluggish riding. Setting it up for maximum speed takes a bit of patience, but it's essentially a straightforward process. We'll take it step by step:
Setting your fork up right can make the difference between plush riding and clonky, sluggish riding
1. SAG >If your fork doesn't settle a little as you sit on the bike, chances are it's set up too stiff. Ideally a fork should sag between 20 and 30% of its travel as you sit on the bike - the precise amount varies according to bike setup and personal preference. On a coil fork you could try backing off the preload adjuster - if this doesn't work you'll need a lighter spring. On an air fork you'll need to vary the pressure to suit.
2. REBOUND DAMPING >The speed at which the fork returns to its static position after being compressed affects its ability to cope with repeated trail hits. Too slow and it won't cope with high speed trails; too fast and it'll feel bouncy. Start by backing off the rebound damping adjuster to its minimum setting and then adding damping a quarter of a turn at a time until it feels right.
>3. COMPRESSION DAMPING/LOCKOUT >Some forks offer compression damping, sometimes with a lockout option. A little up-and-down bob doesn't affect forward motion as much as most people think, but it can be off-putting when you're busting a gut trying to get up a steep climb. For maximum speed, though, you want the fork to be able to compress over even small trail obstacles, so avoid using lockout except on road sections.
Riding light

Are you sitting comfortably? Then you're almost certainly not riding as fast as you could.
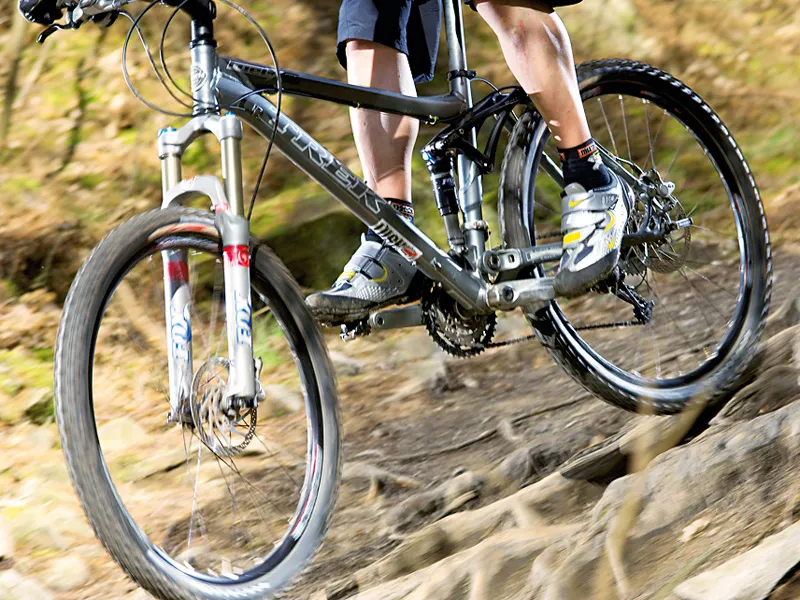
Although it's important to pick the smoothest line for maximum speed, out in the real world it isn't always possible to barrel down a smooth carpet of loam and pine needles. There'll be plenty of occasions when the smoothest line is the least lumpy, but that still means riding over rocks, roots, logs, ditches and what lies in your path. And all of these obstacles will slow you down.
Unweighting the bike as it rolls over obstacles will allow you to maintain more speed
Your bike will benefit from a helping hand, and this is where you come in. Riding light - unweighting the bike as it rolls over obstacles - will allow you to maintain more of your speed, as well as reducing chain clatter, frame stress and wear and tear on your bike's suspension system components. A simple, well-timed squat of the suspension and a lift of the handlebars to help the front wheel over a root can often be enough, but as the speed increases it can often be useful to unweight the rear as well. Try bending your arms and legs and then 'exploding' upwards; you'll reduce the combined mass of bike and rider and therefore its rolling resistance as it encounters an obstacle.
The benefits of full suspension mean that you don't have to lift the bike totally clear of the ground, but even a momentary upward lift can make the difference between stalling on an awkward rock or 'skimming' over the top of it.
TOP TIPS
1. Pick your line
The best line isn't always the one that everyone else has taken. On well-ridden trails there's often a faster, smoother line off the main one. Don't be afraid to use your head and think for yourself.
2. Use your brakes
Bizarre as it sounds, you can use your brakes to help you ride faster. 'Fast' braking is all about merging brake use into gear selection and line choice, so that you never have to unexpectedly and suddenly scrub off speed. Think ahead, think smooth, don't brake unless you need to.
3. Check your forks
Are your fork's seals slowing them down? Well-lubed seals can make the difference between a super-responsive fork and one that feels sticky and slow. If yours isn't up to par, consider getting them serviced.