


Last month we showed you how to service a Fox air can. This month it’s the turn of the RockShox Monarch and Ario – the next most common air shocks found on bikes in the UK.
Time: 60 minutes
Cost: £25
Tools:
- SRAM Pit Stop Red Rum oil
- Boa strap
- Allen keys
- Blunt pick
- Schraeder valve key
- RockShox mount hardware and bushing removal tool
- Shock pump
- Plastic mallet
- Latex gloves
- Bench vice
- Isopropyl alcohol or brake cleaner
- RockShox Air Can service kit
Step 1
Remove the air valve cap and screw your shock pump onto the valve. Check the pressure reading and make a note of it; you’ll need it later. Use the bleed valve on the shock pump to completely deflate the shock. Remove the shock pump.
Step 2
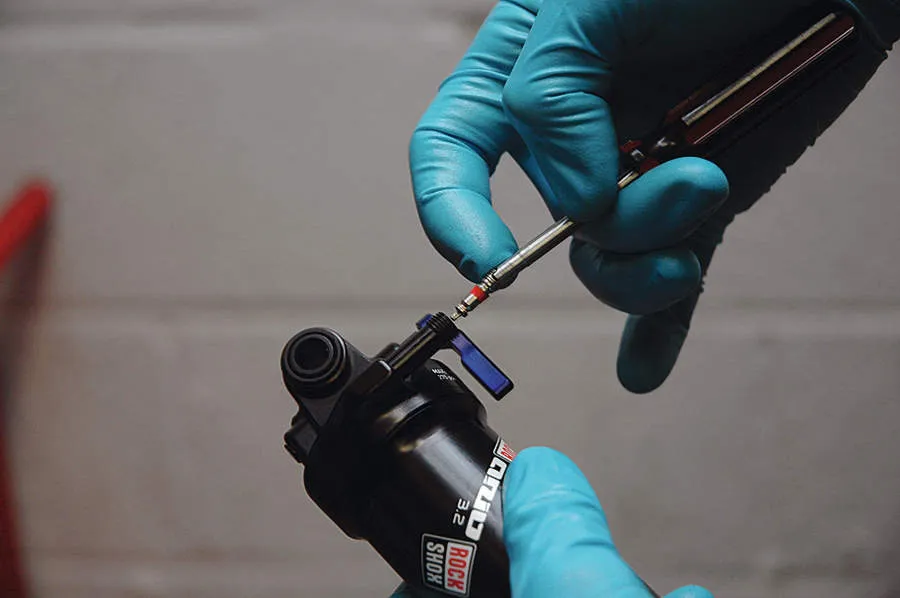
Remove the valve core from inside the air valve. Grab your Schraeder valve key and place it inside the air valve, so it drops over the flats. Unscrew it completely, withdraw it from the valve and stow it somewhere clean and safe.
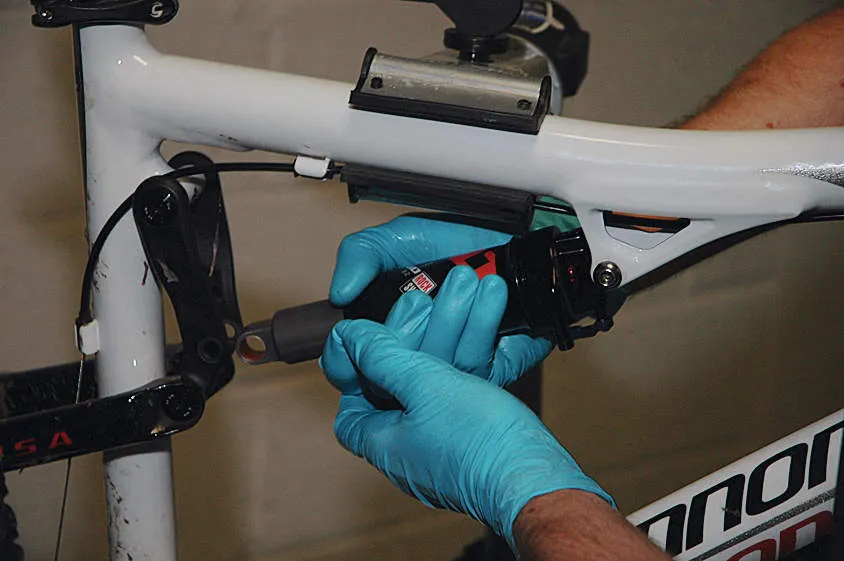
Step 3
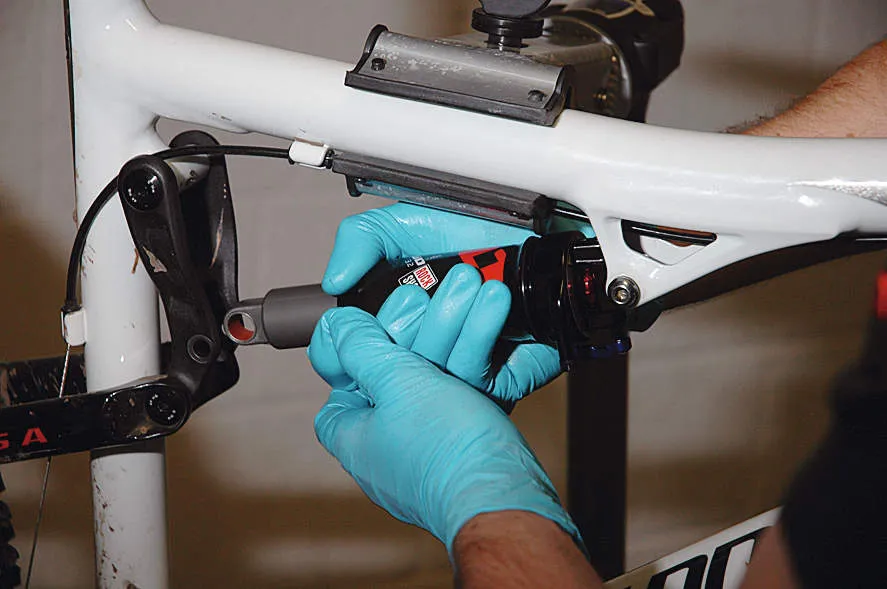
Using the frame as an anchor for the shock, unscrew the air can. Grab the larger diameter section of the shock and unscrew it a few threads by hand, not all the way. If it won’t budge you will need to use a Boa strap wrench. Don’t unscrew the air can all the way off the threads, just enough to loosen it. Remove the shock from the frame.
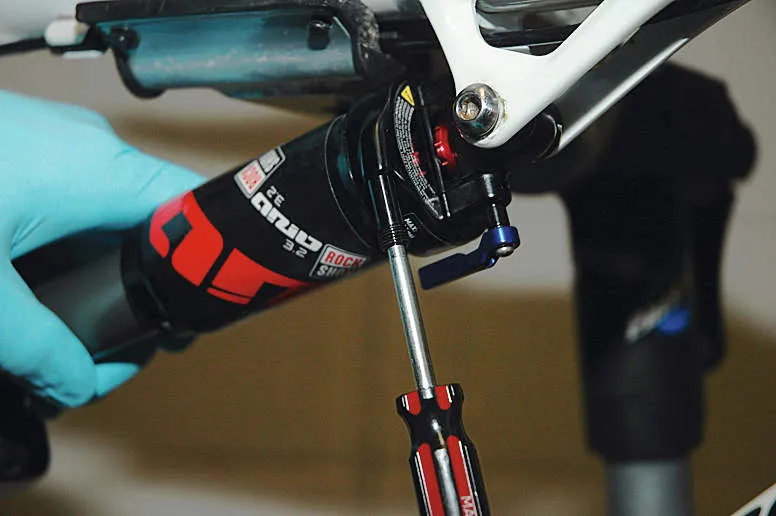
Step 4
Following the instructions, remove the mount hardware from the shaft end using RockShox’s specific removal tool. If you don’t have one of these, it is possible to drive the mount hardware out using the relevant sized bolts and sockets. We wouldn’t recommend you do this, but if you do, be very careful not to mark the shock shaft, because this would be expensive to repair.
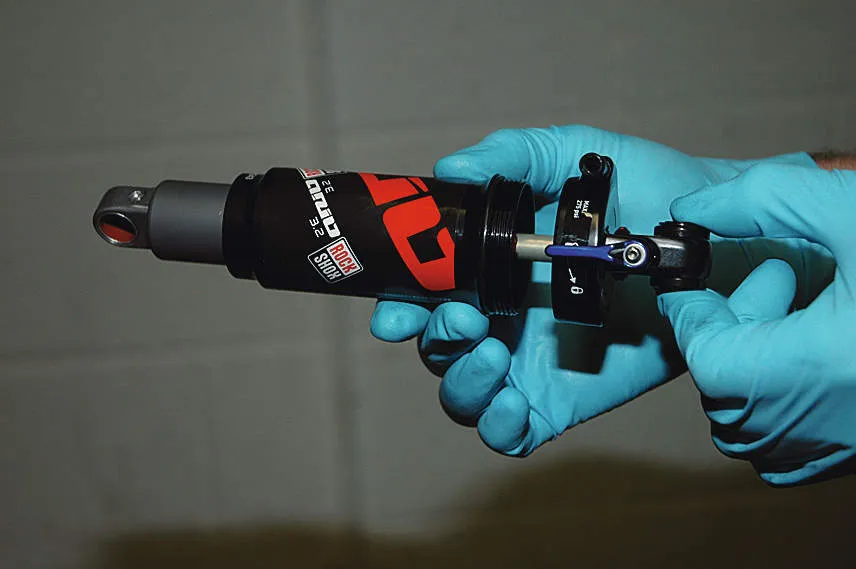
Step 5
Slide the red O-ring off the shock shaft. Unscrew the air can body and slide it off the end of the shaft. Do this over a bowl or rag to catch any fluid. Remove the white foam negative spring bumper from the shock shaft. Clean the shock shaft with isopropyl alcohol or brake cleaner and inspect it for damage. It will need replacing by a shock service centre if it is damaged, because it will cause the shock to leak.
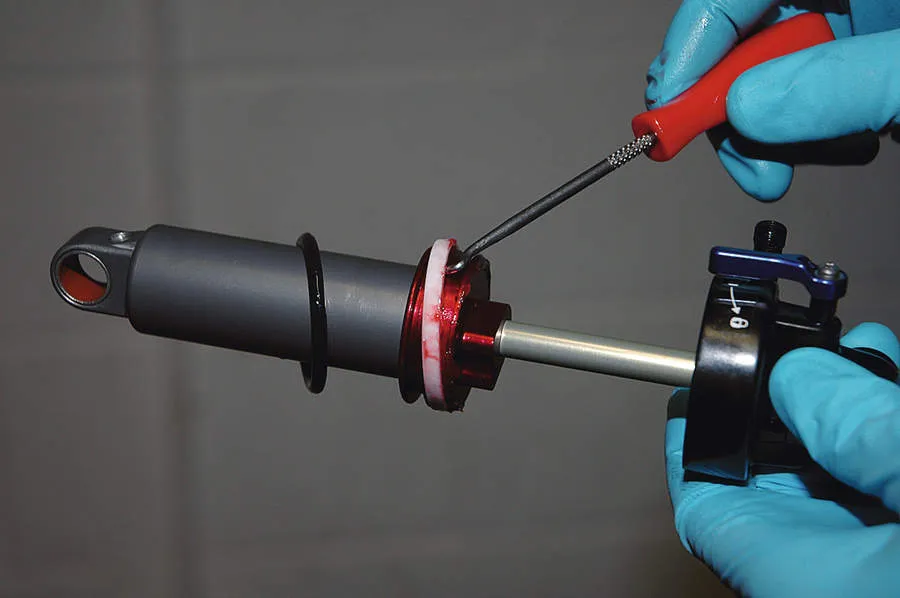
Step 6
Grab your blunt pick, and lever up and remove the rubber O-ring seal and the white plastic glide ring from the head of the shock shaft, noting the order. Be very careful doing this, because marking the aluminium seat can cause the shock to leak. Match up the replacement parts from your service kit, coat them in a little SRAM Red Rum, check the orientation and fit them in place by hand.
Step 7
Grab the air can and remove the small thin O-ring outside of the body, at the end of the external threads. Do this very carefully with your pick, because damaging the seat will cause sealing problems. Match up a replacement O-ring from your seal kit, coat it in a little SRAM Red Rum and fit it to the body by hand, making sure it is evenly seated all the way round.
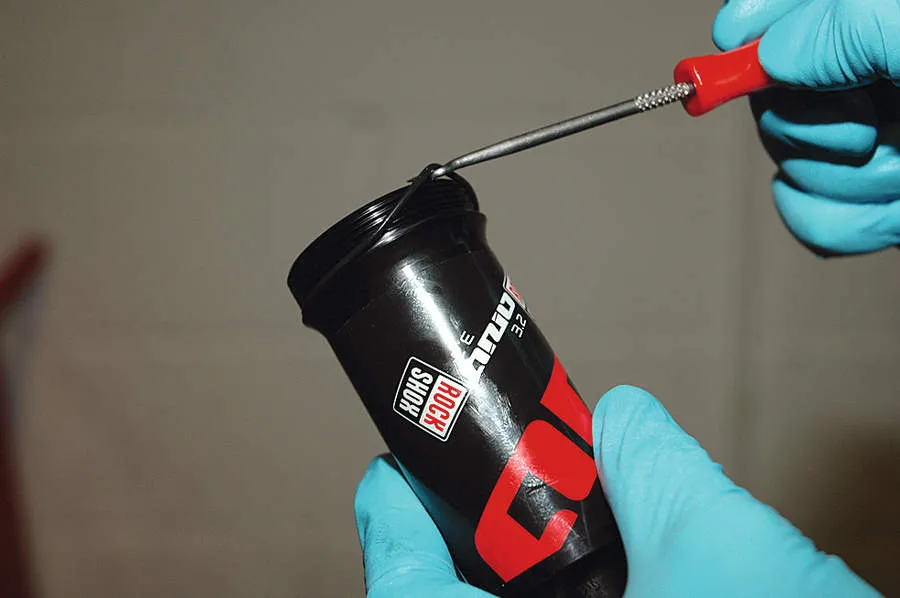
Step 8
Hook out the wiper seal from inside the end of the air can. It will be quite tight. Hook the outer top edge of the seal and pull down and inwards to remove it from its seat. Once it is dislodged you should be able to pull it out with your fingers. Be very careful not to mark the metal surface, because this will cause sealing problems.
Step 9
Once the wiper seal is removed you can remove the rubber O-ring seal that’s behind it, and the white plastic glide ring behind that. Again, use your pick very carefully, pulling them in towards the centre of the body, making sure not to mark the seat. Clean inside the body thoroughly with isopropyl alcohol or brake cleaner and inspect it for damage.
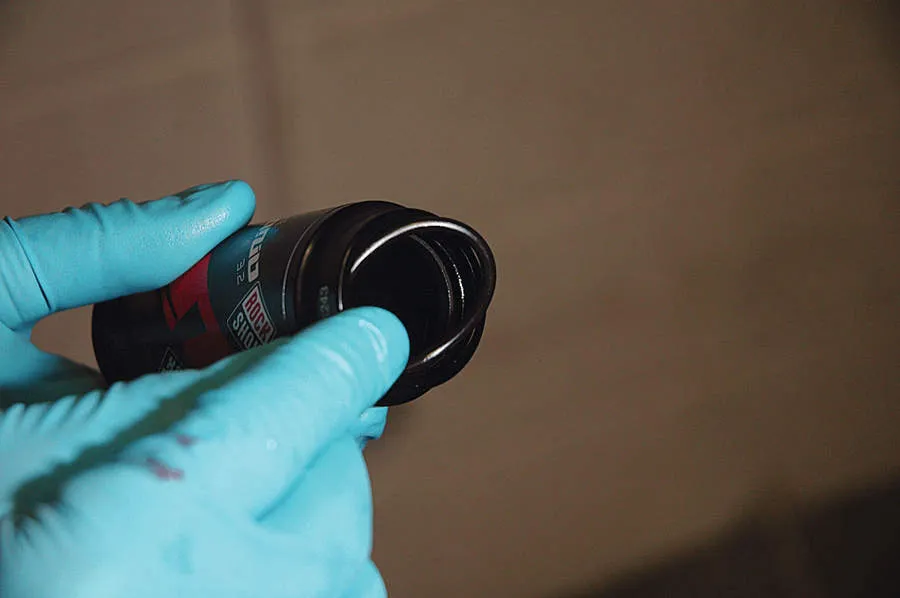
Step 10
Match up a replacement glide ring and O-ring seal from your service kit, coat them in a little SRAM Red Rum and refit them. The white plastic glide ring goes in first. It is split, so you can compress it with your fingers to get it in place, make sure it snaps evenly into its seat. Next fit the new O-ring, making sure it is evenly seated all the way round.
Step 11
Take a new wiper seal from your service kit and coat it in a little SRAM Red Rum. Squeeze it into an oval shape and get an edge seated into place in the end of the air can. Work the rest of the seal into place by hand, checking that it is evenly seated all the way round.
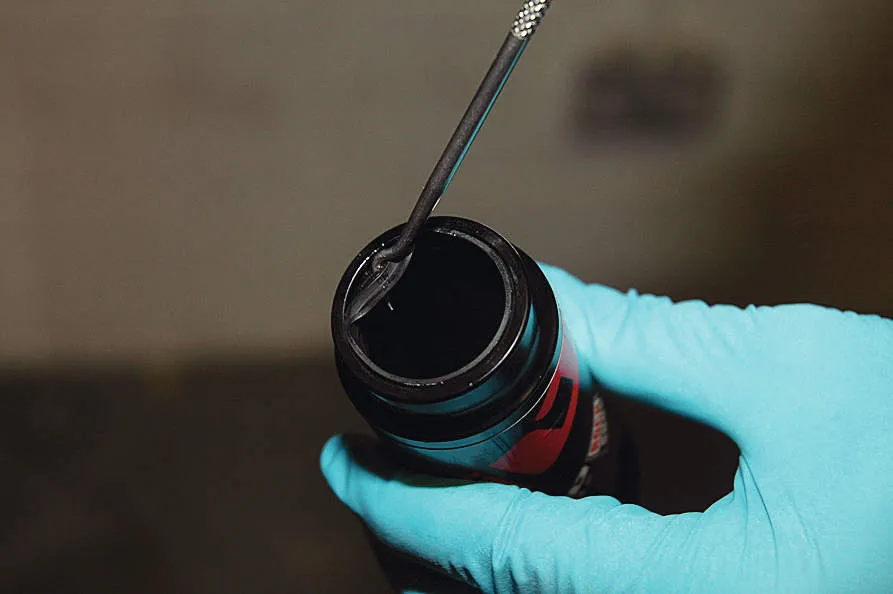
Step 12
Clean the external threads on the end of the air can with a small soft brush if you have one, or some rag. Dip a finger into the SRAM Red Rum and lightly and evenly coat the inside of the air can. Don’t drip loads in there because it can hinder the action of the shock.
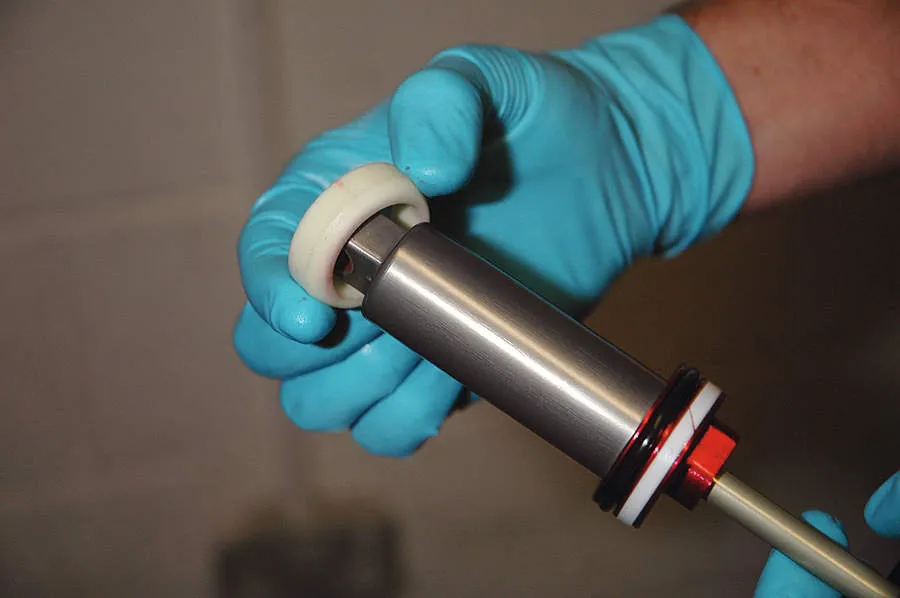
Step 13
Clean the white foam negative bumper with some isopropyl alcohol or brake cleaner. Give it a very light coating of SRAM Red Rum. Refit it to the shock shaft. Note the orientation. The narrower end goes on first and needs to butt up against the seal head.
Step 14
Slide the air can onto the shock shaft, as far as it will easily go. Then bolt the top of the shock into the bike to give yourself an anchor point. Now pull the air can up toward the body eyelet while tightening it. It may take a little while for the threads to engage. Once engaged, tighten the air can as tight as it will go by hand.
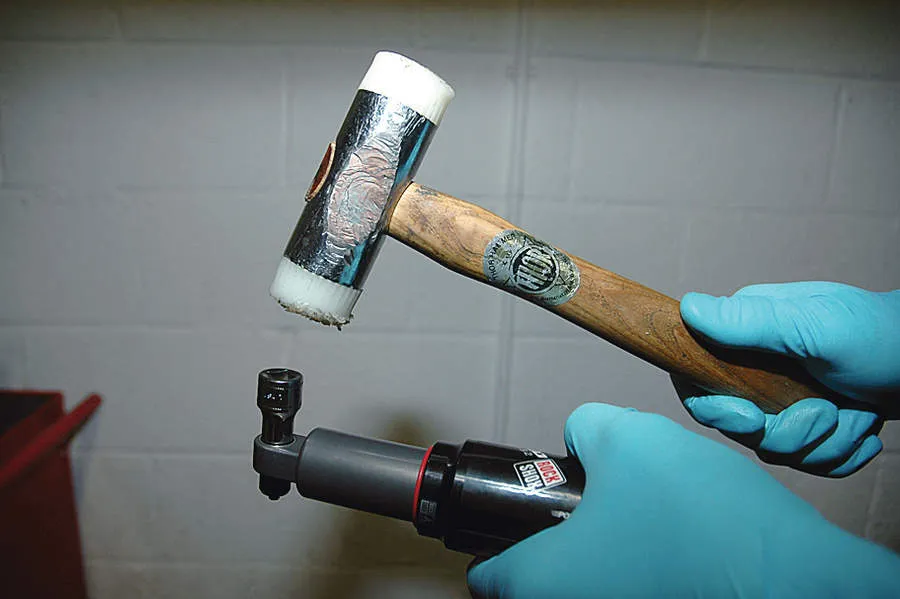
Step 15
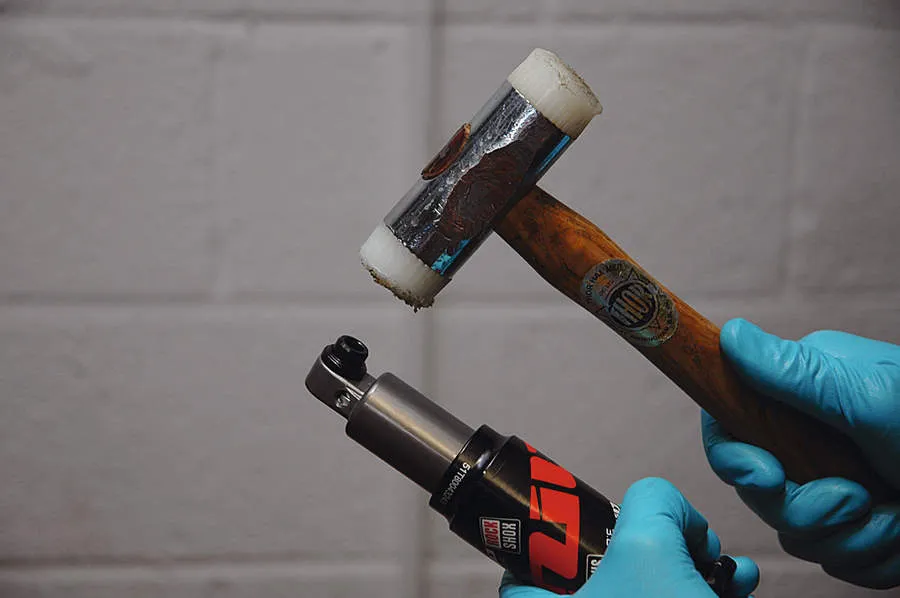
Remove the shock from the bike and refit the shaft end mount hardware. Ideally it should be pressed in place in a vice or with a bushing installer. If you don’t have either of these, they can be knocked into place using a plastic mallet. Be very careful not to hit the shock shaft.
Step 16
Refit the red O-ring to the shock shaft and then the Schrader valve core into the valve. Now fit the shock back into the bike and tighten the mount hardware to the manufacturer’s recommended torque. Grab your shock pump and repressurise to the pressure you marked down in step one, refit the valve cap and you’re ready to rock.
Top tips
- An air can service can make your shock a lot smoother, so you may need to check your rebound damping settings, because it may be too quick. It may also be worth checking the sag setting, because it may sit further into the travel than when it was a little sticky.
- Service your air can regularly. If you ride a lot of miles in the wet it would be worth doing every couple of months. Prevention is certainly cheaper than cure.
- A digital camera can really help here. You can make an easy-access record as you disassemble the shock, to make sure that everything goes back in the right order.