This is a promoted post in association with David Millar and A1 Members.
The ‘David Millar TT System’ gives a roadmap to all riders on how to improve their time trialling. The system isn’t a strict set of rules on how to do it ‘right’, or an argument for purchasing an expensive list of equipment. Because every rider is unique, Millar’s system reveals how everybody can unlock their full potential and become the best time triallist they can possibly be.
As I outlined yesterday in the introduction to this series on my TT system, the amount of misinformation out there about time trialling really frustrates me. It seems that a large proportion of competitors think the only path to speed is to invest thousands of dollars in equipment, wind tunnel testing and suchlike.
I hate seeing riders waste time and money in the pursuit of speed when the real gains for most are much simpler and closer to home.
This is one of the reasons why I hooked up with the guys at A1 Members. Like me, they ask the awkward questions and don’t take things for granted.
So, I decided to write this blog and help create the free video series because, by making simple changes to the various elements of the TT System I developed, it is possible for riders to see a huge increase in performance: that is, if only they know what to look for... !
null
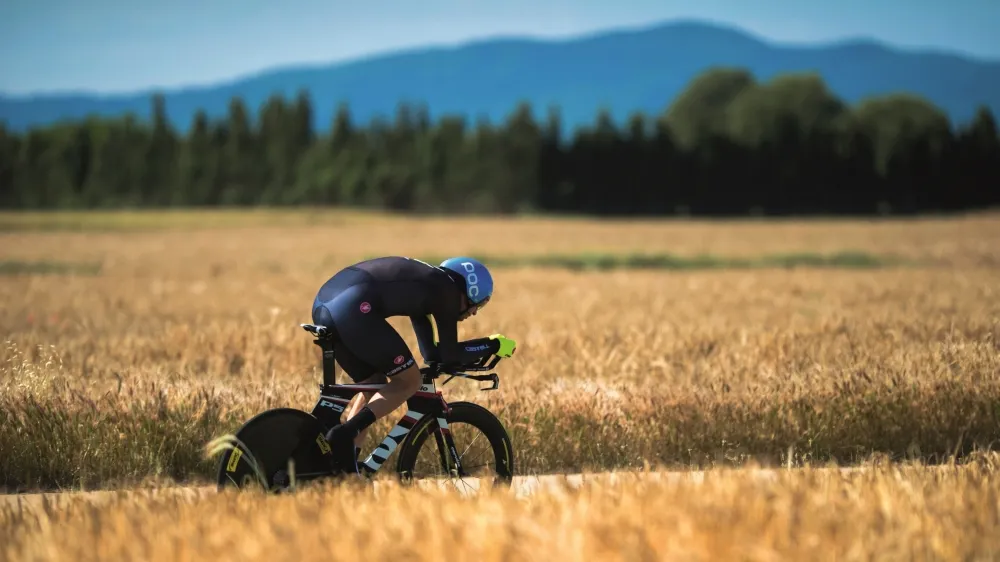
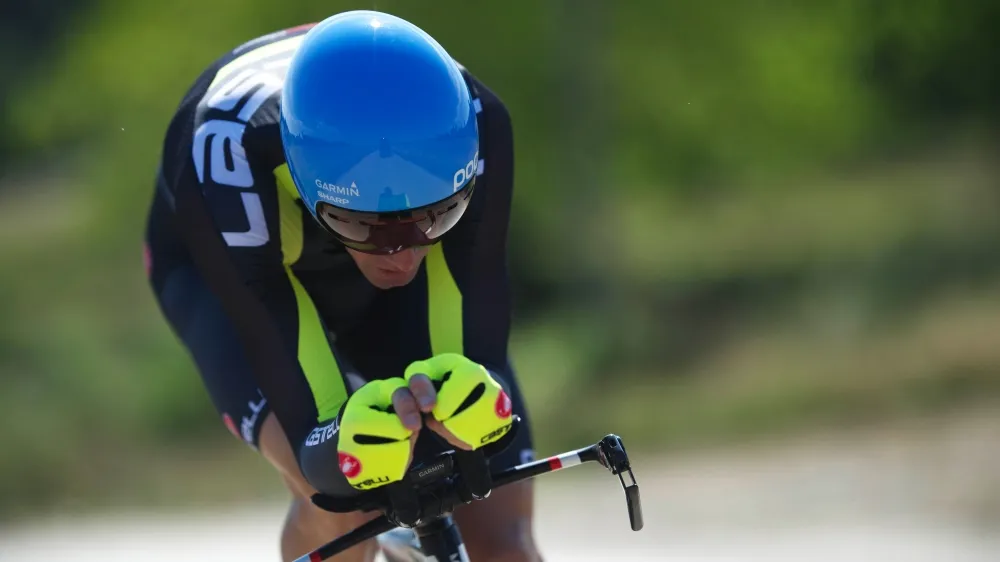
The biggest obstacle in almost every time trial is air resistance. Hence, good aerodynamics is vital and your body is what creates most resistance. That’s why position is the number one element of my TT System – the more aero you are, the faster you’ll go, and that’s before you’ve even started training!
By following these guidelines, my system will give you the best position for YOU, and not some theoretical ‘BEST’ position.
1. Begin with what you have
The best way to begin is by aiming to get the most out of what you already have.
It took me years to master my position by experimentation – the use of wind tunnels and other high-tech methods weren’t the norm when I turned professional. So, I had to work it out for myself, mainly through trial and error.
In hindsight this was a good thing as I had to learn and understand how each change brought benefits. Through this process I learned far more than I would have by just going into a wind tunnel and being given a bike set-up and a list of equipment.
My position continuously morphed as I experimented and adjusted, until I found my perfect position in 2010. That was 13 years after turning pro!
The main lesson is that it’s a relatively simple process to set up an effective TT position, although it will then take some tweaking to perfect it. Hopefully this won’t take you 13 years, though, because I’ve done the hard work for you.
2. First steps
The first step is to maximize your position relative to the UCI legal limit so that you can pedal efficiently - you can have the most aerodynamic position in the world, but it’s useless if you can’t pedal efficiently.
To do this, move your saddle forwards, using the UCI legal limit of 5cm behind the bottom bracket axle as the target. Use a plumb-line from the tip of the saddle to measure it. The reason for doing this is that your body’s natural tendency at high power and cadence is to slide forwards on the saddle.
Then set your bike up on a home trainer, get into your current TT position, and have somebody take pictures of you from the front and side.
Use these images as the baseline – study them. One basic principle I adhere to is that if you look fast, you probably are fast. This is often the way with aerodynamics: it’s an external surface dealing with external forces. In other words, it’s visible. This is much the same as if you looked at a racing car, you’d be able to discern that it actually is a racing car.
Examine your knee angle also because, if you’ve had to move your saddle forward significantly in order to reach 5cm, you’ll probably need to raise it by a few millimetres, or even angle it slightly upwards in order to accommodate the forward rotation of your hips over the cranks.

3. Compare, study and learn
As you look at the pictures of your own setup, compare them to others – especially the fast guys. In the words of Pablo Picasso, “Good artists copy, great artists steal.”
Use magazines, TV, and the internet to research how the fastest “testers” position themselves on the bike. Don’t look at their bikes, look at their bodies and how they position themselves on the bike. It’s our body that has the largest surface area - the bike’s frontal area is tiny by comparison.
4. The cockpit
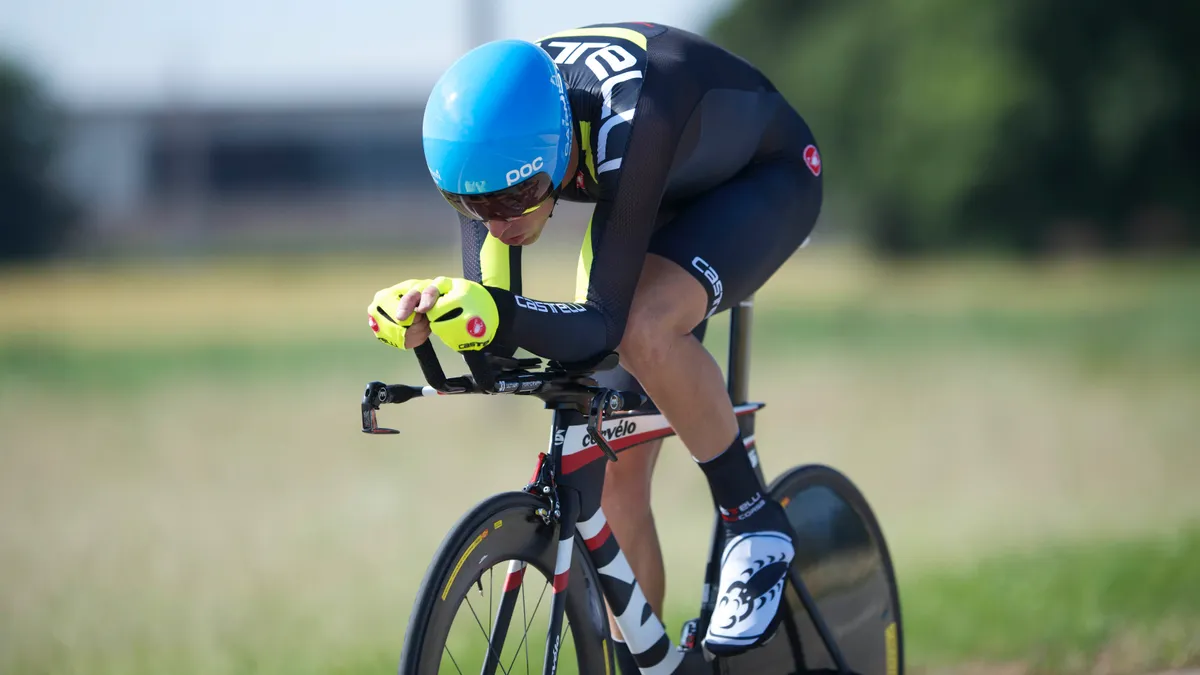
TT bars are a necessity as they allow you to get into the aero tuck position and reduce the frontal area you present to the wind, much like a downhill skier.
With your new saddle position you should set up your bars so that there is close to a 90 degree angle at your elbow. Ensure that they’re far enough forward so that your knees don’t touch your elbows when you’re in the tuck.
Aim to have your forearms horizontal, or even slightly inclined upwards.
Try and get your arms as close to each other as is comfortable as this will make you narrower in front, and faster.
Your hand position is a matter of personal taste and also dependent on the type of bar you’re using. Personally, I liked having my hands in an upward-angled grip – very rarely did it feel like I was gripping hard when in the aero tuck.
The height of the bars is dependent on your particular morphology – the shape and proportions of your particular body. This is why it’s important to set your position up on the home trainer so that you can continuously test, adjust and find what feels and works the best – you do not want to have your thighs striking your stomach at the top of every pedal stroke at your TT race!
Adjust the height of your armrests until you find the position which gets your thighs closest to touching your stomach while taking into account that, when you’re doing a TT effort, your diaphragm will be pushing your stomach out even more. Once you have found the lowest position you can pedal in, with clearance between knees and stomach, take photos again from the side and front to compare to the original position. You’ll already look faster!
With all of the above aspects of your cockpit setup, experiment until you find a combination of positions that allows you to relax your upper body: if there’s any strain, or you’re having to tense up to hold the position, then it’s not right.

5. On the road
You won’t be doing your TT events on the home trainer so, once you have found your best initial bike setup, it’s time to learn how to ride it in race conditions on the road. In this regard, there are a few things to understand about your time trialing position when under effort in race conditions.
The first one is that it’s not static, and you will need to learn how to move and morph to the variables of terrain and effort. You should learn to pull your shoulders in, as if you’re stuck in a shrug, while at the same time tucking your head down and pushing it forward into the ‘turtle position’.
In essence you are trying to hide from the wind. The smaller and pointier you can make yourself the less you’ll have to push through the air.
Again, have somebody take pictures of you with your head in different positions and, once you have these images and have worked out what is your preferred position, you’ll be able to decide what type of helmet to get. There are enough helmets on the market these days to allow you to find one that works for you – if you chose one that looks to have the best airflow over your head and back, then it’s likely to be a good option.
Secondly, when climbing you will likely not be able to hold your full aero TT position. You may find yourself sliding back in the saddle as the cadence drops and you will probably need to change your grip on the bars also.
This is your climbing TT position: it’s halfway between your normal road position and your full aero TT position. There are not many riders who can stay in a full aero TT position while climbing: Chris Froome and Richie Porte are two who spring to mind and few of the best professional racers are capable of it.
So, in summary, take primary responsibility for your own position and study, learn, evaluate and adjust. And be prepared to adjust your position dynamically in events.
Check back tomorrow for part two of my series when I’ll talk about equipment that makes you go faster.
David Millar has collaborated with A1 Coaching to present ‘The David Millar TT System’, along with a free 4-part video series. Millar is a world expert in time trialling and A1 Coaching has become a leader in the business by bringing cutting-edge science and training methods to the everyday cyclist. This synergy, between Millar and A1, has led to the insightful five-part Millar TT System and the accompanying four-part video training Series.