


Sometimes, trail centres can assume a little too much knowledge and ability from riders who may not be familiar with freeride setups. There’s never anything that tells you how to roll a steep drop, or if the North Shore section ahead gets harder than what you’ve just started riding.
If you’ve honed your skills out in the wilds, this is no problem, but what about those who are new to it all? Help is here, in the form of this new freeride series, which will take you through some of the more common features that you’ll find all over the country when riding trail centres – and how to ride them safely.
Remember that practice makes perfect, and if you’re lucky enough to have a purpose-built trail network near to you, get out there and ride it as much as possible. You’ll soon build up your skills and you’ll be the one leading your friend down a gnarly trail.
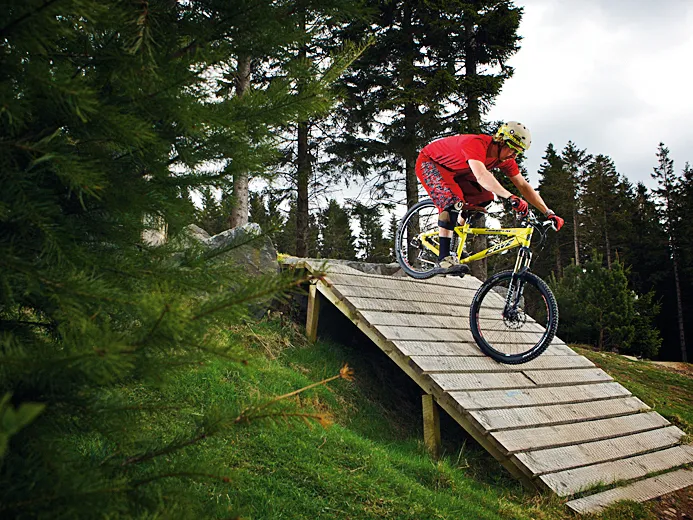
Drops
The feeling of floating off a drop is one of the most exhilarating things you can experience on a bike. But before you go flying off the nearest 4ft drop, tackle something that’s rollable first, ideally with a landing slope to lessen the impact to you and your bike.
Look after your bike by absorbing as much of the landing as possible with your body. Gauging your speed can be tricky at first, so practise before moving on to bigger, more advanced drops. If you go a little slowly on a rollable drop, your rear wheel will just meet with the face on the way down, which isn’t a problem. But if there’s any kind of gap it could prove hazardous.
Never do too much too soon. Practise on rollable drops, and build up to ladder drops – these require a little more dedication, because once you’re on the run in, you have to drop them.
1 Approach
Once you’ve assessed how fast you need to go, it’s essential to commit. Once you put your feet on the pedals, you need to see it through.
2 Pull up
As you reach the drop, pull up slightly, get your weight back and let the front of the bike fall away slightly as your rear wheel approaches the edge, so your bike drops at a similar angle to the landing.
3 Airtime
Once airborne, keep the bike level with the landing – this will feel surprisingly natural after a few attempts. It’s all about the take-off, but you can rescue the bike with extreme fore and aft movement of your body weight if you have to.
4 Landing
Extend your arms and legs like a cat jumping off a wall and use them as giant shock absorbers – and be ready for the impact. Even if it’s small drop, it’s good practice to suck it up and reduce impact to your bike.
5 Heads up
A common mistake that we often see people make is getting ‘goose neck’ on landing. This is where your head flops down towards the bars. Not only is this potentially dangerous, but you won’t be able to see where you’re going either. Keep your head up and look down the trail.
Top tips
- Beware of wind on the drops: Many trail centre drop areas are conveniently placed on open sectionswhere the wind likes to pick riders off one by one. Don’t say we didn’t warn you!
- Practise wheelie dropping off kerbs: In the event that you lose all your speed you’ll still be able to loft the bike off the drop safely.
- Add more rebound damping: When practising, set up your suspension with a little more rebound damping than usual– you don’t want to be kicked up the arse by your bike on a hard landing.
- Lower your saddle: Do this when you first start dropping, so you can use your full leg extension to absorb the impact. Gradually move it higher until you’re comfy riding with it at regular riding height.
- Watch Red Bull Rampage: The Evolution: It will blow your mind and make you realise what’s possible. That 4ft drop will suddenly seem quite rideable.
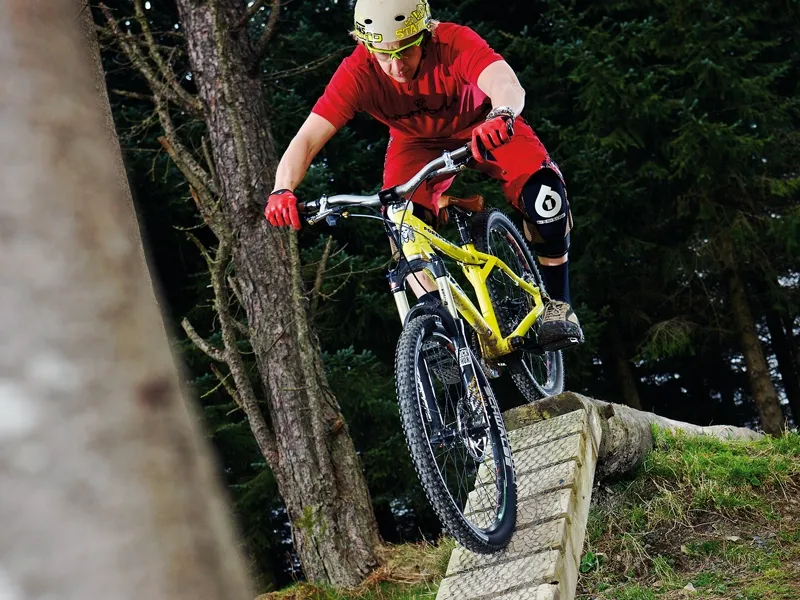
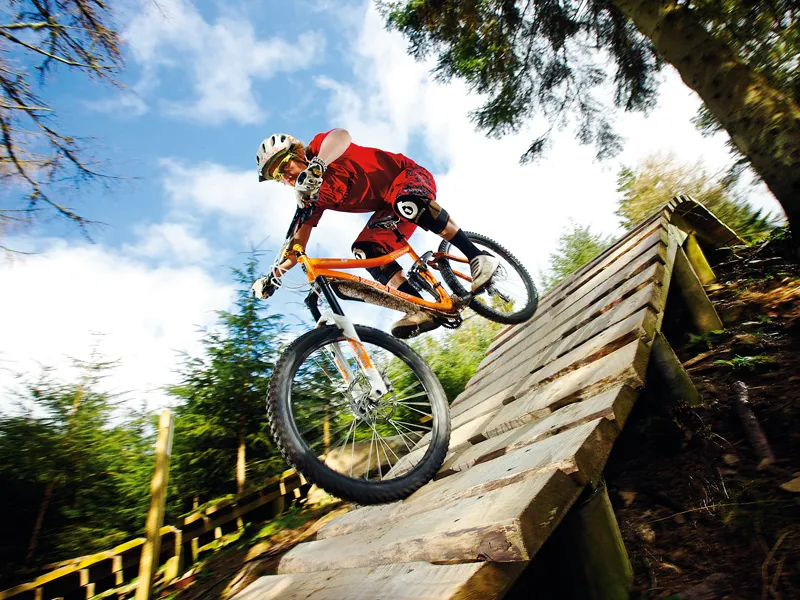
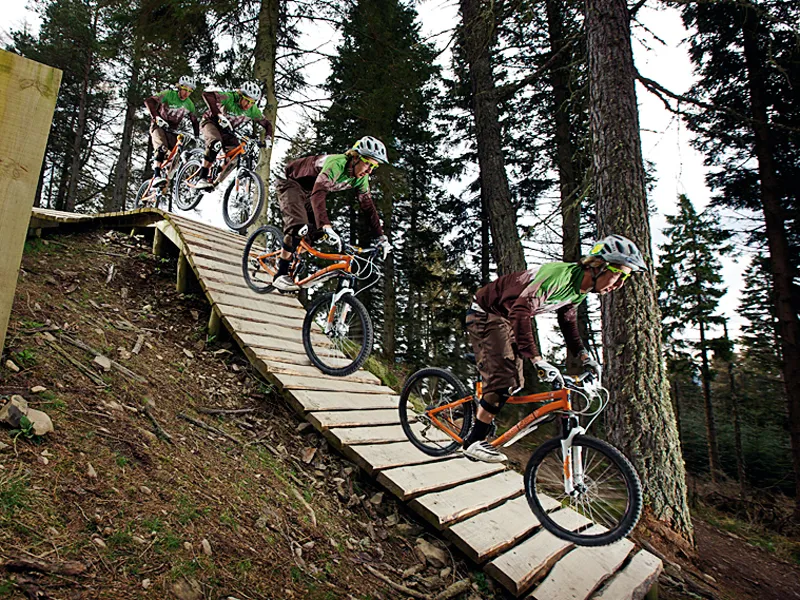
Rolling steep drops
You’re likely to encounter steep drops and banks pretty much anywhere you go out riding, and learning to ride them at a trail centre is a good, safe option, because they’re specifically built to be ridden.
Drops are different to regular steep sections of trail because you have to slow down and prepare to ride them. If you go too fast, you risk accidental air and a crash, and if you don’t have your weight far enough towards the back of the bike you risk taking a dive over the bars. Get your your technique dialled so you’ll be able to assess the situation on the trail and be able to deal with whatever comes your way.
1 Approach
On approach, control your speed so you’re at a comfortable roll. Keep focused on the entry point to the drop, and spot your exit point as you approach. Stay balanced and stable. When you approach the drop, resist grabbing handfuls of brake. Instead, just gently squeeze your brake so you can control your speed, tailoring it to suit the drop.
2 Drop in
Have your preferred foot forwards and, as the bike rolls over the edge, allow it to move away from you and get your weight back. If you need to, let the brakes drag a little – but don’t grab a handful or you’ll get a nasty surprise.
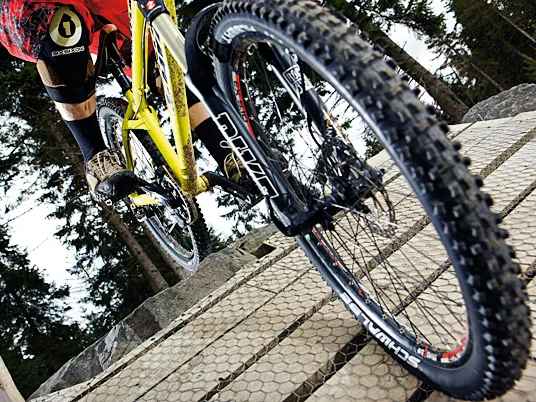
3 Ground out
It’s fairly common to rub a chainring on the edge when you roll into steep drops – as long as it’s a rub, rather than a bash, you’ll keep momentum. If in doubt, roll your bike over the edge to check first.
4 Heads up
A common mistake that we often spot, is people looking at their front wheels when rolling off drops – don’t do this! As you roll over the edge, glance to check your line, but once you roll off you need to scan ahead, so keep your head up.
5 Weight back
How far you lean back is down to how comfy you are on steep stuff. Your weight only needs to be a touch behind the balance point, but until you learn where this is, there’s no harm in getting right off the back of the bike, just to be safe.
Top tips
- Chainring solutions: If you have a low bike or tend to catch your chainrings, try a bashguard. MRP’s XCG model is just £29.99, enables the use of all three chainrings andallows the bike to glide over obstacles.
- Line upfor practice: Before trying apre-jump, you need to be able to judge distance well, so find a car park to practise bunnyhopping and landing on the white lines – this way it won’t hurt if you miss! The faster you go, the further back you’ll have to hop in order to land on the line.
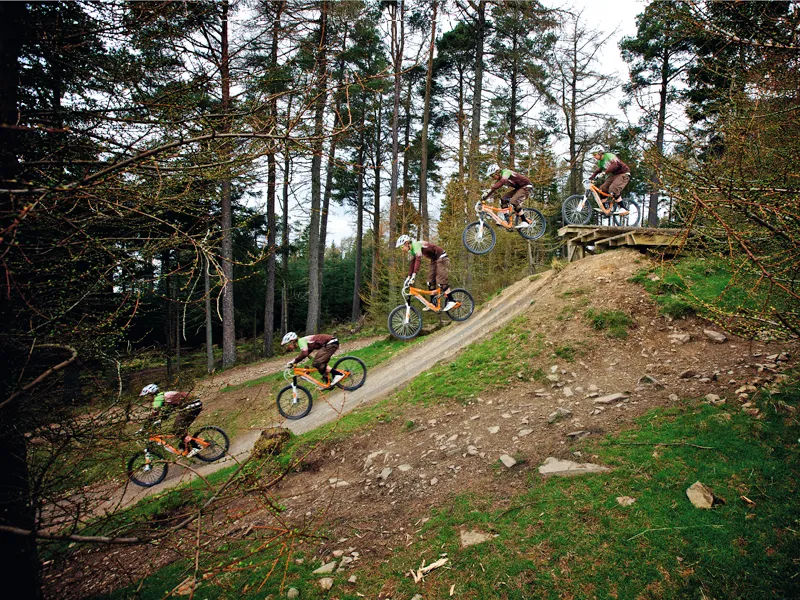
Pre-jumping
When you’ve mastered rolling steep drops, find ways to hit them faster. Try bunnyhopping into the transition, to stop the bike getting ‘bucked’ as you go over the edge. This is called pre-jumping, because you pre-empt the motion the bike would make if you rode off at speed, but stay in control.
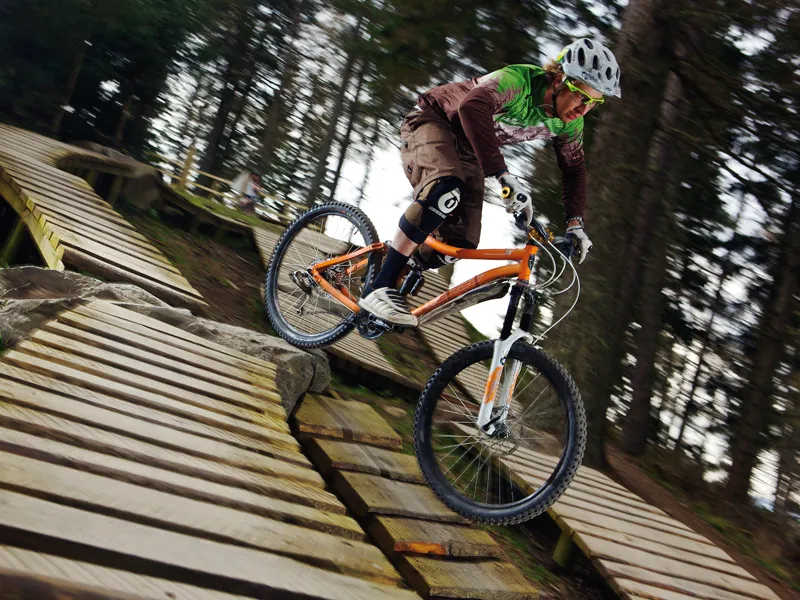
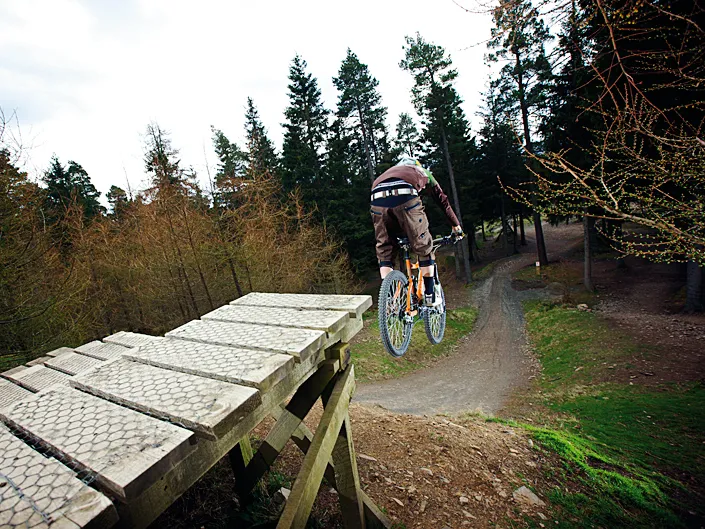
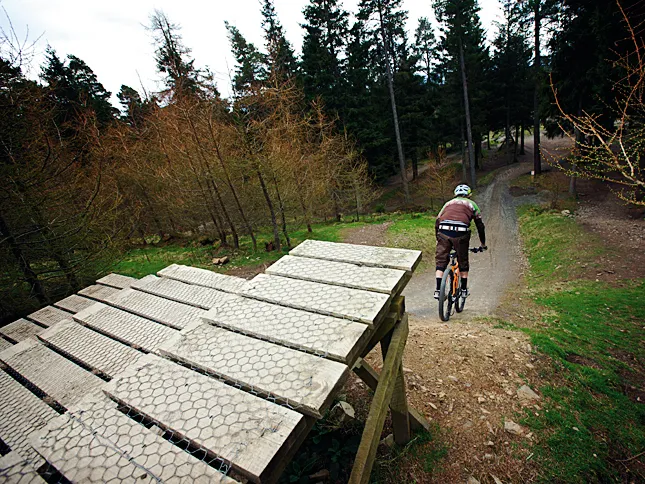
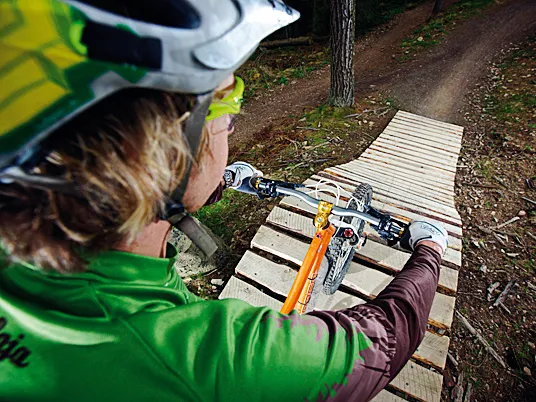
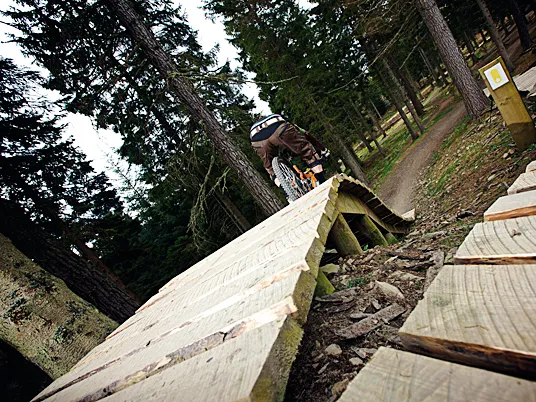
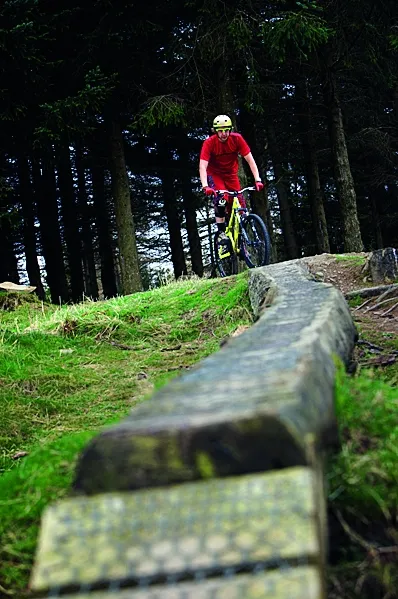
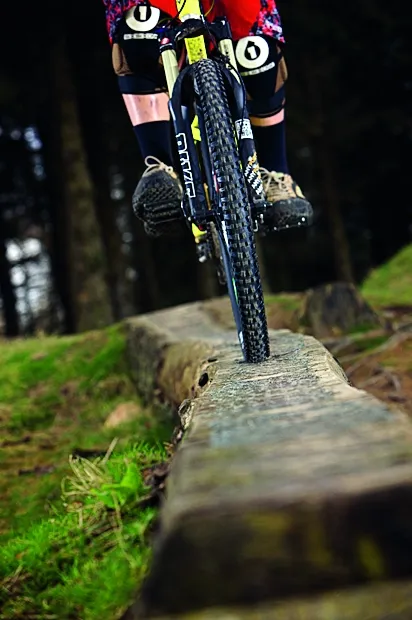
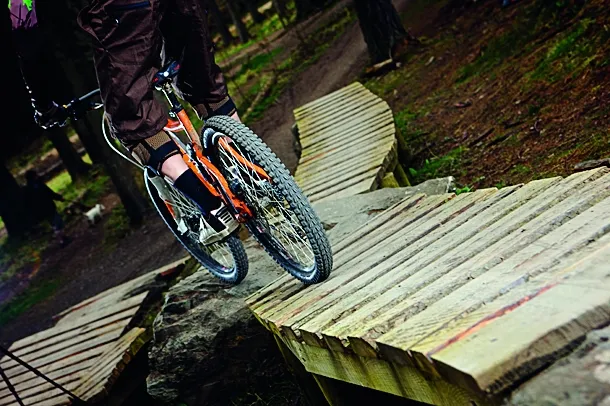
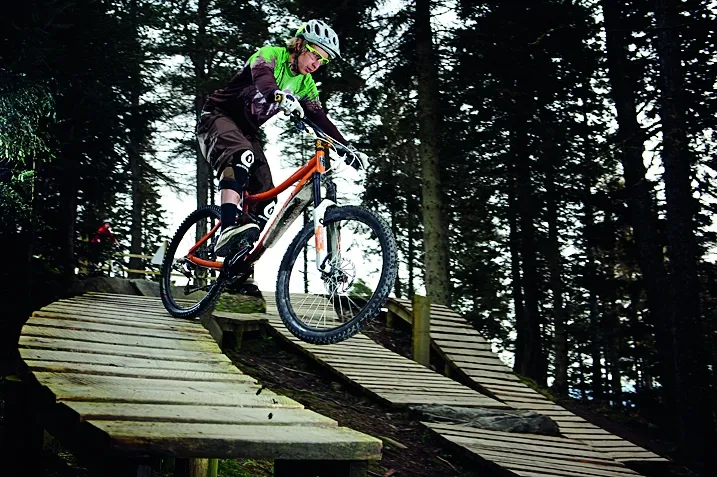
North Shore ladders and log rides
Having originated from the North Shore of Vancouver in Canada, ladder sections and log rides were originally used to provide a way of riding over fallen trees, bogs and other trail debris found on the notorious Shore, and have now spread to every mountain biking pocket of the world.
They’re not just good for bridging debris, these narrow obstacles are also great for building skill and increasing confidence. Spend some time mastering your balance on these sections and you’ll be able to attack any trail centre in the country, knowing that you can tackle what’s ahead.
1 Approach
Set yourself up on the way in to tackle the obstacle at walking pace. If you go too slow, balancing can be tricky, and going too fast won’t do you any favours when it comes to turns.
2 Body position
Keep your weight fairly neutral on the bike to aid control and help you judge both the length of your bike and how much room you have to play with on the obstacle.
3 Line it up
Try to stay as central as possible when riding skinny sections like logs – that way, if things do get a bit sketchy, you won’t ride straight off the edge of the log.
4 Focus
If you’re riding a straight, narrow section, concentrate on looking ahead at the exit point. This will give you more stability and enable you to plan your next move.
5 Know your bike
You need to know the length and turning circle of your bike, to help you avoid dropping the rear end off narrow sections when making turns. It’ll save damage to your disc rotor or rear mech too.
Top tips
- Bailing out: If you have a wobbly moment and need to get off the ladder quickly, the safest way is to pull up and ride the bike off. Lean back and pull up as you ride off the side, and cover the brakes ready to control your speed on touchdown. If it’s a higher drop and you can’t jump off it, you need to get off the bike. The safest way to do this is to step off the bike and let it fall off one side of the obstacle while you go the other way. Being hit by a bike is never a good thing. If you do have to bail, make sure you can do it safely by checking your ‘fall zones’ beforehand.
- Walk the plank: Walk the obstacle first if you’re unsure about riding it clean on your first go.
- Believe!: If you don’t think you can clean the obstacle, you probably won’t.
Stay tuned for part two of "First-time Freeriders", where we'll show you how to handle bermed corners and wallrides.