

You’ll be seeing a lot more of Formula's brakes as they crop up more and more on production bikes over the coming years, so we thought it would be handy to show you how to bleed them…
- Time: 60 minutes
- Cost: £23
Tools for the job
- T10 Torx key
- T15 Torx key
- T25 Torx key
- 4mm Allen key
- 5mm Allen key
- Formula bleed kit
- Cable cutters
- DOT 4 brake fluid
- Formula pad spacer
- Rubber gloves
- Two clean, shallow vessels
- Torque wrench
- Isopropyl alcohol cleaner or brake cleaner
How to bleed Formula R1 and The One brakes
1 Though you can bleed the brake while it’s fitted to the bike, we recommend you remove the brake system first – this will prevent damage to paintwork if you spill brake fluid. Use a 5mm Allen key to remove the calliper from the frame. Working your way up the bike, remove the hose. If you have to remove hose clips or cut zipties, be careful not to damage the hose or paintwork. Remove the lever clamp bolts using a T15 Torx key.
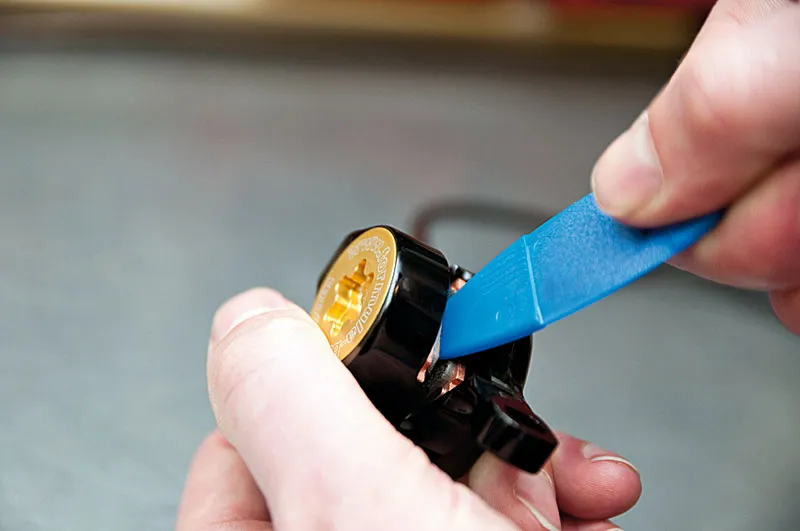
2 With the entire brake system removed from the bike, clean and inspect the brake for pad wear, signs of fluid loss and damage to the hose. Make sure the pistons are fully retracted using the blue Formula pad spacer that’s supplied with each Formula brake kit. This can be waggled between the pads until the pistons are fully retracted. Leave the Formula pad spacer between the pads.
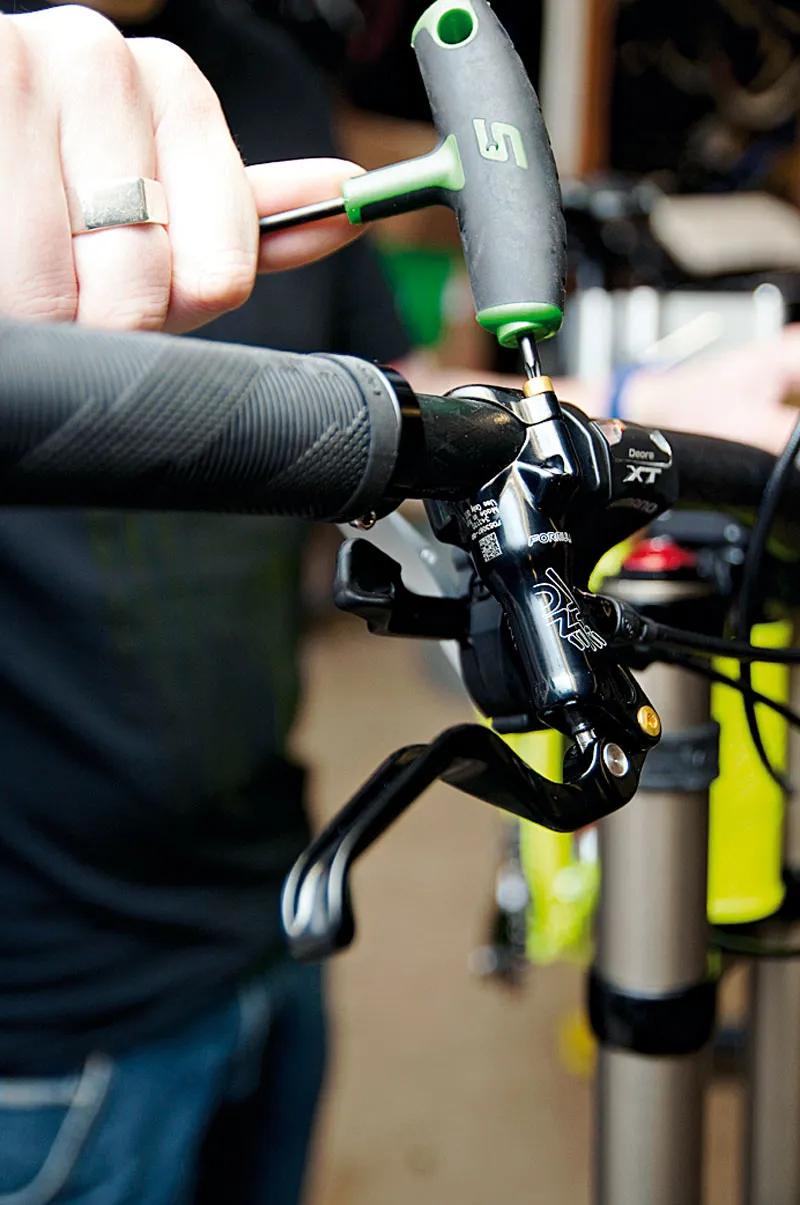
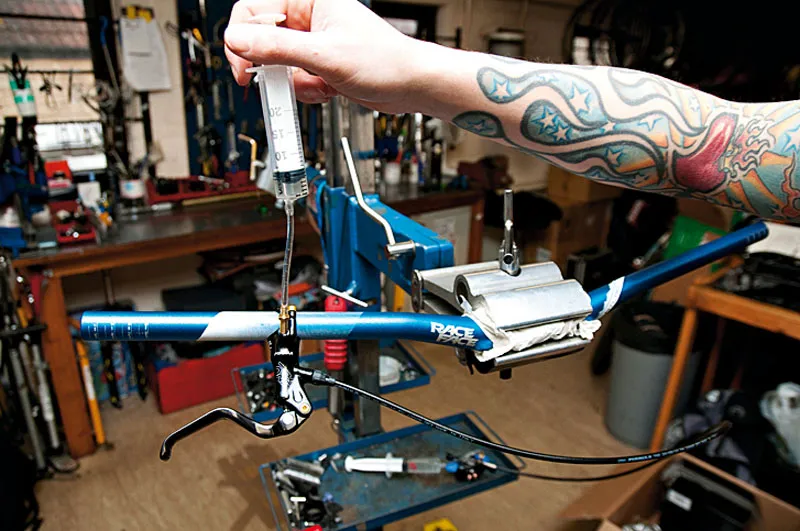
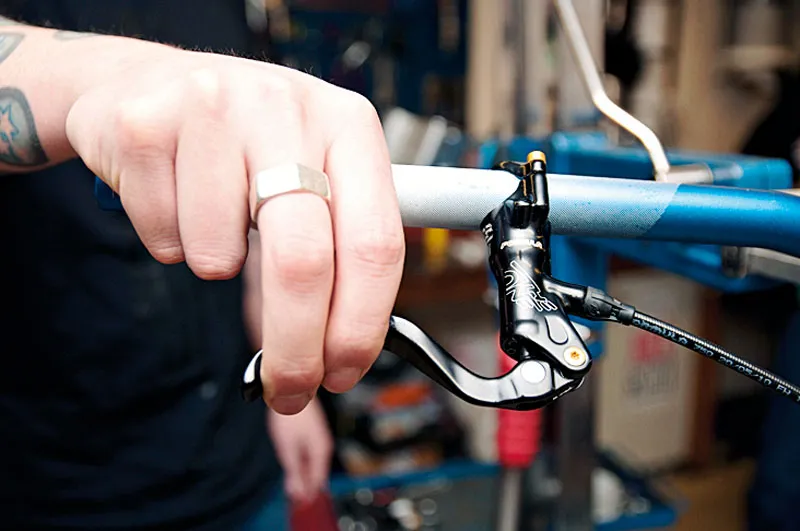
3 If possible, use an old set of bars to clamp into a workstand. Slide the brake lever onto the bar and clamp loosely in position with the T15 Torx key. Rotate the lever around the bar until the top of the bleed screw sits horizontal (if it’s flat, no fluid will spill out with the bleed screw removed). Tighten the lever in place so it stays firm while you bleed the system through.
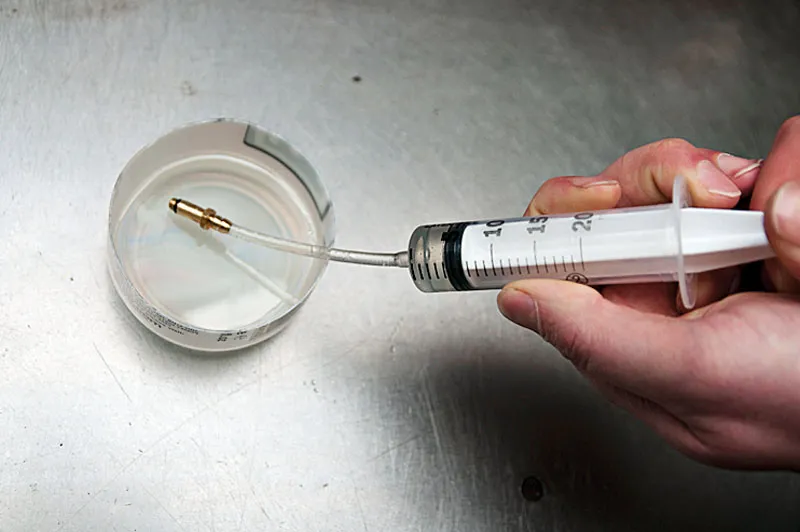
4 Add 30ml of DOT 4 brake fluid to a clean vessel (cut a plastic bottle down to size, or use something about 2in deep). Take the two syringes supplied with the bleed kit and depress them, expelling any air. Fit the brass end fittings securely then fill the first syringe (A) with 20ml of fluid. Now fill the second syringe (B) with 5ml of fluid, being sure to keep the end of the syringes submerged in the fluid at all times while filling them.
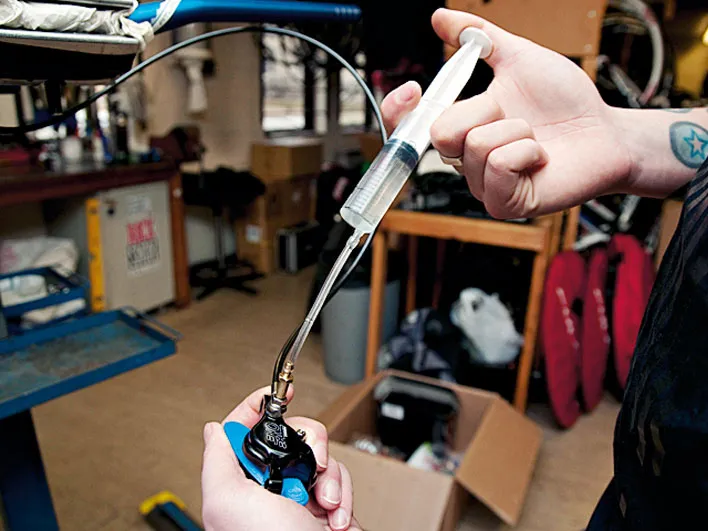
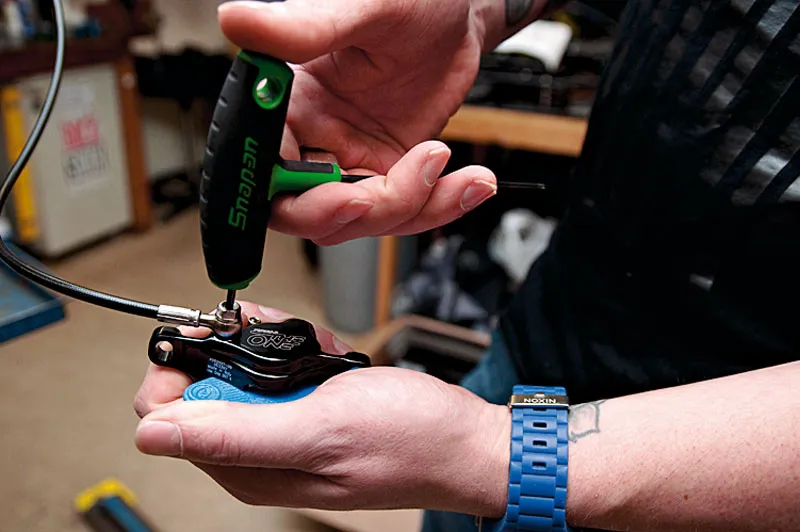
5 Starting at the calliper, remove the bleed screw with your T10 Torx key. Making sure not to damage or lose the bleed port O-ring located in the bleed port. Hold the calliper over a second clean vessel and carefully drain the system by depressing the lever in a braking action. This will force the fluid from the system. Be careful to direct the fluid from the brake into the vessel to stop it getting all over you.
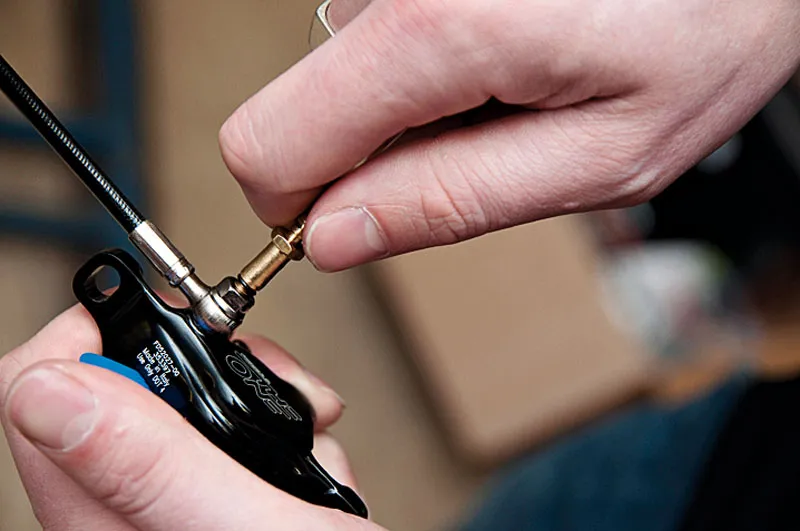
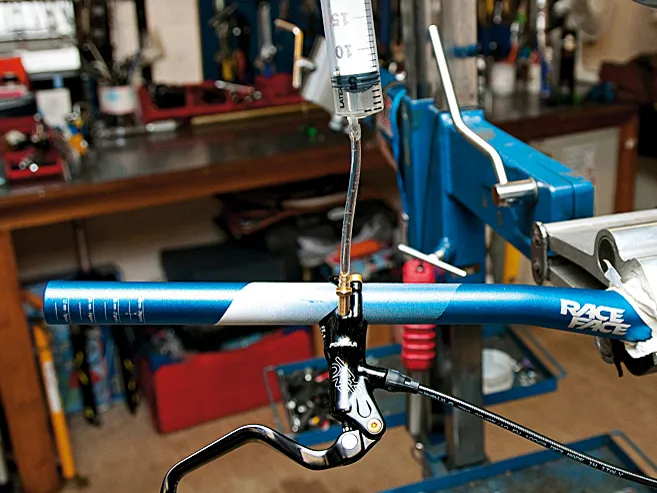
6 Gently attach syringe A to the calliper’s bleed port by screwing the brass fitting clockwise, again being sure not to damage or lose the bleed port O-ring.
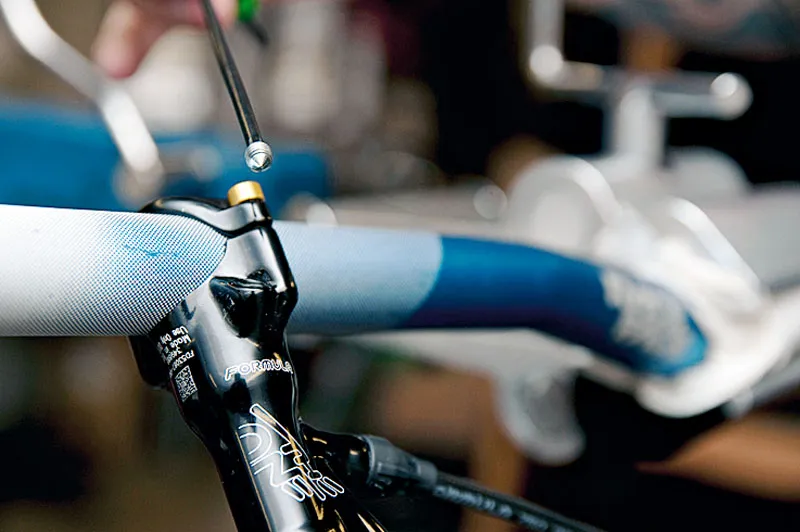
7 Moving on to the lever, remove the bleed screw from the master cylinder (brake lever assembly) with your T10 Torx key and attach syringe B carefully. Turn it clockwise until the brass fitting is engaged. Take care not to damage or lose the bleed port O-ring located beneath the bleed screw.
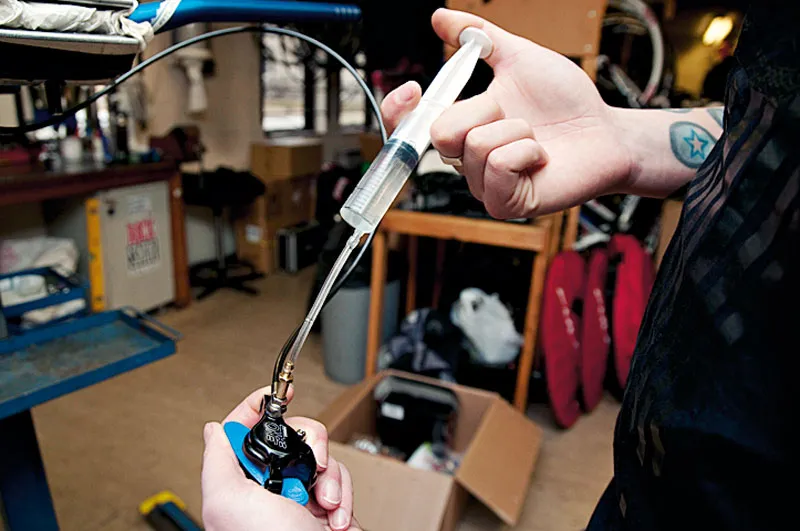
8 Keep syringe B upright and start working from the calliper end, forcing approximately 15ml of fluid from syringe A through the brake system and watch a mix of fluid and air enter syringe B. Keep an eye on syringe B and stop depressing the plunger on syringe A while there is still a decent amount of fluid in there.
9 Now move back up to the lever. Using syringe B (which is attached to the master cylinder), force 15ml of fluid back through the brake system watching air and fluid enter syringe A. Again, hold syringe B upright so any air inside the syringe isn't accidentally forced into the system.
10 Working back down at the calliper end, force 15ml of fluid back through the brake system with syringe A. While doing this, depress and release the lever in a braking action and watch for any trapped air entering syringe B at the lever. Again, position syringe A in such a way that you don’t accidently force any air from the syringe into the system.
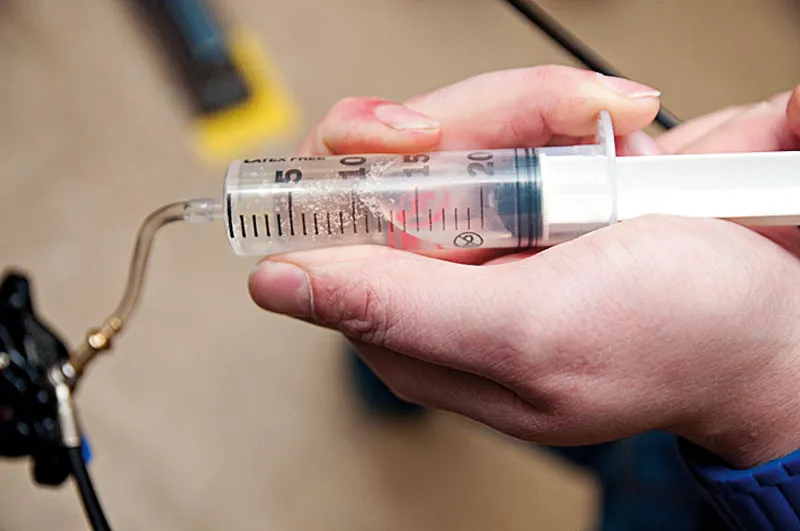
11 Gently apply suction to syringe A by pulling back on the plunger. Repeat this process until the fluid is free from air bubbles. Fluid will work its way through the system while you’re applying suction, so make sure syringe B is upright and no air can be sucked into the system, with at least 5ml of fluid remaining in there.
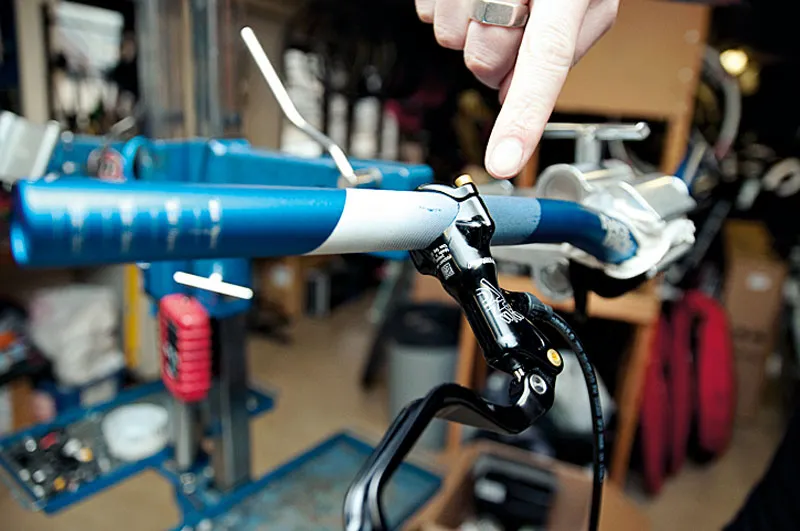
12 Carefully remove syringe A from the calliper, turning the brass fitting anti-clockwise. Refit the bleed screw using a T10 Torx key and tighten to 2Nm, making sure you don’t lose or damage the bleed port O-ring that sits below the bleed screw. Back to the lever and the master cylinder, gently apply a small amount of suction to syringe B while turning it anti-clockwise to remove it.
13 With syringe B removed, check the bleed port and fluid level. The fluid should sit flush with the top of the bleed port (up to the top of the threads). If there isn’t enough fluid in there, carefully top it up, holding some workshop towel around the lever to catch any excess. Replace the bleed screw and tighten to 2Nm, being careful again not to damage the bleed port O-ring that sits below the bleed screw.
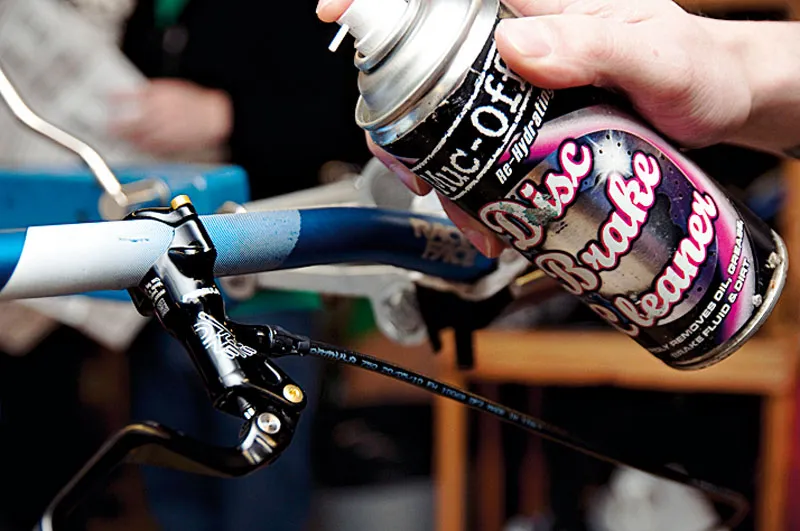
14 Using isopropyl alcohol or disc brake cleaner and a workshop towel, clean any excess fluid from the lever and calliper. If you left the original pads in place while carrying out the brake bleed and they’ve had any fluid spilt on them, give them a squirt with brake cleaner.
15 Check the bleed has been successful by depressing the lever in a braking action. It should feel nice and firm. If it isn’t, you’ll have to go back to step 4 and repeat the whole bleeding process.
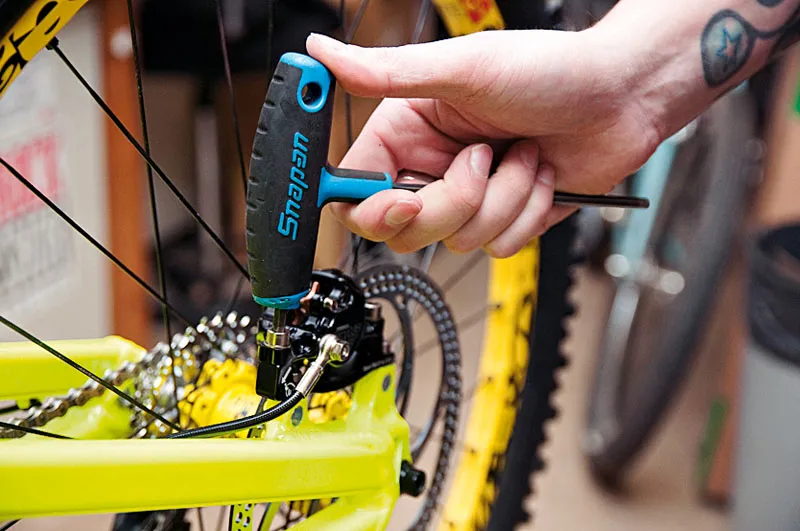
16 Refit the entire brake system to your bike. Clamp the lever up using the T15 Torx key and tighten to 2.5Nm. Re-route the brake hose through the frame, slotting it back into the cable guides and mount the calliper to the rear brake mount using a 5mm Allen key, tightening to 9Nm. Before you hit the trails, double check the brake works properly by taking it for a short test ride.
Video guide
In the video below, BikeRadar's James Tennant demonstrates how to bleed Formula and Avid brakes. He demonstrates it on Avid brakes, but the process is the same for Formula.
how to bleed avid and formula disc brakes
Video: How to bleed Avid and Formula disc brakes
Top tips
- To keep your brakes running in top condition you should bleed them at least once a year.
- If you’re really careful, you’ll get away with using your regular pads while bleeding your brake but they'll need to still have some pad remaining for the bleed to be successful. If you're a keen bike mechanic, it’s worth investing in a separate set of brake pads that can be used specifically for bleeding your brakes – then it won’t matter if they get contaminated.
- When working on your brakes, wear protective gloves because brake fluid is really quite harmful.