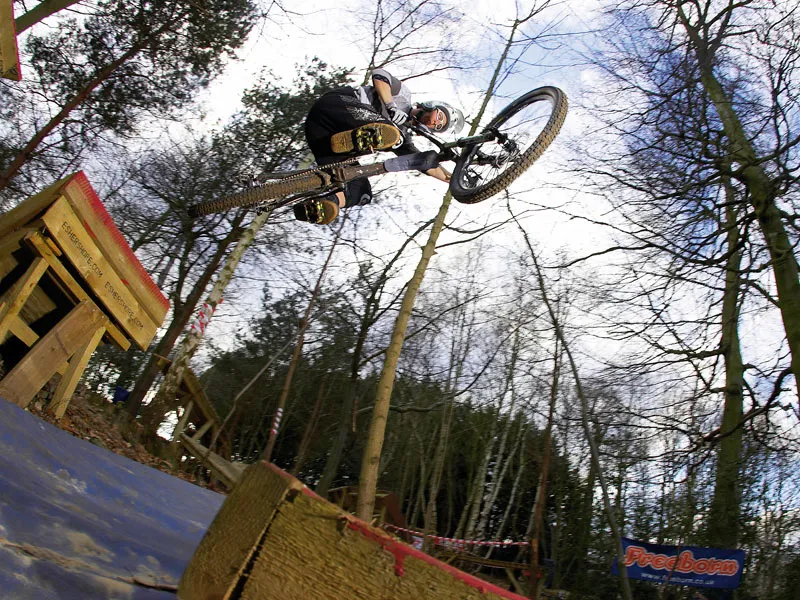
With your tyres hooking up a treat in the tacky mud, you rip round a turn that’s previously bothered you. Hitting the roots that follow like a 4X pro, you push into the slight bank that comes next. You know that your mates are right behind you, so you put the hammer down and launch the jump over the stream while your mates splash through, slowing down.
Pedalling off with a smug grin, you know it won’t be long before your mates catch up to your skill level, so taking things to the next level will keep your friends at bay…
Freeride parks have North Shore-style obstacles and jumps all over the place. Don’t be put off by thinking that they’re only for hardcore riders though, because all the spots tend to have obstacles and tracks for all abilities. At first you might just see a network of gnarl, but look closer and you’ll notice that most of the obstacles are only polished versions of what you encounter out on the trail.
EsherShore, in the south east of England (eshershore. com) is the perfect place to top up your skills. You’ll find tabletop jumps, gap jumps, drop-offs, roots and most trail obstacles, which all add up to a good dose of fun, as well as developing your skills.
Here's our step-by-step guide
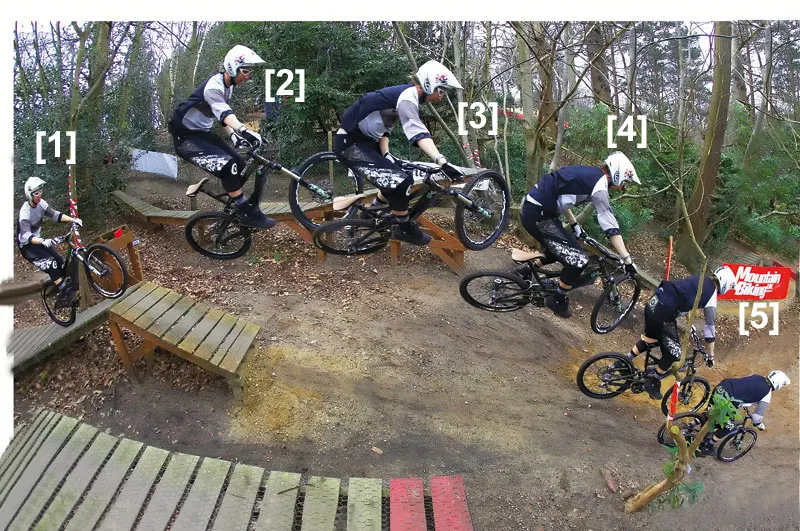
[1]
Approach
This take-off ramp is between a couple of trees, so you should have subconsciously taken note of this and be focusing beyond the take-off, while still keeping it in your peripheral vision. You should also have your approach speed ready and your preferred foot should be forward.
[2]
Take-off
At first you’ll want to literally ‘plop’ off the takeoff to test the water, but once dialled, this kind of jump is smoother and actually easier with speed. Hit the ramp with your weight central on the bike, but you should be ready to lift the front end slightly and unweight it for take-off.
[3]
Levelling out
As the front wheel leaves the ramp, shift your weight slightly forwards in order to allow the bike to come up underneath you. As Gee Atherton puts it: “You need to let the bike take its natural path, but control it using your body weight.” You should have a grasp of this now, so only practice will make perfect.
[4]
Spot the landing
Once you’re comfy in the air, spotting the landing is the next thing on the list. As well as making sure that you’re heading for the smoothest area to touch down, you should be keeping an eye out for hazards on the run-out, such as trees, stumps, fluffy riders…
[5]
Landing gear down
This particular landing is steep enough to take away most of the impact, but you should still lessen the shock to the bike by using your arms and legs as suspension. If the landing is harder than you expected you’ll get a classic ‘goose neck’, which can be extremely painful, so always treat every landing as a hard one when you’re jumping - your bike and body will come off better for it.
Improve your jumping
- Tech and prep - Seeing as you’re visiting a place dedicated to developing advanced techniques, you need to make sure your bike is up to it. As before, learning jumps is best with the saddle dropped out of harm’s way – you should also probably use flat pedals, and have some protection. As usual, a helmet is vital but gloves are also recommended, because North Shore-style obstacles are often covered in chicken wire for traction in wet weather.
- Where to learn - With many obstacles on offer at Esher, it’s easy to just start riding and lose sight of what you went there for. It’s a great place to learn jumping and doing drops, but try and stick to finding a couple of more basic obstacles to perfect and make sure that you nail them first. You can move onto more advanced/different obstacles a bit later on.
- Back to basics - Even though a North Shore obstacle looks completely different to a natural trail, just imagine that it’s a piece of singletrack with a root or some kind of kicker, and a slope or transition following it. It’s just a man-made interpretation of what you can find out riding. Here though you ride it for fun, whereas out on the trails it would be more of a necessity.
- It’s all in the head - You’ll probably look at the kicker and wonder what the hell you’re doing, but it really isn’t that hard. Watch other riders tackle the obstacle, but instead of wincing when you see a rider get it wrong, watch what he does wrong.
- Jumping – on any kind of obstacle – is largely about being able to visualise your flight path, and how you’re going to jump – not how you might crash. If you think it then you’ll probably do it.
- Progressing your skills - We used a classic ‘fly off’ jump with a transitioned landing for our main example here, because it’s something that’s easy to find on the trail, and something that many trail builders replicate – for the simple reason that they’re super fun to ride.
If you want to progress, try looking at more technical obstacles. Just think about your key moves – run-in, take-off, run-out, because they apply to any obstacle, natural or man-made – it’s all jumping after all.