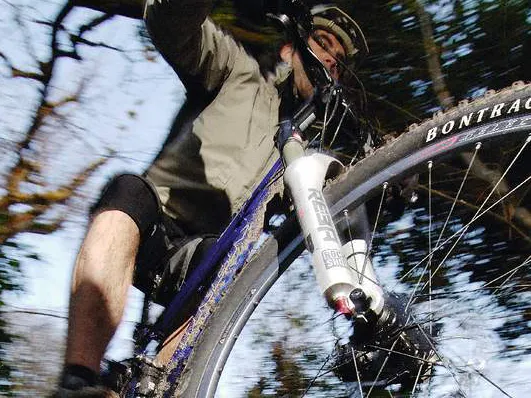


The Reba is the cross-country workhorse of the RockShox family, almost as light as the SID and able to tame tough trails. It’s strong, versatile, responsive to tuning and most of all easy to service – at least it is when you know how.
Read on as SRAM technical boffin Gary Mullaney shows you how to keep your Reba running smoothly. The job itself isn’t very technical, but taking care and sticking to the procedure will make it something you’ll relish rather than shy away from.
The key to effective servicing is to schedule it in often. The worst thing you can do to any suspension fork is to leave thousands of miles of use between major services. It’s the regularity of care rather than the depth that will ultimately reward you with better fork performance and longer life.
Essential tools
- Fork oil & syringe
- Soft mallet
- Allen keys
- Shock pump
- Lint-free rags
- Grease
- Socket and driver
1 Feel it before you peel it
Before you tear into the guts of the Reba it’s a good idea to have a ride on it – not for the buzz but to try to identify any issues that might need addressing when it’s apart. When you’re done, drop the fork out of the frame and remove the disc brake calliper from the fork mount. Give the fork a good wash, mount the fork in a stand by clamping the steerer tube in the clamp, and you’re ready to go.
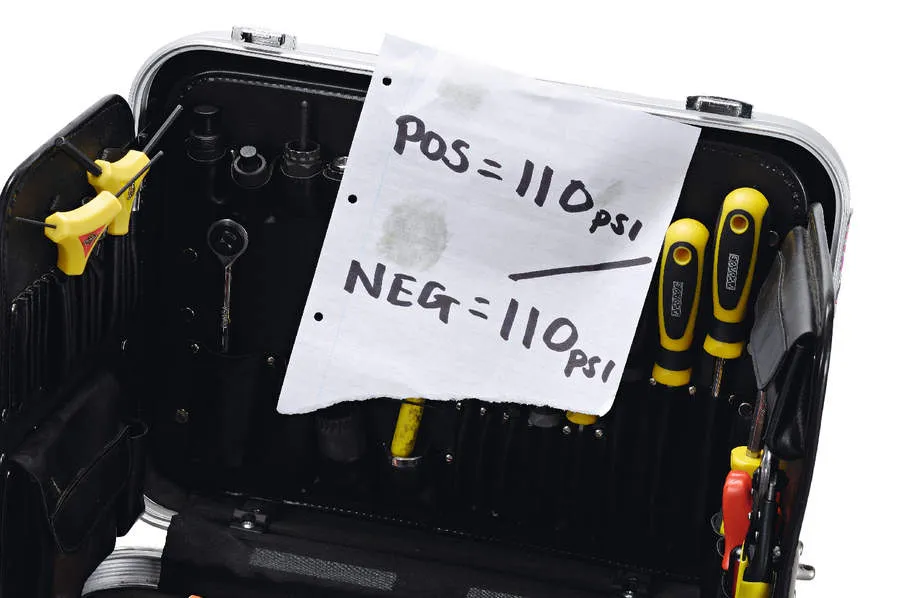
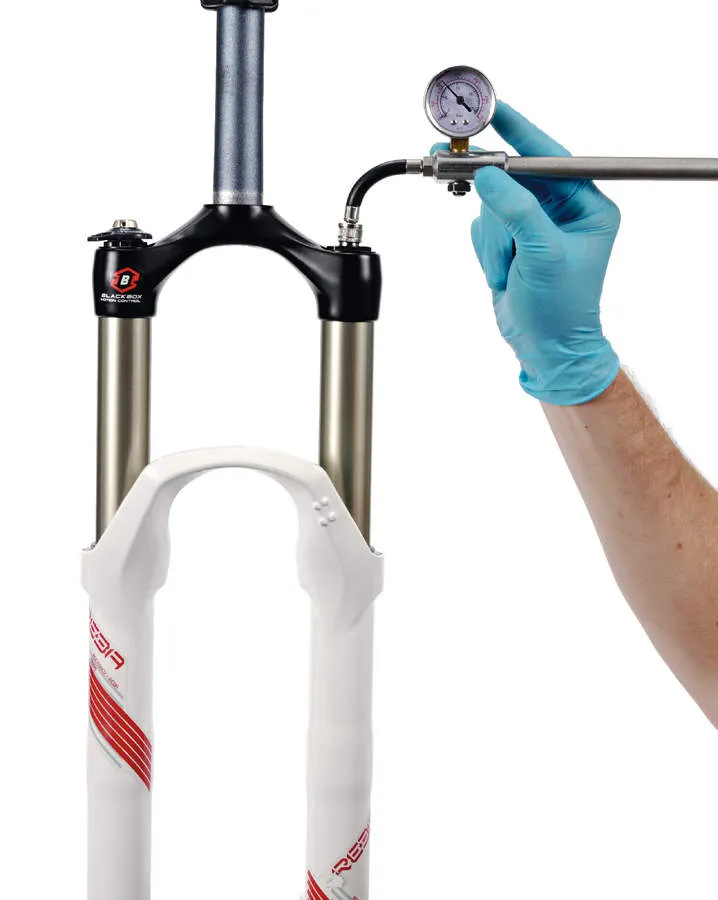
2 Data management
Note the pressures you’re using in your fork. If they’re right for you, jot them down for future reference; if they’re not record them anyway as they’ll be your starting point for making adjustments later on. Making notes about the setup of your bike – weights, lengths and angles as well as pressures – is a good habit to get into. It means no matter what happens to your bike, you can set it up again to fit you perfectly.
3 Let it all out
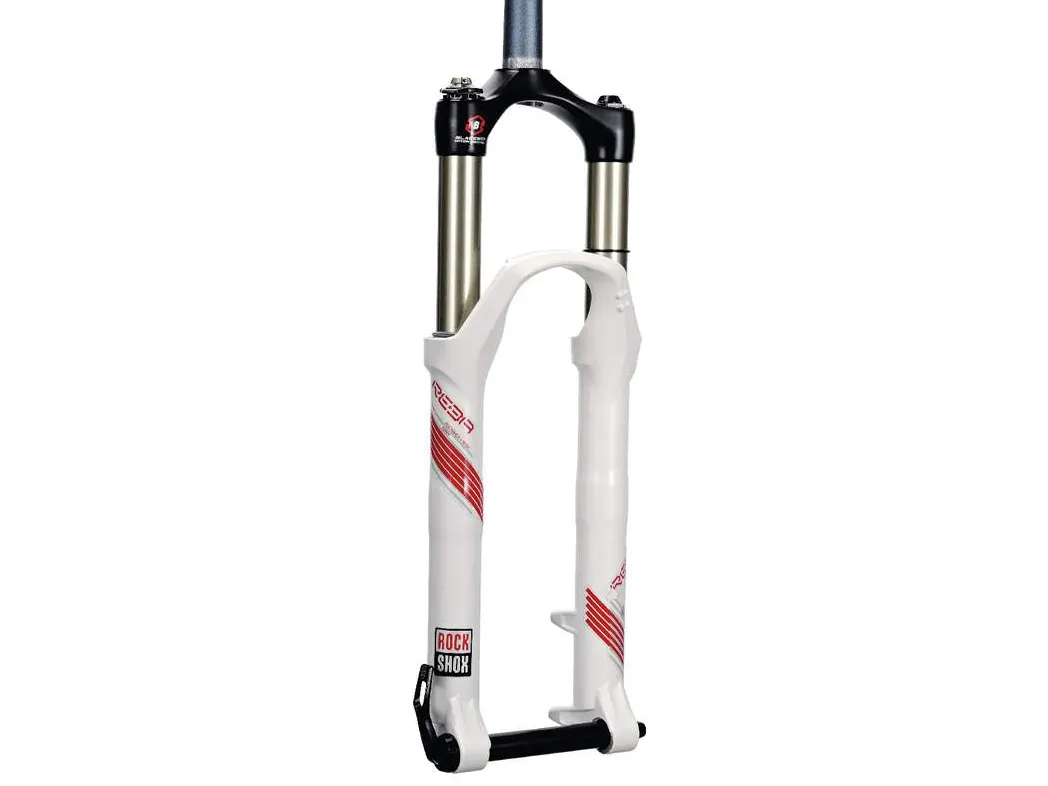
The first step to taking the fork apart is to release the air pressure, as it would be dangerous to remove the foot nuts that hold the sliders and stanchions together with pressure in the fork. Remember the Reba uses two air chambers, each with its own valve. Release the lower chamber first (the valve is in the lower left leg). Next, remove the air from the top chamber (the valve is located under the black screw cap on the top of the left leg).
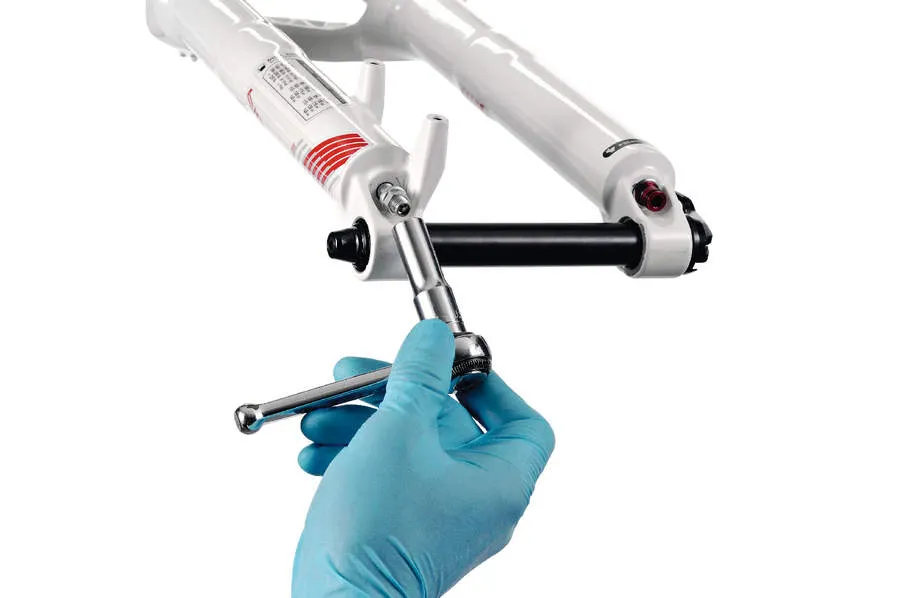
4 Nut job
The next step is to remove the air side (left leg) foot nut. You can use a spanner for this but it’s much easier and faster with a socket. If you don’t have a set of small sockets we recommend you get some. Don’t bother with a huge car kit; you don’t need 90 percent of them. Instead buy some individual sockets and the appropriate drivers – they’re handy for all sorts of bike jobs, especially servicing forks and pedals.
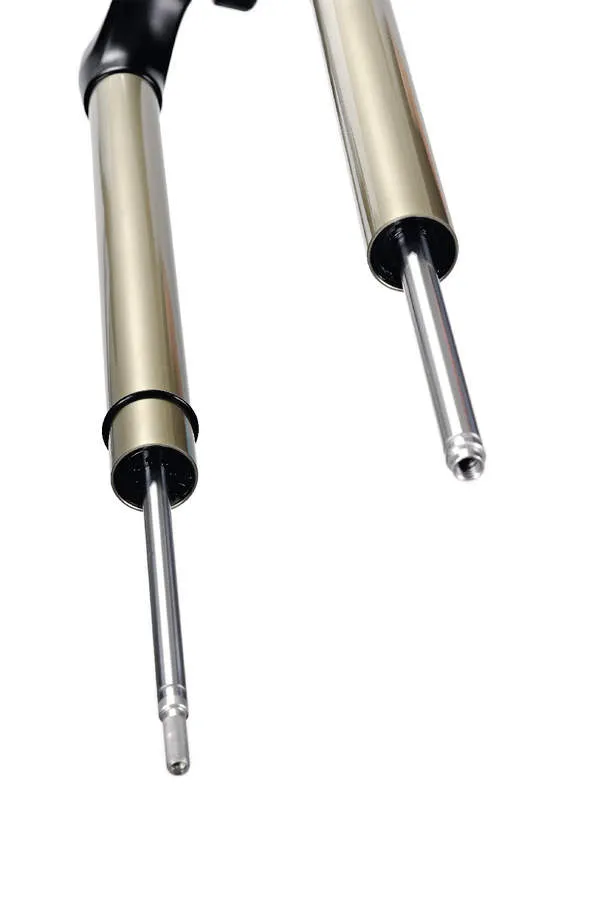
5 A firm tap
With the air side nut loosened, unscrew it about halfway down the length of exposed damper shaft. Don’t remove it as it’s useful to stop the damper shaft from disappearing inside the lower legs when you give the damper shafts – with socket still attached – a tap with a soft mallet. This is often necessary to release the damper, which can get stuck.
6 Release the bolts
Now undo the locking nut on the foot of the right-hand leg. You can remove this one completely. Remember when removing small parts from a fork or any complex component to keep them somewhere safe – and preferably in the order in which they came off. This helps keep the job ordered and reduces the chances of you reassembling the fork incorrectly.
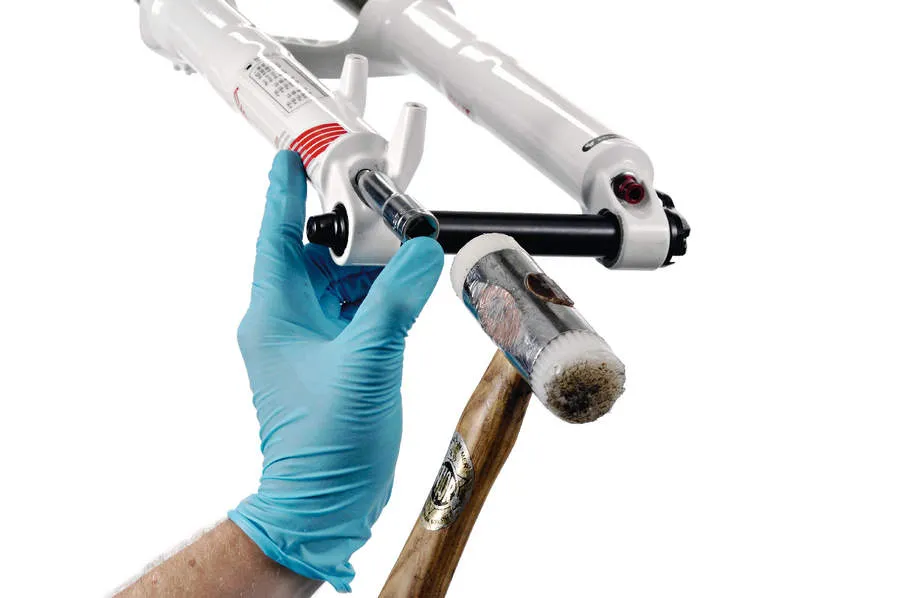
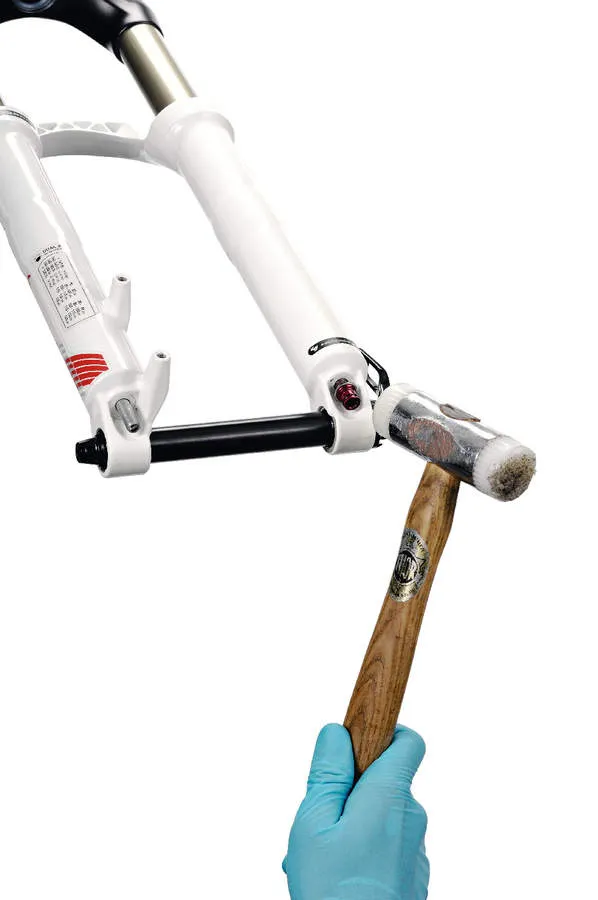
7 Hammer time
You should be able to pull the fork apart at this point (only a short distance, as the air side nut should still be on the damper thread), but usually the ends of the two shafts need a helping hand. You can strike the ends of the dampers directly with the mallet, but a good habit to get into is to place a T-handle Allen key in the bottom of the shaft and strike the top of the T. This reduces the possibility of damage to the shaft and the easily marked sliders.
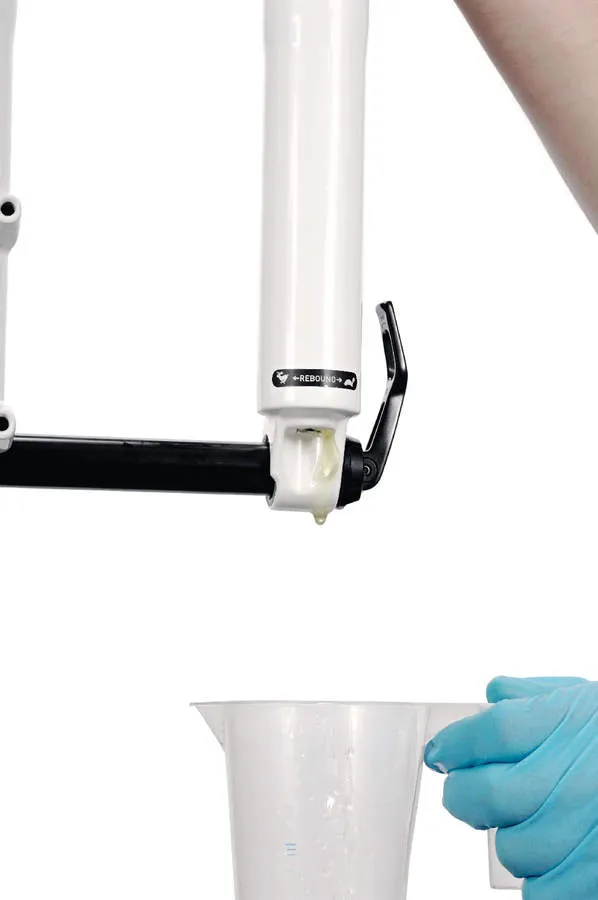
8 Oil leak
At this point fully remove the air side nut. Before you pull the fork completely apart, remember that there’s oil inside the fork waiting to spill out. Make sure you have a suitable container to catch the oil and preferably a good covering of newspaper or old carpet to go under it, as inevitably there’ll be a drip or two that misses. When ready, slide the lower legs off; it might take a minute or two to let all the oil drip out.
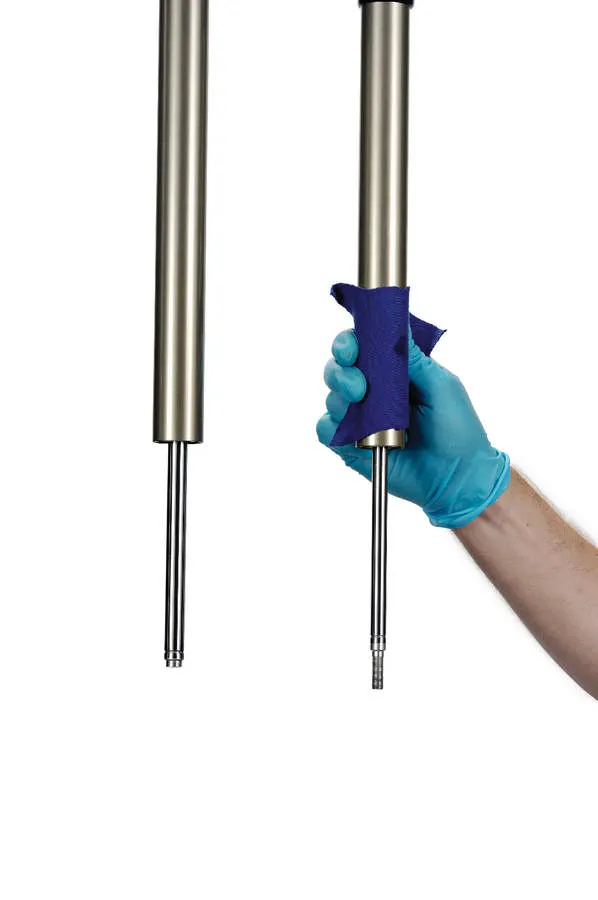
9 Clean the legs
The insides of the lower leg castings can be home to all sorts of icky mess, especially if you haven’t serviced the fork for ages. Work a lint-free rag down inside the lower legs to remove as much oil, grease and dirt as possible. The cleaner you make the fork prior to reassembly, the better the result will be. Use a length of dowel or similar to prod the rag inside. Don’t use tissue or paper towels, as these break up and can get stuck inside the legs.
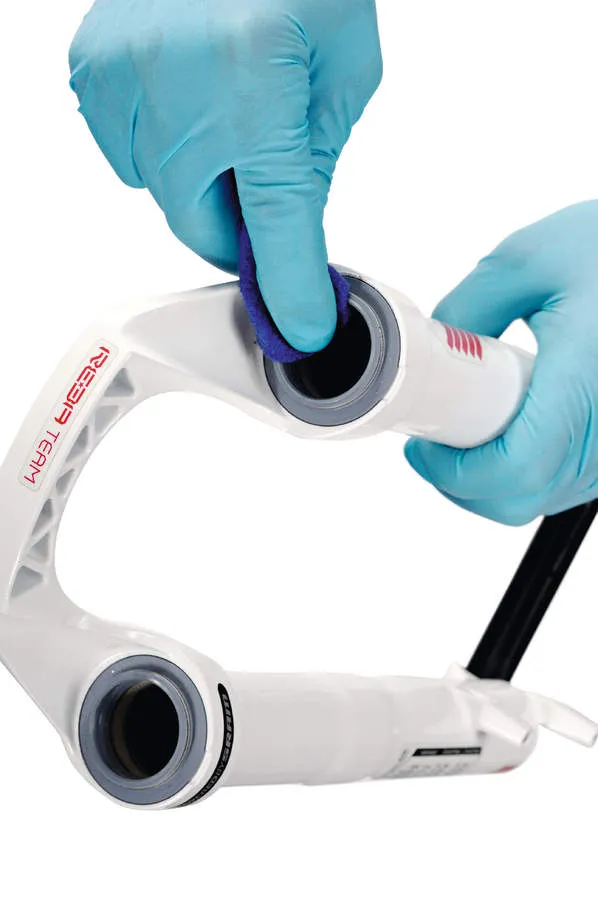
10 Check the seals
Now is a good time to take a look inside the lower legs and the grey wiper seals. Check for damage and shards of anything hard or sharp that might have got wedged in the inside edges of the wiper seals. Damaged seals should be replaced; this can be done at home but it’s better to let the local bike shop do it as it’s easy to damage the sliders if you get it wrong.
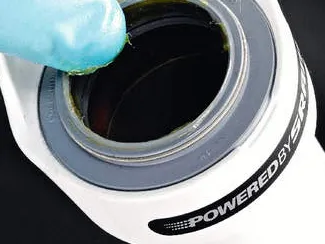
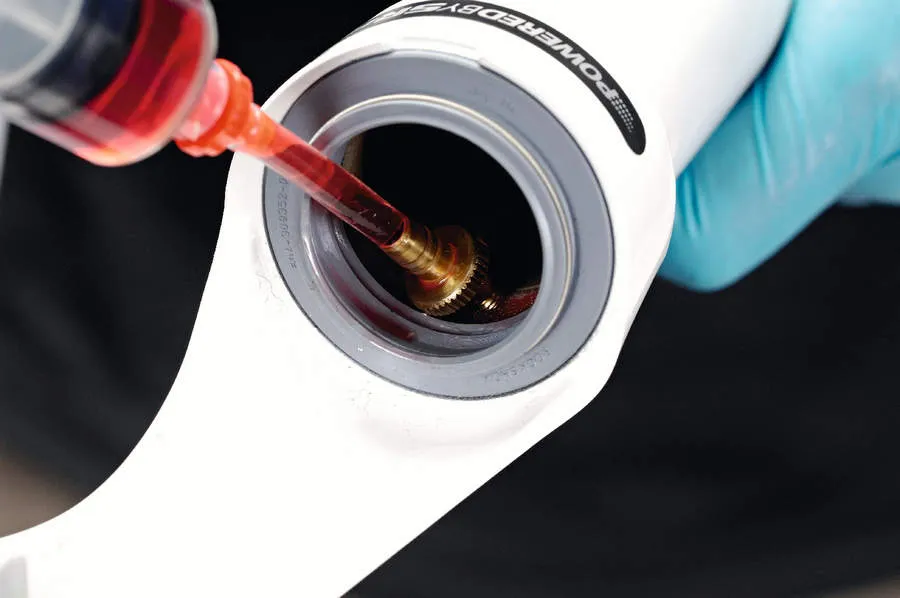
11 Red Rum
RockShox’s own Red Rum lubricant is designed for use in its forks. Put some in a syringe and apply to the foam wipers that sit just inside the grey wiper seals. It’s these foam wipers that soak up and store the lube and keep the contact area between stanchions and grey wipers lubed with every movement of the fork. This step is important as it’s the one that will ensure that supple feel for which the Reba is famous.
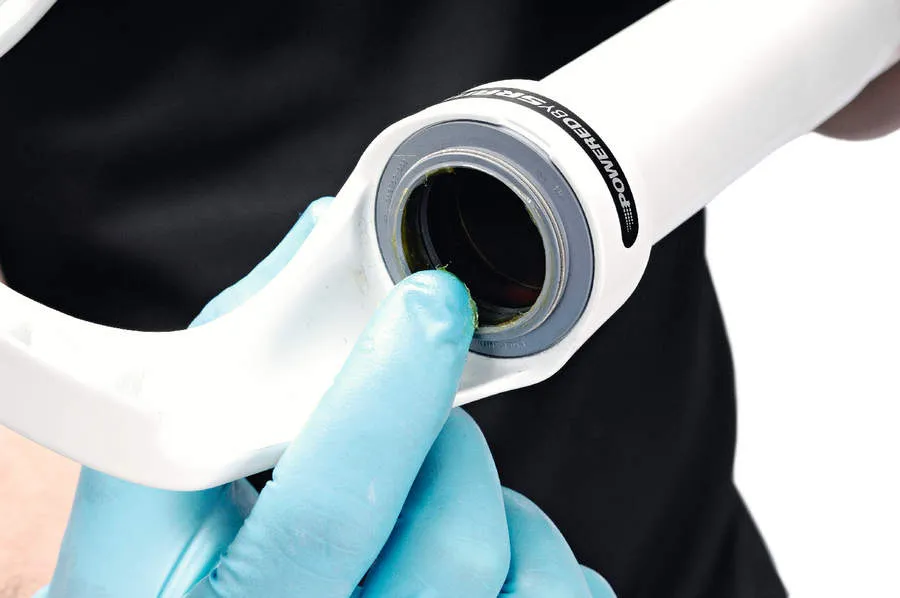
12 Better Butter
The next step is to break out the RockShox Judy Butter grease and smear it on the inside edges of the grey wipers. This allows the fork to slide back together easily and prevents the grey wiper seals drying out. Don’t be tempted to dig your finger into the pot of grease: the fork seals need only the smallest amount. You don’t want gobs of grease inside the fork or smearing up the stanchions as this will kill the supple feel and attract dirt.
13 Put oil in leg
Hold the stanchions so the damper rods are horizontal then slide the lower legs on. Before the damper rods poke through the holes in the lowers, up-end the fork and add 10ml of suspension oil to both legs. Now continue to fit the lowers to the stanchions. You may need to wiggle them to line up with the damper rods. Take care when pushing the stanchion tubes through the lip seals because you can damage or unseat the seals.
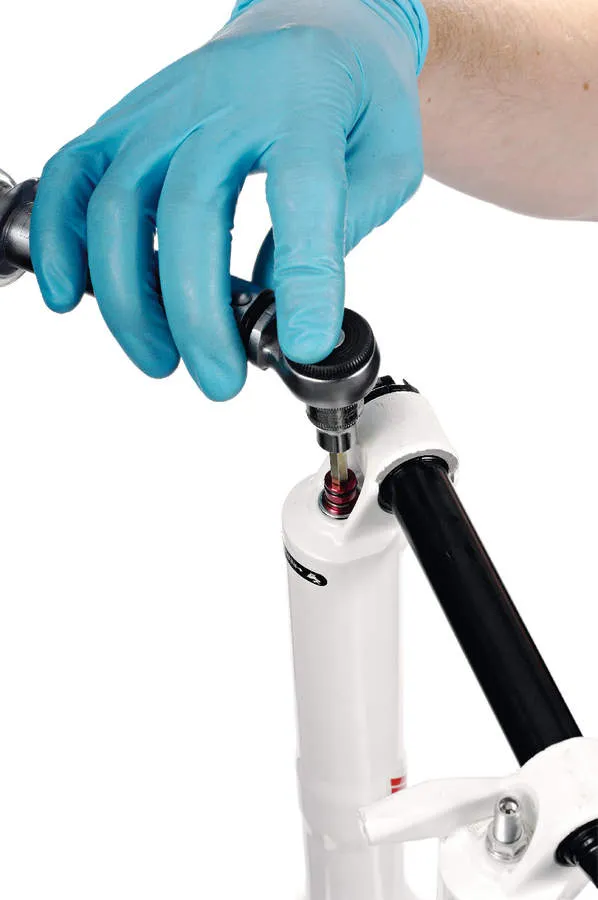
14 Replace bolts
With the fork now back together and lubed up, it’s time to carefully replace the retaining nuts on the lower legs. Be careful not to cross-thread these as it’s easy to do so with the fine pitch of the thread. Make sure the nuts are tightened to the correct torque settings and, if you don’t have a torque wrench, tighten to the point just prior to your knuckles whitening. They’re critical bolts for the fork’s safety, so err on the side of tighter.
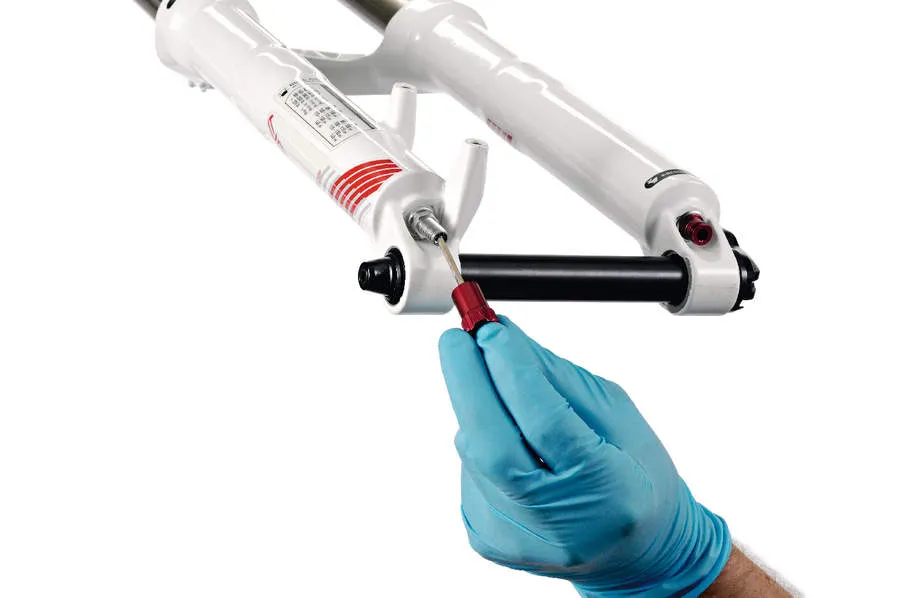
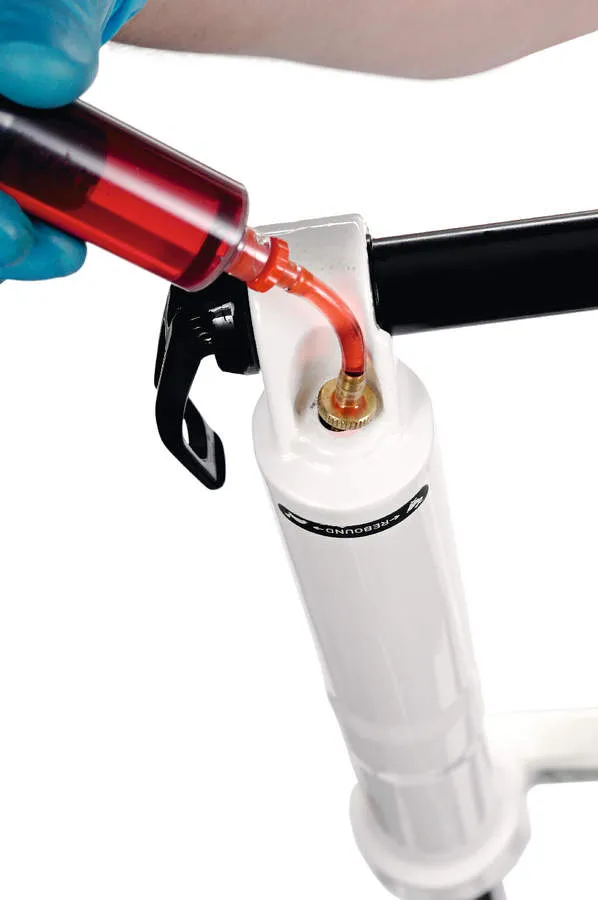
15 Pump in air
The fork is now sealed and will not leak oil, provided everything has been done correctly. You can now pump some air into the fork with no worries about the lowers flying off. Adding air is easy with a shock pump, but be sure to use your previous pressures so the fork retains its familiar feel. Later, you can adjust the air pressure settings to dial in the performance of your newly serviced fork.
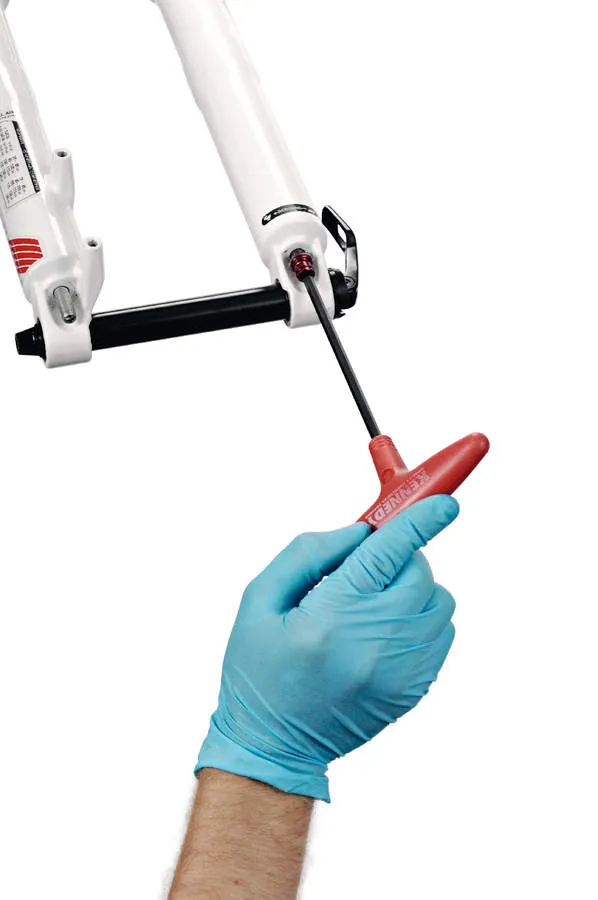
16 Grease Maxle
It’s easy to forget the other moving part of your Reba fork, if you have the 20mm bolt-through axle Maxle Lite version. Remove the Maxle through-axle from the lower legs and ensure the threaded section has a light coating of grease. This will make insertion and removal easier, and less likely to bind or permanently damage the threads in the right-hand dropout. Now you’re ready to ride.
Top tips
Ring piece: Many riders use a zip tie around a stanchion to give a visual indication of their used travel. While the fork is apart, why not do it properly and fit a less harmful rubber O-ring? They cost next to nothing from electrical retailers. Slide it on and look like a pro.
Socket to ’em: Getting the face of the soft hammer to connect with the ends of the damper rods can be a bit tricky, because the lower leg castings can get in the way of a clean tap. Using an appropriately sized socket can give you the clearance from the lower legs you need to get a clean and effective strike.
Wipe away: After cleaning your bike, wipe some 5wt fork oil around the stanchions to remove fine debris from the seal. Cycle the fork up and down a dozen times — you will see ‘dirt rings’ appear. Wipe these and the oil away to prevent attracting more dirt. This will help your fork feel smoother.