

Even pros get plagued by screeching brakes once in a while. We’ve all been there. It’s all about being creative and running through a sequence of settings. By a patient process of adjustment, testing and elimination, you should arrive at a positive result.
The following tips will hopefully explain and illustrate some of the principles involved for the three main types of rim brakes commonly seen. The most important principle affecting noise is the angle of the pad relative to the rim: generally, the front must come into contact before the rear – known as ‘toe-in’.
Tools
- 4, 5, 6mm Allen keys
- Adjustable spanner
- Abrasive block by Mavic or light sandpaper
- 10, 11, 12, 13, 14mm offset brake spanners
- 8, 9, 10mm Y-wrench
- 10mm box end/open ended spanner
1 Clean-up act
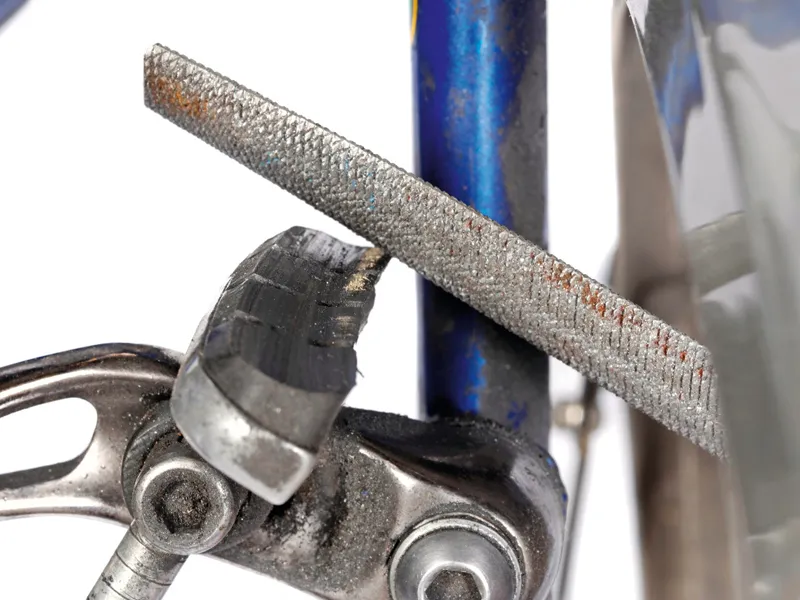
If your pads still have a fair bit of material, you’ll need to clean them first. Wipe them off with a bit of damp cloth and check the wear indicator, usually a line about 2mm from the backing edge. If they’re worn beyond this mark, you should replace them. The pad will sometimes have developed a ridge along either the lower edge, which indicates that it’s set too low, or the upper edge, which could indicate it’s too high and risks wearing through the tyre over time. Using a coarse half round file or emery cloth, roughen up the surface, making sure to remove all signs of shiny hard glaze. Remove the pad first to improve access if required.
2 Rim in trim
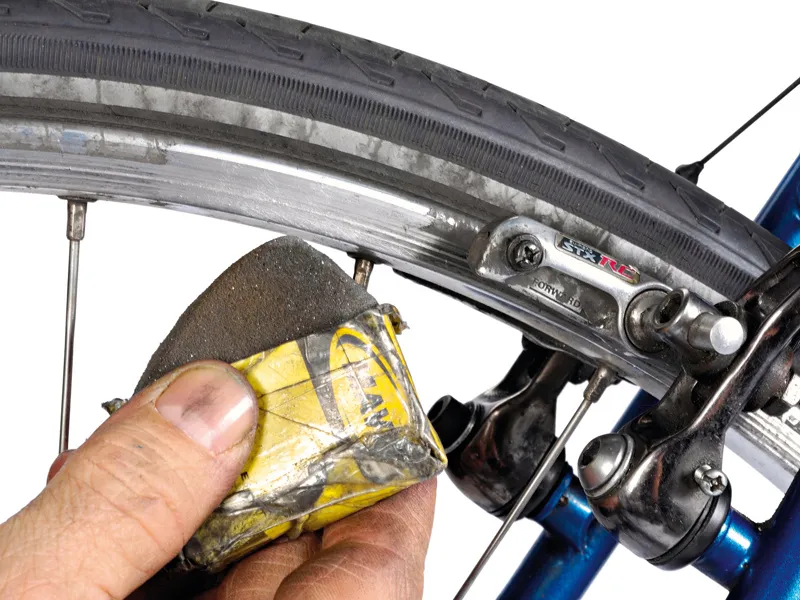
The condition of the rim surface can have a great effect on braking and noise levels. Most rims now have a machined or heavily scored surface when new. This has gone a long way to reducing the need for masses of toe-in, but as this rough surface becomes re-polished, squealing can occur. Not only can pads get glazed, but so can rim surfaces. Removing pieces of embedded aluminium will keep the scraping noise down; you might have noticed little raised dots of metal which form through braking and deposit themselves on both the rim and pads. Use a Mavic abrasive rubber block or coarse emery cloth and wipe clean. Carefully remove embedded aluminium from the pads.
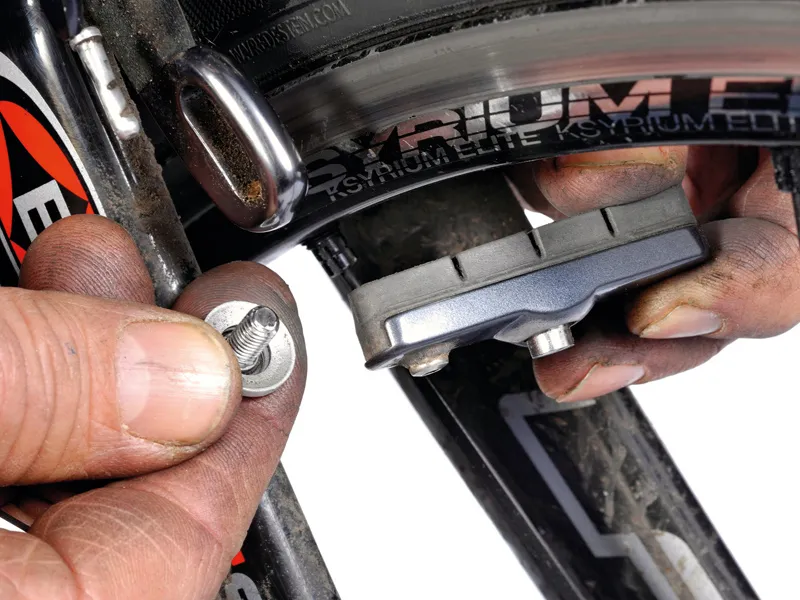
3 Pad points
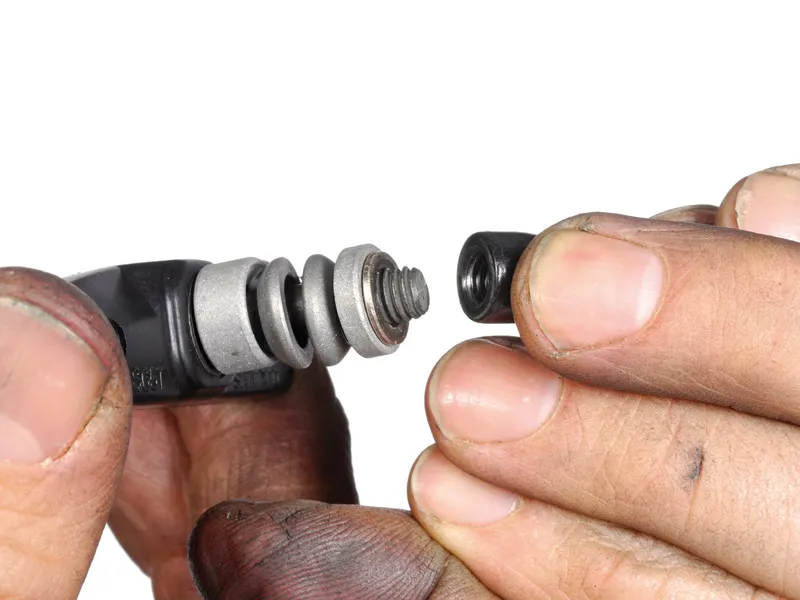
Concave and convex washers provide rotational adjustment in all planes, and are included on many aftermarket pads which can be fitted to side-pulls, dual pivots, V-brakes and cantis. Kool-Stop popularised offset pads, which were orientated in such a way that more force was exerted at the front of the pad than the rear, minimising the need for substantial amounts of toe-in while simultaneously curing squashy brakes and squealing. In the late ’80s, Shimano introduced offset pads orientated with the long edge forward. Where possible, short edge forward is less prone to noise, but be sure the closed end of the metal pad holders is always pointing forward.
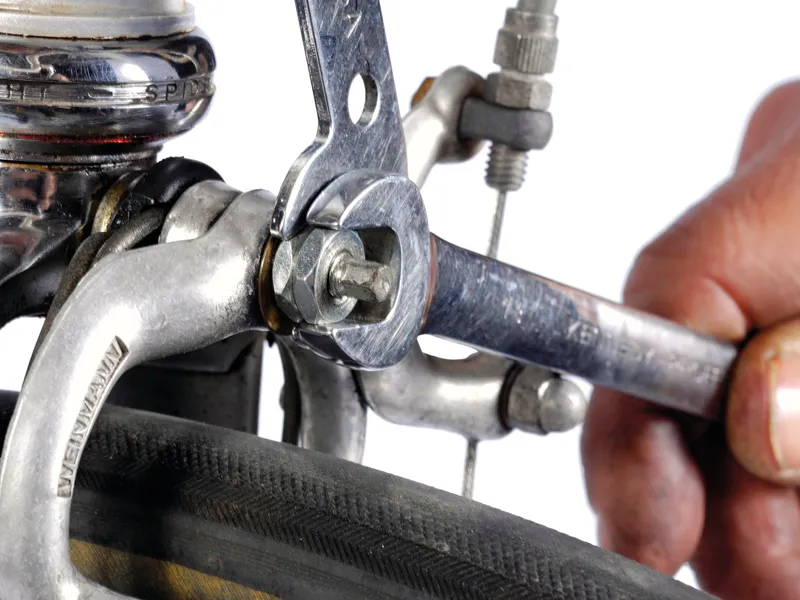
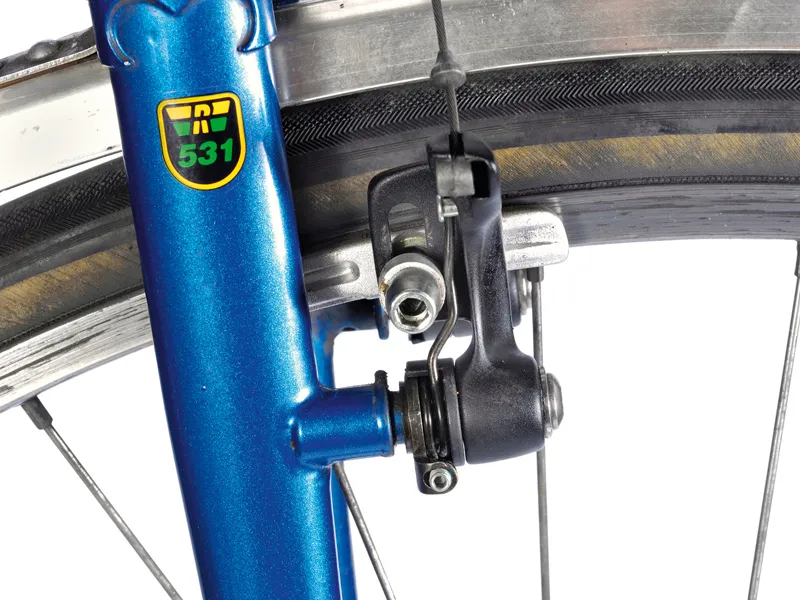
4 Snug and secure
First tighten the main fixing bolt to ensure the calliper is firmly attached to the frame. This will be a 6mm recessed nut with a 5mm Allen head, or an older style non-recessed 10mm hex head, preferably a nylock nut (with a nylon insert to prevent the nut working loose). Using a brake spanner or cone wrench on the back adjuster nut, release the front lock nut, tighten the adjuster nut enough that the arms don’t deflect under braking loads, while still moving freely, allowing snappy lever return. Re-tighten the lock nut against the adjuster nut. On some dual-pivot brakes, check the exposed pivot bolt, if any – it’s usually a 4 or 5mm Allen. Tighten firmly while retaining movement.
5 Side-pull toe-in
With the advent of concave/convex washer systems, toe-in adjustment achieved by bending the calliper arms has become pretty much obsolete, but among bikes being dusted off and taken out of the shed there’ll be a few skinny Weinmann side-pulls getting a second chance at glory. Bend the arm inward at the front – we used a Park tool that’s now discontinued, but you could use a small adjustable spanner positioned to grab the arm in a similar way. On current dual-pivot brakes you’ll often get a set of concave/convex washers making toe-in easy; if yours are slightly older and don’t have them, install some that do. Tighten pads firmly so they can’t be moved or twisted by hand.
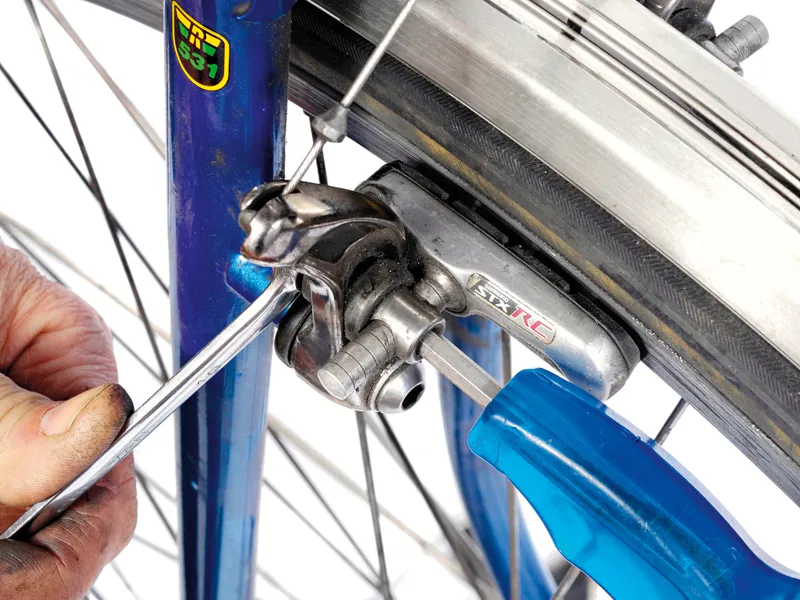
6 Baggy pivots
Minimising flex and vibration is the main goal of this anti-noise exercise, so checking that the pivot mechanisms and bolts are tight is critical. V-brakes and cantis are attached to the frame posts using a 6mm bolt, usually Allen but occasionally with a 10mm standard head. The brake arm either rotates directly on this pivot, using a brass bushing on older cantilevers, or incorporates an integrated pivot system which displaces wear from the frame post to its own internal mechanism, shared by modern Vs and cantis. This will also include a spring and adjustment screw, which add mechanical complexity and wear possibilities. Replace if the arms are really baggy, and/or if any toe-in of over about 3mm is lost through play in the arm.
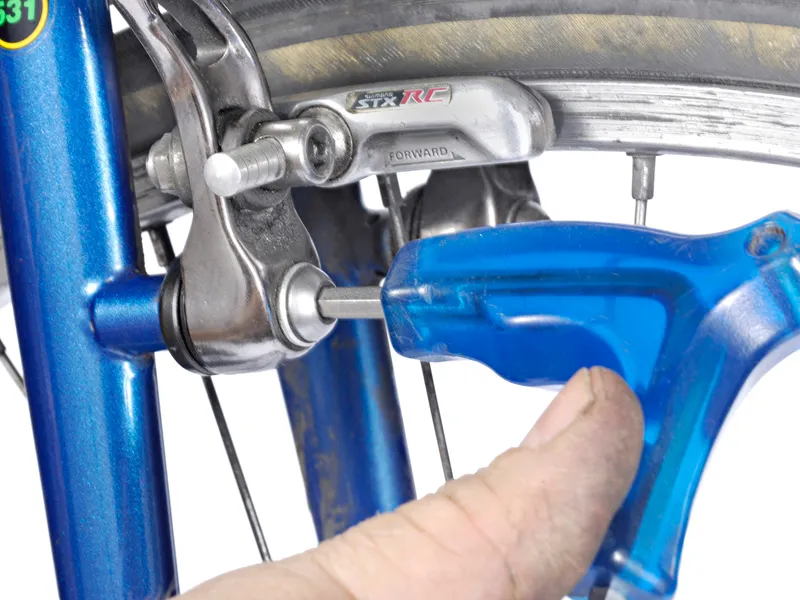
7 V-brakes
Toeing-in V-brake pads will require, in most cases, a 5mm Allen key. In some instances, the pad will use a nut on which you can use a 10mm Y-wrench; it will often incorporate an internal 5 or 6mm Allen fitting. One technique suggested by some of the pad manufacturers for setting toe-in is to insert a small piece of folded card between the trailing end of the pad and the rim. This will keep the rear part of the pad further away as you tighten the nut, and can be useful if you’re having trouble holding the pad in place by hand. Having the spring unhooked on both sides can also make life easier when positioning pads. Bring the pads against the rim to check they’re at the correct height, and then tighten firmly.
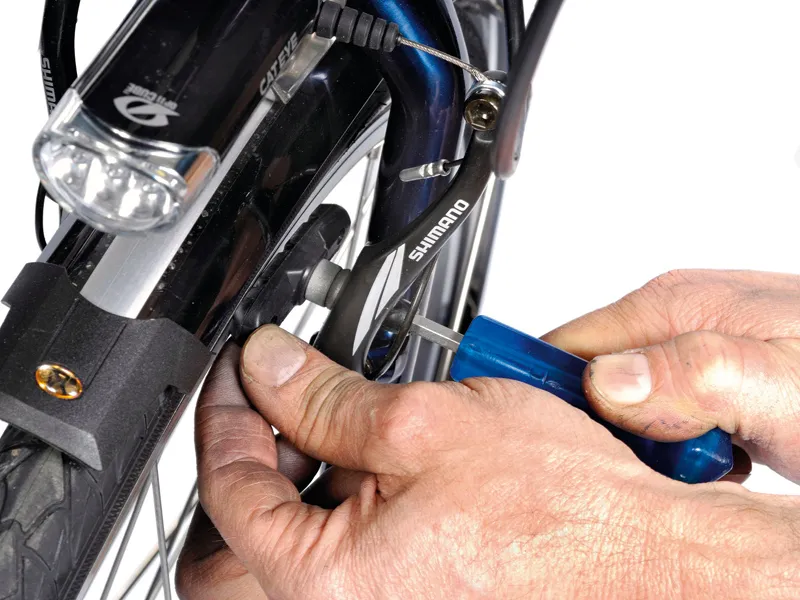
8 Canti correcting
If your cantilever brakes have an external return spring then it can be easier to position the pads if you unhook the spring first; the arm won’t then fight you as you’re trying to line up the pad against the rim, and fine tuning will be easier. To toe in the pad use a 10mm spanner to immobilise the brake pad mount, then loosen the front nut using a 5 or 6mm Allen key. Some designs reverse this configuration or even require two 10mm spanners. When setting up the pads, leave roughly a 2mm gap at the back of the pad. If the pad keeps moving back into its previous position, try rotating the washers and clamping the pad either a little higher up or down the arm, to avoid the old marks left by the previous setting.
9 Swap brake type
Cantilever brakes can be tricky to silence, especially on skinny steel touring forks which are more prone to flexing. One thing that doesn’t help is a design that favours noise-making, where the brake pad post clamp sits way out in front, forward of the arm and mount. If you’ve tried everything to stop the squealing and still no joy, you might have to resort to a different design altogether. One to consider would be the inboard type pictured here, which seems to squeal less; both Ritchey and Avid offer this more compact design. Compare the forward type pictured in step 8 above with the rear mount design pictured below, which minimises flex in the brake arm, reducing the likelihood of high frequency vibration.
Them's the brakes
Brake squeal is caused by vibration, as that’s a fundamental requirement of generating sound (unless you’re riding in a vacuum). Vibration between the rim and pad can be caused by many things, but is most commonly a result of the interface between the pad and the wheel rim. Sorting your brakes out using all of the steps above will make sure your brakes are as good as they’re going to be, but there’s no hard and fast rule that will guarantee that you still won’t be getting brake squeal. The most common remedy, and often the quickest, is to fit a new set of brakes pads to freshly cleaned rims.
Dual compound pads can help to reduce the chance of the dreaded brake squeal coming back. The harder section of the pad gives slightly less friction than the softer sections and also serves to clean up the rim as you use your brakes. This kind of pad gives the best of both worlds: plenty of performance when you really haul on the anchors and clean rims for smooth, squeal-free braking.