

What do you do when your bike breaks down miles from home? You can stick out your thumb, you can call a cab, or with a bit of preparation and ingenuity, you can get yourself home. Here's how.
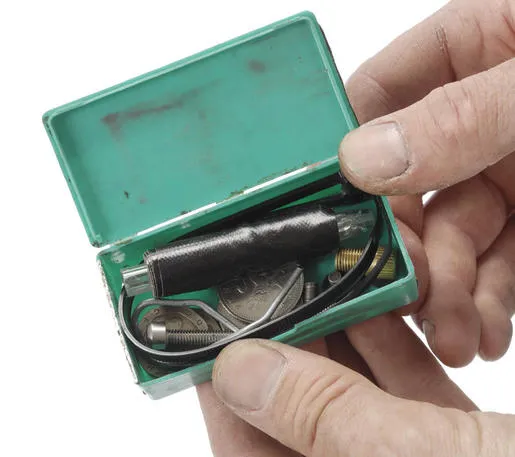
Preparation is the key. As well as the basics of a pump, multi-tool and a spare inner-tube or two, carry a survival kit of essential spares and materials. Use a small container, such as an old Tip-Top patch kit box or a 35mm film canister, and fill it with the following, packing them in tightly so as not to rattle:
- Small and medium zip-ties
- A small piece of cut-down Biro casing wrapped with a length of duct tape
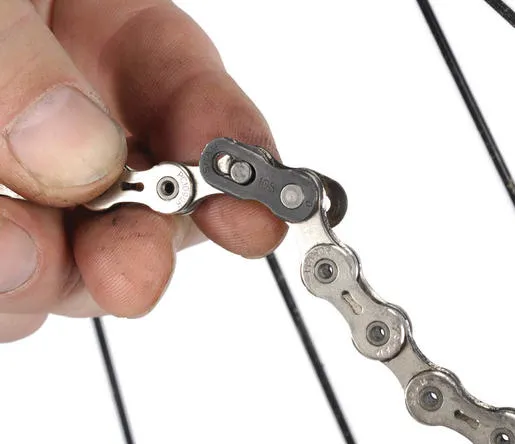
- One or two SRAM Power Links, 9 and/or 10-speed, depending on your bike and those of people you ride with if you want to be Bicycle Repair Man. These links will work with most chains
- A small length of malleable wire (copper wire that can be twisted by hand is best)
- Some 20p or 50p coins
- A piece of tyre casing or other suitable material cut down to about 5cm square
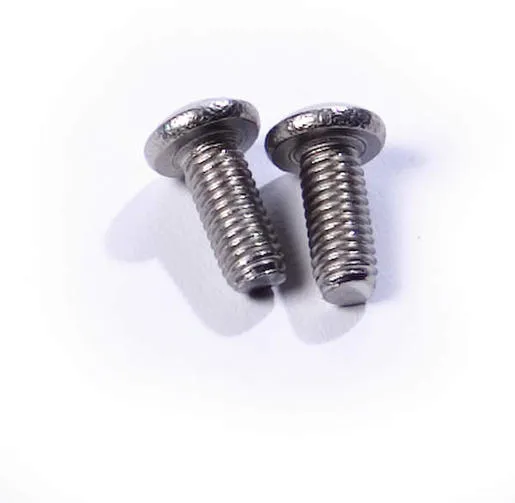
- Optionally, a spare 5mm Allen bolt or two, about 2.5cm in length, and 4mm and 6mm Allen bolts if you have enough space to fit them in your container
- A St Christopher medallion or lucky charm!
Bike prep for panic prevention
- Replace a couple of your shorter 5mm bottle-cage bolts with longer ones that are 3-4cm; these can be used on many modern twin bolt seatposts or clamps.
- Fill your tubes with tyre sealant such as Slime. This can be extremely effective at warding off the debris from recently trimmed hedgerow. You can buy pre-filled tubes or inject sealant into Schrader or two-piece Presta valves. To treat tubes with one-piece Presta valves, you can cut a hole in them (as small a possible!), inject the sealant and fix it afterwards.
- Buy a couple of spare normal spokes of the right length, with nipples, and tape them or zip tie them tightly under the left chainstay to keep them out of sight – they are handy to have in reserve.
Now you're all set, here's how to use your emergency kit to deal with common problems
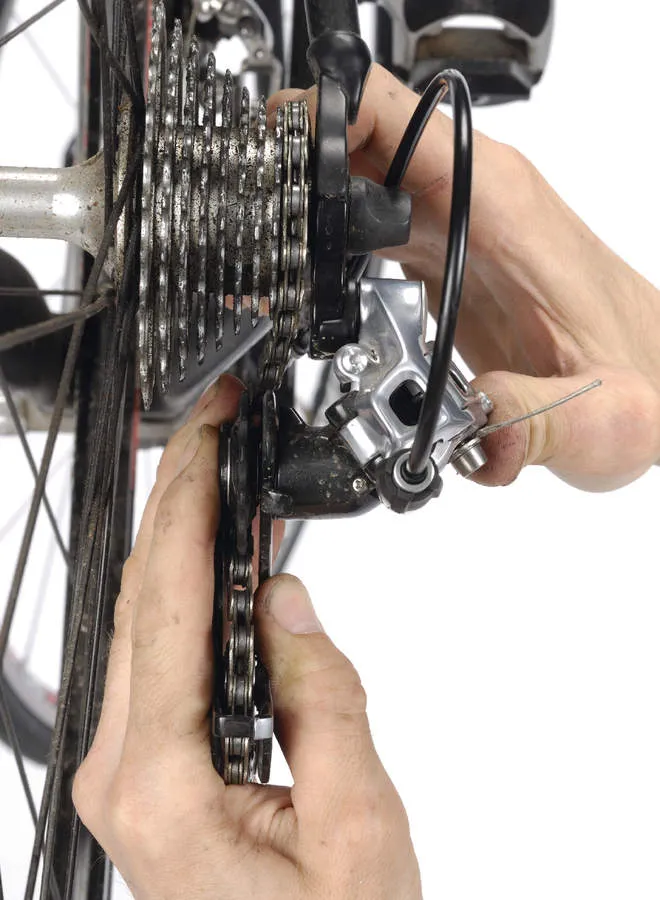
Loose jockey wheels
Jockey wheels have an annoying habit of coming loose, usually because they weren't tightened correctly after cleaning. That piece of copper wire or the 5mm bolt you've got can now do its thing. Just loop the cable through the centre of the jockey wheel to keep it in place.
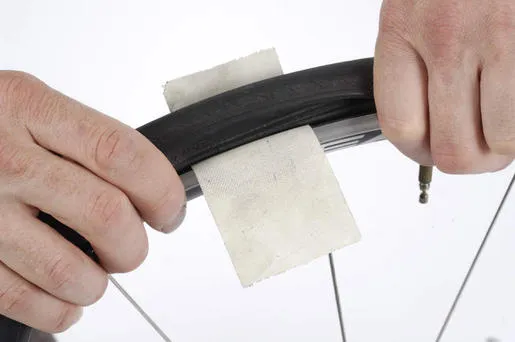
Badly slashed tyre

Use your handy survival kit duct tape and install a slightly larger piece overlapping the bead of the tyre, thus anchoring it securely when inflated. You might want to put a second layer, or even use the piece of cloth or tyre casing, which you also happen to have in your box of tricks.
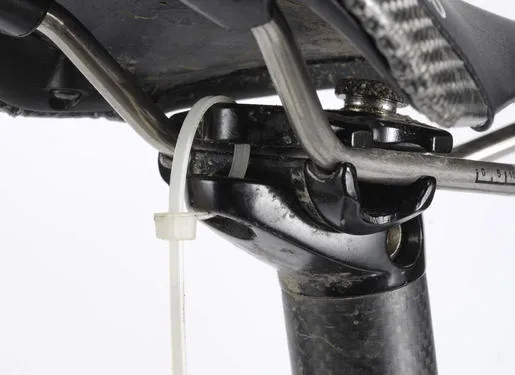
Broken seatpost clamp
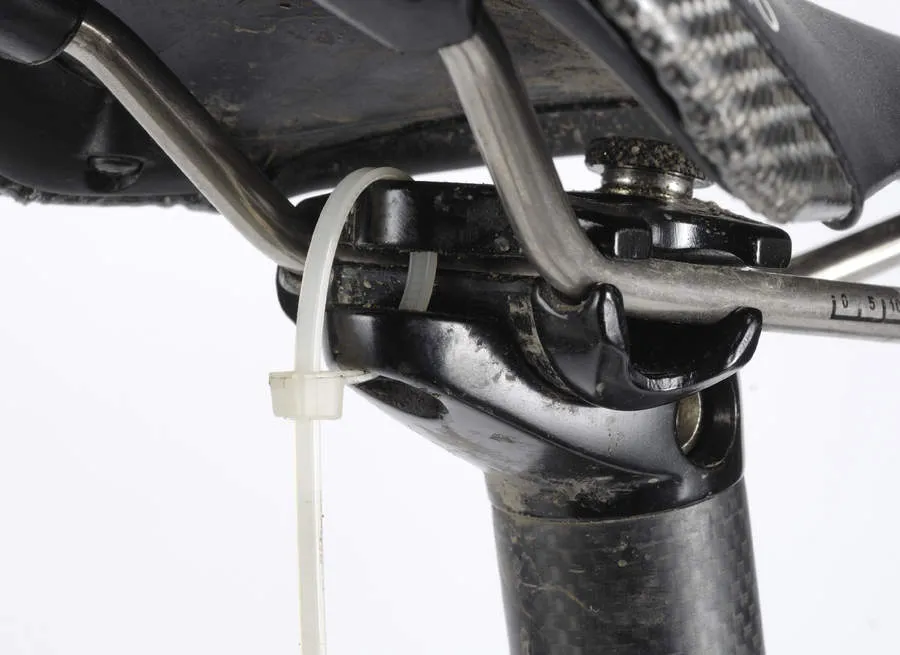
Re-attach a saddle to a seatpost when the clamp bolt has broken using zip-ties, but sit on it gingerly for the ride home. It's not perfect but better than sitting on a seatpost.
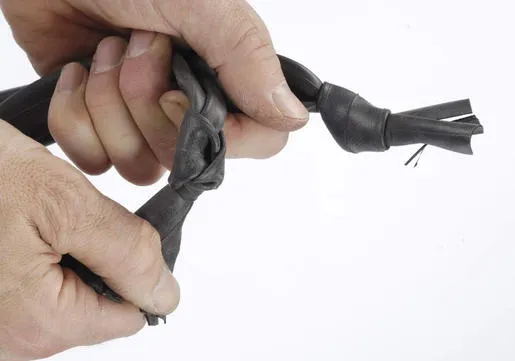
No spare tube
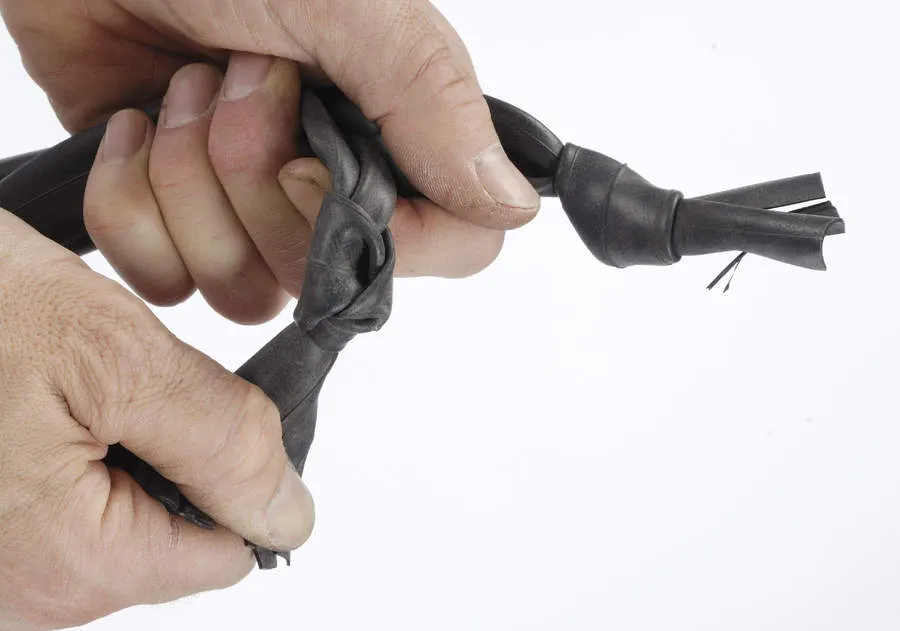
Carefully tear the tube apart at the puncture, then tightly knot both ends; or do the same with your handy zip-ties. The tube will expand back into the tyre upon infl ation, but go easy on the pressure.
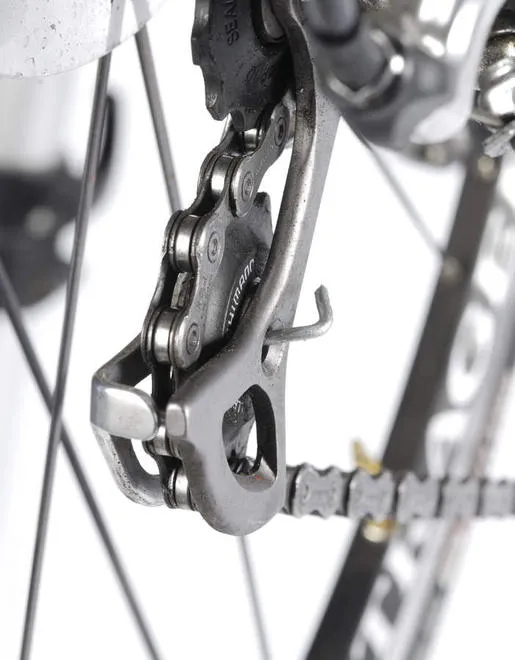
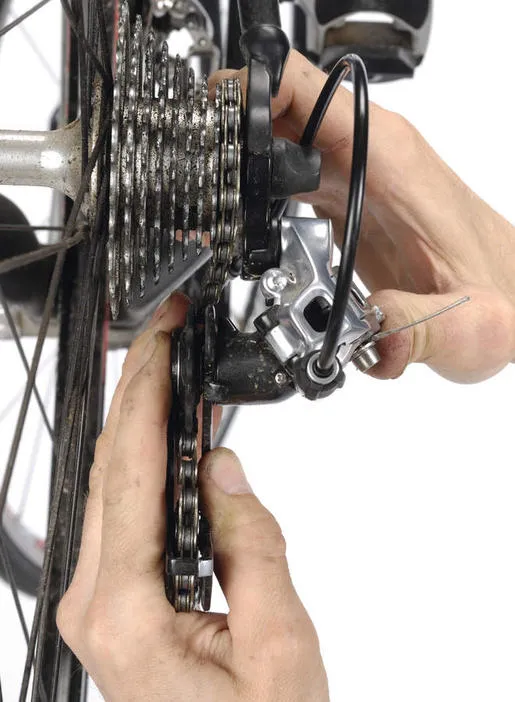
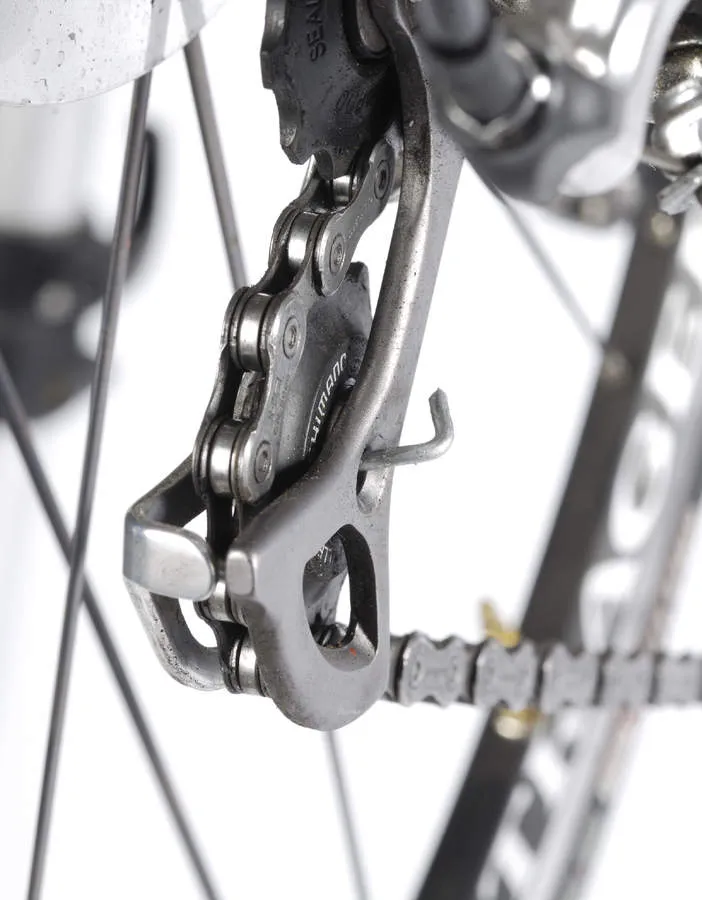
Bent rear mech or gear hanger
Place the bent rear mech into the smallest cog and big ring, then carefully and slowly pull the derailleur back into position. The cage of the rear mech should be in line with the smallest sprocket and check that it's pointing in a perpendicular direction to the ground.
Be careful when selecting the lowest gear while riding afterwards though, as the derailleur might no longer be as well adjusted and could get caught in the spokes.
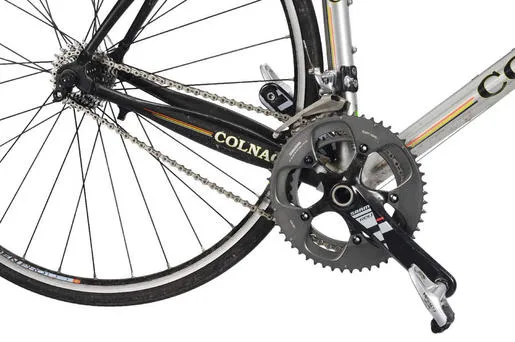
Broken Rear Mech Or Gear Hanger

If your derailleur or hanger is broken beyond repair, you can remove it entirely and then shorten your chain using the SRAM Power Links in your survival kit. This repair depends on a bit of luck and preparation – having a multi-tool that includes a chain breaker will make life a lot easier, though you might not be able to get ideal chain tension if you have vertical dropouts. Try to get the chain line as straight as possible.
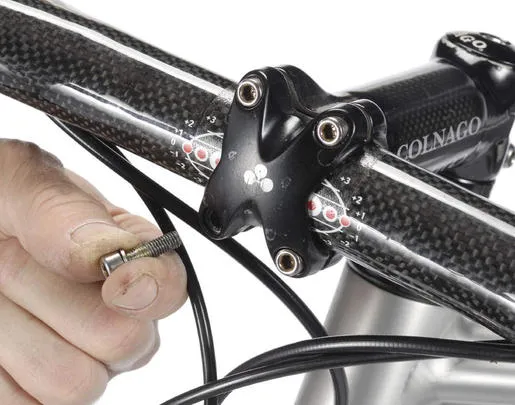
Bolt-on repairs

You can pinch a bolt from a place on the bike where it can be spared, and use it where it's more critical in an emergency. If you lose a stem bolt, for example, you can borrow one from a rack strut or from a water bottle cage bolt. But be careful and go easy until a permanent replacement can be found, especially if you think carbon parts might be damaged. Run a cloth lightly over suspect areas to check for a cracked surface – any small cracks will pull the cloth's threads.
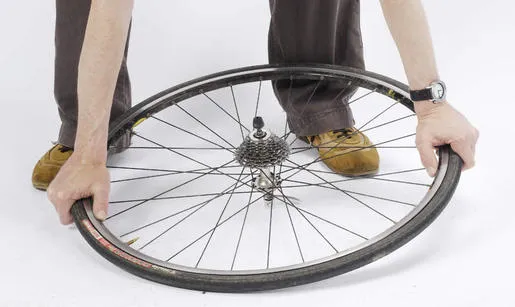
Pretzeled wheel
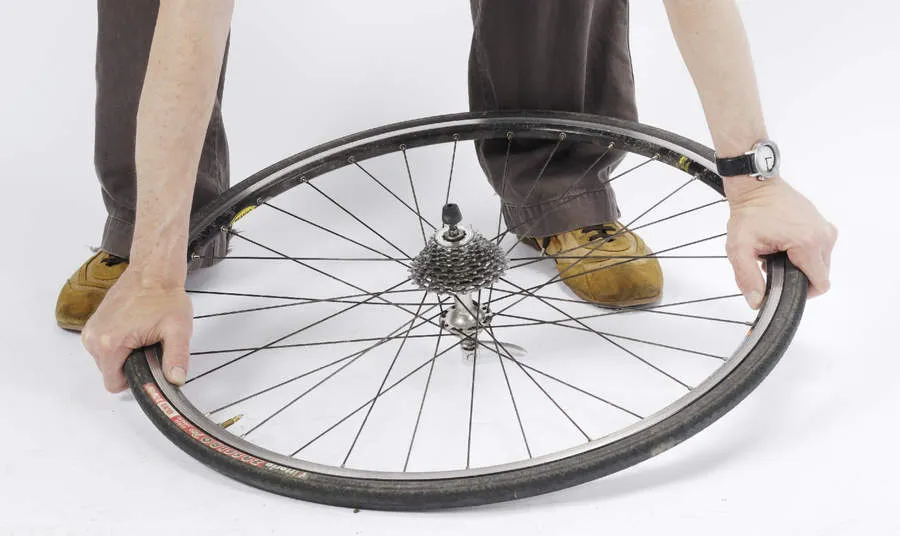
If replacing a spoke won't do or isn't an option, a pretzeled wheel can be straightened sufficiently to get you home with a bit of technique and brute force. Place the wheel with the axle and high point of the buckle against the ground, then firmly push with substantial weight while gripping the rim on either side of the bent zone. You can focus and increase your leverage by using your feet in place of hands and body weight, along with a stone or raised surface feature such as a kerb.
Having your brake quick release open will reduce the chances of the wheel rubbing all the way home. Exceptions might be if you have a delicate carbon frame with tight clearances, where a few miles of tyre rub could not only result in a blowout, but put a hole in your chainstays, seatstays, or fork blades. Those spare coins might come in handy now if you forgot your phone or ran out of battery charge.
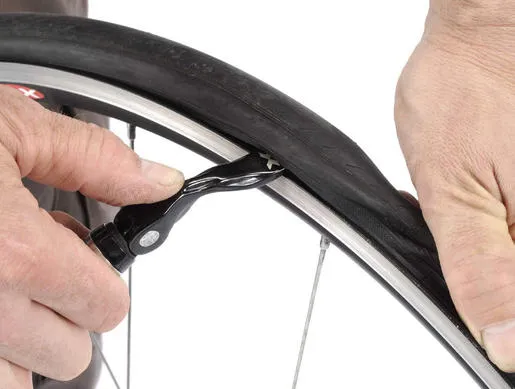
Tyre removal

A useful trick is knowing how to remove a tyre without the aid of tyre levers. First, make sure all the air is removed, then lean over the wheel, holding it vertically against the ground. Starting with both hands at the top, pinch and manipulate the tyre beads into the centre of the rim channel simultaneously, with both hands working downwards.
As your hands meet towards the bottom you'll find that you've gained a substantial amount of slack, which should be enough to just pull the bead over the rim flange. If it's still a little tight, remove your quick-release skewer and use the lever – it works!
Check the tyre for any debris before fitting the new inner tube. Run your hands all the way round the inside of the wheel rim to feel for anything that may have pierced the casing such as a thorn or piece of glass, taking care not to cut your fingers.
Gear cable repairs
If you break a gear cable, it's most likely to be the rear one, in the lever itself or near the head-tube where most friction occurs.
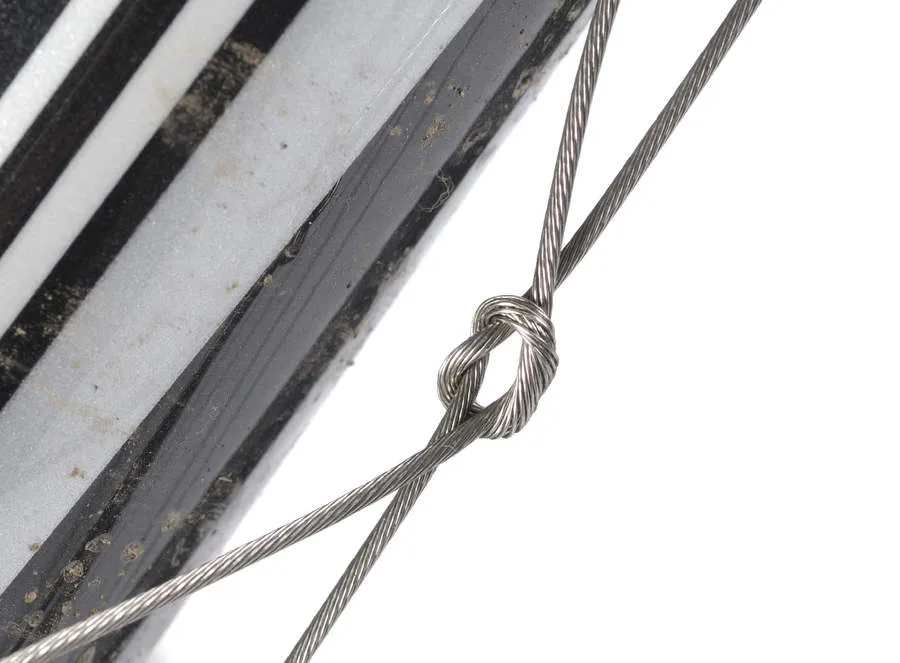
Remove your front derailleur cable and carefully thread it through the right lever (you'll probably have to twist it in the direction of the winding to stop the strands from fraying). Tie it using a square knot onto the cable attached to the rear mech, about halfway along the down-tube.
Before tying the knot, push the mech up onto the big cog. This will take up any slack when it's released – though with a multi-tool you can take up the slack in the usual way.
You can also immobilise the derailleur in a specific gear if all cable options are gone – jam a twig or piece of debris in the parallelogram, after placing it into the desired gear.
