


Bleeding your brakes means you can keep them working in tip-top condition without the hassle and expense of taking them to a repair shop.
When your brakes get sluggish or the lever feel changes dramatically (do check the pads in the caliper too) it’s likely the brake fluid needs a change or top-up.
In the video below, BikeRadar's James Tennant demonstrates how to bleed Avid brakes. The process is the same for Formula brakes. You can also read written instructions below.
How to bleed avid disc brakes
Video: How to bleed Avid and Formula disc brakes. This video is part of the Park Tool Maintenance Monday series. You can purchase the Park Tools used in the video at a number of dealers across the UK and internationally. For more maintenance videos, subscribe to the BikeRadar YouTube channel.
How to bleed Avid disc brakes
Tools for the job
- Torx keys
- Allen keys
- Avid brake bleeding kit (syringes and adaptors)
- Avid brake fluid (or DOT 4 or DOT 5.1 fluid)
- Rubber band
- Tissue or cloth
- Water
- Degreaser
- Gloves and eye protection
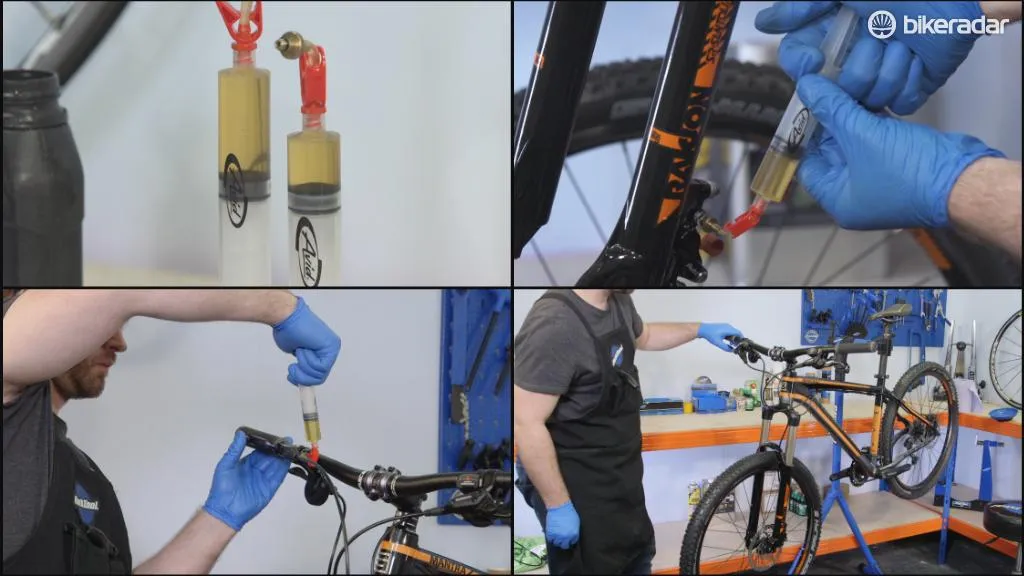
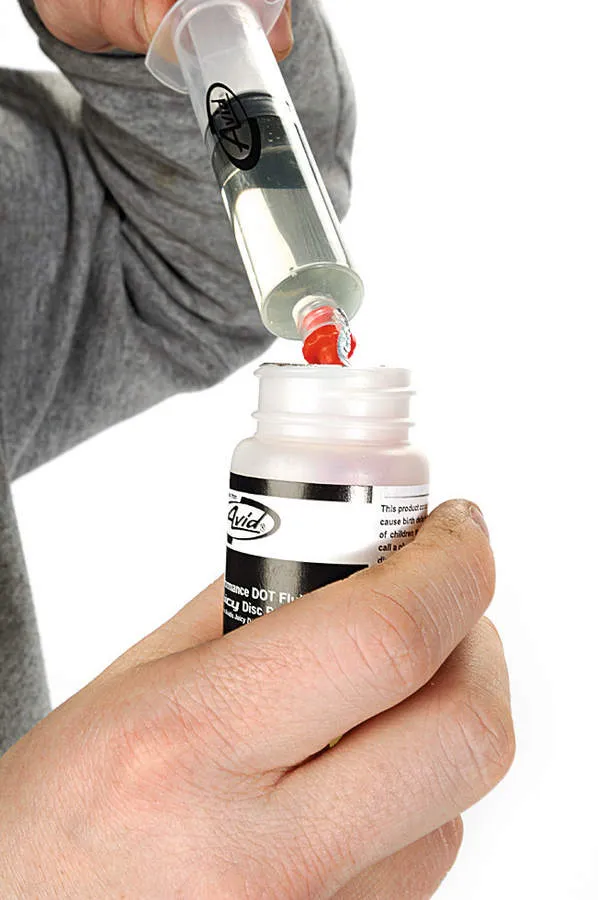
1 Prepare the syringes
We recommend always trying to use the manufacturer’s own brand brake fluid so you know there will be no hidden compatibility issues. With the Avid adaptors attached to the syringes, half-fill the caliper syringe and fill the master cylinder syringe to a quarter. Try to do so in a slow, controlled manner so as to reduce the chance of introducing bubbles into the syringe. Now lock the adaptor closed.
2 De-gas the fluid
You can rid the fluid in the syringe of most bubbles by tapping gently on the syringe plunger. You will see the bubbles appear in the syringe and then rise through the fluid to gather at the top. Release the lock on the adaptor and push the gas from the bubbles past the lock. When out, reclose the lock.
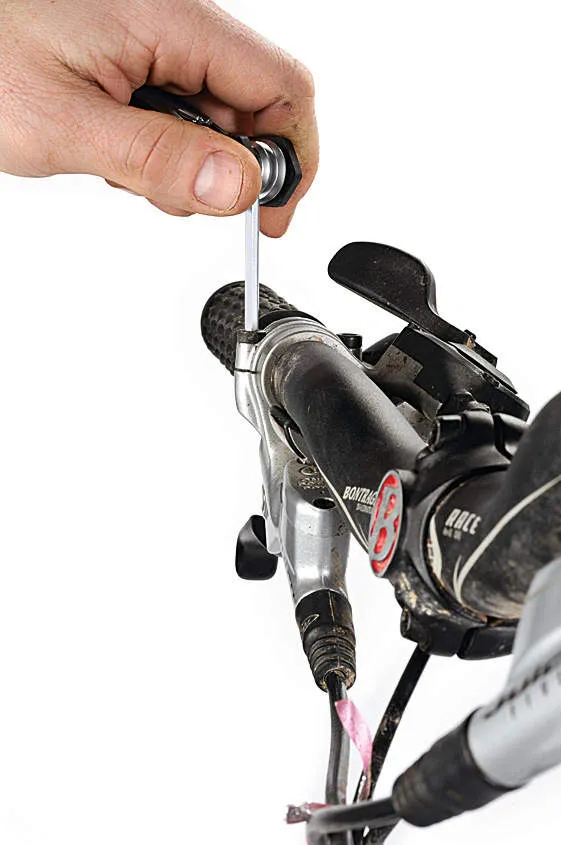
3 Remove the caliper bleed screw
In order to attach the syringes firmly to the caliper and the master cylinder, Avid add a threaded port on each. This allows you to screw the syringe adaptors to them and, because they have O-ring seals, they’re drip-free. Use a Torx T10 tool to remove the bleed screw from the centre of the banjo mount. Place the bleed screw somewhere safe!
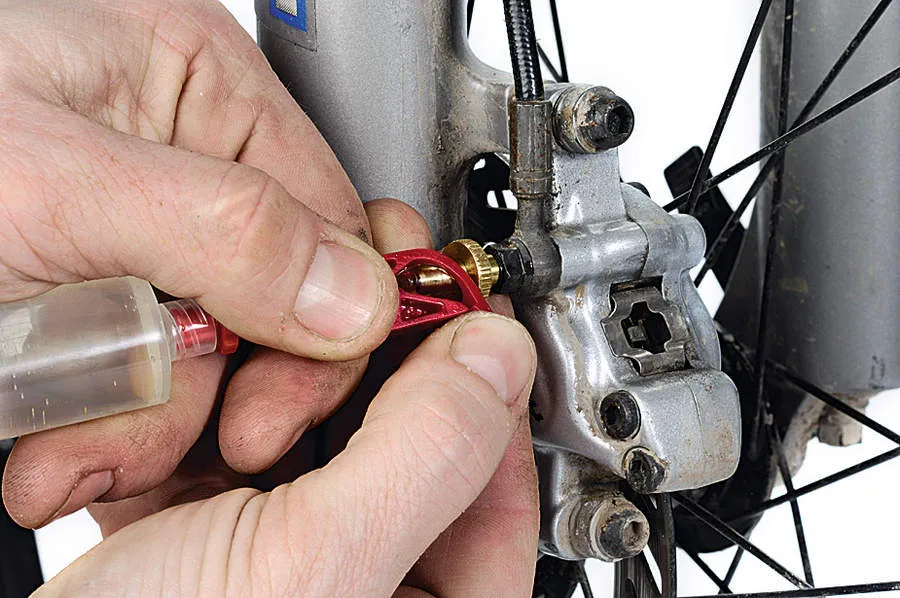
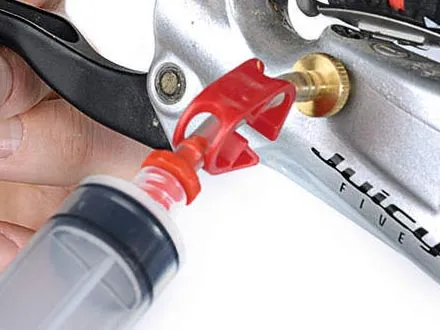
4 Attach the caliper syringe
Making sure that the fluid in the caliper has been pushed right to the tip of the syringe, and that you’ve already removed the air (so there should be no bubbles to be seen), screw the brass adaptor into the open caliper bleed screw port.
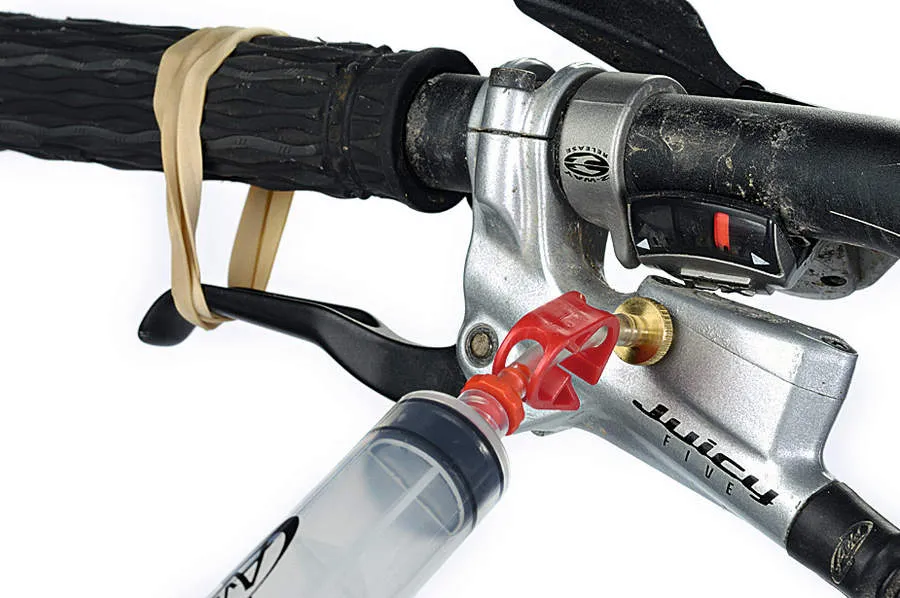
5 Move the brake lever
Air — the mix of gases that will be trapped inside your brake — is lighter than the brake fluid around it, so it will rise to the uppermost point in the brake system. To make sure that any air is as high as it can be, rotate the brake lever so that it is hanging vertically. Make sure the lever clamp is done up tight, otherwise it makes the bleeding process difficult.
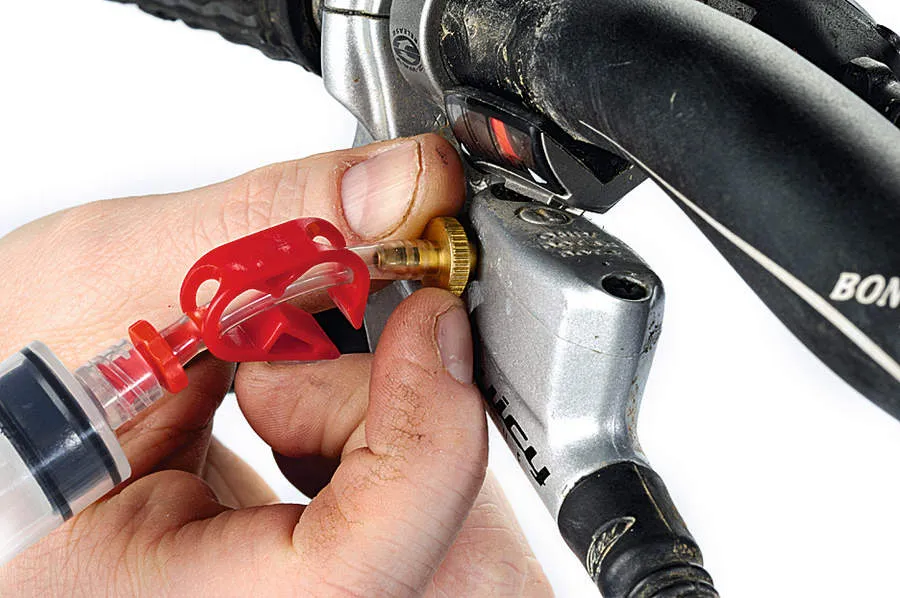
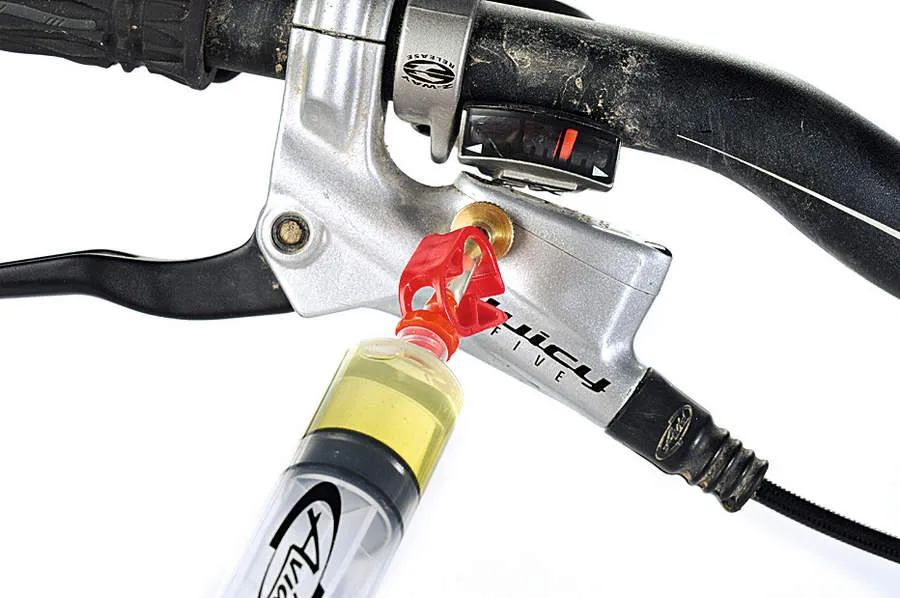
6 Attach master cylinder syringe
Remove the master cylinder bleed port screw (another Torx T10) and place the screw wherever you left the caliper bleed port screw. Take the second syringe, which should be a quarter full, and remove the bubbles as per the process in step two. If you have reach-adjust, make sure it is not adjusted so far out that the brake lever can touch the grip. Pad contact adjusters should be turned all the way out.
7 Depress caliper syringe
Open the locks on both syringes. Press the plunger on the caliper syringe, releasing half of the fluid through the system. This fluid and any air in the system will be pushed out through the master cylinder bleed port and into the master cylinder syringe.
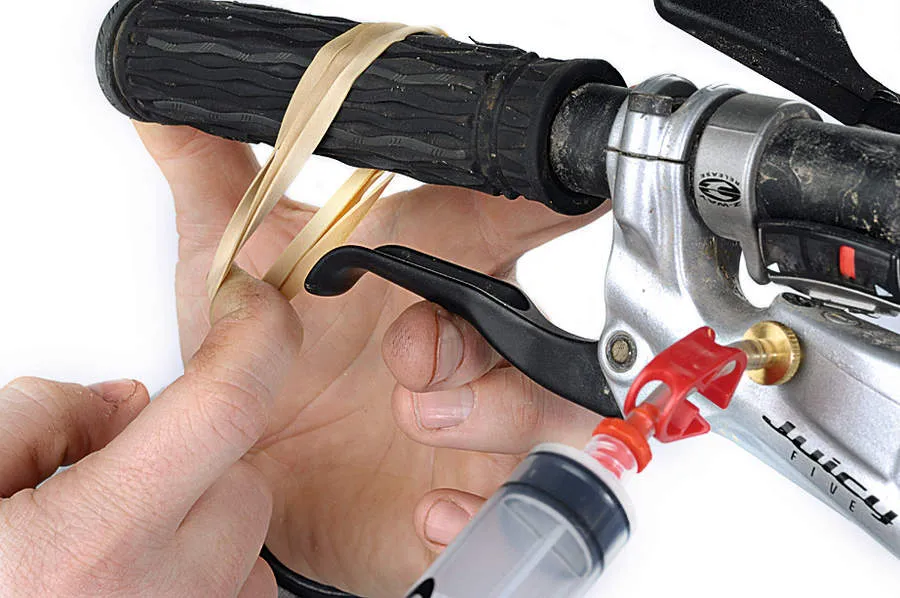
8 Close the lever
Next, close the lever. You could have someone hold it for you, although we find a simple rubber band wrapped around the grip and the brake lever does the job well and is easy to remove with one hand.
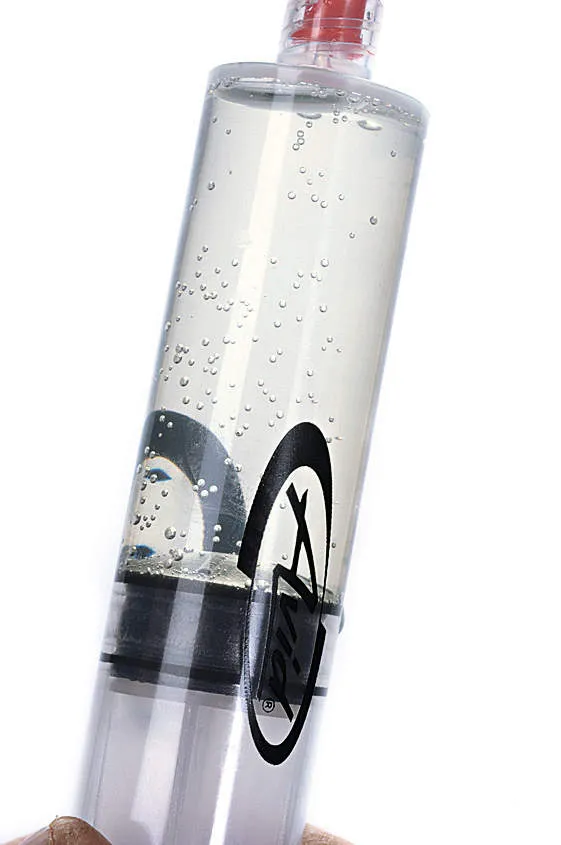
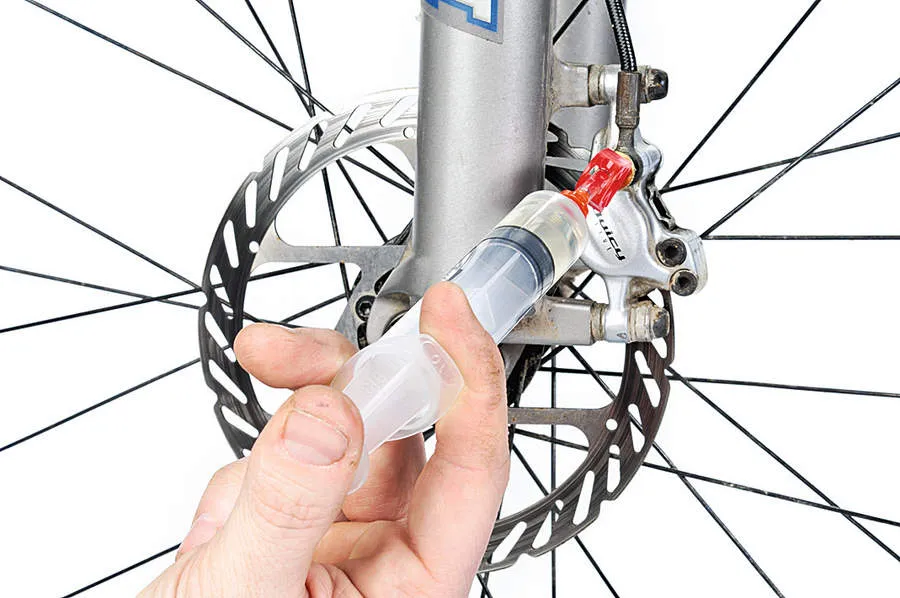
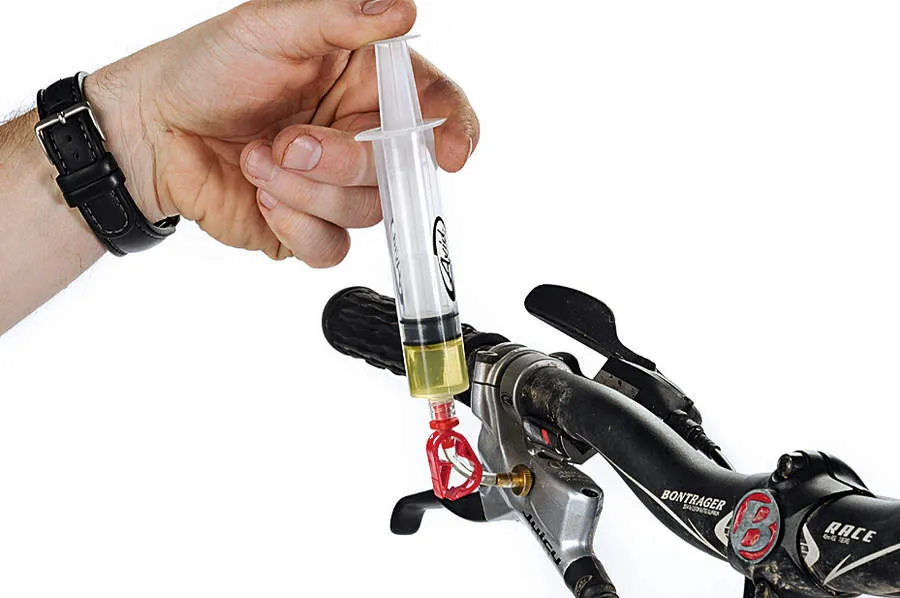
9 Create a vacuum
Gently pull on the caliper syringe to create a mild vacuum. Then lightly push on the syringe plunger to add pressure to the system. This should be continued until you can no longer seeing bubbles coming out of the caliper. The picture shows a big air bubble at the top end of the syringe. Don’t pull too hard or you may actually accidentally introduce more air into the system.
10 Undo lever, but hold
When the major bubbles have stopped emerging from the caliper into the caliper syringe, undo the lever but hold it with your fingers — don’t let it flick out, otherwise this will stop the bleed from being completed effectively.
11 Press on caliper syringe
Press on the caliper syringe; you will feel the pressure building in the lever blade. Continue with the process until the brake lever is fully extended.
12 Remove caliper syringe
With the brake lever fully extended, you can now remove the caliper syringe. Close the lock on the hose and unscrew. Be ready to catch any drops of fluid that fall out with some tissue or a cloth. Don’t worry about these, they won’t harm the overall bleed.
13 Refit caliper bleed screw
Refit the caliper bleed screw. Be careful how you go: dropping these little grub screws is extremely easy and they’ll find a new home under the fridge if given half a chance.
14 Open clamp on lever
The next step is to remove any air left in the lever. With the caliper now closed, you need to open the bleed lock device on the syringe hose. This will allow the passage of air from the lever into the syringe.
15 Vacuum until bubble-free
Hold the master cylinder syringe vertically. Gently pull on the plunger to create a mild vacuum, then push in the plunger with a similar force — this will have the effect of pressurising the system. Squeeze the brake lever about ten times, allowing it to snap back into position. Any bubbles will make their way into the syringe. When there are no more bubbles coming out, you’re done.
16 Refit master cylinder bleed port screw
The final step is to refit the master cylinder bleed port screw. Before you do this, move the brake lever back to its usual position and unscrew the attached syringe. Don’t worry if you lose a drop or two of fluid. With the port brimming with fluid, replace the bleed port screw and wipe away any drops of spilled fluid with a damp cloth.
Top tips
Clean as you go to avoid damage: Brake fluid is pretty corrosive stuff and can do real damage to your bike’s paintwork, so it’s best to clean up as you go along. When you’ve finished bleeding your brakes — following the steps overleaf — and wiped away any obvious wet patches with a rag, rinse everything with a good spray of water. Water nullifies the harmful effects of the fluid and will save your frame paint.
Tap the caliper to remove bubbles: Use a hard but non-marking item, like the plastic handle of your Torx tool, to gently tap the caliper to coax out any stubborn bubbles from the recesses. The more air you can remove, the more effective your brakes will be, so it pays to be patient.
Don’t be like us and forget to protect your hands! Buy a box of latex-free surgical gloves and wear them when working on the bike, especially when handling brake fluid. They’re thin enough to handle small objects such as bleed port grub screws, yet tough enough not to rip if you snag them.
Protect your floor: If you’re going to bleed your brakes indoors — we don’t really recommend it — make sure you put something like newspaper down before you begin. DOT brake fluid is corrosive and will quickly ruin most carpet and wood flooring surfaces, making you one of the least popular people in the house.
