


By nature, full-suspension bikes have pivots that allow the rear wheels to articulate. The most basic designs use a single pivot to achieve this function, although the suspension bike market is populated with multiple-pivot options. No matter how many pivots your bike has, it won’t work as it ought to for very long if you don’t attempt to keep the bearings clean and lubed.
Most brands publish a full service programme so that you can stay on top of your bike’s maintenance situation. Some manufacturers offer long – sometimes lifetime – warranties, in which case you shouldn’t have to sort out any pivot issues for the time that you have the bike. However, this isn’t generally the case with multiple-pivot bikes.
The key to avoiding pivot wear is keeping your bike as clean as possible while avoiding excessive use of degreaser and direct jet hosing. The good news is that servicing pivots isn’t usually that difficult. You just need to use the basic tools you’re likely to have in the shed, as well as some new bearings – you might have to buy those. That way, you should be done, dusted and back on the trail in little more than half an hour.
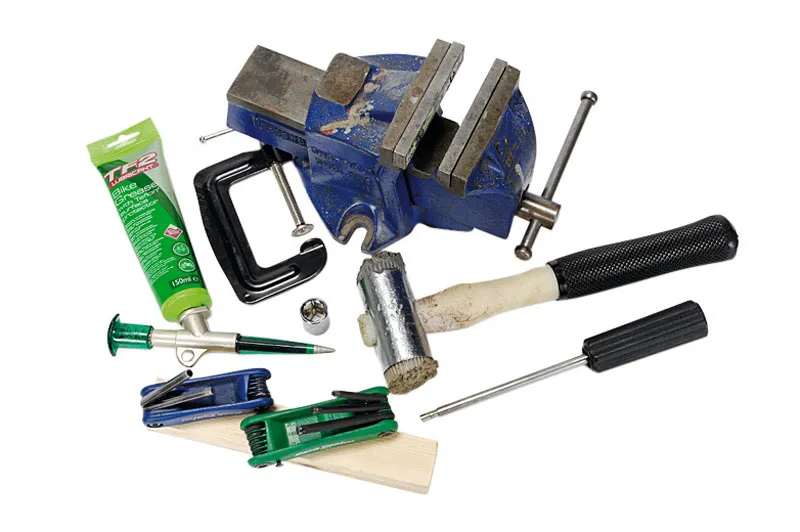
Tools
- Grease gun
- Hammer
- Mallet
- Wood
- Drift
- Screwdriver
- Scalpel
- Allen keys
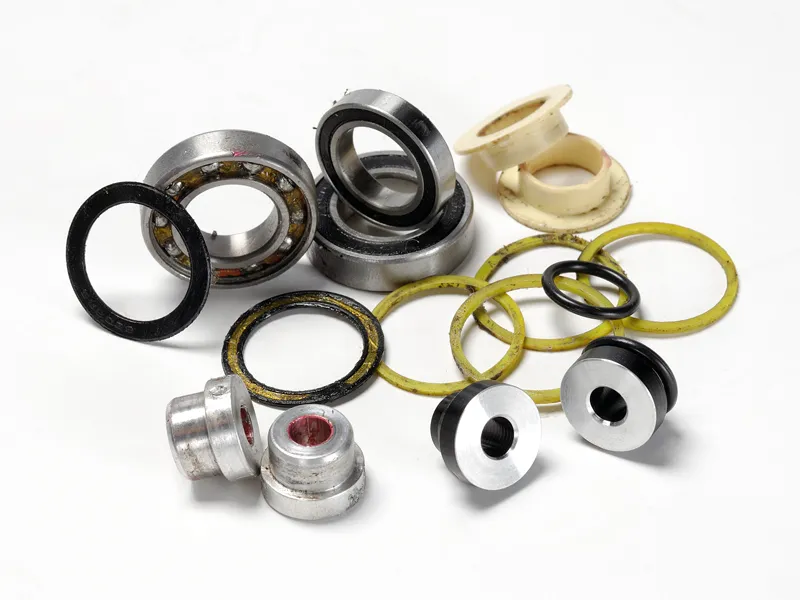
1 Bushings
Suspension pivots come in two varieties – bushings and bearings. The former are simply low-friction plain bearings – sleeves inside which the alloy pivot bolt shrouds (and pivot bolts themselves) reside. They’re cheap and technically perfect for low-speed, restricted-angle-rotation applications. They’re also good when loads are high and operating conditions are wet or dirty, as is the case with all mountain bike pivots.
2 Bearings
Bearings as we know them comprise ball, or occasionally needle, bearings in cartridge housings. They’re sealed and not usually serviced, just replaced. Cartridge bearings are best in high-speed, fully rotational applications, which is not what most mountain bike suspensions need. That said, they’re often favoured for their lower level of initial static friction, which makes the first part of the rear stroke feel plusher on bearing bikes than bushing ones.
3 Lube bushings
Bushings are often made from a self-lubricating material, meaning application of grease is not essential initially. Sometimes PTFE is used to line bushes to help reduce rotational friction. Sooner or later, though, most bushes will require a smear of good suspension grease. Thin, fine ones work best – such as Manitou M Prep – to help them along. Remove the pivot bolt, slide the two frame sections apart and apply a thin smear of lube. Then reassemble.
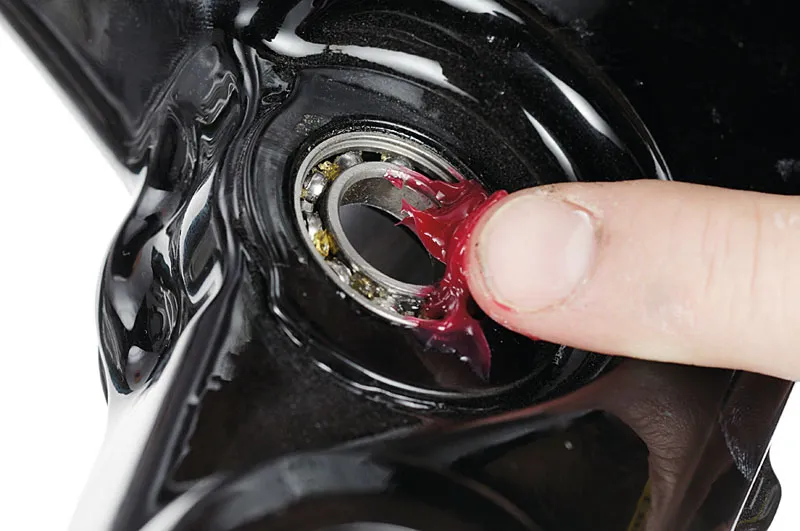
4 Grease nipples
Some frame builders who use bushes in their suspension pivots fit small, metal one-way grease ports, also called nipples. These use a small ball bearing to form a one-way valve into which grease can be injected. The new grease is channelled into the bushing, where it forces the old grease out at the pivot joint. You’ll notice the dark, old grease oozing out. You can’t overfill a bushing, so don’t worry about how much you use.
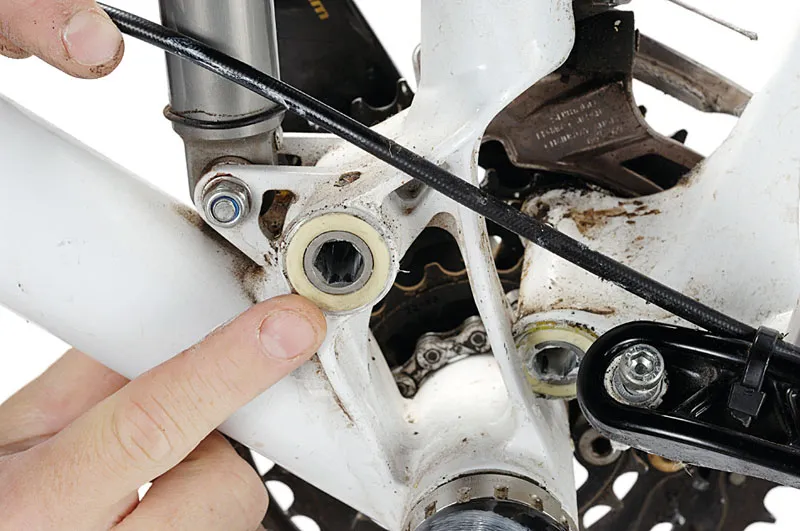
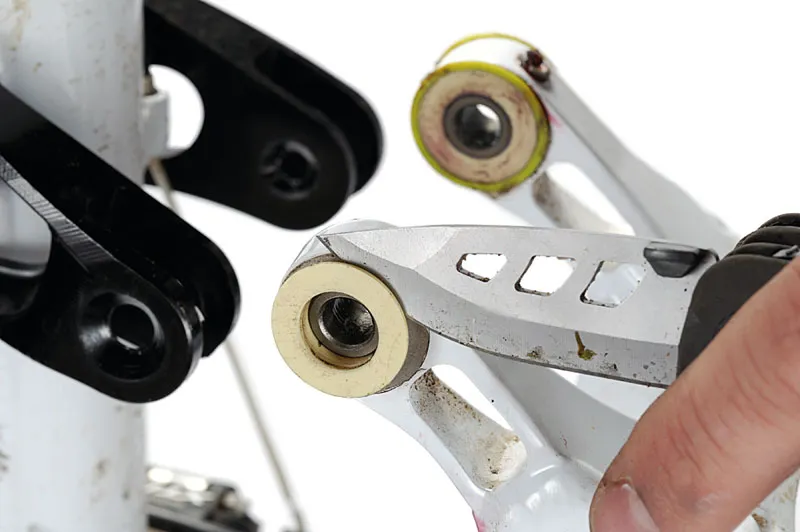
5 Remove bushings
This is usually a straightforward procedure. You remove the pivot bolts then ease the two sections of the frame apart. You should see the creamy yellow edges of the bushing flange and occasionally a rubber O-ring that’s used to seal out crud. These will just lift off, but the bushings themselves may need a little help from a blunt knife to ease them out of the frame. If you have to reuse the bushings, be careful not to damage their inside edges.
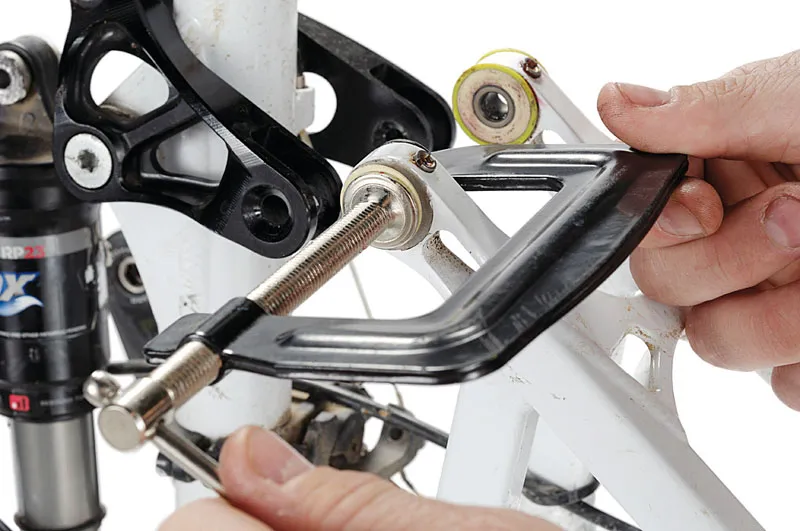
6 Refit bushings
The refitting procedure is essentially the reverse of the removal one, although it can be tricky to get what are often tight-fitting components to sit together. We’ve used small G-clamps in extreme cases, although care should always be taken not to damage the bushing of the frame element. If you take the rubber O-rings off, make sure they go back on. If they’ve perished or gone baggy, replace them – they’re cheap.
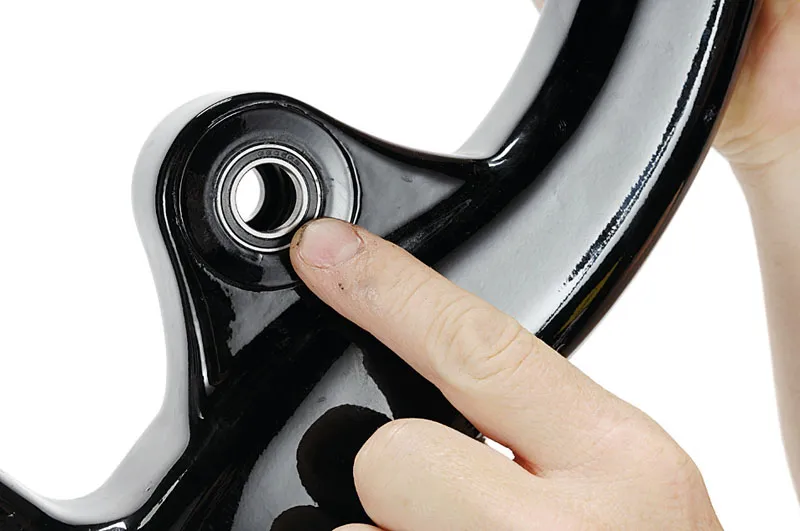
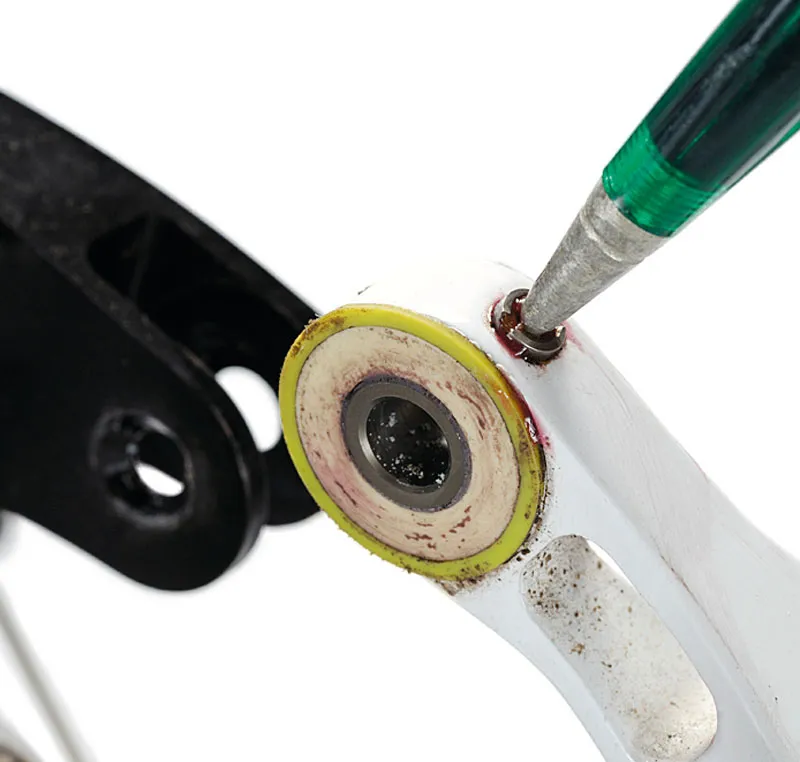
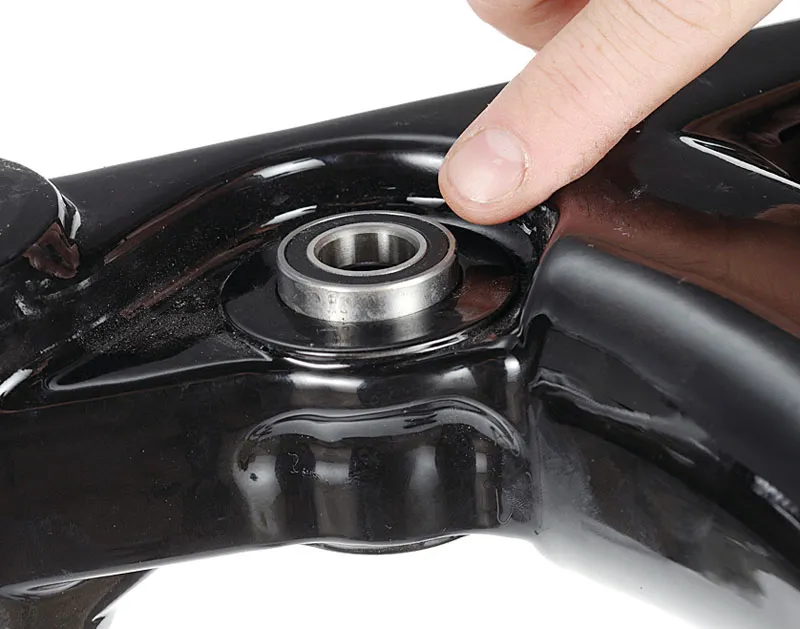
7 Lube bearings
Bearings have lubricant in them, and this will degrade and become displaced over time, depending on the level of sealing and the conditions the bike’s been exposed to. Undoing pivot pinch bolts and removing the frame element will expose the outer face of the cartridge bearing. Taking great care so as not to damage the rubber-covered metal shield, use a thin blade to pop the cover off.
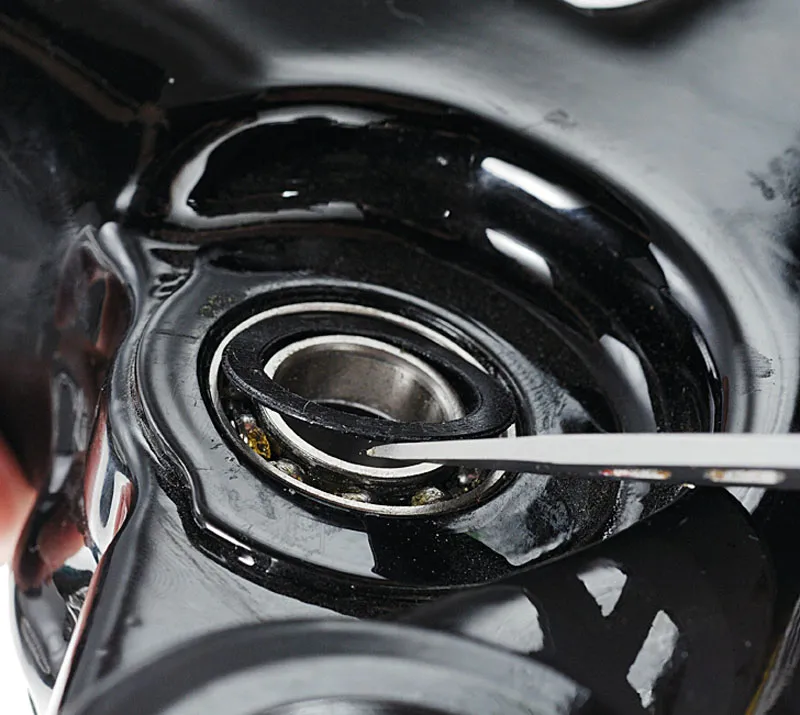
8 Add fresh grease
Leaving the bearings in position, add fresh grease by hand or with an injector. You can use slightly thicker grease than you would with a bushing, because there’s space for it to sit. Pack it full – the excess will just squeeze out as you reinstall the shield. Take care when reinstalling the shield, though – once bent, they’re hard to seat in their retaining groove.
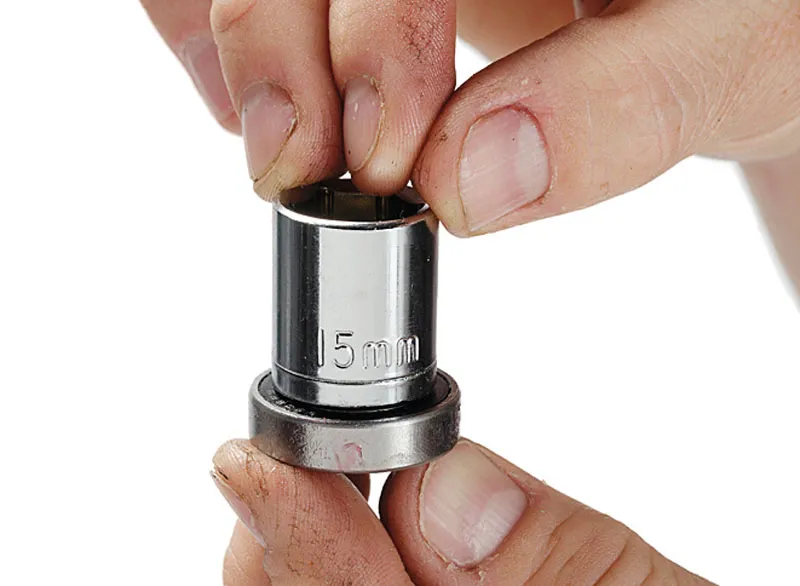
9 Loosen bearings
Most cartridge bearings are fitted in frames in pairs, one on each side. Occasionally, in lower swingarms, there might be as many as four bearings to spread load and resist torsional wear. Cartridge bearings are press-fit, meaning their diameter is slightly larger than that of the object you fit them to – you can’t just pick them out with your fingers. If there are any pinch bolts securing the chainstays around the bottom bracket pivot, loosen them.
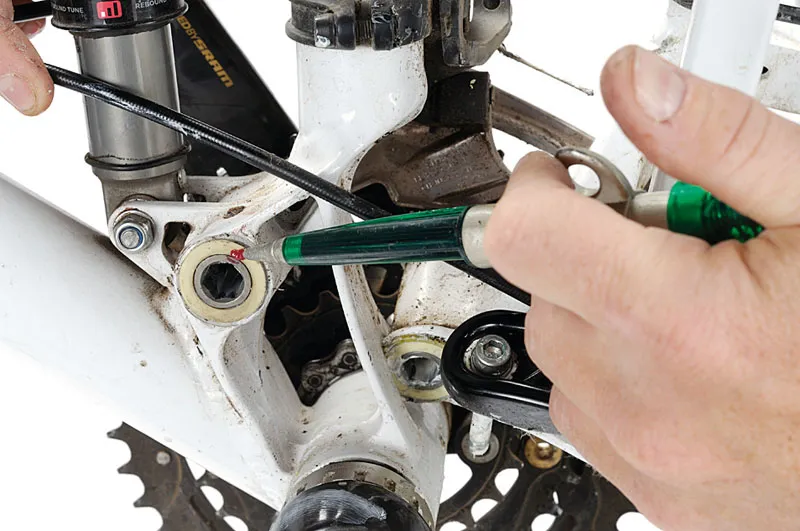
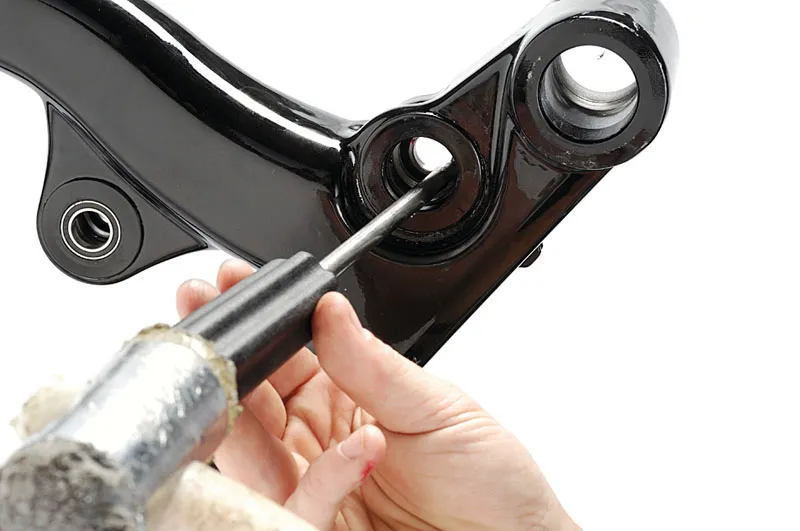
10 Insert drift
To remove cartridge bearings, insert a drift. This is normally a long, thin metal tube or rod, although you wouldn’t be the first to use a screwdriver – note that the latter will damage the bearing if you need to reuse it, though. With the drift located on the metal ring at the centre of the bearing, use a hammer to strike the free end of the drift firmly. Don’t whack it. The far bearing should pop out – if it’s tight, it might need a few goes.
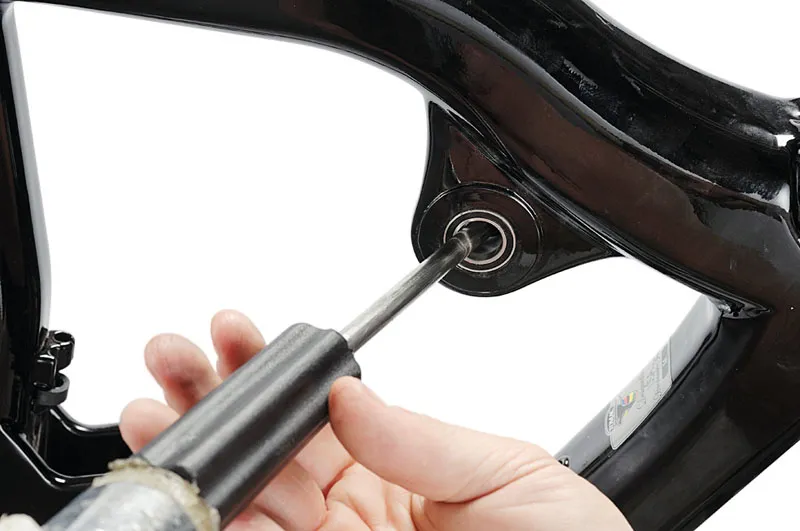
11 Take out far bearing
With the far side bearing removed, you’ll have a less obstructed view of the rear of the other bearing. Again, place the drift on the metal part of the bearing and tap it out. When the bearings are completely out, you have an opportunity to inspect both them and their seats – the bits of the frame you’ve just removed them from. If you have to reuse the bearings, this is your chance to perform steps seven and eight.
12 Get bearing seats ready
In order for the bearings to fit correctly and remain properly aligned, the holes in the frame/swingarm should be smooth, clean and undamaged. Although the press-fit nature of the bearings means there’s no definable space for grease to sit in, we’ve always applied a thin film on the assumption that it can’t do any harm.
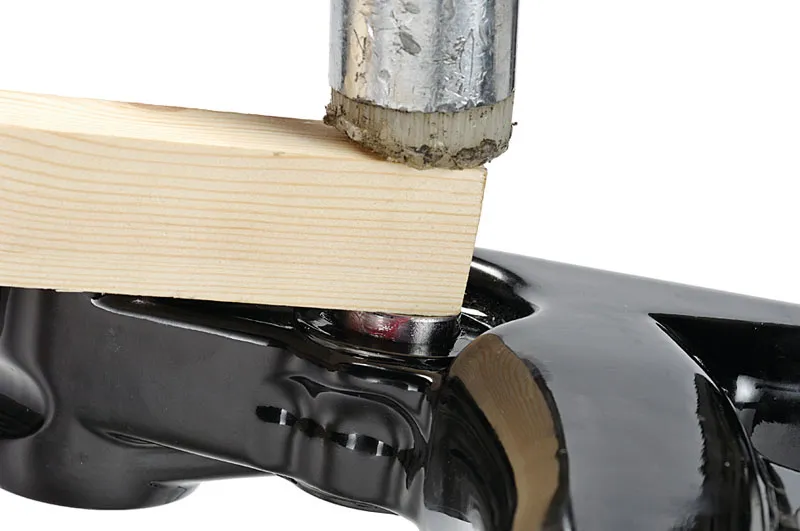
13 Drift first bearing in
Because bearings are press-fit, they’ll appear fractionally too large to fit. Sit the bearing squarely over the hole and use a piece of soft wood to cover it. Then tap the bearing down into the hole with a soft mallet. You may find that it begins to go in at a slight angle, so square it up. If it’s really wonky, tap it out and try again. This is often just a case of patience. Hang in there and it’ll go in straight in time.
14 Drift second bearing in
Follow the same procedure for the second bearing. For both, it’s worth making sure that they’re fully home. Bearings that aren’t may cause interference when you reinstall the rear end/linkage. Remember that bearings are delicate items and not designed to take side loading or sharp lateral impacts. This can cause the internal races to deform and make the bearings run rough, which isn’t ideal.
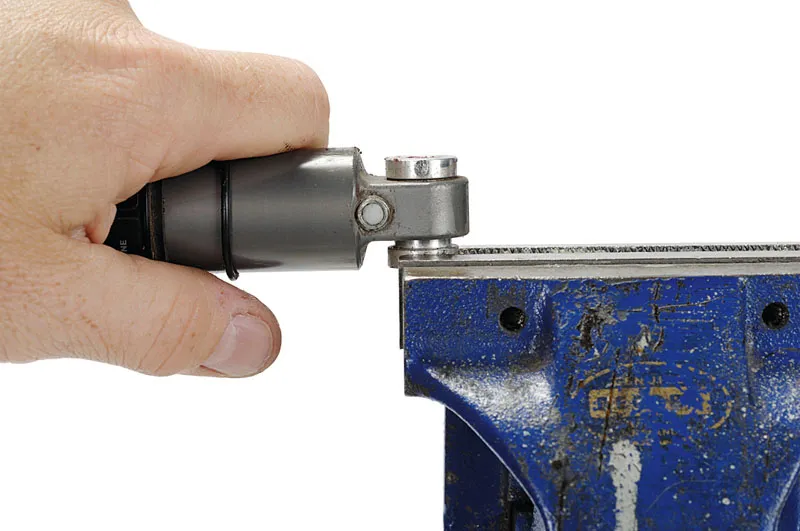
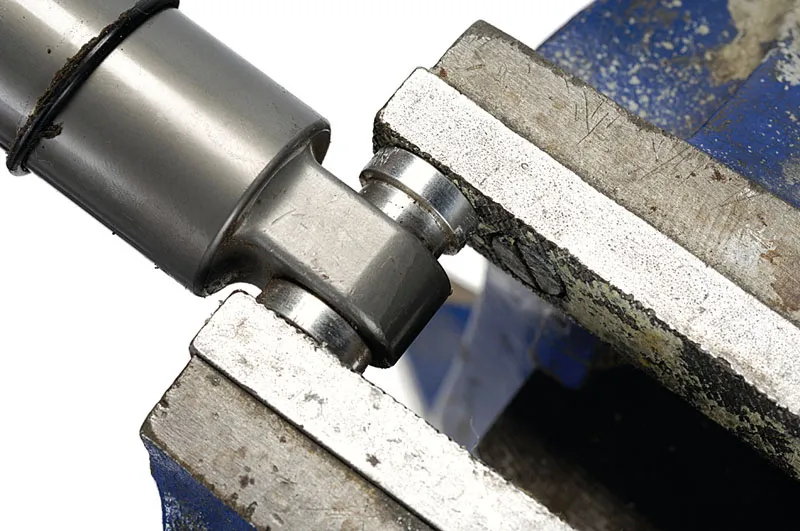
15 Remove shock bushings
Rear suspension units have bushings too, which are in the mounting hardware that attaches the shock to the frame. The small silver or black alloy stepped bushes are press-fit into the eyelets at either end of the shock body. To remove them, you’ll need to remove the shock and insert the exposed step edge of the bushing into a vice. Nip the jaws up so they’re tight and gently work the shock body back and forth.
16 Refit new shock bushings
Refitting alloy bushings is easiest using a vice. If you don’t have one, they’re extremely useful and we advise all budding tinkerers to invest. Open the vice jaws and line up one of the four bushings with an eyelet. Slowly close the jaws. When the jaws are holding the shock and you can see that everything’s lined up, continue to apply pressure and force the bushing into the eyelet. Repeat with the other three.
