
SRAM take a less orthodox approach to road shifting than their main rivals Shimano and Campagnolo, and as a result their Force kit has some unusual and interesting features that help enhance performance.
This also means there are some peculiarities unique to the range, which need to be taken into account when setting up and maintaining the groupset. Thanks to gracious input from SRAM’s very own tech guru Gary, we've put together a few tips on the most prominent differences.
The advice that follows assumes that you have experience working on your own bike, but if you’re in any doubt, get down to your local bike shop and let a professional take over.
10-step guide to adjusting SRAM Force
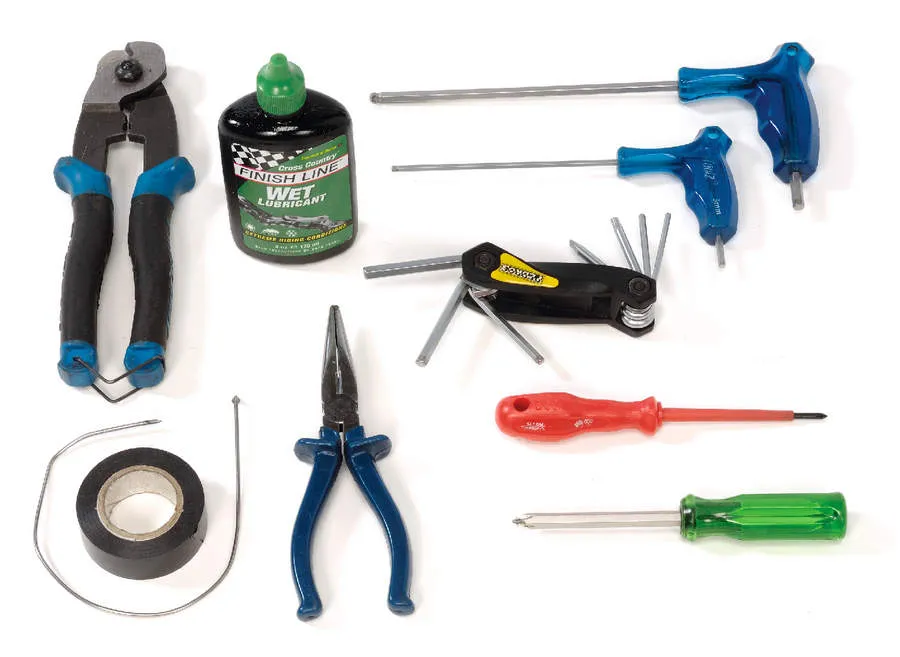
Tools required
- Light oil/light grease
- Scribe or sharp pointy tool
- Needle-nose pliers
- Allen key multi-tool, 5 and 3mm
- Flat and precision Phillips screwdrivers
- Cable cutters
- Optional: file, small torch, torque wrench, straight edge
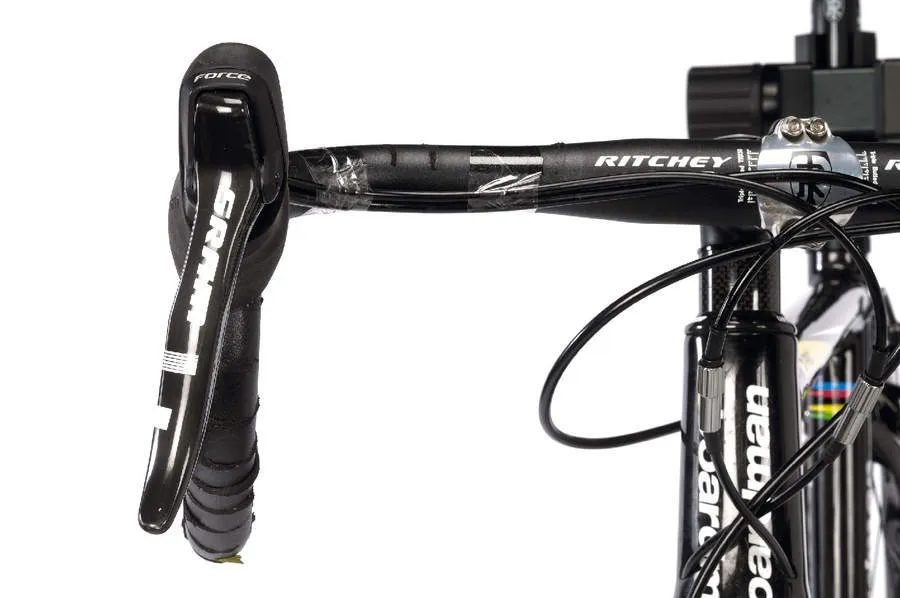
1 Lever positioning
The main axis of the body direction should be straight forward, which will create a 15-degree offset in the levers relative to the vertical drop of the bar. When squeezing the brakes, the shifter paddle should not strike the bar.
Position the top of the lever body flat or level with the forward flat section of the bar, if your bar has that shape. If you’re running an older classic shape, it’s likely that it will begin to dip into the curve right from the flats, so achieving a smooth transition won’t really be possible.
Peel the rubber hood back over the body to access the 5mm Allen clamp bolt; the rubber used is pretty tough, so tearing is unlikely, but bear in mind the locator protuberances when it comes to re-installing.
2 Cabling conundrums
Determine the outer lengths for brake and gear cables, allowing safe bar movement. Running both cables together on the leading edge of the bar makes for a better shaped handhold after wrapping; unless there’s a specific trailing edge groove, positioning the gear outer behind could be uncomfortable.
Notice the ferrules: unlike Shimano and Campagnolo, SRAM requires the use of up to 5.8mm ferrules in the lever body. Use ’em. SRAM’s system is optimised for 1.1mm gear inners, but will also work with thicker 1.2mm cables.
The use of a 1 to 1 actuation ratio, ‘Exact Actuation’, in SRAM’s road range, means cable pull accuracy is less susceptible to problems within the cabling that might affect shifting. See the next step.
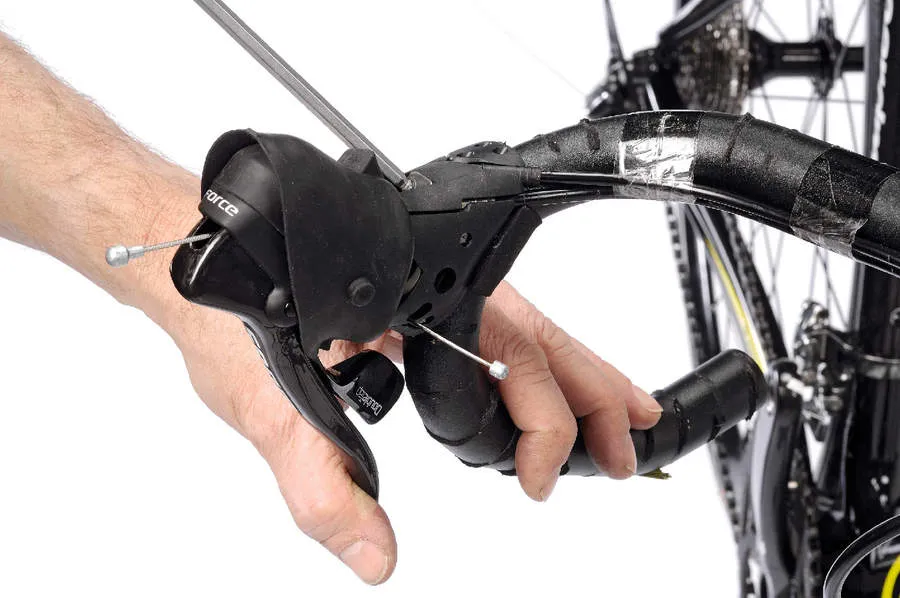
3 No kinky business
It’s important to make sure that you don’t put any kinks or bends into the cables when you’re trying to thread and pull them through, because this will affect the shifting accuracy and the snappiness of the brakes.
First, ensure that the shifters are fully released, so the cable anchor seat on the red nylon cable carrier barrel is lined up correctly with the opening in the body. When you’re trying to flatten out the cable as it enters the outer, pull it flat at the very beginning of its length
This will keep any kinks restricted to the portion of the cable that’s likely to be trimmed. Notice also the replaceable body plate extension; this is a section of the shell which can be replaced if damaged or removed to facilitate cabling.
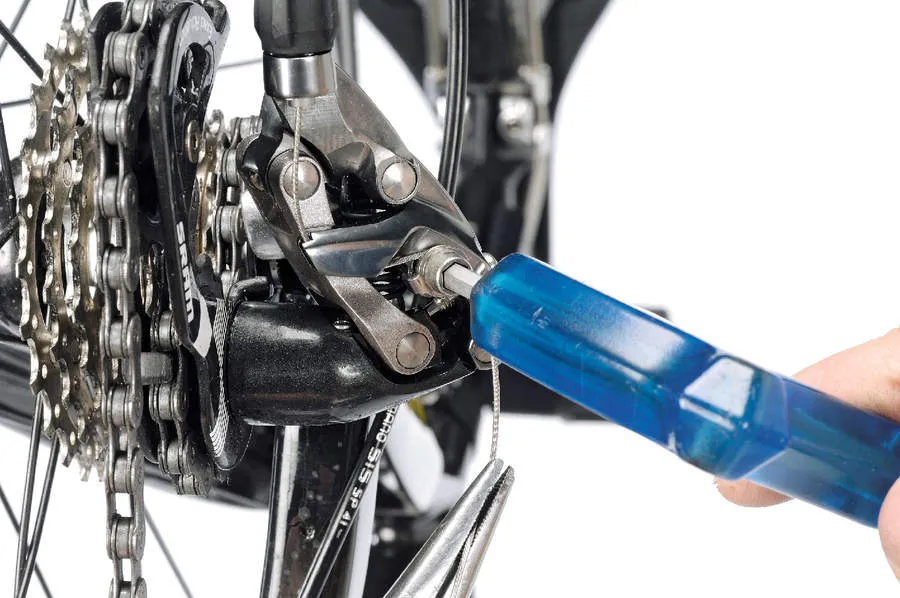
4 Anchor routing
Fully release the cable by actuating the paddle while pulling the cable. Check that the anchor bolt threads and washer are either oiled or greased. Wind in the barrel adjuster completely. Wrap the cable around the actuation lever groove and under the pinch bolt washer as shown. Do up the nut nicely but not too much (the cable should be slightly squashed).
Actuate the shifters a few times through the gears to bed down the cables: the rear mech will butt up against the low gear set screw, while the front will do the same for the big ring, so make sure you’ve correctly adjusted the appropriate stop screws to prevent any damage. Now pull out any slack at the anchor bolt and pinch the cable medium-firm (about 5Nm/45in-lb).
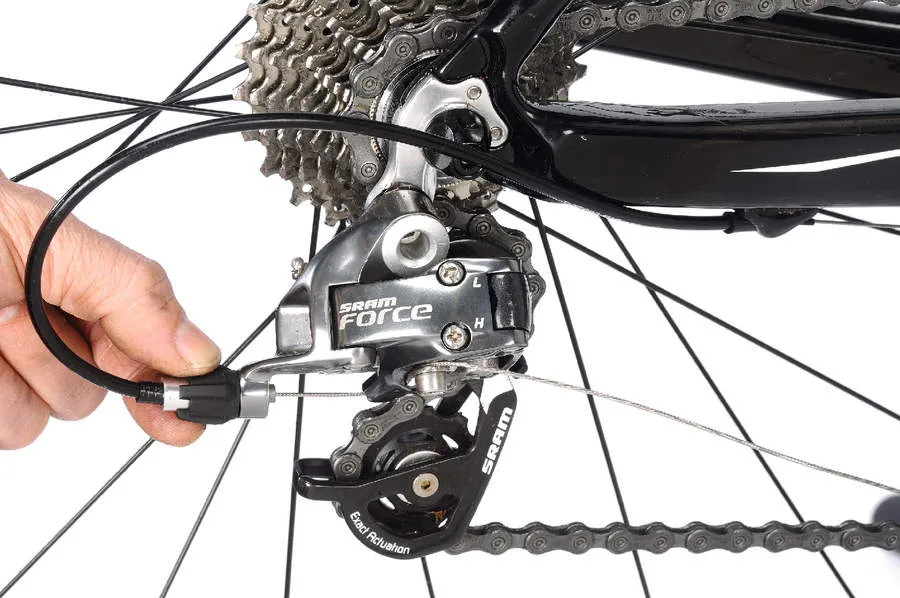
5 Set low gear stop/cable outer length
Because SRAM’s DoubleTap paddle acts as both up and down shifter, and requires you to cycle through the release click to access the next low gear, it requires a specific setting on the rear mech low screw.
In effect a mis-shift override, SRAM include an extra index point, past the first gear position (largest cog), which allows the paddle to be pushed beyond the release click without dropping out of gear.
Set the low stop screw (marked L) slightly slacker than would normally be the case, to allow the mech to travel a touch beyond the cog without hitting the spokes or dropping off. The cable outer should be the length that enables it to curve as shown above, passing just over the quick-release skewer nut.
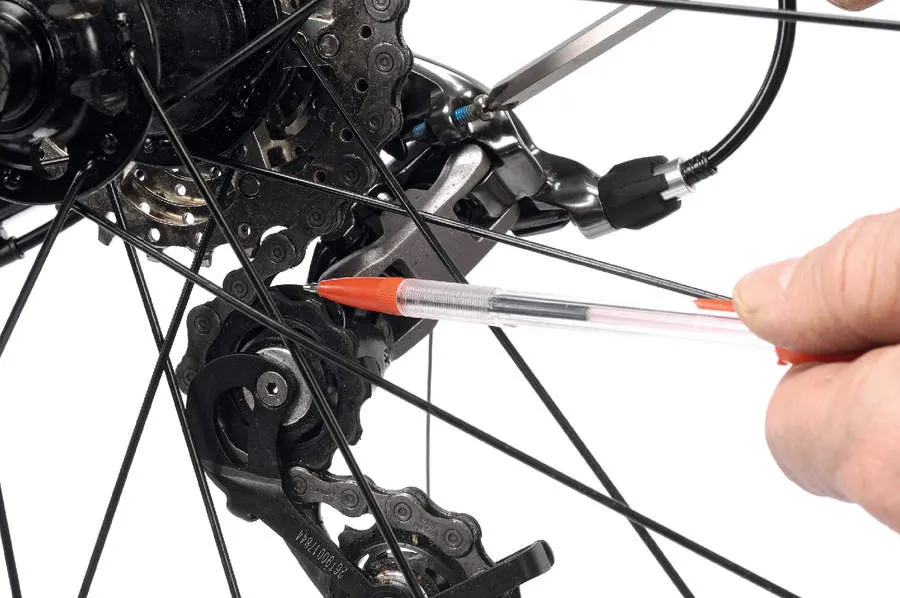
6 Jockey for position
This is an important step in your SRAM setup. First you need to ensure you have the correct chain length by threading it through the large cog at the rear and the large ring at the front but bypassing the rear derailleur.
Wrap and pull the chain fi rmly and note the chain length at this point, holding on to the appropriate link. Now count two extra links in length (one set of inner plates, one set of outer), split at this point and join the chain according to instructions, having now threaded it through the rear mech.
Recheck in big/big: if it’s too short, the rear mech can jam or explode. Now, in the small ring and large cog, set the gap between the top jockey wheel and cog at about 6mm, using the B adjustment screw as pictured.
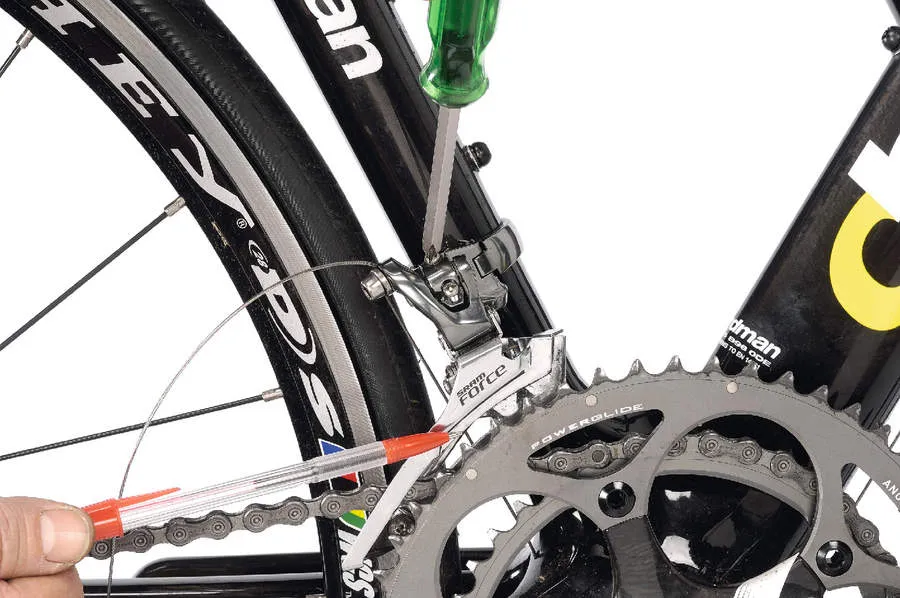
7 Mind the gap
Both front and rear, the higher of the two gear screws trims the derailleur’s low gear position, and the lower screw trims its high gear position. SRAM braze-on front derailleurs have two features which set them apart: the availability of an angle adjustment washer to accommodate different seat angles, and two bolt holes in the braze-on body enabling optimal positioning of the cage relative to the large chainring.
As usual, distance between the lower edge of the cage and the top of the teeth on large rings should be between 1-3mm. Too close, and the chain might resist being shoved off the ring, resulting in hesitation, while too much of a gap will allow the chain to over-shift and slip past, dropping off the outside onto your shiny chainset.
8 Adjust indexing
Fine tune the indexing using barrel adjusters. These effectively lengthen the cable outers when you turn them anti-clockwise, shortening the relative cable inner length and advancing derailleur movement.
Looking along the jockey wheels and cassette, ensure each click results in a single gear selection, with the upper pulley coming to rest directly below the chosen cog. Start in the smallest cog and work inwards towards the largest cog.
Test the gearing in the opposite direction as well. If the gear hesitates a little, release a bit of cable a quarter of a turn at a time. Adjust the front mech cable so the big ring trim feature (obtained by feathering the paddle) moves the cage in just enough to avoid chain rub, while keeping the chain on the ring after upshifts.
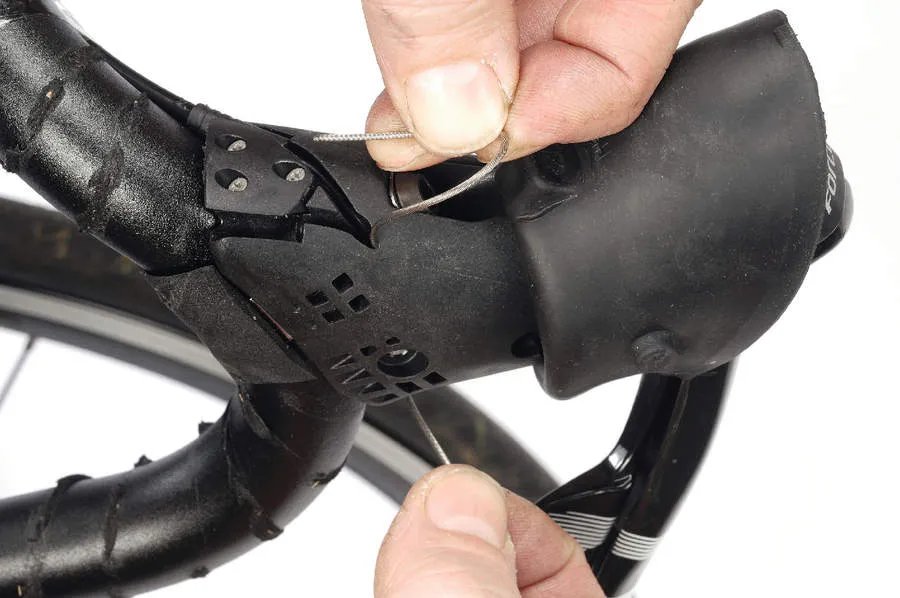
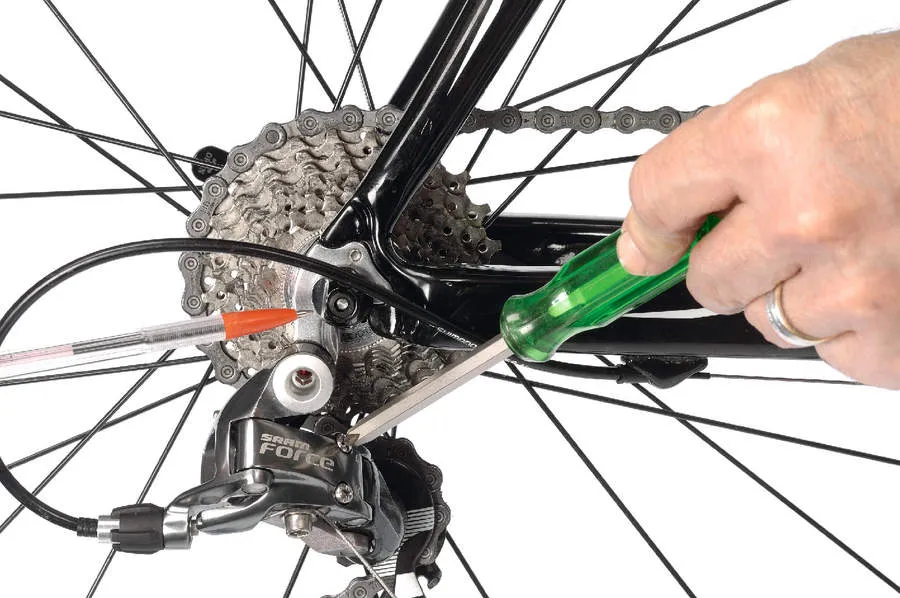
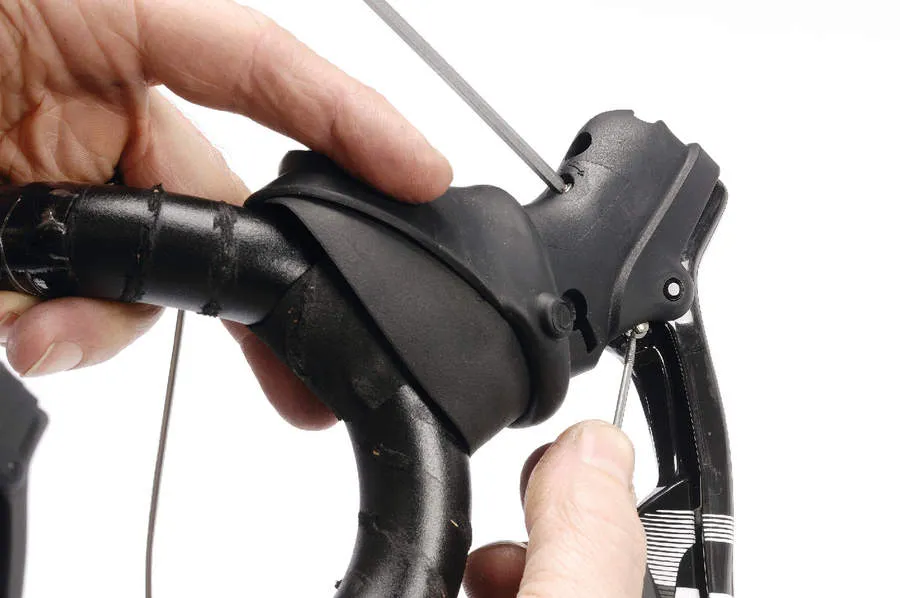
9 Fine tune ergonomics
The SRAM levers have a couple of final tricks up their sleeves, as you can set the brake and gear paddle reach quite easily with a couple of clever adjustment points.
Using a small scribe, first set the inner paddle to the desired position by pressing in then rotating the little six-position eccentric dial as pictured. Make sure it nestles back into its correct resting place. This will push the paddle in a little as required.
Do this first before you set the brake lever reach, which can also be adjusted by turning the small 3mm Allen screw inwards a few turns as pictured. If you set the brake lever reach too far inwards before setting the gear paddle, the two will interfere with each other.
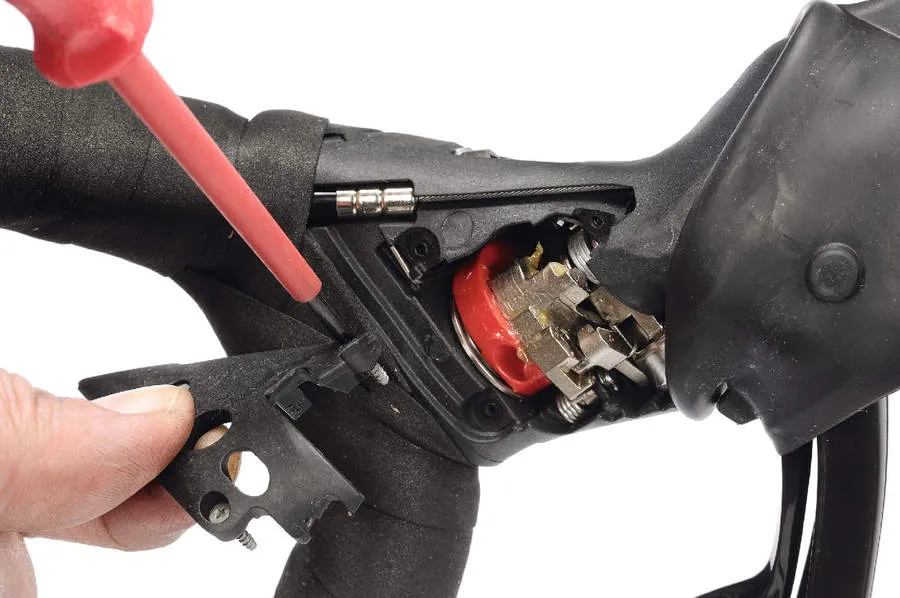
10 Maintenance
The beauty of these SRAM levers is that they’re made with a certain amount of long-term thinking in mind. They’re meant to be keepers, and a little periodic maintenance (once a year perhaps) of the internals is made easier with a removable cover plate.
Peel back the hoods: a small precision Phillips screwdriver will be required, keeping a white cloth underneath to catch any falling screws. You definitely don’t want to lose these. A light cleaning and lubing can then be performed.
Gently shoot a bit of WD40 or compressed air to dislodge any dirt; follow with a few drops of light oil or a sparing application of light grease. Use a cotton swab to dab up any excess, but don’t leave any fibres behind to entangle the mechanism.
