


Whatever kind of bike you ride, be it mud beast, road speedster or a simple mode of transportation, it will benefit from a good maintenance routine. A few basic tasks that you perform frequently can lengthen the life of your bike and protect your machine from costly mistakes. Our in-depth guide will help you tune your routine to prevent common issues and keep those wheels spinning.
Tools for the job
A good set of kit is essential for your maintenance efforts, so don’t skimp and get the cheapest tools available. You'll often find they won’t do the job without damaging your bike. Replace worn tools and take care of the ones you own to avoid impairing their functionality. There are many common tools you'll require to get a good routine in place, so let's explore those first.
Allen keys
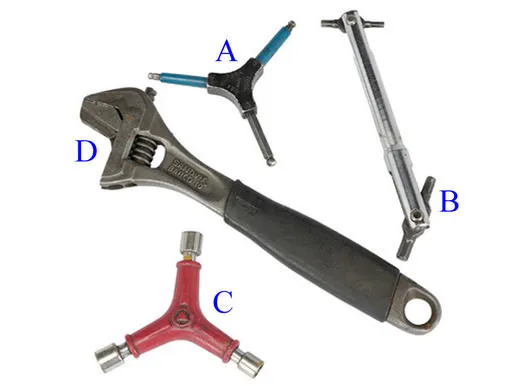
Ball-ended Allen keys are designed to make tightening or undoing Allen bolts with limited access easy. It's best to use the standard end for the final tightening or initial loosening. For normal use, multi-headed Allen keys such as the Y or four-headed type are more versatile than individual keys. Y-type spanners with socket heads will also grip bolts better than open-ended spanners, and they're often easier to use.

Y-type (A C) and four-headed type (B) keys are often easier to use than open-ended spanners (D)
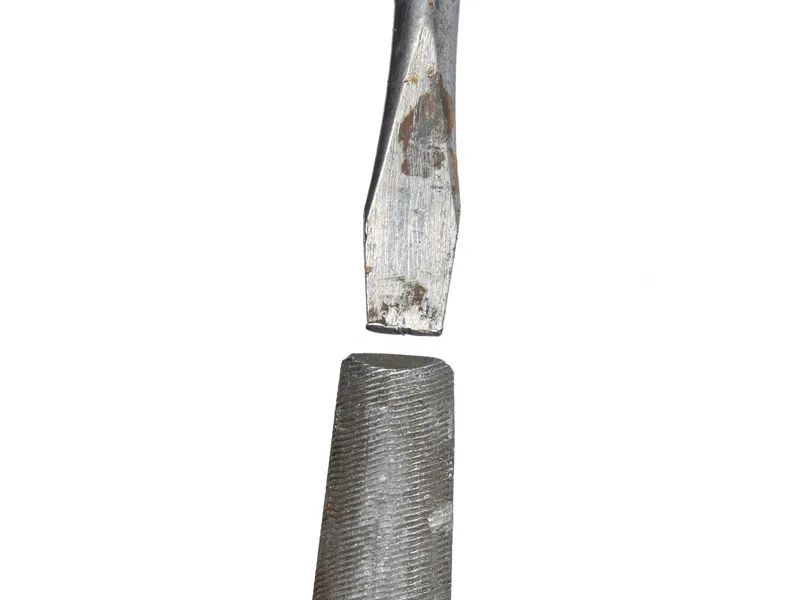
Screwdriver blades
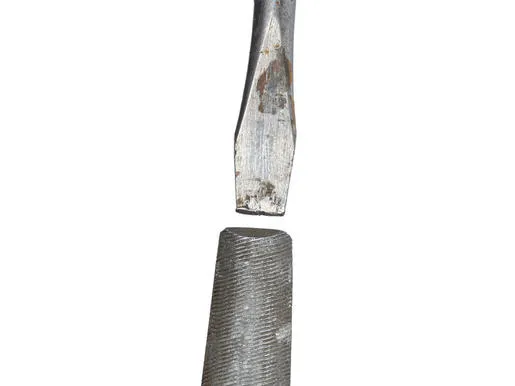
Keep your screwdrivers in good order by using a file to remove any burrs and square up the end. Make sure the end of the blade is of even thickness to ensure a good bite into screw heads and prevent slipping.
Tools supplied with components
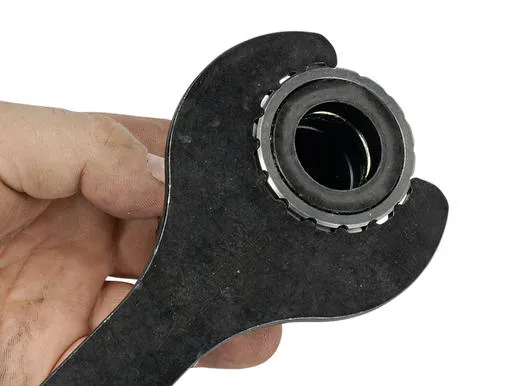
Many components will be supplied with the correct tools to fit them, so if you get a shop to fit the parts for you, make sure that you ask for the tool. Pictured here is a bottom bracket cup tool for Hollowtech bottom brackets, which is useful for removing or fitting the cups.

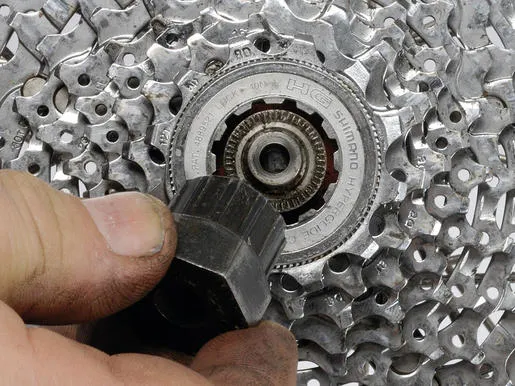
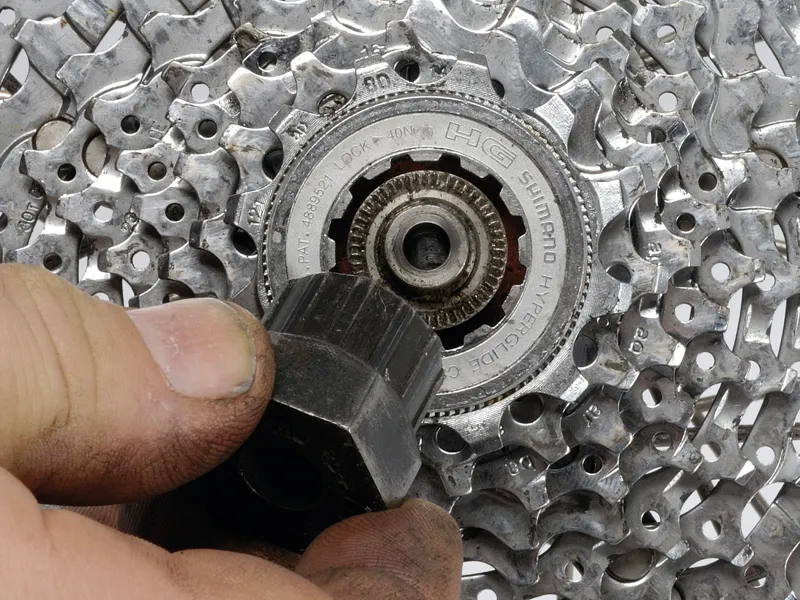
Cassette lockring tools
An older style Shimano HG Freewheel extractor will work with both Shimano and Campag cassette lockrings, but it's best to ensure that you have the correct style of tool for your bike's cassette to prevent damage.
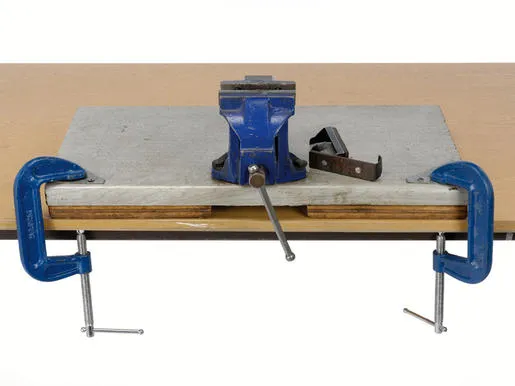
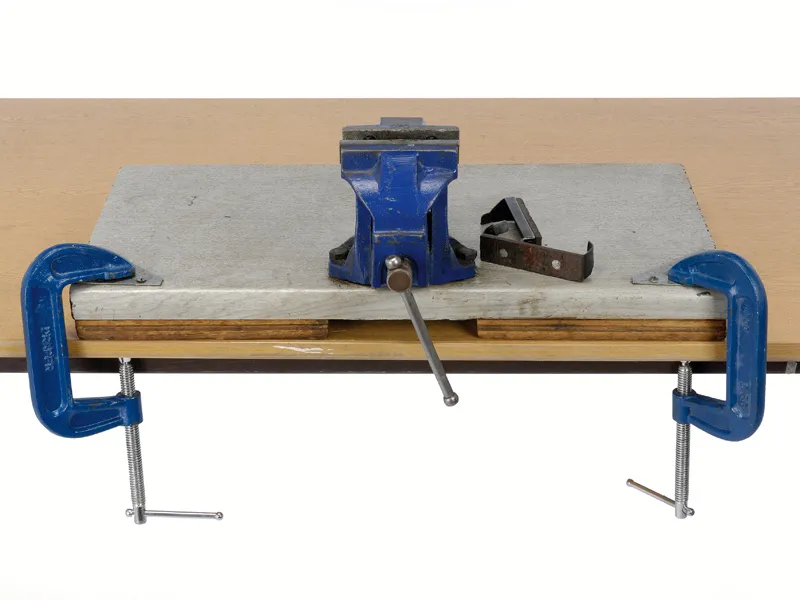
Vice
A standard 4in vice is an ideal but space consuming tool. If you don't have space for a permanently mounted vice, it's possible to mount one on a board and clamp it to a suitable table when needed. This temporary vice will be strong enough for most bicycle jobs, but be aware that it is not as secure as a bench bolted vice.
How to make a temporary vice
Materials needed
- Offcut of kitchen worktop about 60 x 30cm
- Vice mounting bolts
- Some sheet steel (which can be salvaged from an old biscuit tin)
- Four reinforcing plates
- A piece of wood about 75 x 25mm
- Offcuts of hardwood about 10mm thick
- Size 6 and 8 wood screws
- Two G-clamps
1] With tin snips, cut a piece of sheet steel about 20cm square. Fit it to the underside of the worktop (around where you're going to mount the vice) with the small wood screws. Now drill holes (about 10mm wide) for the vice-mounting bolts. Bolt the vice to the board and the bolts will protrude below. Attach offcuts of hardwood either side of the bolt heads to protect your table from damage and at the back of the board to keep the vice level.
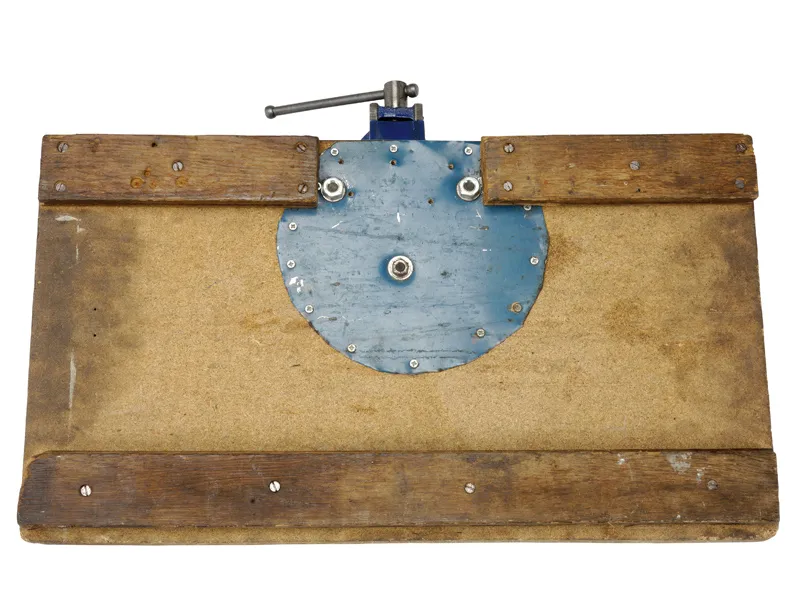
2] Fit reinforcing plates at the two front corners of the mounting board nearest the table edge where you'll clamp the board to the table. Fit similar plates to the long piece of 75x25mm wood to use between the underside of the table and the clamps. Now clamp the board to a sturdy table. Don’t forget to use soft facings for the vice jaws when you're holding threaded parts.
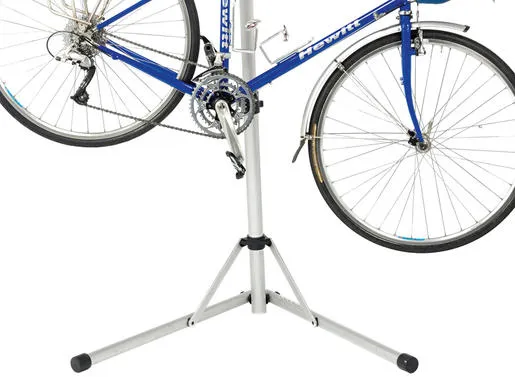
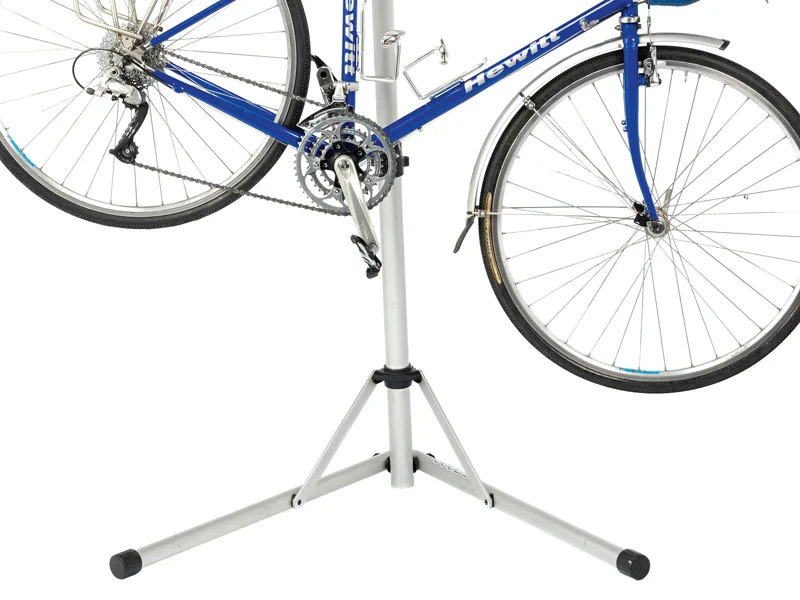
Workstand
A good workshop stand is essential, and many fold up if you do not have much space. Although it can be tempting to use a makeshift alternative, such as hanging the bike with ropes, these 'solutions' are often dangerous and next to useless.
When using the stand, angle your bike so that it points slightly ‘downhill’, as this will prevent excess movement from the front wheel. If your frame is made of carbon fibre or aluminium, avoid clamping the bike's tubes. Instead, clamp the frame to a suitable seatpost – preferably a spare steel one that you can fit for the sole purpose of working on your bike.
Common Tasks
Fitting and removing pedals
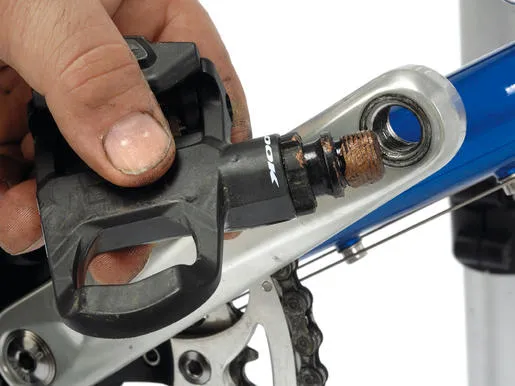
All pedals have left or right-hand threads. They're generally marked – the right-hand pedal with an R or D and the left-hand pedal with an L or S.
Pedal threads are designed to stay tight when you pedal. To undo your pedals turn the spindle in the opposite direction to your pedalling action. The opposite applies when you're tightening – turn the spindle in the same direction as you would pedal. Don’t forget to use anti-seize grease on the pedal threads to prevent them becoming stuck and to re-apply the grease regularly.

Don’t forget to use anti-seize grease on the pedal threads to prevent them becoming stuck and to re-apply the grease regularly
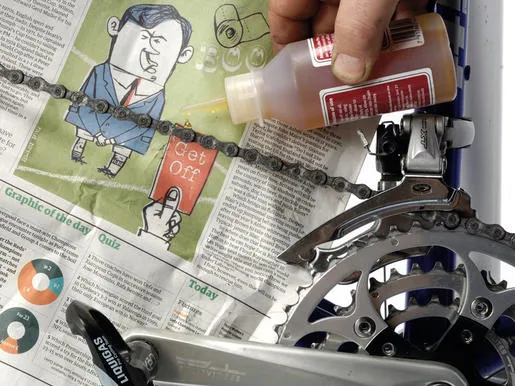
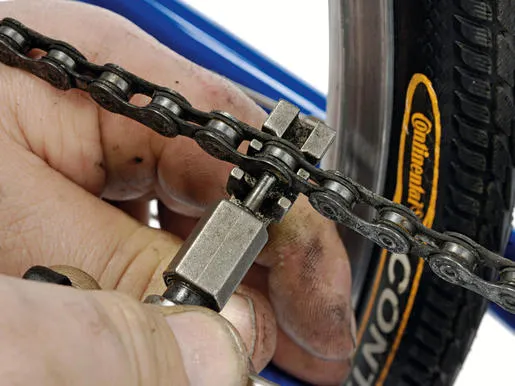
Chains
A slightly dry chain will often prevent your gears from working properly – keep your chain lubricated with a good quality chain lube at all times. Use a piece of newspaper behind and underneath the chain when lubricating it.

To maximise cassette and chain life, buy three new chains when fitting a new cassette. After 500 miles replace the first chain with the second. After a further 500 miles replace the second with the third and continue to rotate the chains every 500 miles.
If you've got an aluminium cassette instead, reduce the distance between rotations to 250 miles.

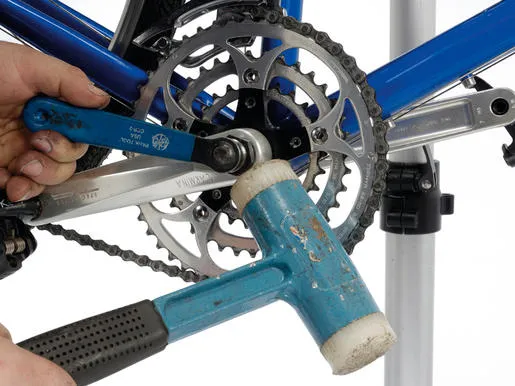
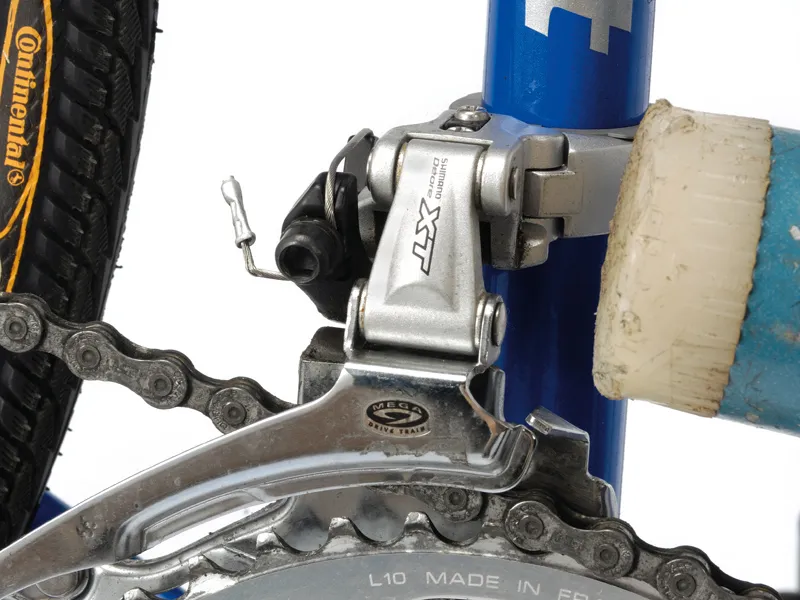
Adjusting front derailleur position
When adjusting the position of a front derailleur, a plastic-faced hammer or rubber mallet is very useful to tap the gear into the optimum position.
Chainsets
Crank removal
Removing cotterless cranks from a standard square taper axle can be tricky, even with a good extractor. If the crank is very tight, tighten the extractor and, using a plastic hammer or rubber mallet, tap firmly around the boss of the crank to shock the taper free.

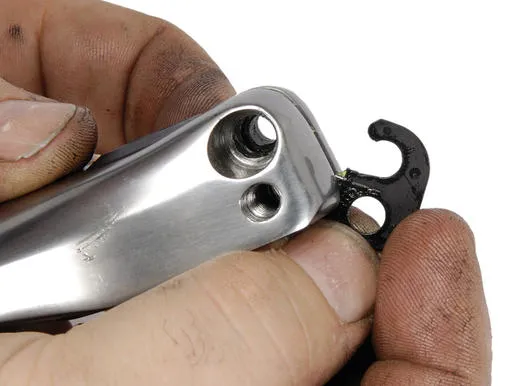
Shimano Octalink 2 crank packing piece
Make sure that the packing piece on the left-hand Shimano Octalink crank is always present when refitting the crank – if it's missing, the crank bolts will be over-tightened and may cause the crank to crack, which is an expensive mistake to make.

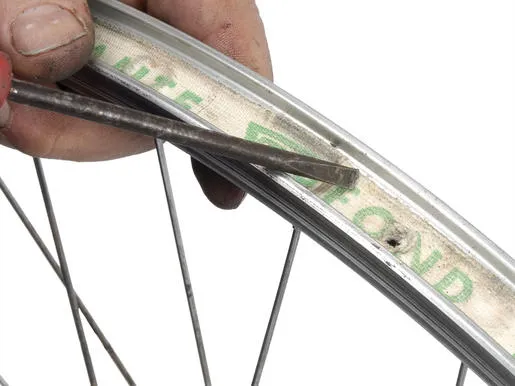
Fitting tyres
If the tyre bead sinks into the rim well at one point on the wheel, there will be another point on the wheel where the bead can be easily forced over the rim edge by the air pressure in the tyre. The solution is to use either thick or several layers of rim tape – this will prevent the tyre bead from sinking into the rim well and blowing the tyres off.

Simple solutions
Anti-seize grease
Some of the most common and difficult problems to solve are caused by components that have seized up. To prevent this regularly remove the seatpost and coat with anti-seize grease. Do the same with your pedal threads.

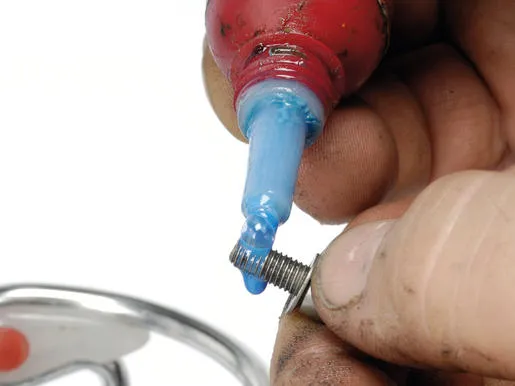
Thread lock
Common parts to loosen and fall off on bikes are bottle cage bolts and chainring bolts. Remove them and put a drip of thread lock on each bolt before reassembling – they will still undo when necessary but won’t vibrate loose.

