
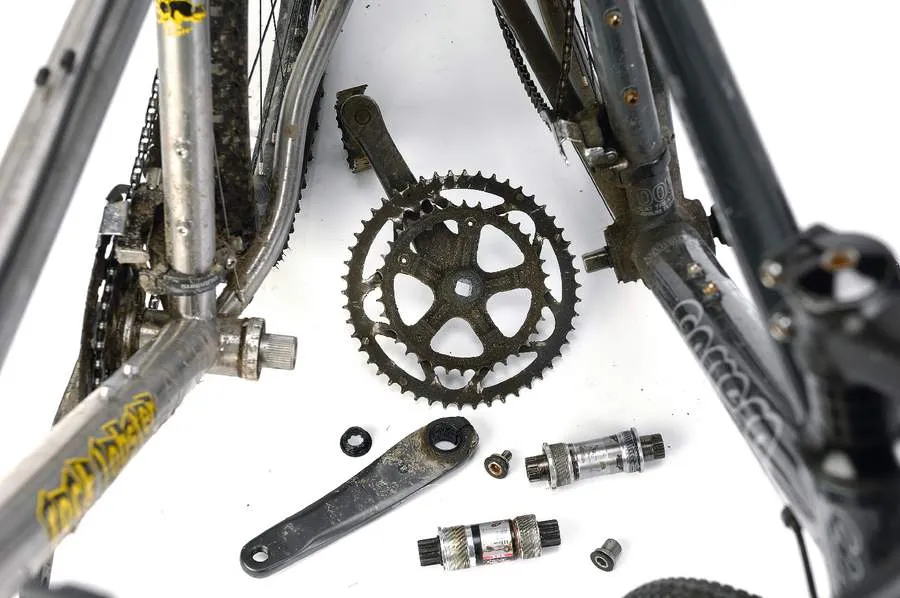


The humble bottom bracket (BB) gets subjected to some of the most intense and punishing conditions of any system on the bike.
High loads are continuously channelled through rotational motion onto the bearings, which take the full brunt of both bodyweight and muscle power. If you ride for an hour spinning at 80rpm (160 cranks strokes per minute) that will result in 10,000 strokes in an hour, or about 5 million stokes over a year – that’s a lot of normal wear on a bearing! Factor in a few stream crossings and a long winter of salty slurry, and you’ve got one extremely hostile environment.
Servicing will rarely involve actually repairing the BB itself. It will usually just mean removing the old unit and refitting with a new one. Diagnosis involves listening for rough sounding noises, and feeling for play or lack of smoothness when spinning the cranks. Remove the chain, spin, feel and listen. Any lateral play (more than 1-2mm at crank arm ends) combined with roughness means it’s time for replacement.
Tools required
- Shimano or other splined BB spanner for external cups
- Shimano or other cartridge BB splined tool
- Extractor tool for standard and ISIS/Octalink arms
- Quality ratchet or large adjustable spanner
- 8mm and 10mm Allen keys
- Rubber mallet or block of wood
- WD40/grease/threadlock compound
- Torque wrench (optional)
Step-by-step: Replacing Shimano, Truativ or FSA bottom brackets
Quality aftermarket replacements such those by SKF or Crank Brothers can be worthy alternatives, but generic econo-brand BBs are a bit hit and miss
1 Position bike safely
Make sure the bike is securely positioned and immobile. Working with the bike on the floor is acceptable for this job, as many home stands are not robust enough to withstand the forces required to dislodge the more stubborn versions. Removing the pedals can help with accurate diagnosis, but don’t confuse worn and rough pedal bearings with BB bearings.
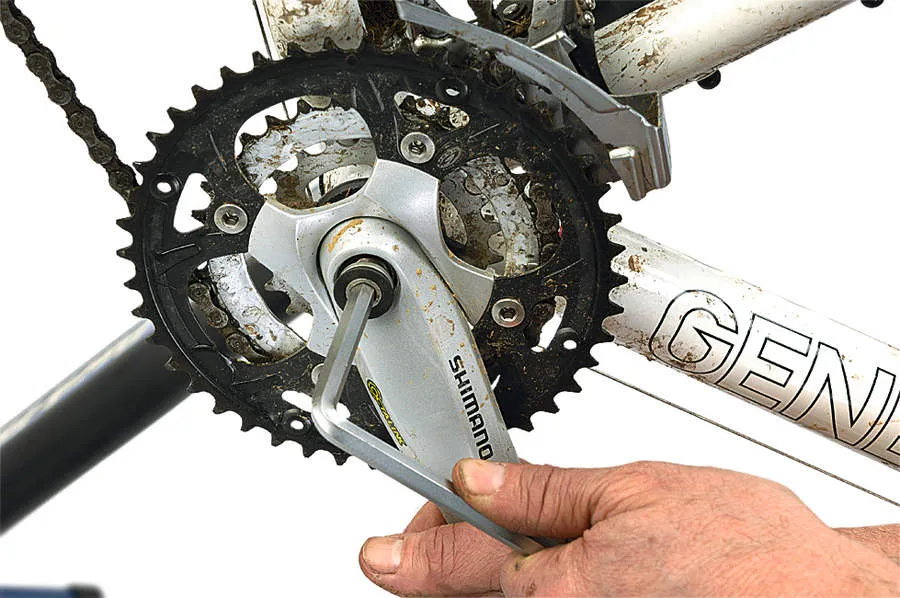
2a Remove crank arm bolts
Using an 8mm (or sometimes 10mm) Allen key (or a 14mm socket on older standard retaining fasteners), remove the bolts on both sides - be prepared to put some welly into it, or use your cheater bar. Remove any large washers that have become stuck, then inspect your crank extractor and tool threads to make sure they’re not damaged. Any that are worn or shallow risk pulling through without removing the arms.
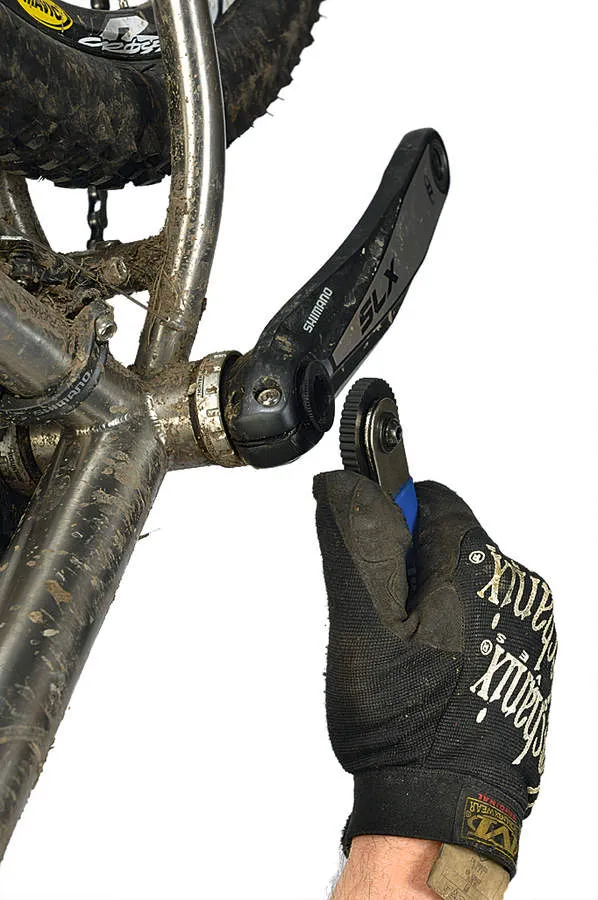
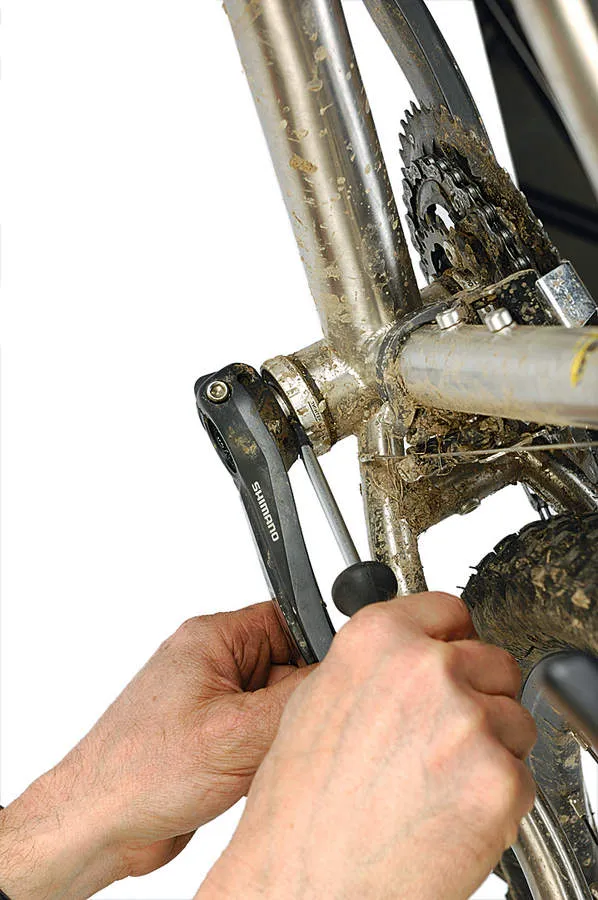
2b Remove HT II nylon bolt
Loosen the two 5mm bolts clamping the crank arm to the spindle. Now unscrew the nylon retaining bolt with the Shimano crank installation tool (TL-FC16), a sort of lobed insert with a circular handle. Most other aftermarket HollowTech-type cup spanners will include this device, without which it would be virtually impossible to do this job. Use a rough cloth or work glove to get a better grip if really stuck.
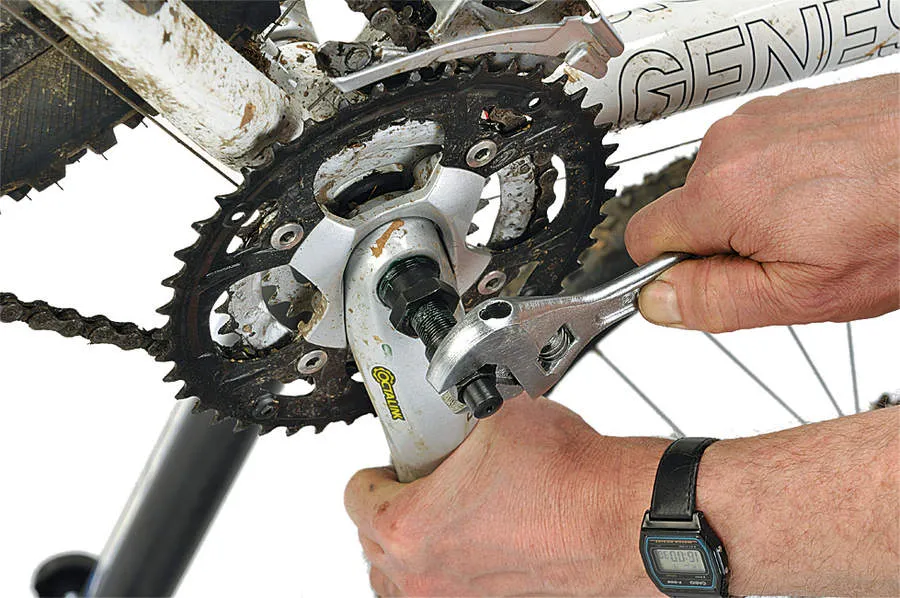
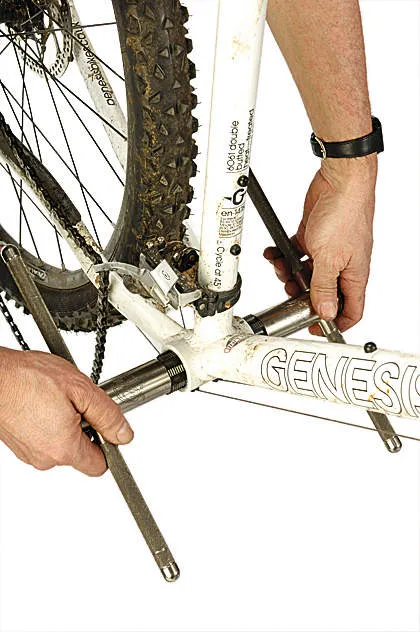
3a Arm extraction
First back the extractor press all the way out, then thread the tool into the arm, nipping it up with an adjustable spanner. ISIS and Octalink versions require a larger diameter stop to help extraction. Shimano produces a small top hat plug (TL-FC15), but most modern removal tools incorporate this. Turn the draw bolt clockwise, ensuring the arm begins to move. If the tool pulls out of the crank threads, it will need to be removed by a professional.
3b HT II arm removal
On HollowTech II arms, the safety latch needs to be swung upwards with a screwdriver, releasing the pin from the locator hole in the end of the spindle. The fit may be snug. If so use a tape-covered screwdriver to gently pry the arm away until it’s loose enough to remove by hand. Now drop the chain and yank out the chainring side with a firm tug. Wear gloves, as some crank spiders have sharp machined edges.
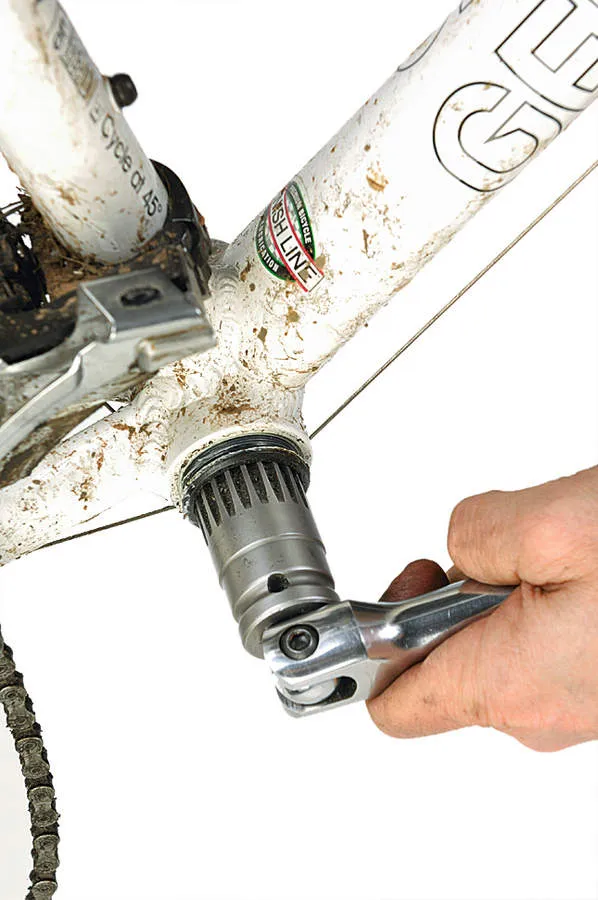
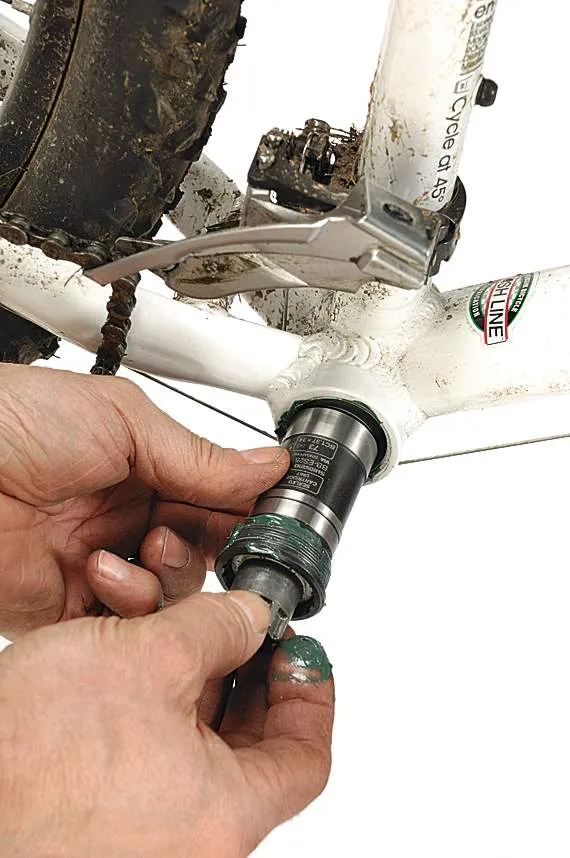
4a Remove cups: UN/ES type
Unscrew any bottom bracket guide screws that might be protruding into the frame. Remove the left side first, which always has a standard thread (turn left to loosen). The right side (chainset side) needs to be turned clockwise to unscrew (reverse thread on English fixed cups). Ensure that the splined tool is fully engaged and squared up against the cup before loosening to prevent slippage.
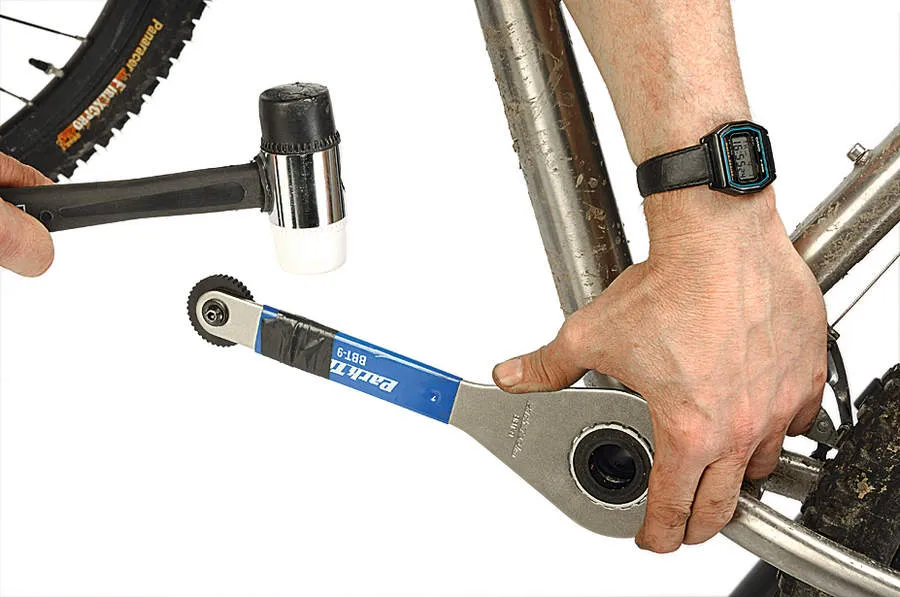
4b Cup removal: external type
On HT II external cups, ensure the tool is aligned before applying force. The same thread directions apply (see Step 4a). A strip of masking tape can be wrapped around the cup to protect the finish from the tool. Use a cheater bar if your tool permits. A judicious blow with a wooden block or mallet can work wonders. Avoid unscrewing the cup with unprotected hands to avoid any metal splinters.
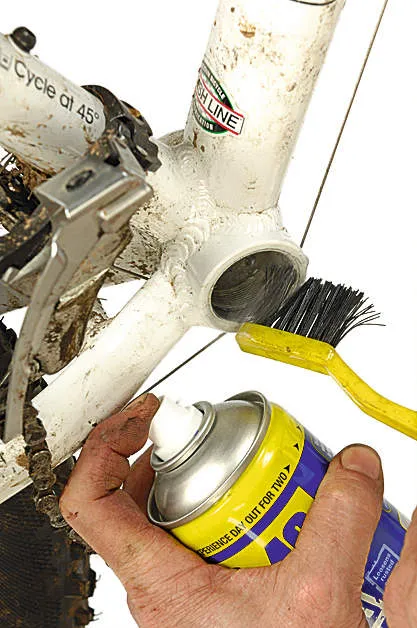
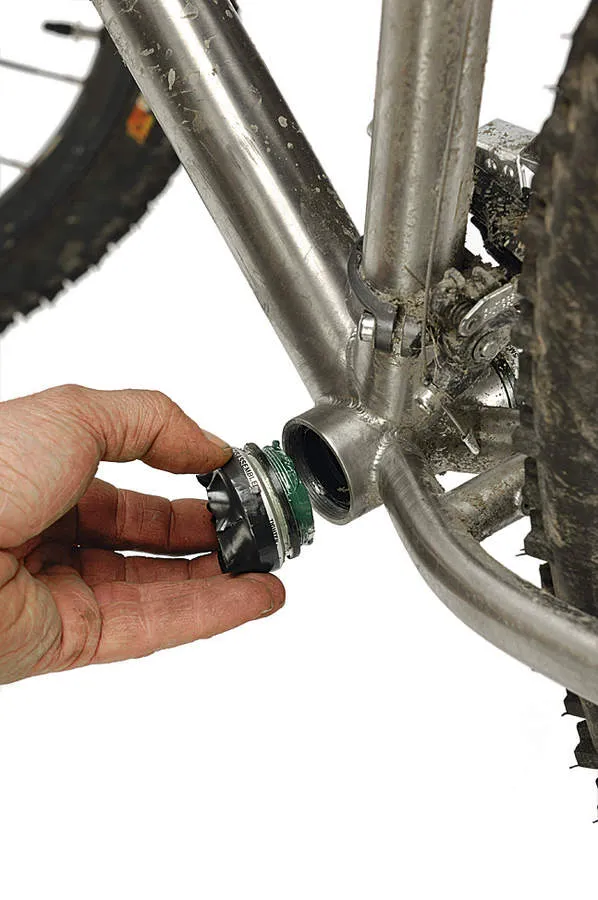
5 Clean and inspect
Wipe the threads clean making sure not to snag your fingers on a shard of metal thread or swarf. A healthy shot of WD-40 and an old toothbrush works well. Check for corrosion due to moisture, and wipe clean. If the threads stiffen up when unwinding then show signs of damage when finally removed, you may have to get a bike shop to chase and face your bottom bracket to ease installation and removal.
6 Grease heavily or threadlock
Grease is best for long-term serviceability, but a generous amount of medium threadlock compound works well for added security. These compounds are formulated to prevent corrosion, but often aren’t as effective at doing so when you’re riding around for months with a frame full of salty winter sludge. Consider drilling a drainage hole in the BB shell to prevent water ingression.
7a Install UN/ES type cartridge
Bottom bracket threads can take quite a lot of force, so there’s not much danger of the cups being overtightened. Using a foot-long handle, tighten up the fixed cup side as much as you can. Torque should be quite high (somewhere above 35N). Go easy on the left side nylon cups — half as tight at most. Any spacers should be made of metal, should square up nicely and be of the correct diameter.
7b Install external type cups
To ensure correct BB cup spacing, measure the width of the hub shell then follow the manufacturer’s instructions on spacing. A 68mm width shell may need an extra 5mm or more worth of spacers, while a 73mm shell may not require any. Don’t pack more than two spacers on any one side: this will stop sufficient threads from engaging into the frame, which could lead to the cups coming loose and damaging threads.
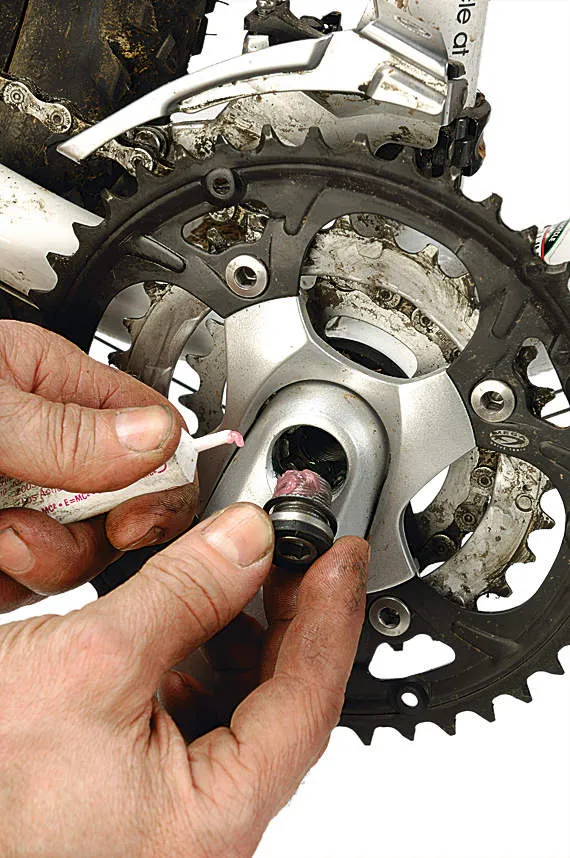
8a Reinstall three-piece cranks arms
Tapers and splines should be greased to prevent noise, creaking and corrosion, and a dollop of threadlock on the retaining bolts will prevent loosening. This allows you to use slightly less torque, and may increase the number of removal and installation cycles. Ensure you use the correct Octalink spline length: short for Shimano XTR, and long for everything else.
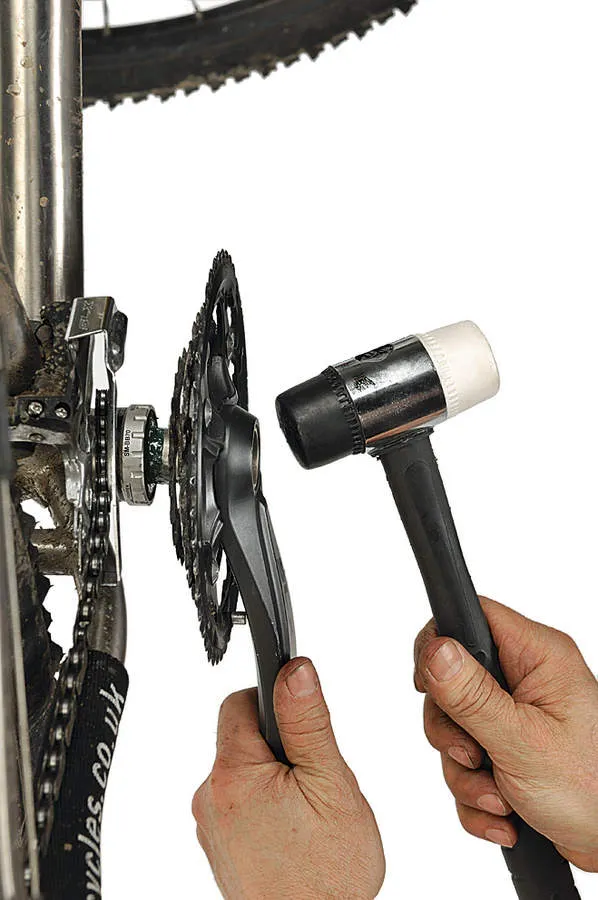
8b Reinstall HT II arms
Apply grease to the crank spindle and insert the crank through to the bearing cups. A good shove should get it to push all the way through to the other side. Use a rubber mallet to help it along. Line up and slide the arm onto the spindle, then draw it on by tightening the nylon bolt. Press down the safety latch pin. The twin bolt arms should be tightened gradually, a little at a time, until even torque is reached (about 15N).
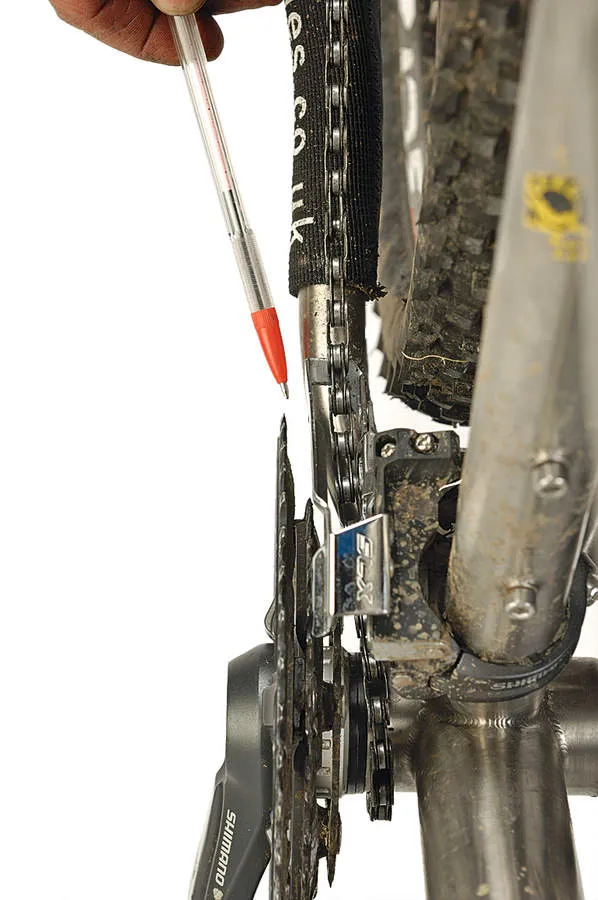
9 Get spaced
Check spacing between the chainstay and inner chainring and crank arm. When retightening crank arms, put them on a bit further up the taper with each removal and reinstallation. If it’s rubbing, check that you’ve been supplied with the correct spindle length on UN and ES-type cartridges, or that there’s a spacer between the cup and frame on HT II cups. A couple of 1mm spacers between the fixed cup and frame can help.
10 Readjust the front mech
Test the front derailleur. If the chain is dropping off outside the big ring, the cranks may have pulled in a bit closer upon refitting, so readjust the high gear stop screw about half a turn clockwise, and let out the low screw a little (counter-clockwise). Also, release a bit of cable by turning the shifter barrel adjuster clockwise about a half a turn - just enough to prevent chain rub on the inside of the front mech cage.
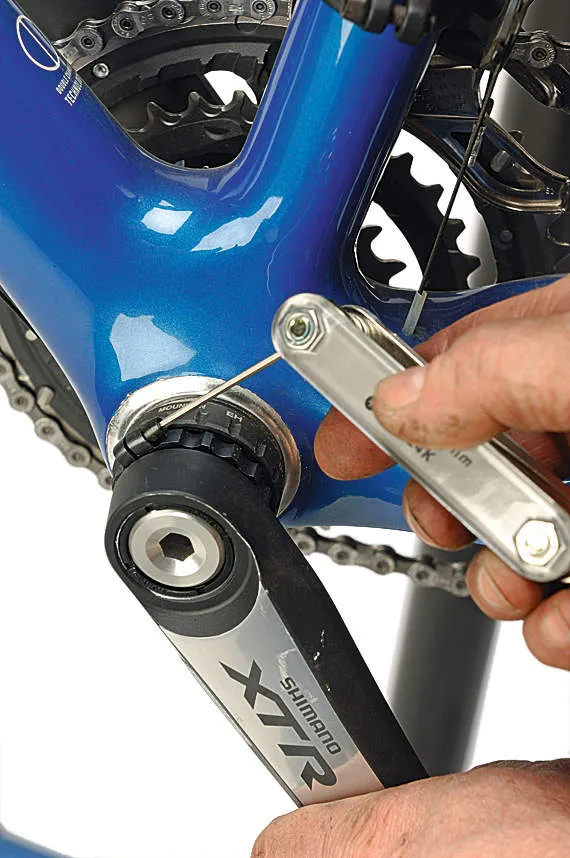
11 Ride and re-torque
Recheck the crank bolts after the first ride: on XTR, play can be removed via the threaded ring adjustment on the inside of the left crank arm. Loosen the small Allen grub screw, then rotate the ring clockwise until any play is removed but the cranks still spin freely. Retighten the grub screw. External cup crank designs have higher levels of friction: when spun, expect no more than three to five rotations when new.
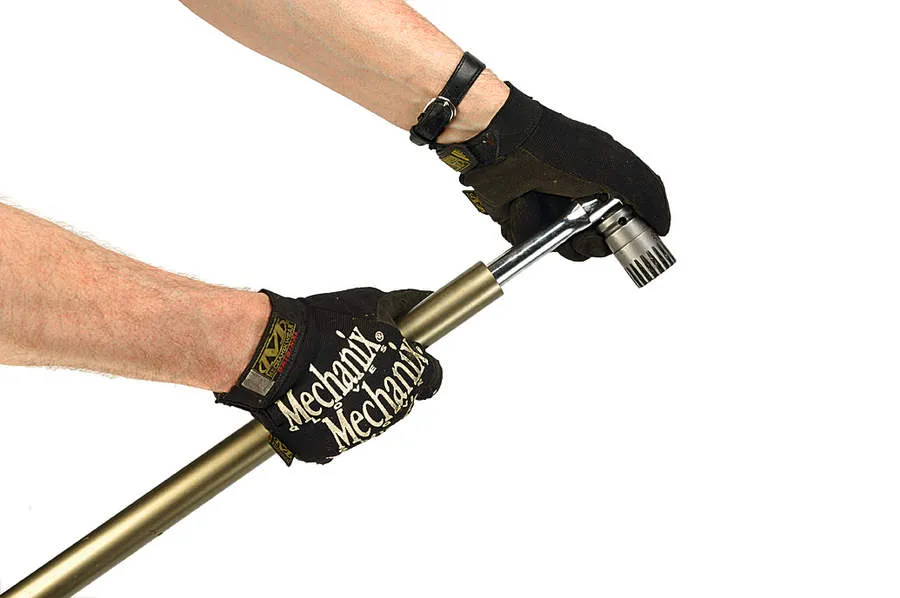
Top tips
Cheat 1: On splined UN/ES series BBs, an automotive quality ratcheting tool might be necessary. It should be robust enough to allow the use of a cheater bar. Wrap the handle with duct tape to prevent damage and get a better grip, then slide a strong tube onto the handle. It should be close enough fit to prevent it slipping off.
Cheat 2: For really tight UN/ES series fixed (right) cups, remove using the standard Shimano tool clamped firmly in a bench vice. Take off both wheels and place entire bike onto the tool, using the frame and body as a lever while steadying the BB cup in the tool with your free hand.
Cheat 3: Using a block of wood, give a sharp blow to the tool handle to dislodge a tough external BB cup. Place the handle at about 5 o’clock for right side (7 o’clock for left) and strike downwards. This should do the trick.
Time: 30mins to 1hr
Cost: Bottom Bracket (BB) cartridges £15-£100; special tools £15+
Rating: Hard
