


Hope hubs are superb and the bearings supplied with them are grade-A quality, but jet washing and filthy weather can wear them out. Here's how to breathe life back into your rear hub...
Time: 45 minutes
Cost: £40
Tools For The Job
- Soft hammer
- Vice
- Teflon grease
- Methylated spirits
- Seal tool HT175
- Hub bearing tool HTT174 (essential)
- Hub support tool HTT167 (optional)
- 2 x 61903RS bearings
- Disc side seal
- Cassette body seal tool HTT175 (essential)
- Torque wrench
- Wooden blocks
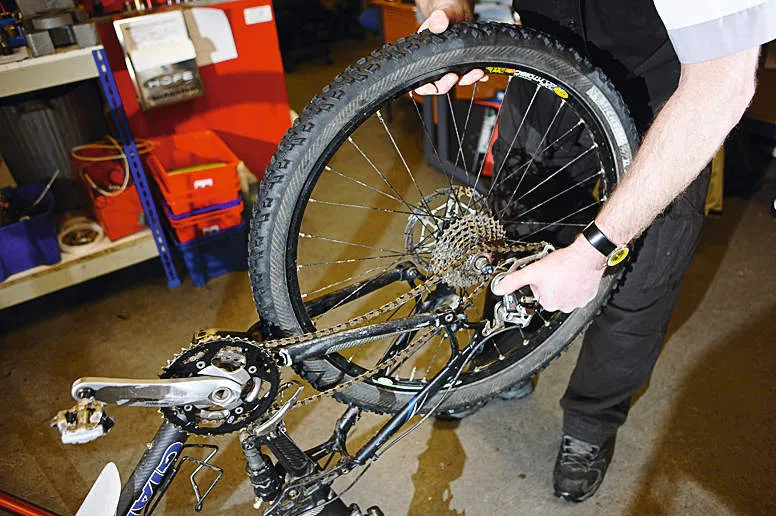
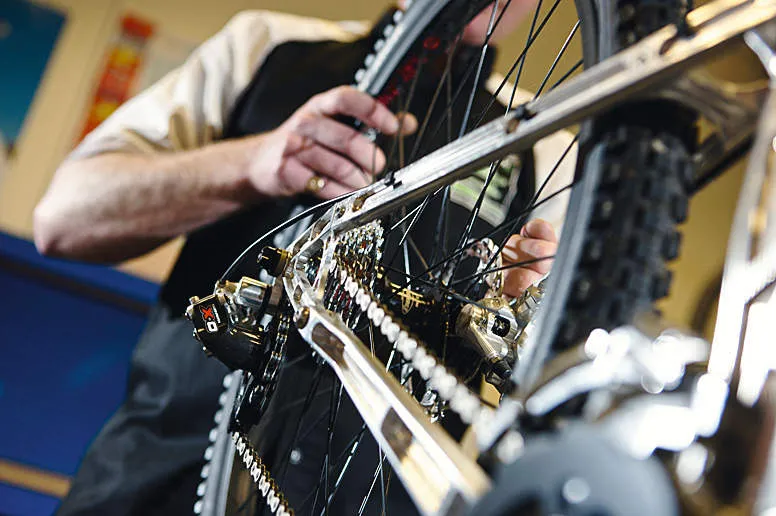
1. There’s no need for a workstand with this job, because we’re concentrating solely on the rear wheel. So spin the bike upside down, shift the rear wheel into the smallest sprocket at the back and remove it.
2. Unscrew the skewer nut, but leave the skewer in place and put the lockring tool into the lockring. Now screw the nut back on to hold it in place. With the cassette facing outwards, place the chainwhip around the sprockets so that it's in your left hand, put the adjustable spanner onto the lock ring tool and push down to crack it undone. Remove the skewer nut and the lockring fully then withdraw the cassette.
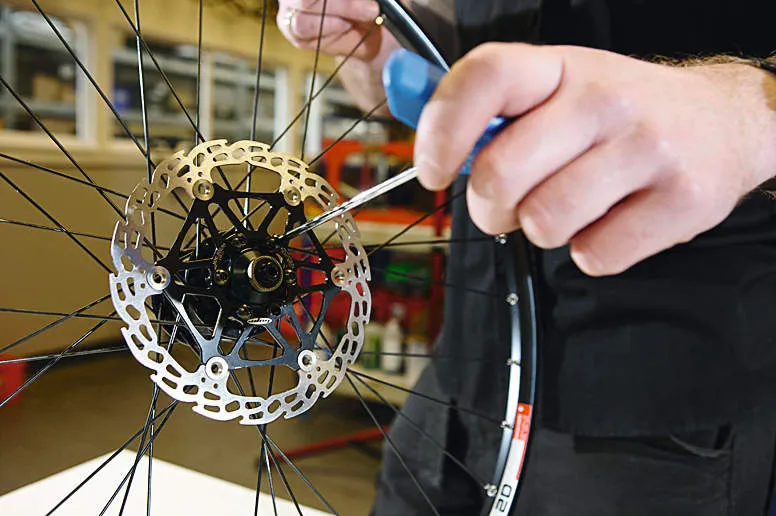
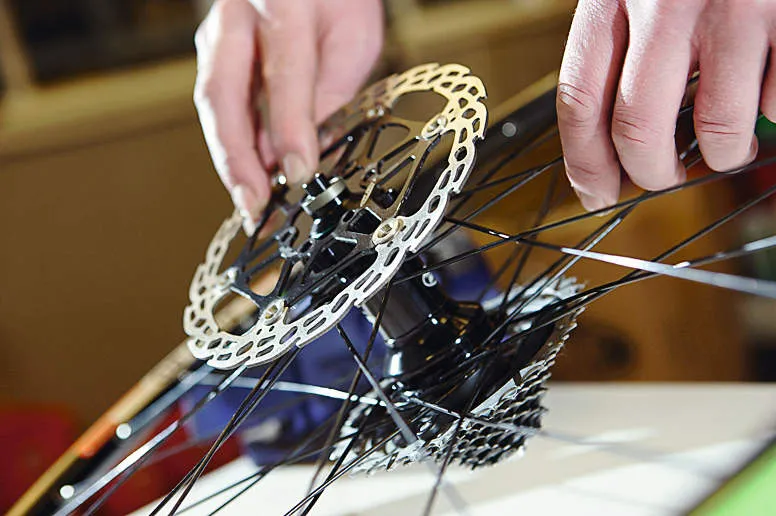
3. We recommend that you remove the disc rotor, because there's going to be grease and all sorts flying around, and you don't want that on your rotor. Removing it also stops it getting damaged. Grab your T25 Torx key and remove all six bolts.
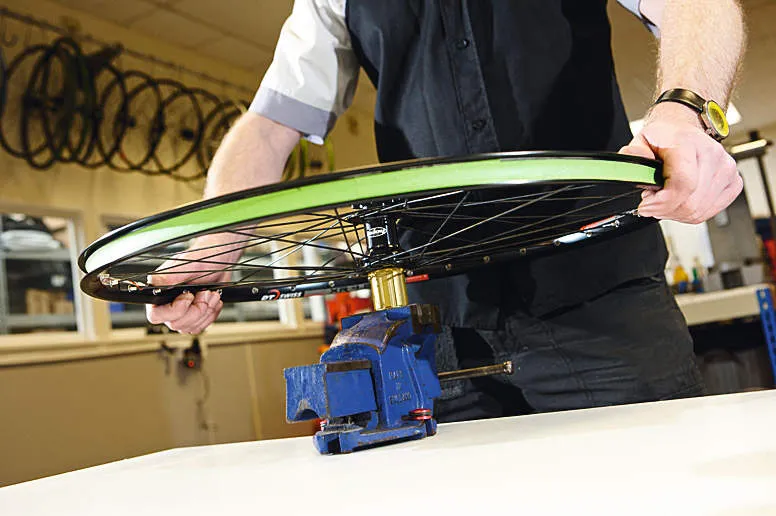
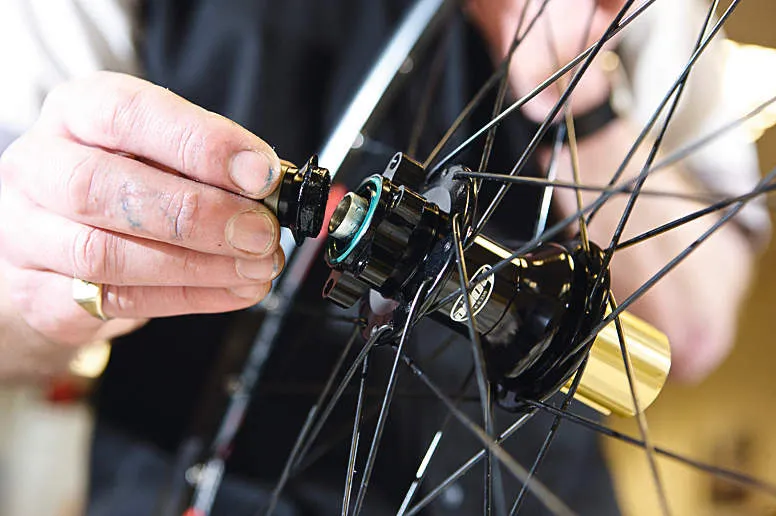
4.The aluminium end-spacers are held in place by O-rings. To remove them, clamp them lightly in a vice, preferably with soft jaws. Pull and wiggle the hub to 'walk' them off.
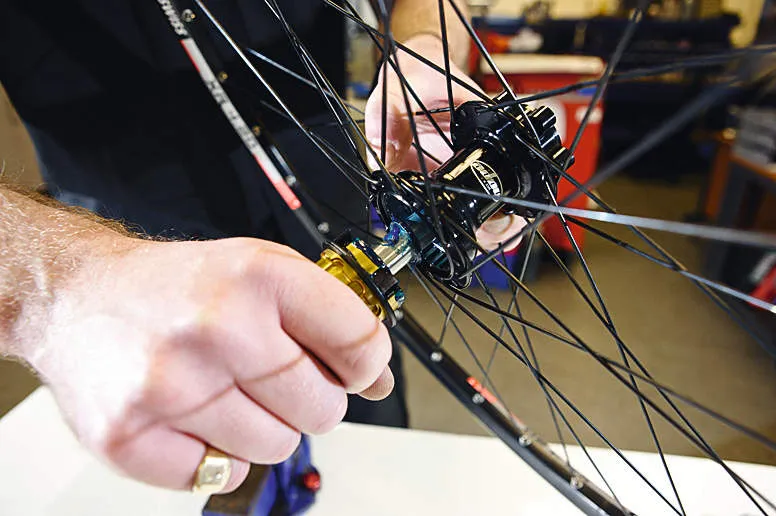
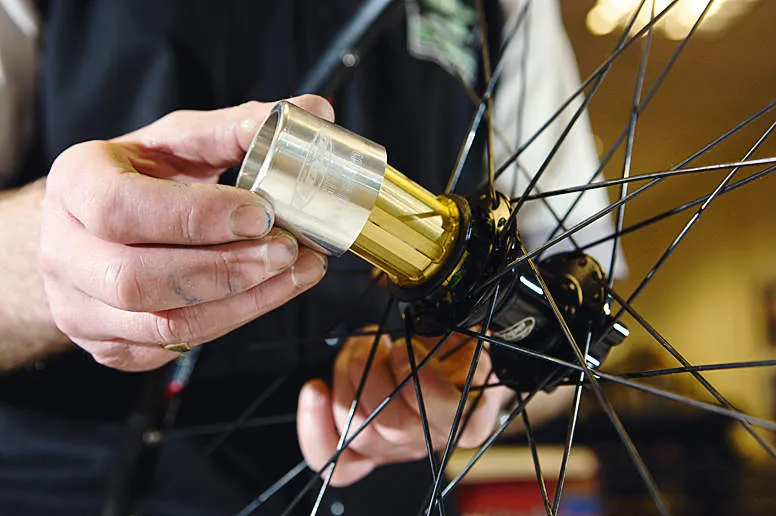
5. The cassette body is held in place by the seal. To remove it, grab it nice and tightly, rotate it anti-clockwise and pull it hard at the same time – it should pop out. Take the washer that sits on the axle between the cassette body and the hub body off at this point and put it to one side with the end-spacers.
6. Now to remove the axle. You need to knock it through from the drive side, out of the disc side. Rest the hub body against a couple of pieces of wood (or onto tool HTT167) with the disc flange supported, take your soft hammer and tap sharply down on the end of the axle. This will drive the axle out along with the disc side bearing and seal.
7. Now remove the disc side bearing from the axle. Place the assembly into your vice, with the long end of the axle pointing down. The bearing needs to be supported by the jaws of the vice, but nothing clamped up. Grab your soft hammer again and sharply tap the end of the axle to drive it through the bearing.
8. You can now use your axle to drive the remaining bearing out of the hub. Grab the wheel and rest the drive-side spoke flanges against the blocks of wood (or against tool HTT167). Drop the shorter end section of the axle down into the hub and drive the axle through and out using your soft hammer. You then need to remove that bearing from the axle as per step seven.
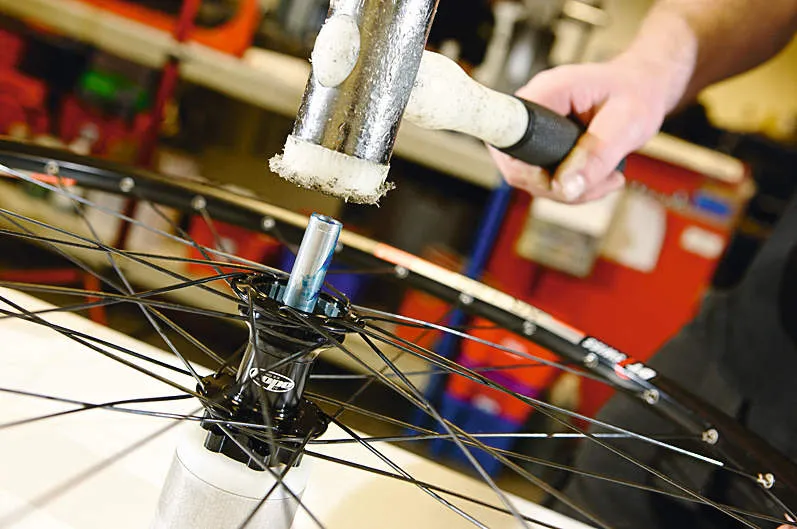
9. Time to fit the new bits. Smear a little grease onto the inner surface of the hub body where the bearing fits, which should help it slide into place. Grab the wheel and rest it on top of your blocks of wood with the disc flange supported (or against tool HTT167). Drop the first bearing into the drive side and using tool HTT174 against the bearing, sharply tap it into place using your soft hammer.
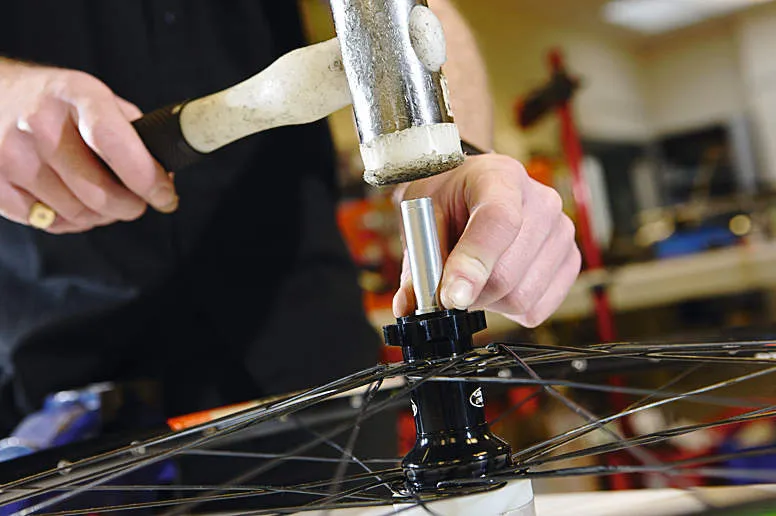
10. Leave tool HTT174 in place, flip the wheel over and rest it on a hard surface, such as a floor without carpet. Grab your axle and put the long end section into the hub. Then get your bearing, drop that over the other end of the axle and roughly seat it into the hub. Now put tool HTT174 against the bearing and drive it sharply into place using your soft hammer.
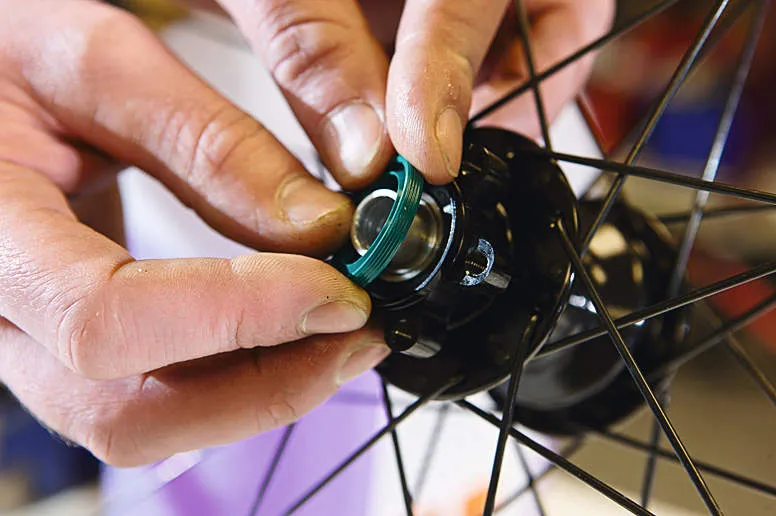
11. To fit the disc side seal, smear some methylated spirits onto the outside of a seal – this helps lubricate it so it seats correctly and then evaporates after a few minutes. Fitting it with grease would lubricate the seal and allow it to push out when fitting the spacer, causing the hub to drag, so just use meths and wait for it to dry.
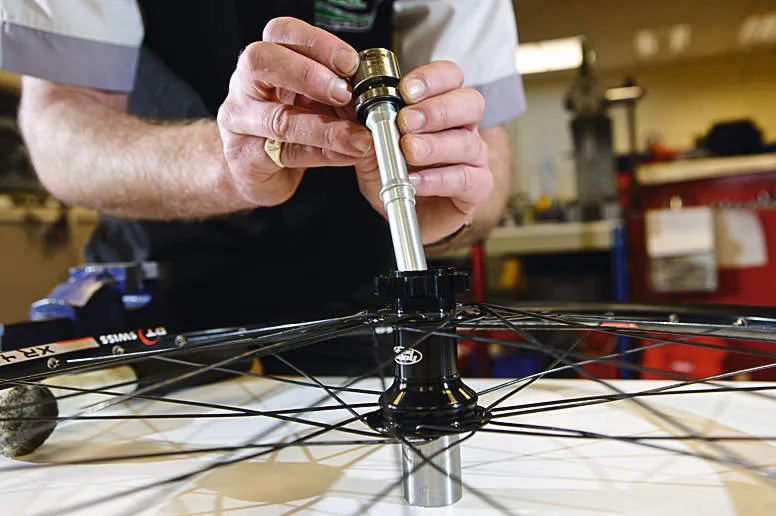
12. Place the small washer onto the drive side of the axle. Take your cassette body and smear a little Teflon grease around the inside of the ratchet in the hub body. Make sure that it's just enough to fill the ramps of the ratchet, as using too much will stop the pawls from engaging correctly and can cause premature wear and slipping of the pawls.
13. Now ensure there's a small amount of grease smeared onto the spring seated in the freehub where they touch the pawls. To refit the cassette body, rotate it anti-clockwise while pushing in gently. You then need to reseat the seal, using tool HTT175. Make sure the seal is centralised, then slip the tool over the cassette body and with a sharp push, the seal will snap into place.
14. Refit the axle-spacers. Put a little smear of grease onto the axle stubs to aid sliding them on, and also put a smear onto the contact surface of the seal but don't fill it as this will push the seal out when fitting the spacer. Then just push the spacers into place by hand.
15. Now refit the cassette. Put a smear of Teflon grease onto the splines first, slide your sprockets on and tighten the lock ring to 34Nm. Wash your hands to get rid of any grease you have on them, grab your disc rotor and refit that, checking its orientation, and tighten the rotor bolts to 5.6Nm.
16. Finally, put the wheel back in the bike, flip the bike the right way up, pat yourself on the back, make a cup of tea and look forward to a rumble and squeak-free super smooth ride next time you go out.
Workshop wisdom
Don’t scrimp on replacement bearings. You get what you pay for. Genuine Hope replacement bearings are the best.
Don't cut corners. You really do need to buy the bearing installation tools, or you'll damage the new bearings when fitting them, negating all your hard work and costing you more.
If the hub binds when you reassemble it, the chances are you've missed the small spacer behind the cassette body.
Check out www.hopetech.com for a video walk-through on replacing bearings.
