


The RockShox Revelation is a fantastic fork, but to keep it that way you’ll need to service it regularly. Here’s how to do a basic service to keep things running smoothly.
Time: 45 minutes
Cost: £15
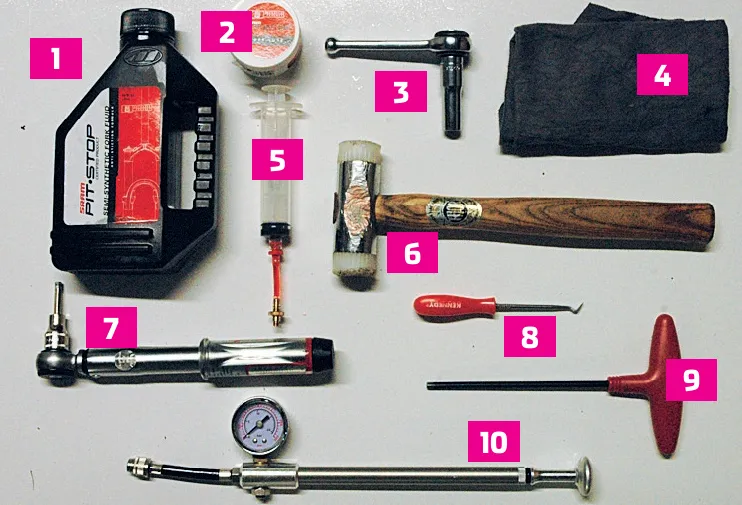
Tools:
- 15wt fork oil
- RockShox Judy Butter/Stendec Easy Glide
- 10mm socket
- Rag or paper towel
- Syringe
- Plastic mallet
- Torque wrench
- Small hook
- 5mm Allen key
- Shock pump
- Isopropyl alchohol
- Plastic bowl
- Thread lock, such as Loctite 242 Ziptie
- SRAM RedRum/Fox Float Fluid
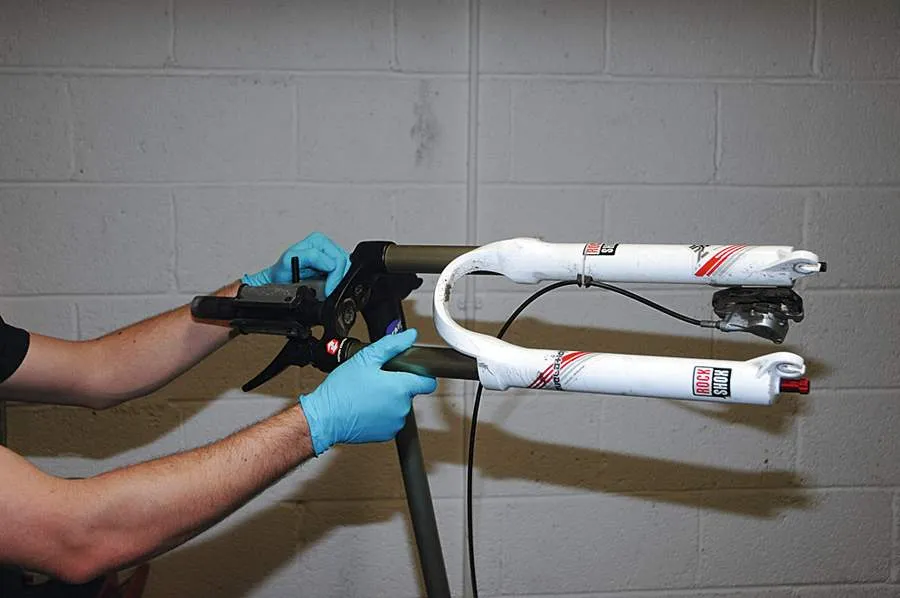
1 The best way to service your fork – and the technique the pros use – is to completely remove it from the bike and clamp the steerer into your workstand. If you don’t have a workstand, don’t worry – it can be done in the bike too. Simply tip the bike upside down and remove the front wheel.
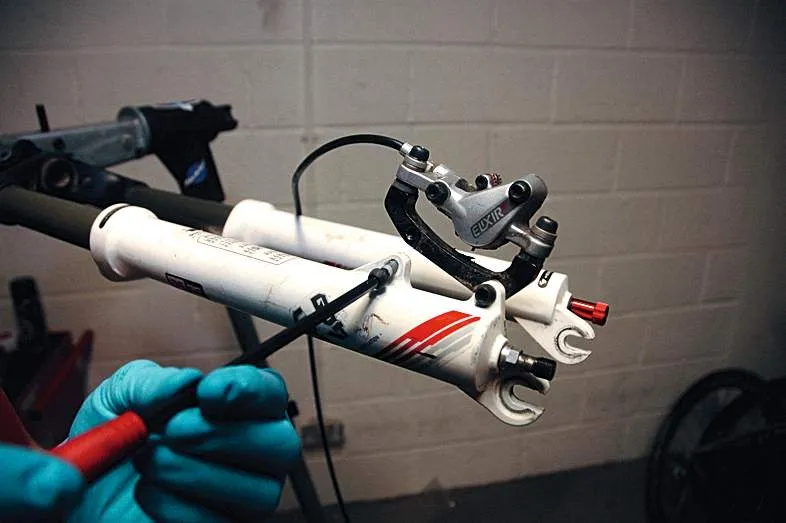
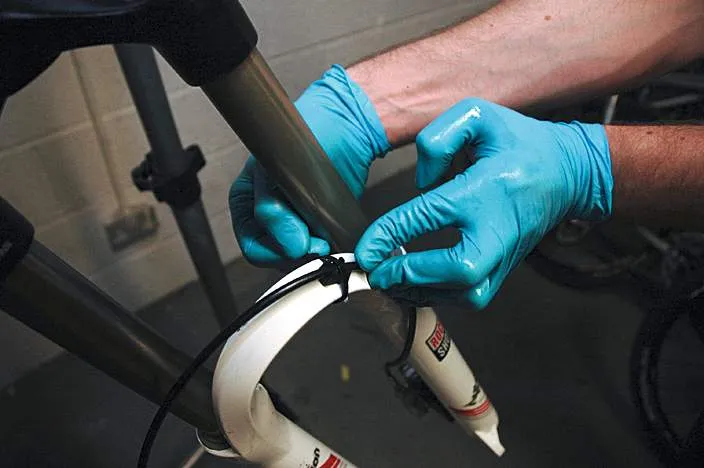
2 Next to come off is the front brake. Grab a 5mm Allen key and remove the brake mount from the fork, rather than the brake calliper from the mount. This means you don’t have to reset the brake when you refit it. Cut the hose-retaining ziptie and lay the brake out of the way.
3 Now give the fork a good external clean. This will stop any of the trail grime on the outside of the fork getting inside when you take it apart. Ideally you should use a soap solution and a brush to do this. Rinse them off with clean water and then dry thoroughly.
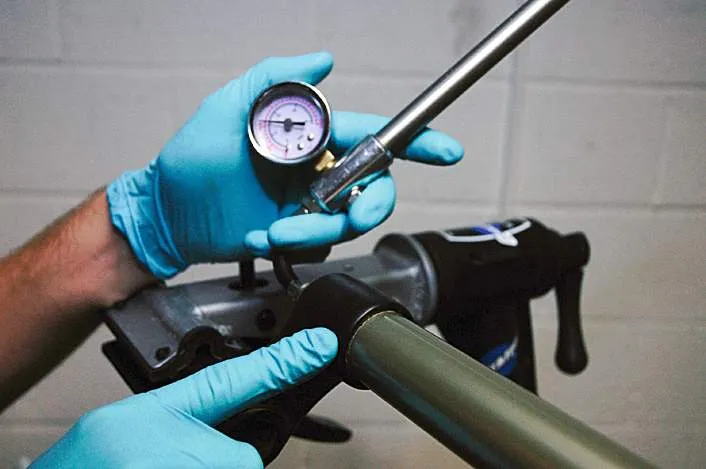
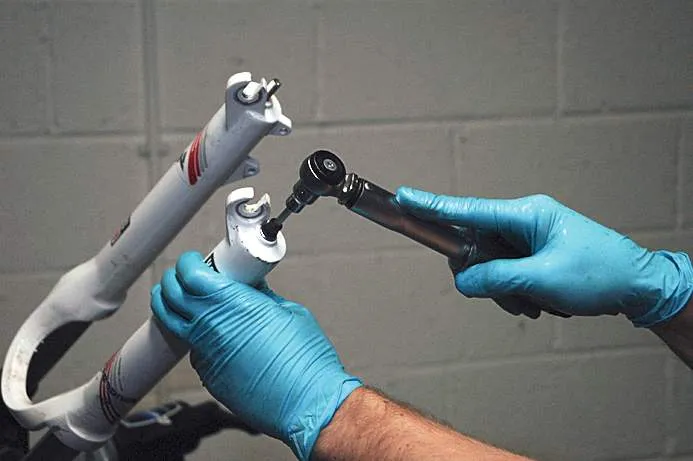
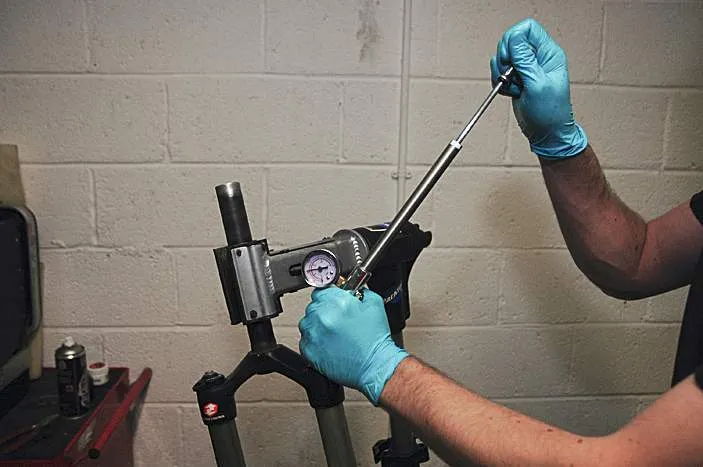
4 If you have an air fork, you need to remove all of the air pressure. If it is a Dual Air fork, attach your shock pump to the valve at the bottom of the fork (negative chamber) first. Note the pressure and then deflate completely using the bleed valve on the pump. Then move up to the positive chamber, note the pressure, and deflate completely.
5 Now undo the lower fork bolts. Using a 5mm Allen key, unwind them just three to four turns, not all the way. If you have a Dual Air fork you will need a 10mm socket to undo the negative air side. Unscrew the nut until it is flush with the end of the threaded section.
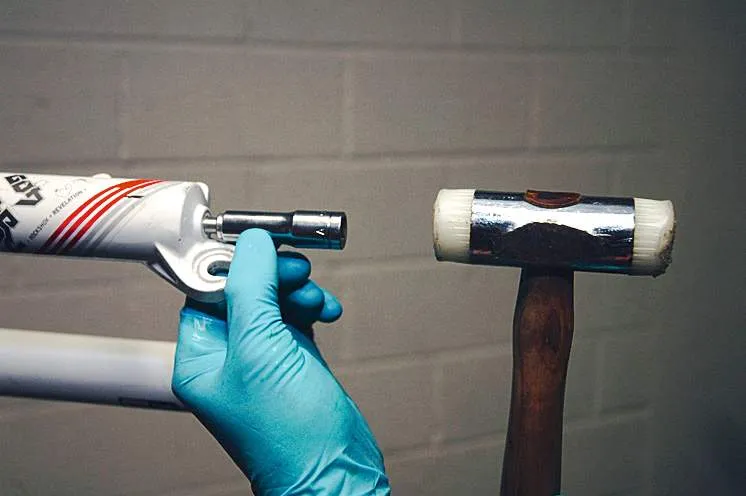
6 The damper rods are compression fitted into the bottom of the lower legs, so need a little tap to free them. For the Allen bolt type, leave the Allen key in the bolt and tap the end of the key gently with a plastic mallet. For the nutted type, remove the 10mm socket from the driver, place it over the bolt and give it a tap with the mallet.
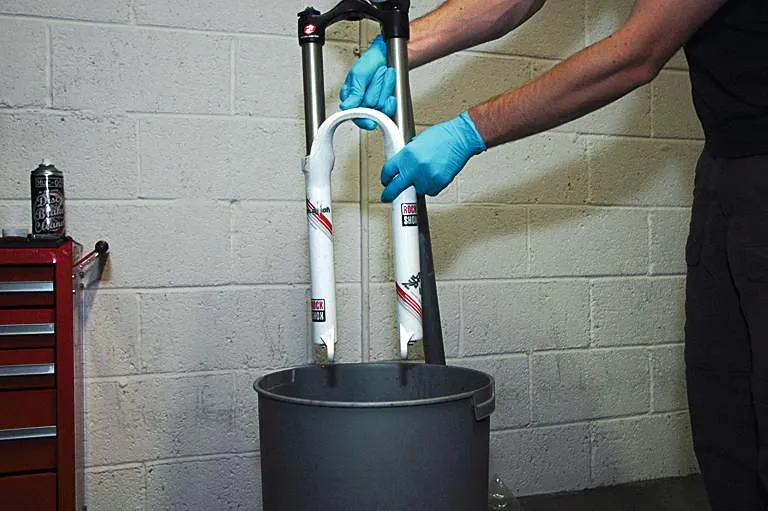
7 Tip the bike the right way up and put the bottom of the fork legs into a plastic bowl. Slide the lower legs all the way off the uppers, and the bowl will catch the small amount of oil that is in the bottom of each leg. Leave the lower legs in the bowl to drain. Turn the bike back upside down and give the upper tubes a good clean with some isopropyl alcohol on a rag.
8 Underneath the top grey rubber wiper seal is a foam ring. Hook this out using an awl if you have one, or a paperclip bent into the shape of a hook. Pour some isopropyl alcohol into a cup and drop them in for a soak while you do the rest of the fork. It’s a good idea to cover the container because the liquid evaporates very quickly and you don’t really want to breathe in the fumes.
9 Next, clean inside the lower legs. Use a rag wrapped around a wooden dowel to get right down inside the fork leg. Pay particular attention to the wiper seals. Clean them with a soft rag, being very careful not to damage the lip seal. Once cleaned, inspect the lip on the wiper seal for cuts or tears. If you find any, you’ll need to replace them.
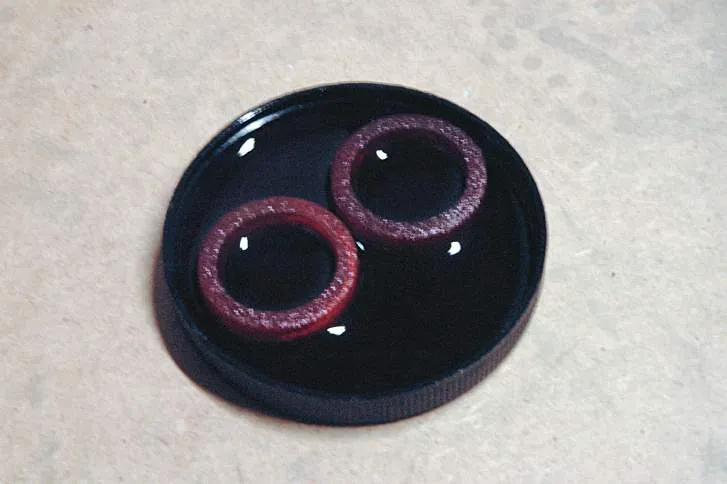
10 Give the foam rings a good swill about in their baths, remove them, shake them off, give them a squeeze and allow them to air dry for a few minutes. When they are completely dry, drop them into a small cup of SRAM RedRum or similar oil. Make sure they are fully soaked and then pop them back into place under the wiper seal.
11 Smear a small amount of RockShox Judy Butter onto the upper wiper seal. A thin, even covering over the inside surface is enough, not globs of it. Refit the lower legs to the uppers, being careful not to fold the lip of the wiper seal – this will damage it. Slide them on until the upper bushing in the lower leg touches the upper leg.
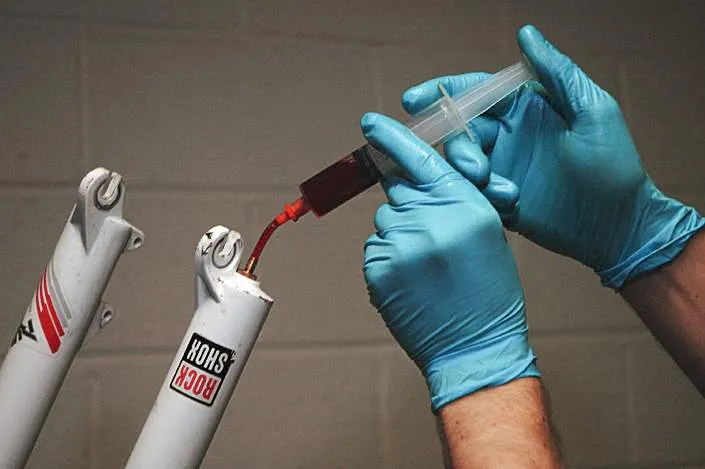
12 Now to add the lubrication oil into the bottom of the fork legs. Grab your syringe and fill it with 15ml of 15wt fork oil (or 30ml of 15wt for the spring side of a 426 Coil U-Turn fork) and add that amount into the bottom of each leg through the bolt holes. Make sure the damper rods inside aren’t blocking the hole. Now slide the lower legs all the way down.
13 Grab the bolts/nuts and give them a good clean. Inspect the crush washer and retainers for damage. Replace them if they are. Add a little thread lock, such as Loctite 242, to the bolts/nuts and refit them into the fork. Tighten them to a torque of 6.8Nm.
14 If you have an air fork, grab your shock pump and repressurise them to the original pressure you made a note of in step 4. If you have a Dual Air fork, then make sure you pressurise the valve in the top of the fork (the positive chamber) before the one in the lower leg (negative chamber). Wipe any excess oil or lube from around the wiper seal and from the upper tubes.
15 Replace the calliper onto the fork and tighten to a torque of 6.8Nm. Grab a fresh ziptie to attach the hose to the fork brace. Put the front wheel back in the bike. If you have a Maxle-equipped fork, give the shaft a wipe clean and smear a little Teflon grease along it to keep it fresh.
Workshop wisdom
» Dry and dusty weather, or muddy conditions can make your forks sticky. For a quick fix, drop a little fork oil onto the stanchion and let it run onto the upper seal. Cycle the fork up and down a few times and then wipe it off clean. This technique grabs dirt and pulls it out of the upper seal, leaving it fresh and lubed.
» Experiment with your fork pressure. Don’t assume that the pressure you have always had it at is the best. Try running higher or lower pressure to see how it affects the performance. You may be surprised.
» Check the stanchions for signs of scoring when you remove the lower legs. Any marking can show signs of major issues such as worn bushes, twisted lower legs or bent upper tubes. All these problems need resolving immediately to avoid further damage. Take the fork to your local shop, or send them to a reputable service agent, like TF Tuned, and they’ll identify the problem and repair it.
» Likewise, if your fork is knocking back and forth then it needs some major repair work. Don’t put it off, because the longer you leave it, the more damage is done and the more expensive it gets.
