
Thankfully Shimano SPD pedals are pretty robust and put up a good fight. But if they do start to run rough it's easy to give them a service. We show you how in 10 simple steps.
- Time: 40 minutes
- Cost: £0
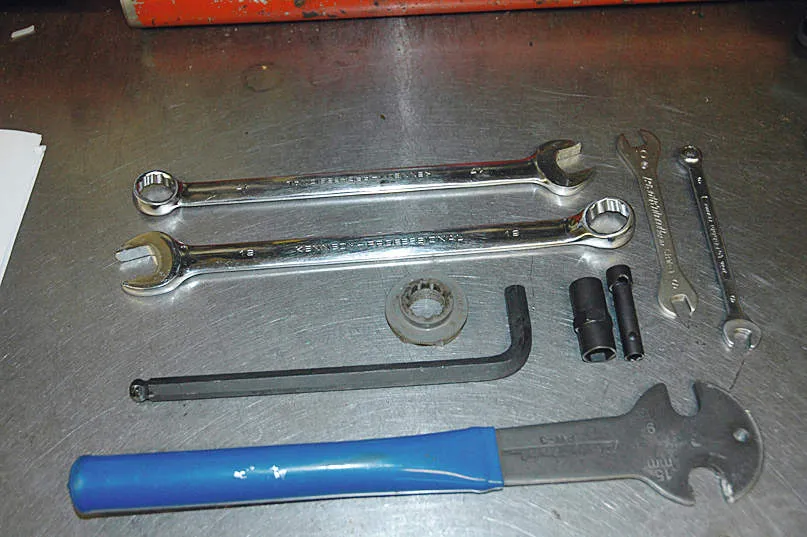
Tools for the job
- Pedal spanner OR long 8mm Allen key (for XT/XTR only)
- 17mm spanner (XT/XTR) OR 20mm spanner (DX SPD) OR Shimano pedal axle tool TL-PD-40 (all other SPDs)
- Vice or adjustable spanner
- Medium cross-blade screwdriver OR 2.5mm Allen key (XTR only)
- Threadlock (eg. Loctite Threadloc 242)
- Torque wrench
- Lubricant (eg. Muc-Off Slick Caramel)
- Shimano bearing adjustment tool TL-PD-73 OR thin 10mm and 7mm spanners
- Teflon grease
- Degreaser or brake cleaner
Step-by-step guide
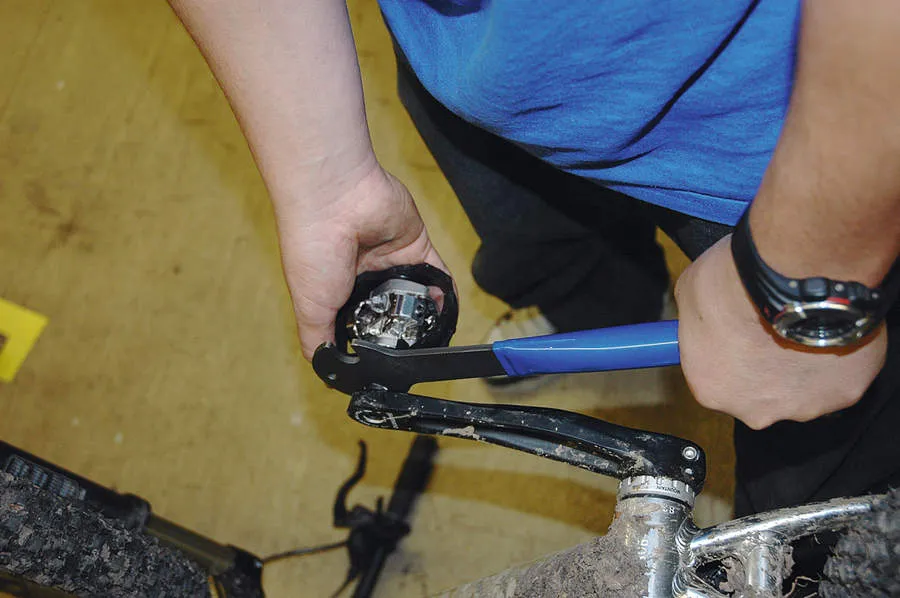
1. First up we need to get the offending items off the bike. Spin the bike upside down and grab your pedal spanner or long 8mm Allen key. Put your foot on the saddle and with the crank facing forward and the spanner or Allen key facing backwards, pull up to release the pedal. This is the same for both sides, because the left-hand pedal is left-hand thread.
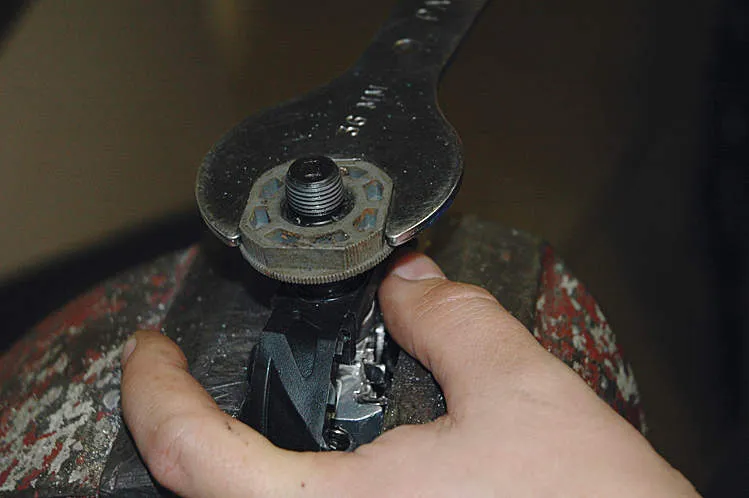
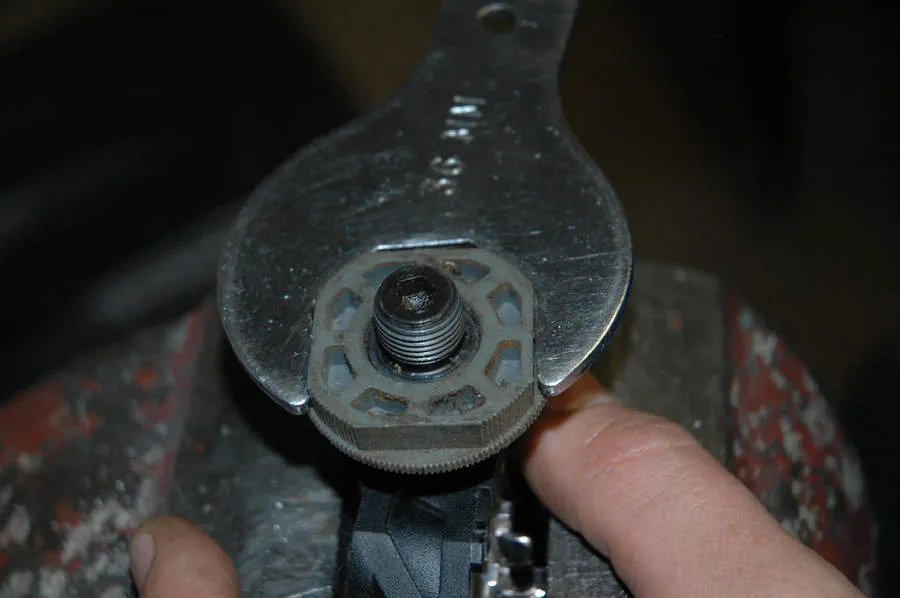
2. Now remove the axle. Use a 17mm spanner for XT and XTR, 20mm for DX and Shimano’s TL-PD-40 tool for the rest. Put the pedal in a vice with soft jaws or in a workstand clamp. As a last resort, hold the pedal in the jaws of an adjustable spanner. Use the adjustable spanner on the TL-PD-40 tool, or the relevant size spanner, to screw the collar all the way out – remember, the right-hand pedal is left-hand thread, and vice versa.
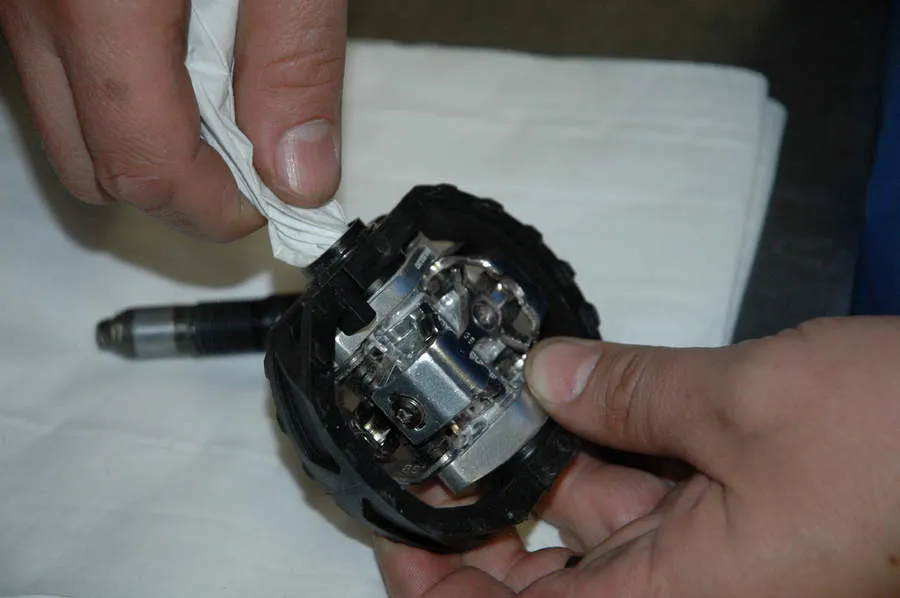
3. You need to get everything clean now. Wipe as much dirty grease as possible away from the axle assembly. There will still be some that you can’t get at, but we will deal with this later. Use a rag inside the pedal body to get it shipshape. Give the pedal’s body a good scrub with some soapy water and a brush too. Dry it completely afterwards.
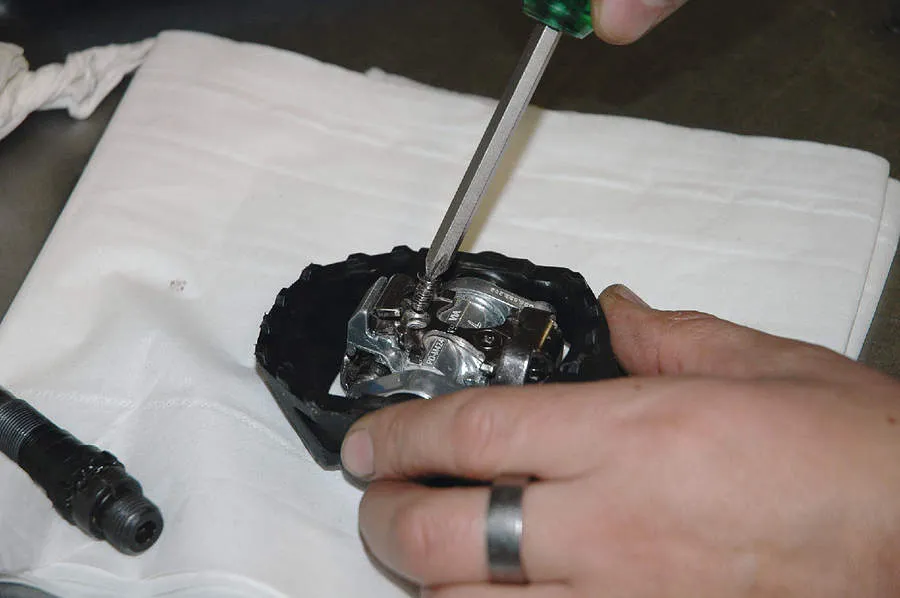
4. The top plate screws can come loose and cause clicking when you pedal or fall out completely. To ensure the top plate stays in place, remove the screws one at a time with the cross-blade screwdriver (or 2.5mm Allen key for XTR) and then clean the thread. Give it a fresh coating of Loctite 242, or similar. Tighten them to 4Nm using your torque wrench. Repeat for the rest of the screws.
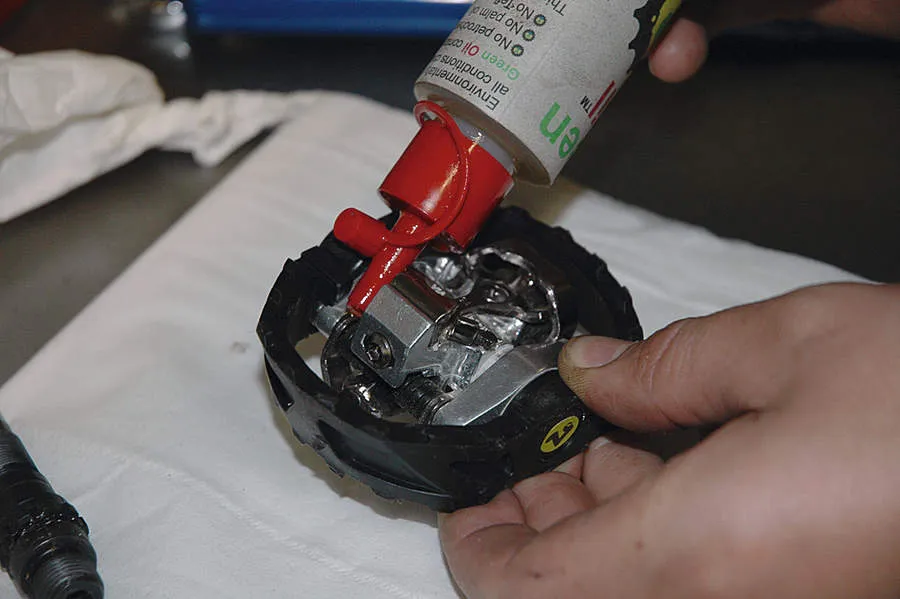
5. Shimano’s spring mechanisms are super hardy and don’t really need any maintenance, but a bit of TLC never goes amiss. Get a thick lube dropper bottle, such as Muc-Off Slick Caramel, and drop a little oil over the springs and into their pivot points.
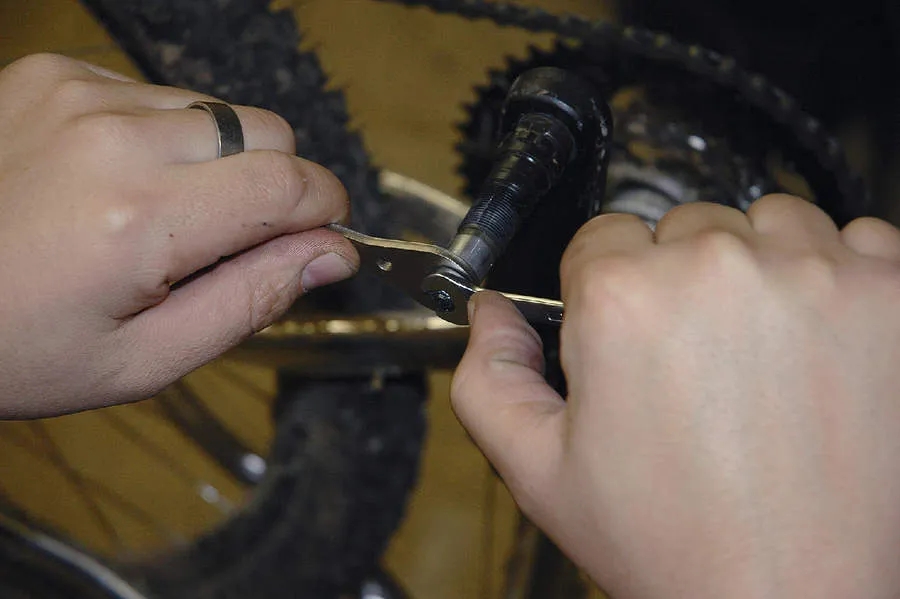
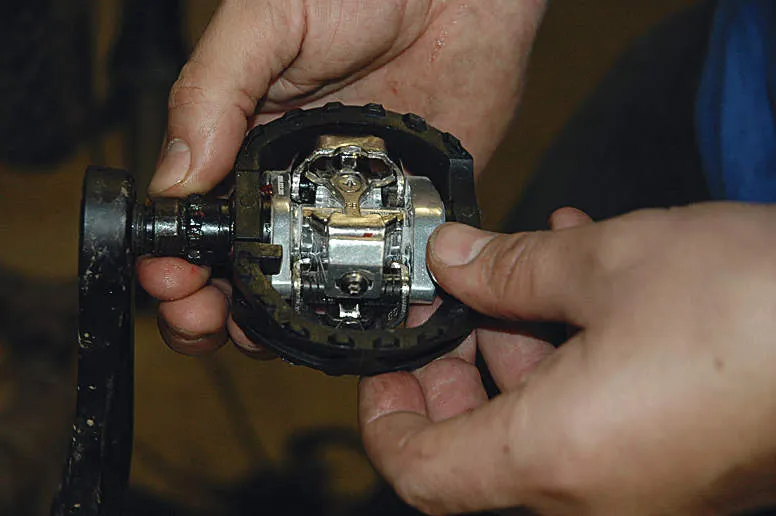
6. Adjust the bearings if required. Thread the axle assembly into the crank and lightly nip it up. Ideally you need a Shimano TL-PD-73, but you can get away with thin 10mm and 7mm spanners. Hold the 10mm nut still and undo the 7mm nut. Tighten the 10mm nut a fraction at a time then tighten the 7mm nut back onto it. Grab the metal barrel and check it spins freely and without play. Continue until the play has been adjusted out.
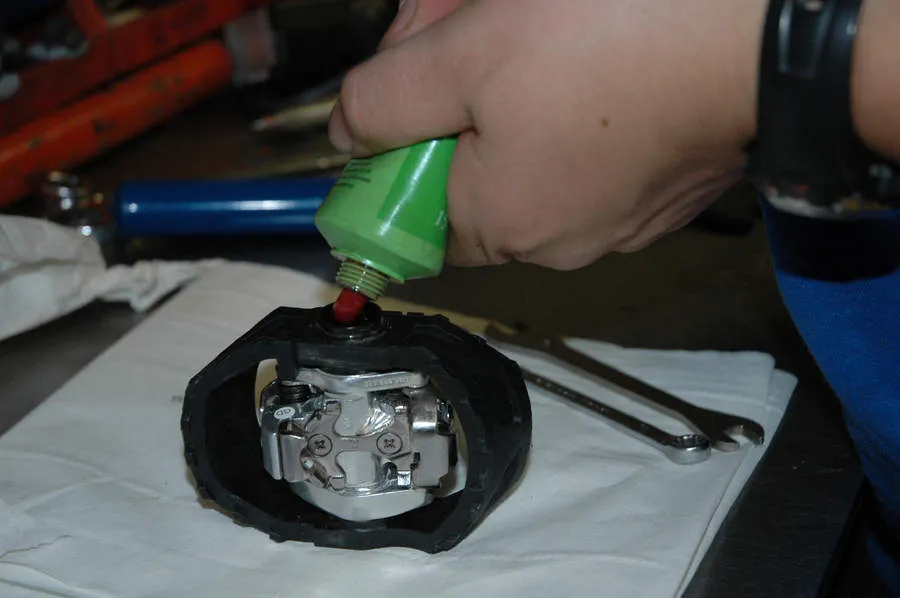
7. Now for the most important but also the simplest step – purging dirt and contaminated grease from the bearings. Get a decent quality Teflon grease and half fill the pedal body with the grease. When you refit the axles this grease will be forced up through the bearing and will push out all the dirt before it.
8. Refit the axle assembly. Make sure you get them the right way round. The collar will be marked with a ‘tighten’ arrow. The one that tightens clockwise (right-hand thread) goes into the left-hand pedal, and the one that tightens anti clockwise (left-hand thread) goes into the right-hand pedal. Tighten the assembly all the way in until it comes to a stop at the end of the thread.
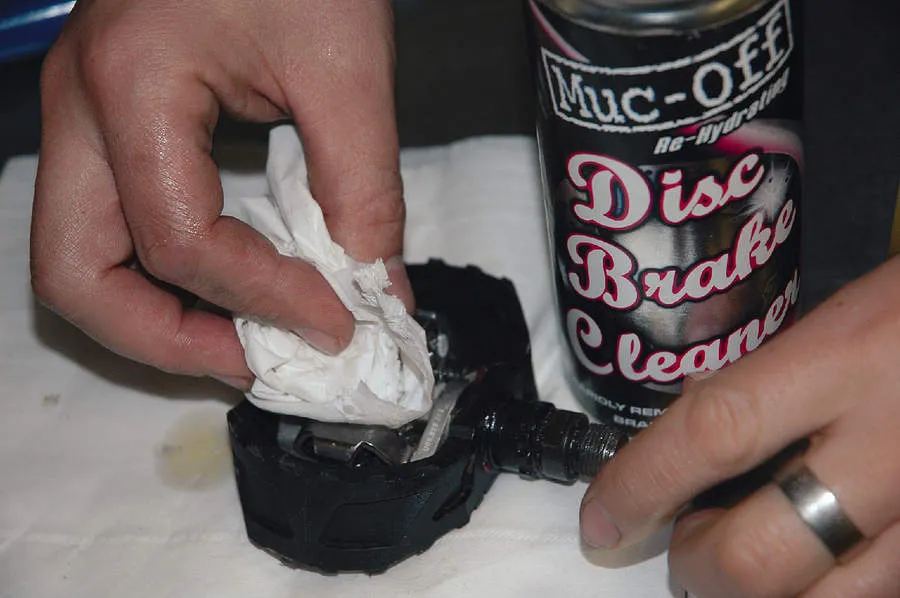
9. It is a good idea to clean the pedal before refitting. Spin the axle a few times and wipe away the grease that comes out of the seal. When you have done this put some mild degreaser or brake cleaner onto a rag and wipe over the surface of the pedal to remove any grease residue.
10. Refit the pedals to the bike, making sure you get them in the right way round. Thread them in very slowly to start with, using only your fingers, as it is easy to cross-thread them. Once you have each pedal threaded in at least half way by hand, use your spanner or Allen key to tighten to a torque of 40Nm, using your torque wrench.
Workshop wisdom 1: Add a grease port
You can make servicing the bearing take a matter of minutes by adding a grease port to the pedal (not for DX). Drill a 2.5mm hole in the end cap, or in the very centre of the pedal body. You can now use a needle nose grease gun to grease the bearings and purge out the old contaminated grease. The grease will act as a seal to keep any dirt and water from entering the pedal.
Workshop wisdom 2: Fit new cleats
If you are having problems clipping in or clipping out, it is more than likely not the fault of the pedal. The cleats in the bottom of your shoe wear out far quicker than any of the parts of the pedal, so always try swapping them before consigning your pedals to the bin.
