


However much you love your bike (and we’re sure it’s true love), the sad fact remains that no matter how much you polish and lube it, you’re actually wearing it out every time you hit the trails.
Unsurprisingly, the first casualty in this war, particulary in winter, is your transmission – the moving mechanical parts that convert the energy from last night’s chicken tikka masala into useful forward motion.
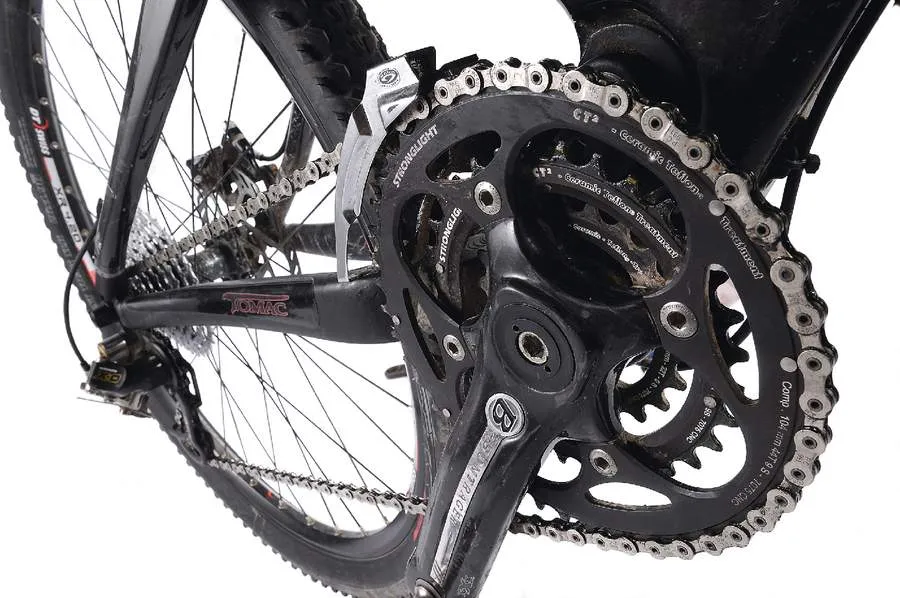
Transmissions are a combination of metals, with the hard steel chain meting out unending punishment to comparatively soft alloy chainrings. This in turn wears the teeth into razor-sharp waves that will, if left unchecked, cause the chain to slip under load and ruin your gear shifting performance. Plastic jockey wheels fare little better, losing their edge and gradually getting noisier and noisier.
It's the chain where the first signs of wear begin, though – and it’s easier (and cheaper, too) to monitor any wear on the chain and replace it often than it is to let it ruin your entire drivetrain.
The problem is, transmission wear is harder to predict than the weather. Every ride is different – some do very small amounts of damage to your bike, while others can sound the death knell for the chain, sprockets and jockey wheels.
We’ve put together the definitive step-by-step guide to assessing the level of wear to your transmission to help you tell how long you’ve got before the end is nigh.
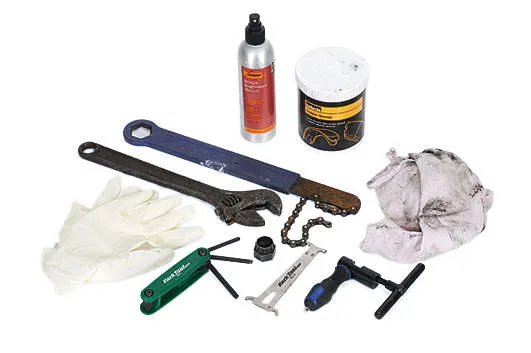
Essential tools
- 5mm Allen key/Torx T-30 key
- Chain wear indicator tool
- Degreaser and anti-seize compound
- Chainring bolt extractor
- Chain splitter and chain whip
- Cassette removal tool
- Big adjustable spanner
1. Get cleaning
The first thing to do is to clean the chain and transmission. There’s not much difference between almost worn and worn, and having gunge stuck in the chain links isn’t going to make the precise measuring of the chain link pitch any easier. Besides all that, who wants to get covered in oil while they’re working?
Get in there with degreaser, hot soapy water and a brush. So many riders clean the frame after a muddy ride and leave the chain and drive sprockets filthy, but it should be the other way around. Frames don’t wear out if they’re dirty, but transmission components do.
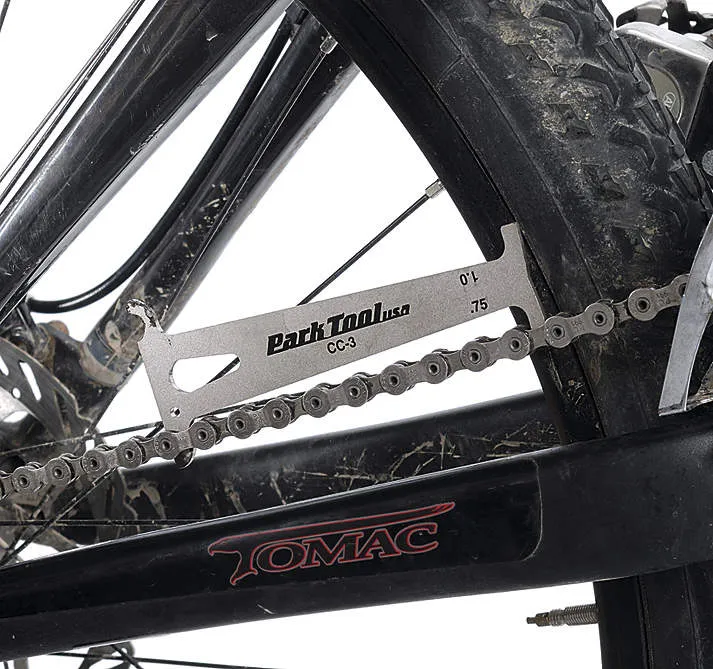
2. Measure chain wear
The humble bicycle chain is a miracle of engineering. A simple set of linked metal side plates and rollers can cope with a phenomenal amount of load. Even metal can stretch, however, and it’s not unusual to find chains that have gained up to 5mm (roughly half a link) in length.
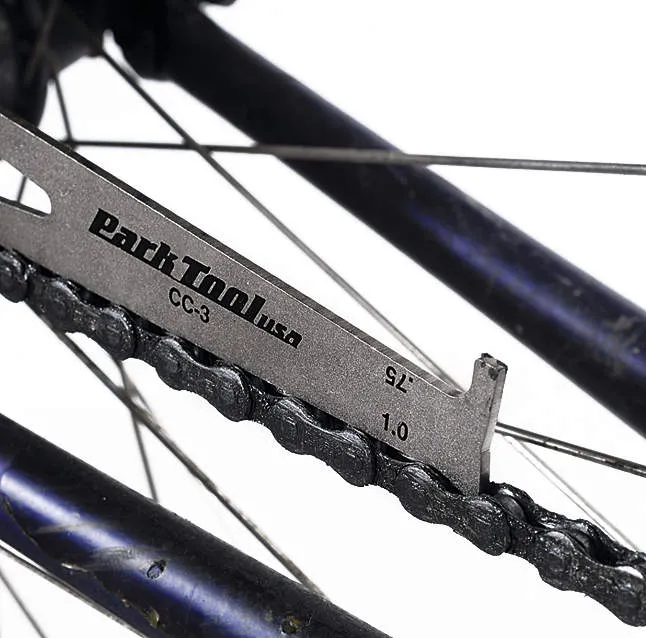
Take your chain wear indicator – we’re using the Park Tools version here, but you could also try one from Rolhoff – and insert the short measuring finger on side A into a link. Allow the other end of the measure to drop between the links.
On an unworn chain, the long measuring finger will not fall between its links. In this case, you have less than 0.75mm of wear, so you’re good to ride.
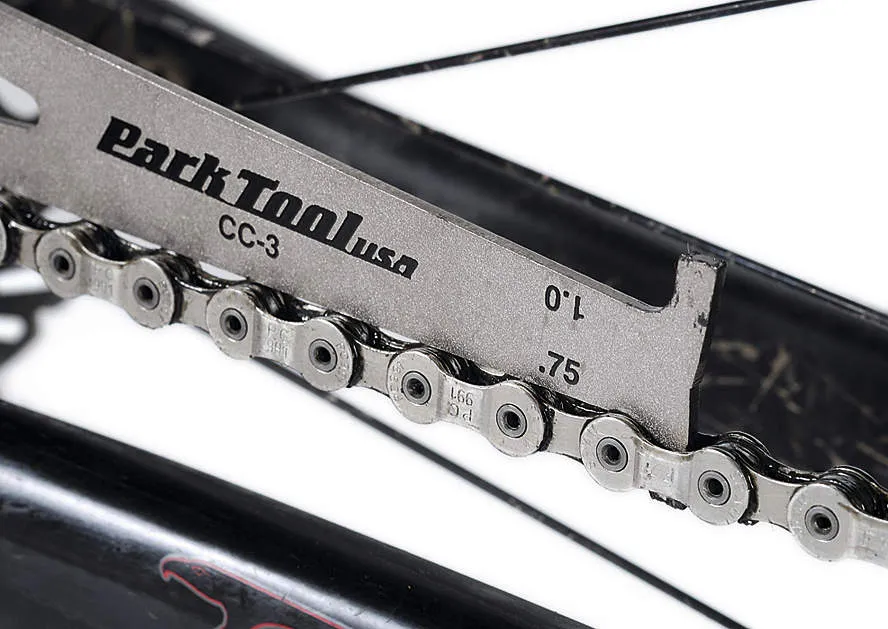
3. Signs of wear
If the long measuring finger falls between the chain's links, this indicates that you’ve got between 0.75mm and almost 1mm of wear. You’re still good to ride, but be aware that the chain is stretching so you’re already adding extra wear on the soft alloy chainrings. Be prepared to replace the chain as soon as is practical to do so.
4. Double-check
If your long measuring finger has fallen between the links, switch the tool over and measure the same set of links using the finger on the other side. If, when the small finger is in position, the long finger still falls between the links, then you’ve got more than 1mm of chain wear. This is a serious issue and the chain must be replaced. Failure to replace a chain that’s worn to this level will damage your transmission system irreparably.
5. Remove the chain
Shimano chains require the use of a chain-splitting tool to break them. As the chain you’re removing is worn out, you don’t need to worry about being too gentle – just split the chain and let it run through the transmission. Lay it out on the floor in a straight line.
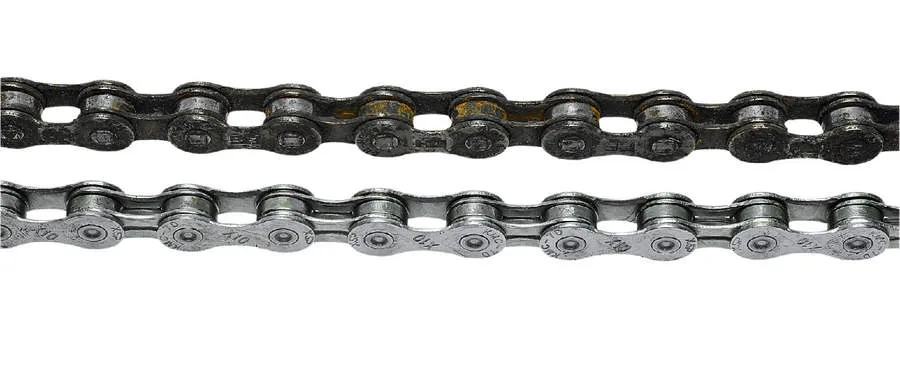
6. Measure your chain
Take your new full-length chain and lay it out flat and straight next to the old one, so you can see how many links to remove to make it the correct length. You’ll notice that at the halfway point, the old chain begins to show its stretch as the links no longer line up. Make sure that you take this into account before splitting the new chain.
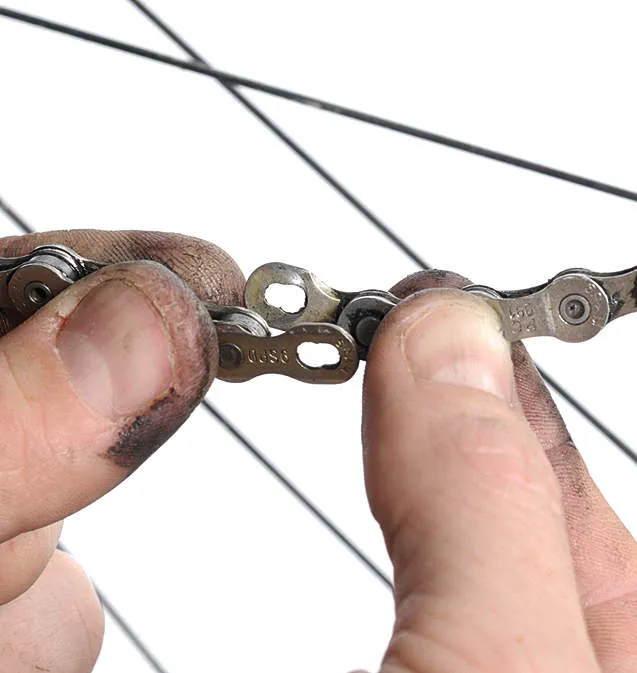
7. Fit new chain
SRAM chains use a splittable Powerlink system that makes fitting (and removal) a tool-less affair. Shimano chains require a special joining pin (which comes with every new chain), so insert it through the corresponding link plates and push into position with a chain tool. Snap off the lead section using pliers. If the newly joined link is a bit stiff, grasp the chain firmly each side of the stiff link and give it a slight flex. This usually frees the link.
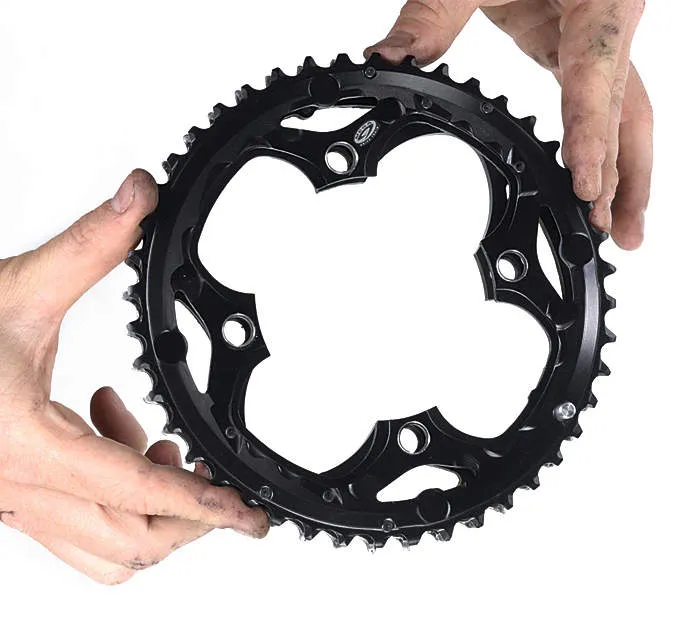
8. Check chainrings
Chainrings have a hard time. They’re made from soft alloy to make them light, but this also means they’re getting constantly mashed by the steel chain.
As the chain wears, the pitch (distance between the chain rollers) increases. This allows the chain rollers to place increased pressure and wear on the leading edges of the chainring teeth. Over time, this will result in the teeth becoming hooked, with ends that resemble the tops of waves.
Check your rings for hooking caused by chain stretch. Also check for bent, gouged or missing teeth – the chainrings can also wear out from non-chain-related illnesses too.
9. Check BCD
Make sure your replacement chainrings share the same bolt circle diameter (often abbreviated to ‘BCD’ on the packaging). Also check they have the right number of arms – it’s easy to pick up the wrong one in the shop. You might want to consider making a change to harder chainrings or different gear ratios at this point.
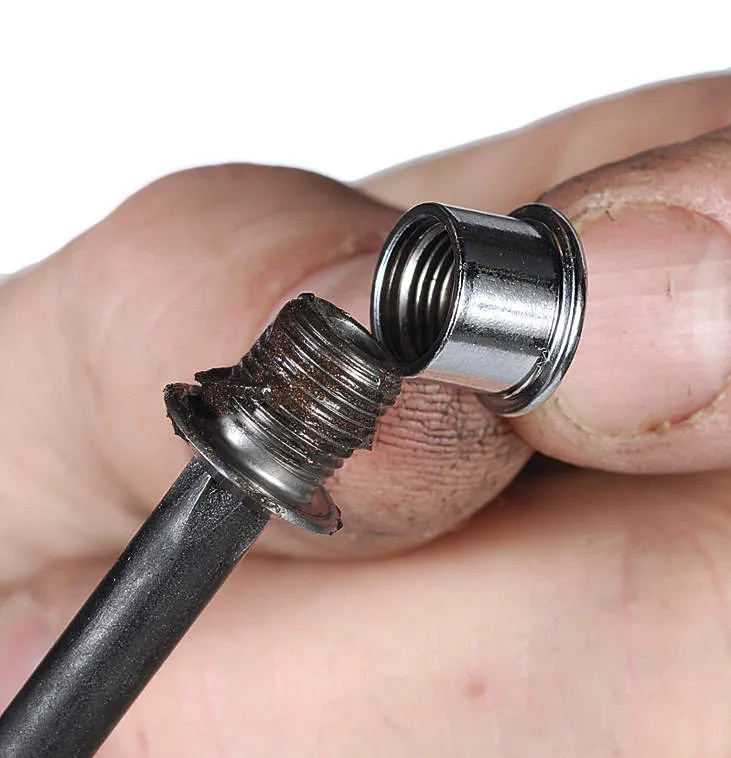
10. Remove worn chainrings
Use a 5mm Allen key (some new cranks use Torx T-30 bolts) to remove the worn chainrings. Occasionally you may find that the two threaded chainring bolt halves have corroded together. You may need to use a special tool called a Shimano TL-FC20 (Park Tools also make a good one). This will hold the slotted side of the nut nicely and allow easy extraction.
11. Get cleaning
Wipe the chainring fitting tabs with a clean cloth. These get quite grubby through daily use, and any dirt left on them will interfere with the ability of the rings to be completely in line. Besides, it’s just good bike manners to put things together cleanly. Also check the crank arm bolt holes for wear, especially on carbon arms.
12. Chainring alignment
Make sure you’ve got the new chainrings correctly aligned. The brand name must be facing outwards, and the small chain defection (outer ring)/alignment tab (inner rings) should line up behind the right-hand crank arm. This ensures all the shifting ramps will work. You might laugh at this, but we’ve seen it all, we really have.
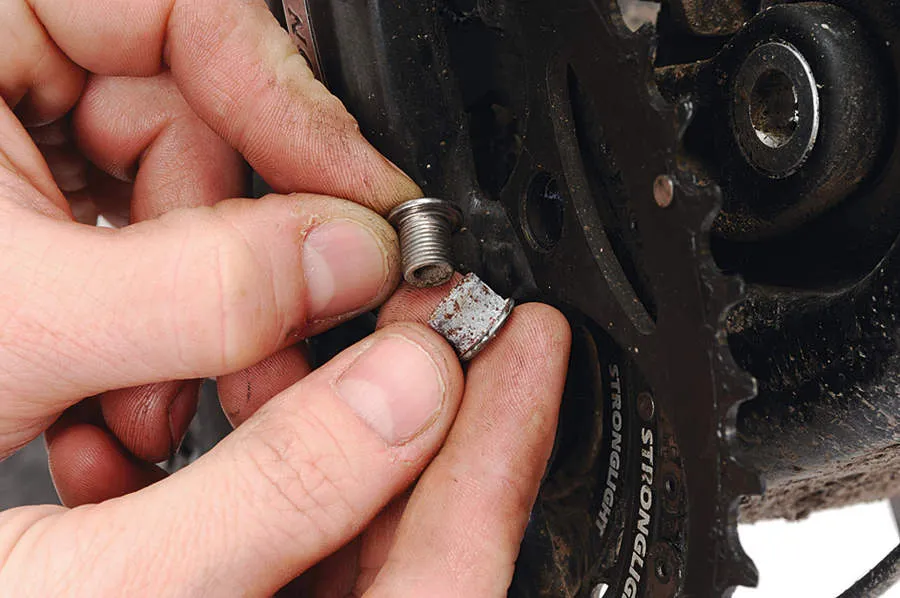
13. Add anti-seize
To avoid the issue of having the chainring bolts seize in future, it is a good idea to protect the threads by coating them with a smear of anti-seize compound. If you haven’t got any, buy some, and a dab of whatever grease you’ve got will do in the meantime.
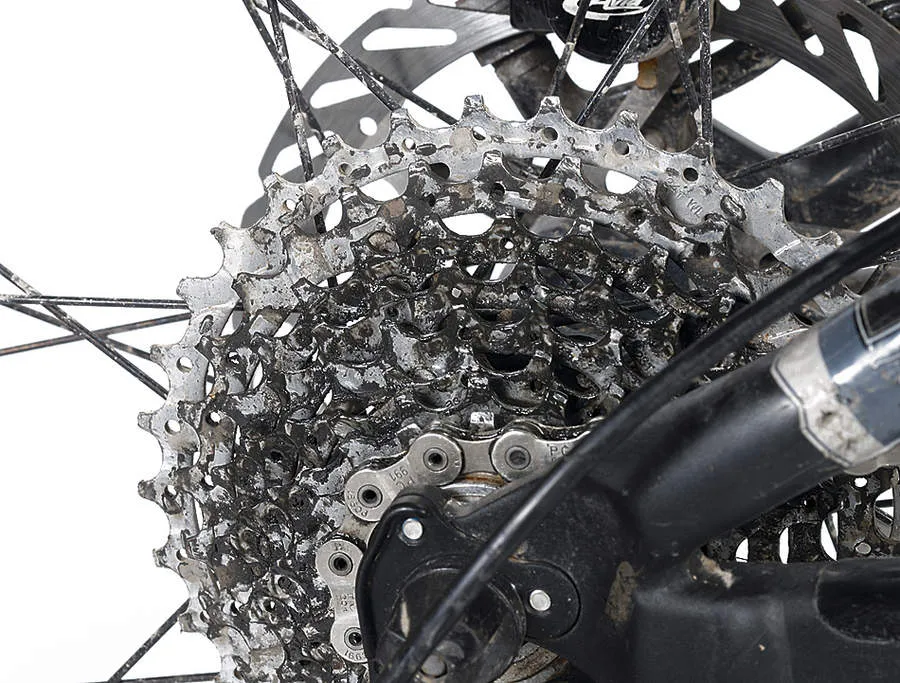
14. Check cassette
Just because cassette teeth are hard steel, they’re not immune from the ravages of wear. In fact, cassette teeth can wear pretty quickly once the chain has stretched, causing similar ‘hooking’ of the teeth as occurs on softer alloy chainrings. As cassettes are expensive compared with a new chain, it’s better to change your chain frequently and save the cassette.
Worn cassette clusters are easily spotted the same way as chainrings. Look for widening of the pitch between the teeth, particularly in the middle five sprockets, and any other bent, missing or otherwise damaged teeth. Remember, though, that sprocket teeth aren’t uniform from new, with some lower and more twisted to provide you with faster and quieter shifts.
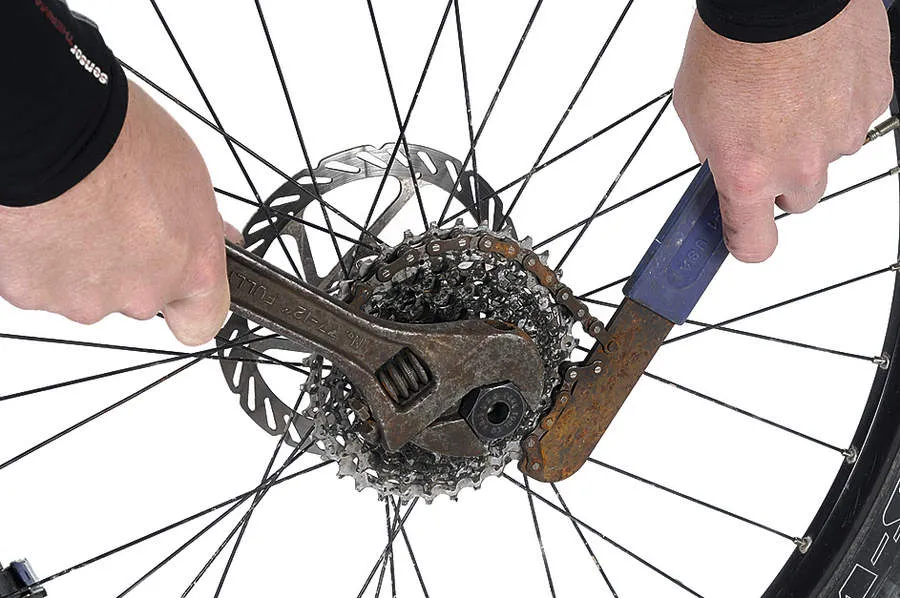
15. Remove cassette
Using a chain whip, cassette removing tool and a large adjustable spanner, remove the cassette as shown. Occasionally the cassette lock ring can be stubborn to remove. Rather than applying more pressure gradually, try applying some strong sudden force to the chain whip and spanner — this can often be effective in ‘shocking’ the lock ring free.
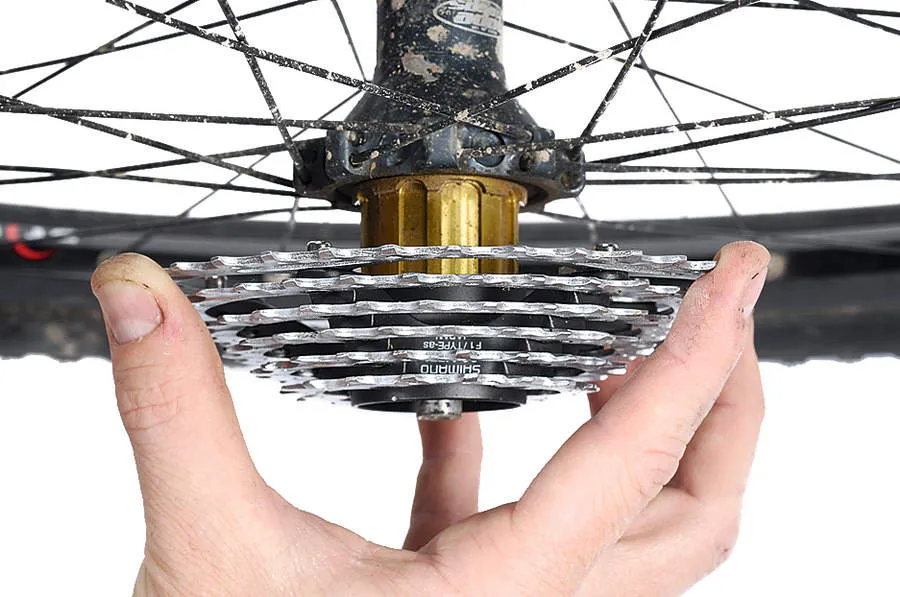
16. Fit cassette
Line up the narrow spine on the free hub body with the narrow spline on the cassette and slide them into position. The larger sprockets will be joined together; the smaller ones will go on singularly. Make sure you get them in the correct order and the right way around, and also ensure that the relevant spacers are in the right places. Replace and tighten the cassette lock ring to 14nm torque.
17. Replace jockey wheels
These little chaps do a sterling job to keep the gears working smoothly. However, they’re only plastic and they won’t last forever. They’re also prone to getting coated in chain lube, so they pick up a lot of gungey grime. This acts as a grinding paste and accelerates wear further.
TOP TIPS
- Clean the freehub body. You’ll very rarely see this hardworking component, so when you do, show it some love. You might also want to check it for wear, as sprockets can ‘eat’ into the splines, making them hard to fit and occasionally creak under load.
- Wear protective gloves. Oil and grease don’t add to the condition of anyone’s hands, so take a tip from the pro mechanics and use a pair of thin medical gloves. Park Tools make the best ones on the market (Nitrile mechanics gloves, £25 from Ultimate Pursuits).
- Treat yourself to a big adjustable spanner. We’re the first to argue the case for only using specialist bicycle tools when working on bikes, but we don’t feel at all bad in recommending that every home mechanic own a large adjustable spanner. Go for a 15in length and you’ll use it 50 weeks of the year.
