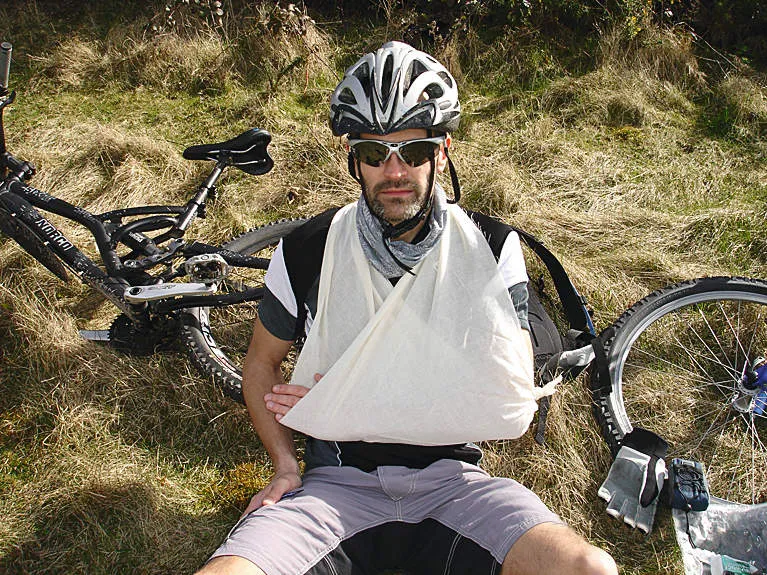
There are some inherent risks associated with mountain biking, especially when riding in isolated areas that are hard for the emergency services to reach.
You'll be much safer if you follow three simple rules: always tell someone where you’re going and how long you’ll be gone, try to ride in a group or at least in pairs, and always carry a first aid kit and fully charged mobile phone.
It's really important to have some basic knowledge of first aid, wherever you ride. We'd recommend doing a proper course, but in the meantime, here are some basic pointers.
What to put in a first aid kit
Making up a lightweight first aid kit is cheap and easy. You can buy the essentials in most chemists or from websites such as www.firstaidwarehouse.co.uk.
“Most off-road mountain bike accidents we see result in soft tissue injuries, with the occasional broken arm or collar bone,” says Dave Craddock, paramedic with South East Coast Ambulance Service. As a keen mountain biker and trauma management specialist, he recommends taking the following with you:
- 1 x size 1 ambulance dressing
- 1 x size 2 ambulance dressing
- 2 x sodium chloride (sterile solution for cleaning wounds)
- 1 x emergency aluminium blanket
- 2 x triangular bandages
What to do if you or a friend is injured on the trail
If the worst happens and one of your friends is injured out on the trail, follow the six steps below:
1 Stay in control: Never put yourself in danger – if in doubt dial 999 (in the UK – call 112 in the EU, 911 in the US, 000 in AUS). Stay calm – if an injured mate sees you going all quivery, it won’t do anything to help them. Take a deep breath and think what you’re going to do.
2 Key signs: Check whether the person is breathing (first priority!), unconscious, complaining of neck, back, abdominal or pelvic pain, or has an altered level of consciousness (unequal pupils, sleepy, slurred speech and so on). If any of these problems crop up, go straight to step 6.
3 Keep them laid still: Injuries and pain can speed up the heart. Get the person to lie down and help support their body. Stemming any bleeding is a priority – if they’re bleeding from an arm or a leg, get the limb elevated into the air. With very heavy bleeding, raise the person’s legs a foot or so off the ground to return blood to the heart, and call 999.
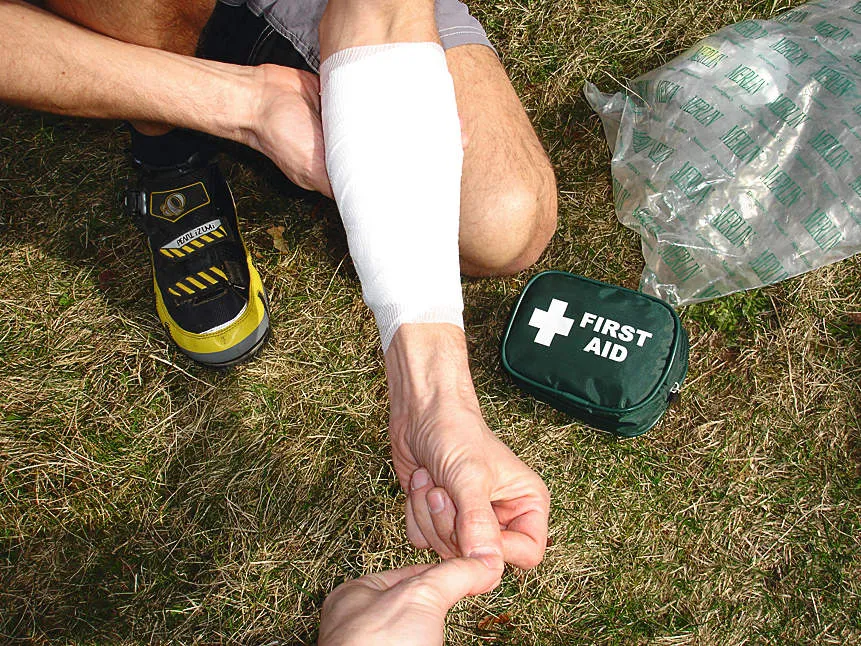
4 Dress any wounds: “Never apply a dry dressing to a wound,” says Craddock. Use a sodium chloride solution to wet the inside of a bandage and squirt it onto the wound to wash away any dirt, then press the bandage directly onto the injury and apply firm pressure. If applying to someone’s limbs, leave their fingers and toes exposed so you can check blood flow beyond the dressing. Do this by pinching the fingernail or toenail for five seconds – if it takes more than two seconds to return to pink, the dressing is probably too tight, so loosen it slightly. See below for more details.
5 Don’t let them move: Injuries any more serious than minor cuts or grazes need to be immobilised to prevent any further damage. The person will instinctively protect an injury by keeping it still. If they can’t do this themselves, an arm sling or leg splint are good basic ways of achieving this (see below for details). Again, wash and dress any wounds. Call 999 / 112 / 911 / 000 for help.
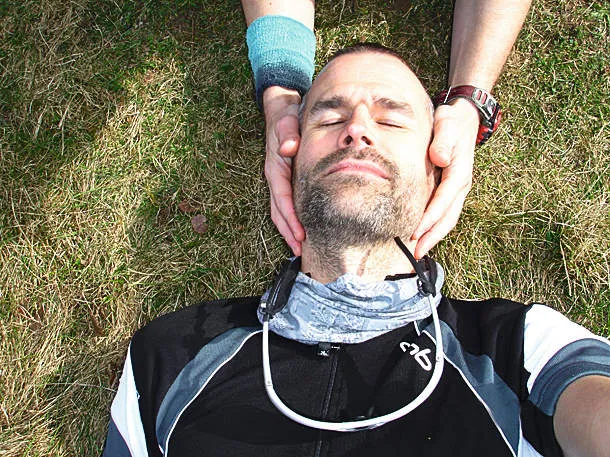
6 Dial 999: If it appears to be a serious injury, don’t move the person unless they’re unconscious, in which case, gently lie them on their side in the recovery position (see below) and check that they’re breathing. “Get someone to hold their head in neutral alignment (its natural position), using Manual In Line Stabilisation (see below). It’s what we do until back-up arrives,” Dave advises. If it’s cold, wrap them in the emergency blanket. Call 999 / 112 / 911 / 000 and ask for help. The operator will talk you through what to do if it’s serious or life threatening.
Here's how to carry out some of the most common first aid you're likely to need if you or a friend has an injury on the trail.
How to put someone in the recovery position
1 Kneel next to the person and straighten both their legs.
2 Open their airway by lifting their chin.
3 Place the arm next to you at 90 degrees to their body, with the elbow bent with palm facing up, as if they’re waving.
4 Bring their other arm across their chest and hold the back of the hand against the cheek nearest to you.
5 With your other hand, take hold of the leg furthest and bend it at the knee, keeping the foot on the ground.
6 Making sure that their hand is still on their cheek, pull on the leg towards you, this will roll them over onto their side.
7 With your hand still on their leg, adjust it slightly so that their knee and hip are both at right angles.
8 Tilt their head back to ensure their airway remains open.
9 Check their breathing and pulse regularly and wait for help to arrive.
---------------------------------------------------------------------------------------------------------------------------------
Manual In Line Stabilisation (MILS)
1 If the person is complaining of neck pain, or has numbness, pins and needles or unusual sensations anywhere, call 999.
2 Without moving them, kneel or lie at the head end of the person.
3 Place your hands gently on either side of their head, with your elbows resting on the ground.
4 Hold their head in its natural position. What you’re doing here is immobilising the neck to prevent any further damage.
5 Keep talking to the person and reassure them to keep them calm.
-------------------------------------------------------------------------------------------------------------------------------
How to make a sling
1 Take a triangular bandage, open it right up and lay it flat on the ground.
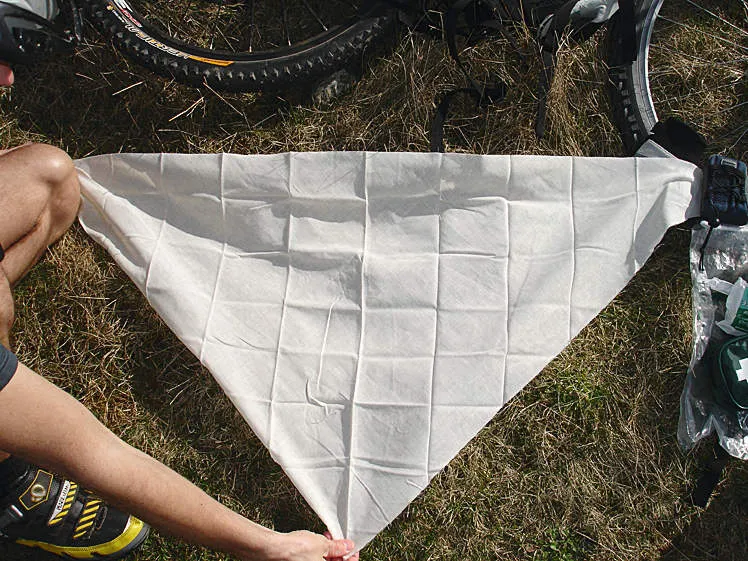
2 Tie a small knot with the tip of the triangle, this is where the person’s elbow will go.
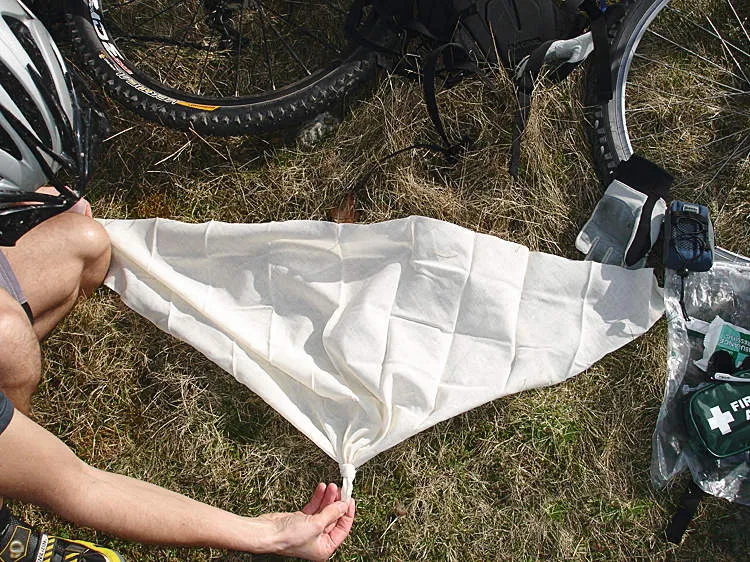
3 Have the person hold their arm, they’ll probably be doing this naturally anyway to soothe the pain they’ll be in.
4 Carefully take hold of the point of the sling in one hand and the knot in the other.
5 Gently slide the point of the sling under the person’s arm and the knot behind their elbow.
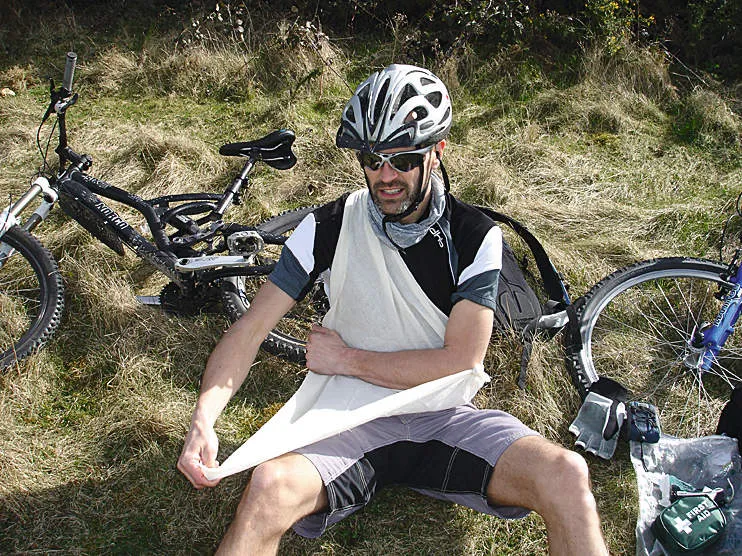
6 Pass the point up behind their neck, it should be on the same side as the person’s hand.
7 Pass the other point over the arm and up across the body towards the shoulder.
8 Tie the two ends of the sling in a bow, either on the left or right of the neck to avoid pressure on the spine.
-------------------------------------------------------------------------------------------------------------------------------
How to dress a wound
1 Clean the injured area and wet the dressing.
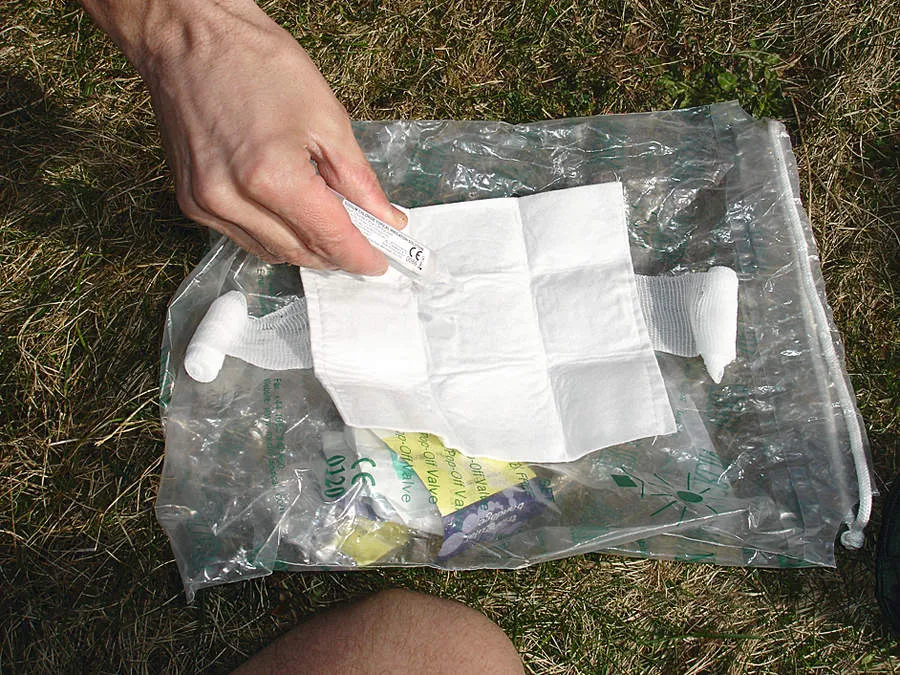
2 Apply direct pressure with the dressing.
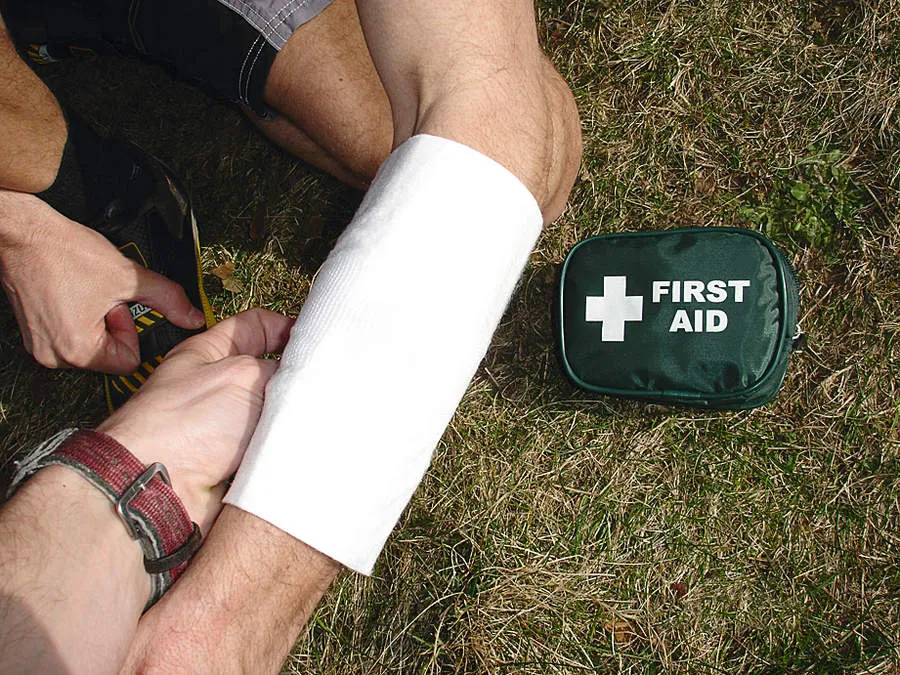
3 Wind the ends of the bandage around the gauze dressing, overlapping each end by 2-3cm and tie together in a bow.
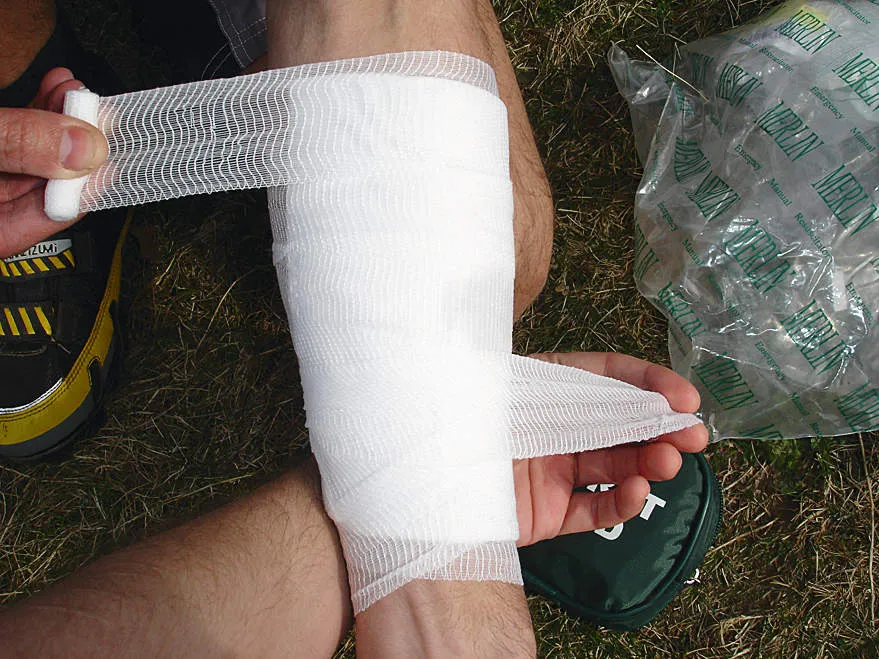
4 Keep the wound elevated higher than the heart if possible.
-------------------------------------------------------------------------------------------------------------------------------
How to immobilise a wounded leg
1 If you think the person may have a fractured leg, or if they can’t be moved, dial 999 immediately.
2 Then, open up the triangular bandages and pass them under the natural hollows of the knees and ankles.
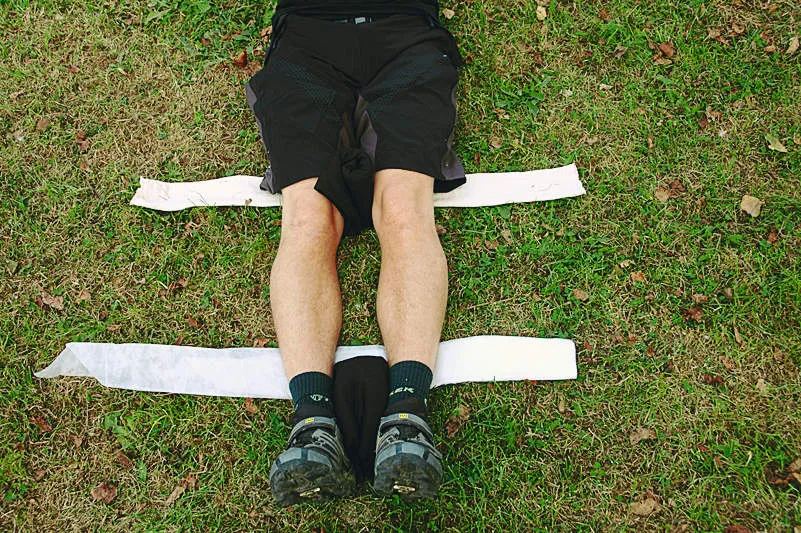
3 Carefully strap the legs together, being sure not to tie the bandages over the injury site or the knees. The idea is to keep the injured leg immobilised, by securing it to the uninjured one.
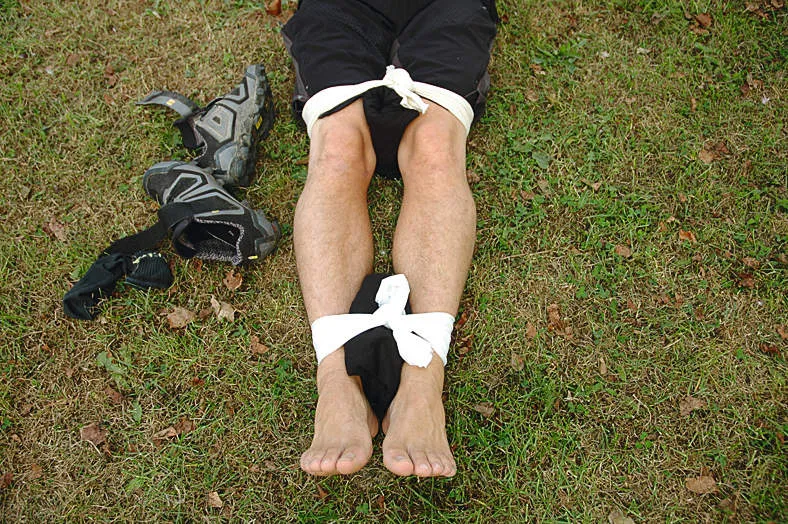
4 Remove shoes and socks and check the blood low to the feet.
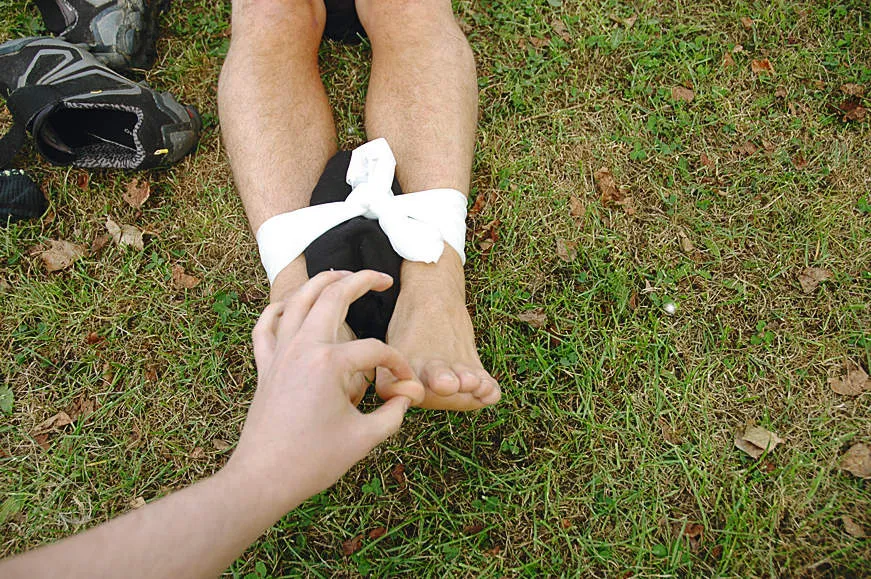
5 Keep the person warm with the emergency blanket, or they'll soon start to get cold.

