In our Tech Q&A series, we tackle cycling queries – no matter how minor or maddening – with help from the BikeRadar team and trusted industry experts. Next up, a reader who’s sick of chasing micro-bubbles around his rims.
I can’t quite get my tubeless tyre to seal. Most of it pops into place, but I can see leaks around parts of the rim when I brush on soapy water. How do I get it to seat fully?
Felix Jones
Few workshop jobs swing so violently between smug satisfaction and nuclear-grade despair as setting up tubeless tyres. When they seat first time, it’s pure magic; when they don’t, you’re often forcing a flatulent floppy bead into submission, or chasing frustrating farty bubbles around the bead.
The latter is among the most annoying tubeless problems, where most of the bead has snapped into place but one stubborn section refuses to seal.
But don’t panic. In many cases, you’re only a small tweak away from a fully seated, airtight setup.
Pile on the pressure

Sometimes, the answer really is brute force.
If the bead is almost there, a small increase in pressure can be enough to push it up onto the bead shelf.
It goes without saying, but don’t exceed the maximum pressure printed on the tyre or specified by the rim manufacturer.
However, you’ll often find that going slightly higher than your ideal riding pressure helps everything pop fully into place.
Kink shame

If the tyre has been folded in packaging for months (or years), it may have developed small kinks or flat spots in the bead. These can prevent sections from sitting properly against the rim.
Before mounting, try massaging the bead to smooth out any obvious distortions. If the tyres have been stored in a cold shed, MBUK TV presenter Tom Marvin advocates leaving them unrolled in a warm room for a while to help them relax back into shape.
Often, once the casing settles and sees a bit of pressure, those imperfections disappear and the bead seats cleanly.
Scrub up
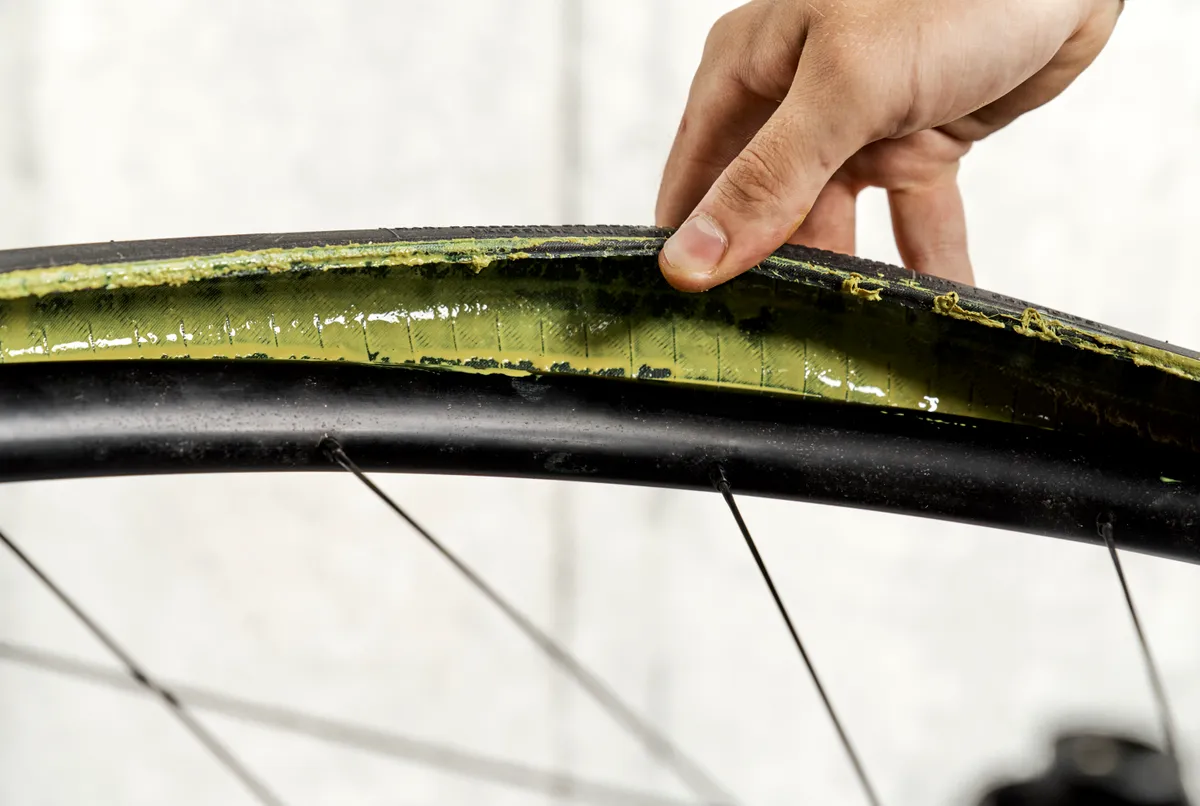
Old, dried sealant on the bead seat is a common cause of persistent weeping – from bike and eyes.
Remove the tyre and inspect the rim closely. Scrape off any crusted sealant and wipe the bead seat with isopropyl alcohol or a clean rag. A bit of dish soap and a gentle scrub can loosen up any crusty lumps.
Even small lumps can prevent the bead from sitting evenly, creating tiny air paths that show up immediately under soapy water.
While you’re there, check the rim tape for wrinkles or damage.
Call in the suds
A light coating of soapy water around the bead is often the simplest and most effective trick.
It lubricates the interface just enough to enable the bead to slide into position as pressure builds.
You don’t need much – just a thin film. As the tyre inflates, the bead can move more freely and settle evenly against the rim wall.
Some riders prefer using glass cleaner for the same purpose, because it evaporates quickly and leaves minimal residue.
Even if it doesn’t work, the steady stream of bubbles will, at least, indicate where everything is going wrong.
What about bead lubricants?
Some riders use dedicated silicone bead lubricants designed for car or motorcycle tyres. In theory, these can help stubborn beads seat more easily.
We don’t have first-hand experience of using these on bicycle tyres, so it’s worth researching carefully and, ideally, checking with your tyre manufacturer first.
We’d suggest using grease rather than a spray, because aerosols can easily contaminate braking surfaces.
Be cautious with oils or general-purpose lubricants because petroleum-based products can degrade rubber compounds over time.