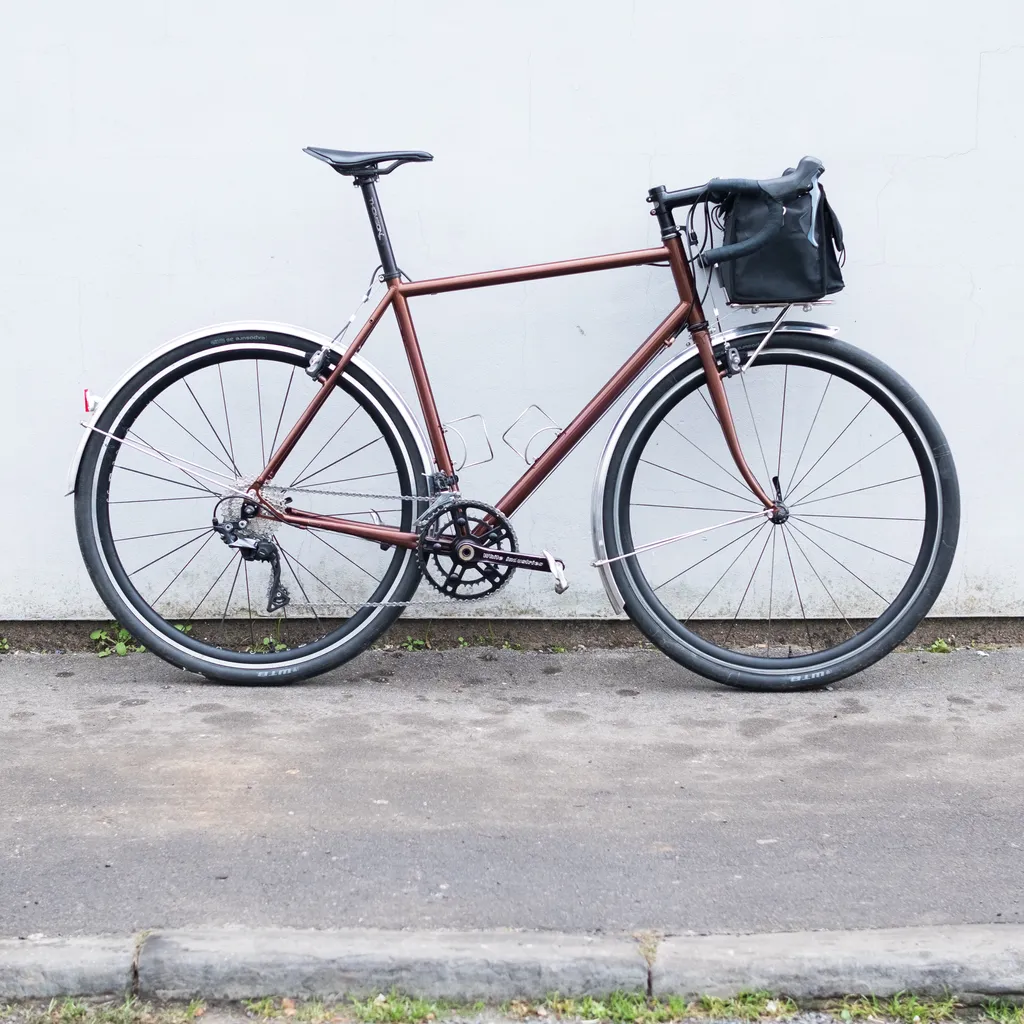
‘Brown Bike’ is my vision of the perfect horizon-chasing multi-surface slaying adventurous overnight-trip specific road bike.
Built by Stuart Allan, the man behind BrocBikes and a former welder for Shand Bikes, it is my first all-custom bike.
Based on the geometry of my old All-City Mr Pink road bike, Brown Bike pairs gravel-bike style wide tyre clearances with a relatively brisk ride.
Brown Bike has also inherited most of its parts from the Mr Pink, resulting in a pleasingly familiar bike.
The bike is also, crucially, brown – I have always wanted a brown bike and my dreams have come true.
In this edition of BikeRadar Builds, I outline all the details of my new bike in excruciating detail.
I also answer some of your questions as posed on Instagram. Proceed with caution – things are gonna get nerdy.
Brown Bike is for me and me alone
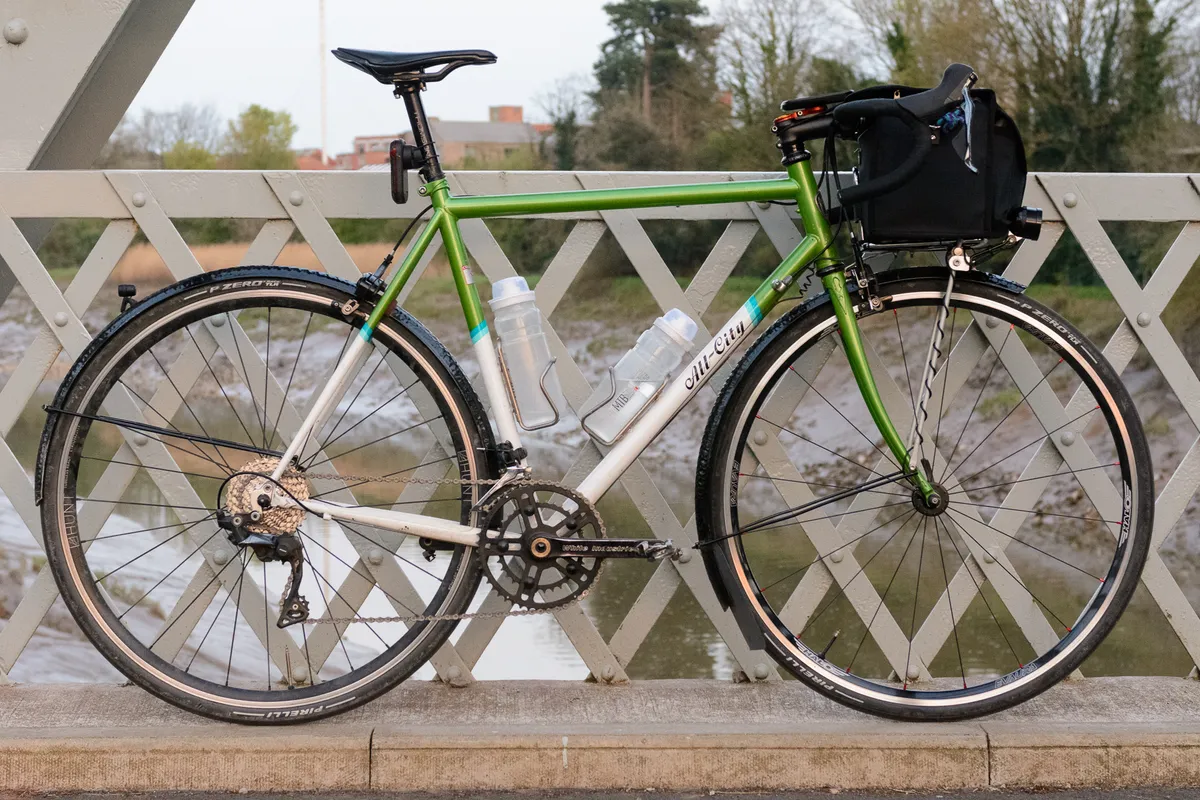
The All-City Mr Pink is an excellent road bike with generous tyre clearances – a gravel bike it is not.
That didn’t stop me from riding the bike on wildly inappropriate terrain and stuffing the biggest tyres possible into its 45mm-wide mudguards.
This had predictably frustrating consequences – it was while fixing the second puncture in a kilometre on a gravel road in Wales that I decided I needed a new bike.
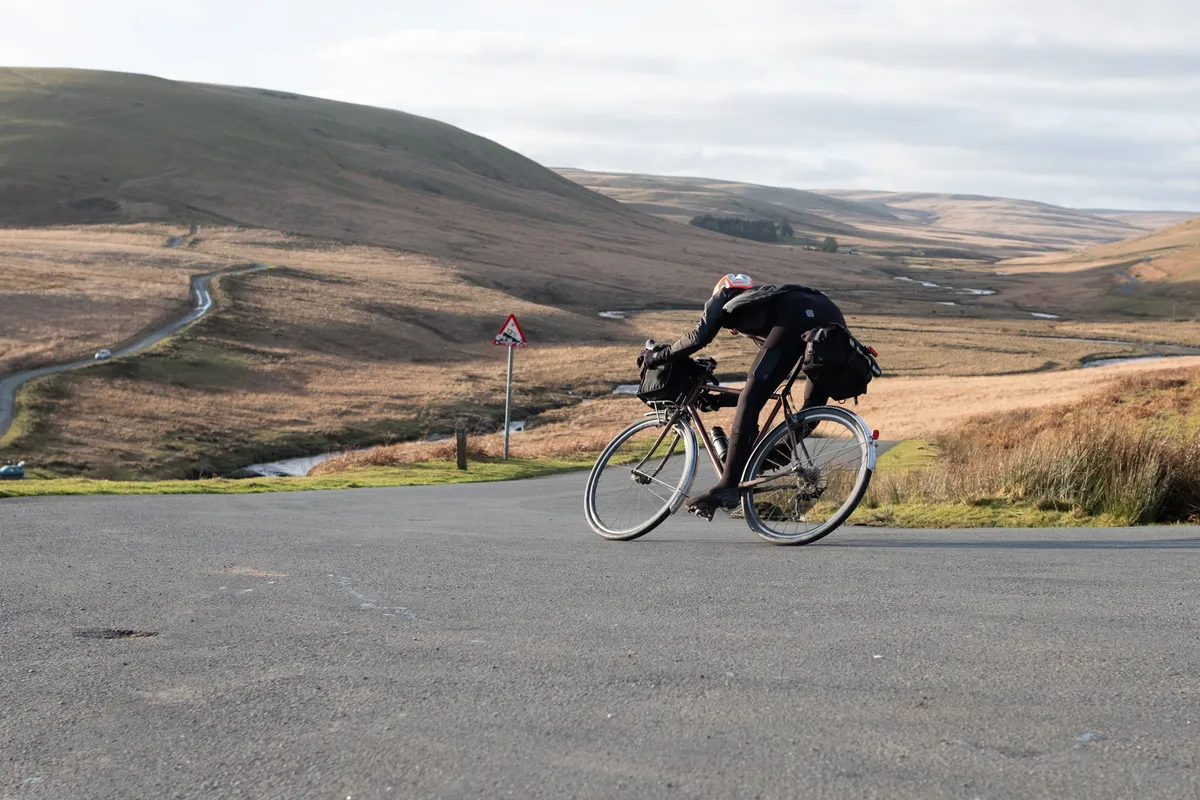
With Brown Bike, I wanted to create a comfortable all-road platform with provision for dynamo lighting, full-cover mudguards and mounts for light luggage.
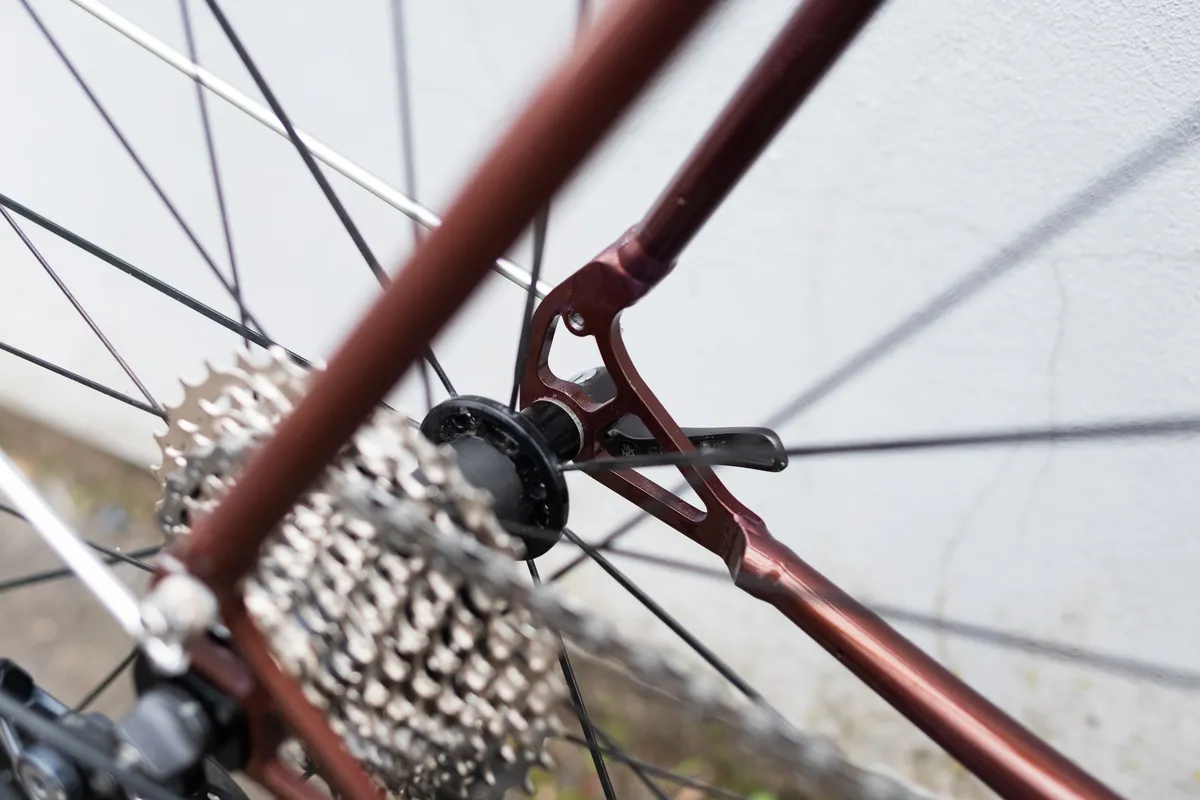
While a few bikes in serial production offer similar features to Brown Bike, the opportunity to commission a bespoke bike at a good price was too appealing to pass up.
With Stu’s input, we settled on a frameset constructed from Columbus Zona tubing. Highlights include the Bear Frame Supplies Standard Steel Replaceable Hanger dropouts and biplane-style Pacenti Brevet fork crown.
Why choose rim brakes in 2024?
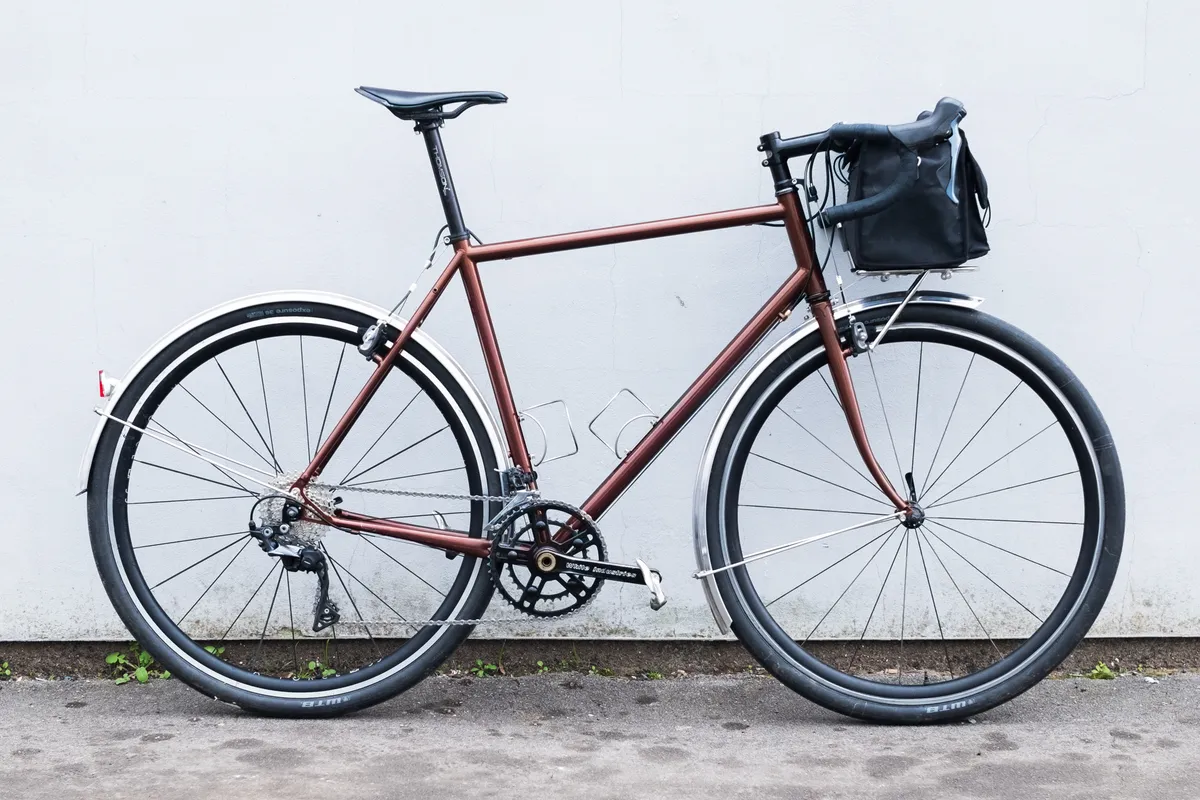
As you can see, I opted to spec the bike with rim brakes – an unusual choice for 2024, given the dominance of disc brakes for adventure bikes of this ilk.
I chose rim brakes for pragmatic, practical and personal reasons.
Starting with the pragmatic, I’ve ridden rim brake road bikes for years. In that time, I’ve amassed a pile of nice parts. I’m also satisfied rim brakes are sufficiently fine for the riding I have in mind for this bike.
Thus, I saw no point in spending cash to replace perfectly good components for a marginal upgrade.
As for the practical, steel disc brake forks are typically less compliant than rim brake forks.
Generally speaking (very generally), a steel disc brake fork must be constructed using tubing that is either broader in diameter or with thicker walls, than a steel rim brake fork. This helps the fork withstand the twisting forces caused by braking, but results in a harsher ride.
Because rim brakes are mounted at, or near, the crown, the fork blades are not subjected to asymmetrical twisting forces. This means they can be built with more compliant tubing.
Tyre choice and pressure will always have the greatest impact on the comfort of a bike, but the pleasing springiness of a skinny steel fork feels terrific.
Finally, I think rim brake bikes look cool, and there’s nothing wrong with admitting that.
The elegant lines of skinny steel tubing paired with visually unobtrusive brakes tickle my pickle.
I decided on Shimano’s CX50 cantilever brakes for Brown Bike. I fancied a set of Paul Components Neo-Retro brakes but baulked at their $133 (per brake!) price tag.
It had been years since I set up cantilever brakes, so it took a while to get the toe-in dialled. The stock one-piece pads also resulted in a horrible squishy lever feel.
But once I swapped these for cartridge pad holders salvaged from an old set of Shimano brakes and bedded the pads in, they felt great.
Cantilever brakes don’t have the outright power of disc brakes but, even when riding in wet conditions off-road, they are sufficiently stoppy.
A carefully curated hodge-podge groupset that has stood the test of time
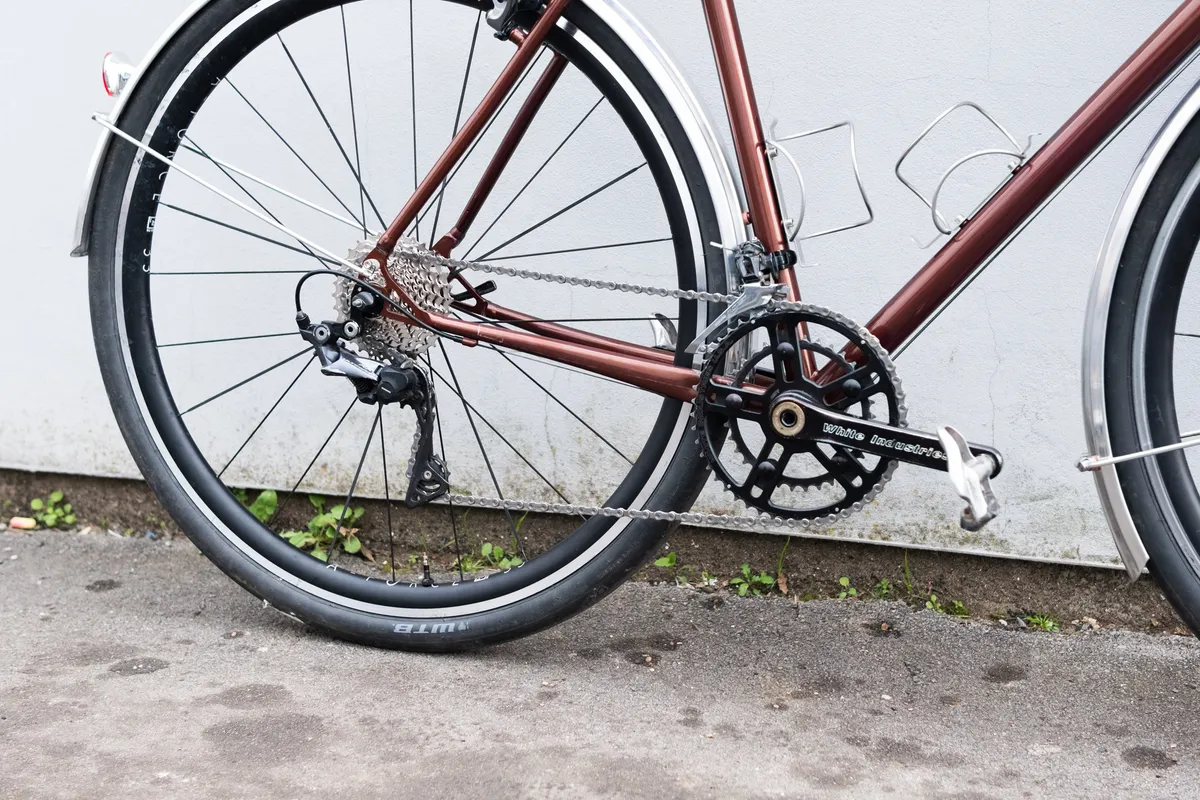
The rest of the Brown Bike’s build came from my old All-City Mr Pink.
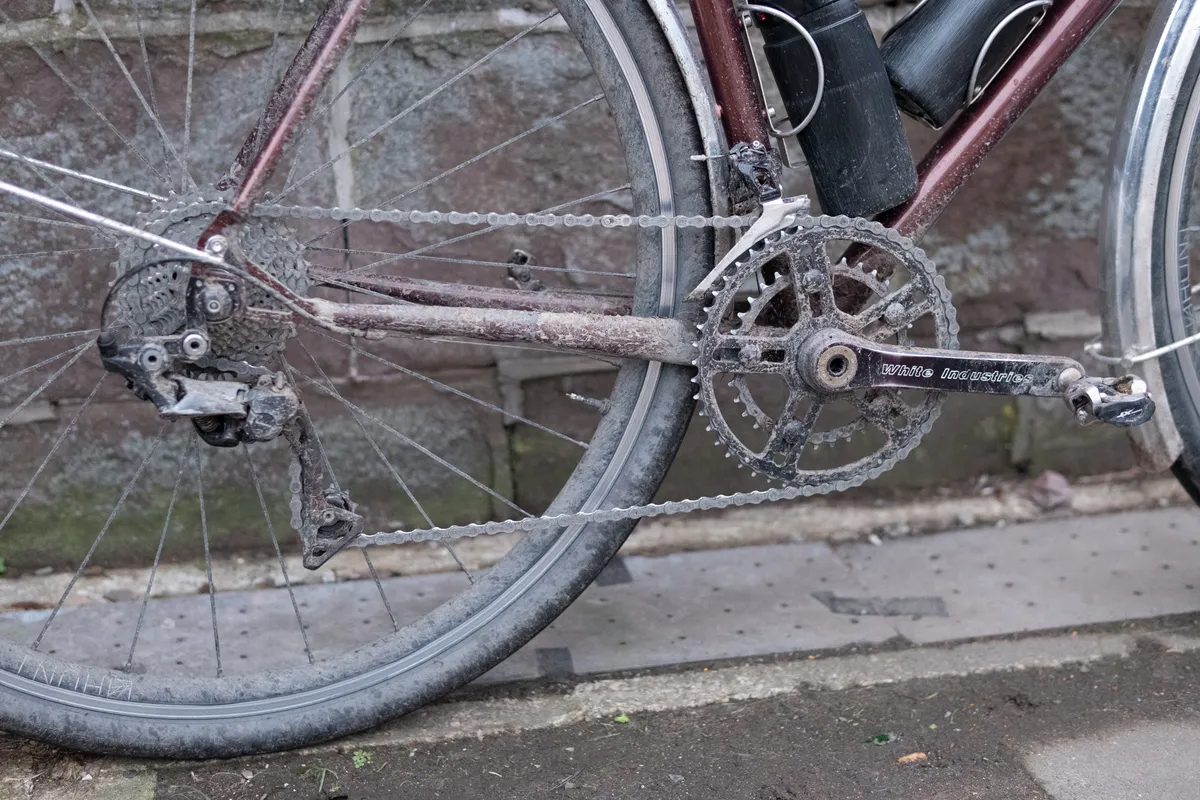
The drivetrain comprises a White Industries R30 crankset, Shimano Ultegra RX derailleur and Dura-Ace shifters.
I’ve fitted the White Industries crankset to three bikes since 2017.
The crankset uses a clever design. The outer chainring mounts to the crank arm using a splined interface. The inner chainring then mounts via sliding nuts. While I’ve stuck with the original 34/44 combo, this design enables you to run any size inner chainring you wish.
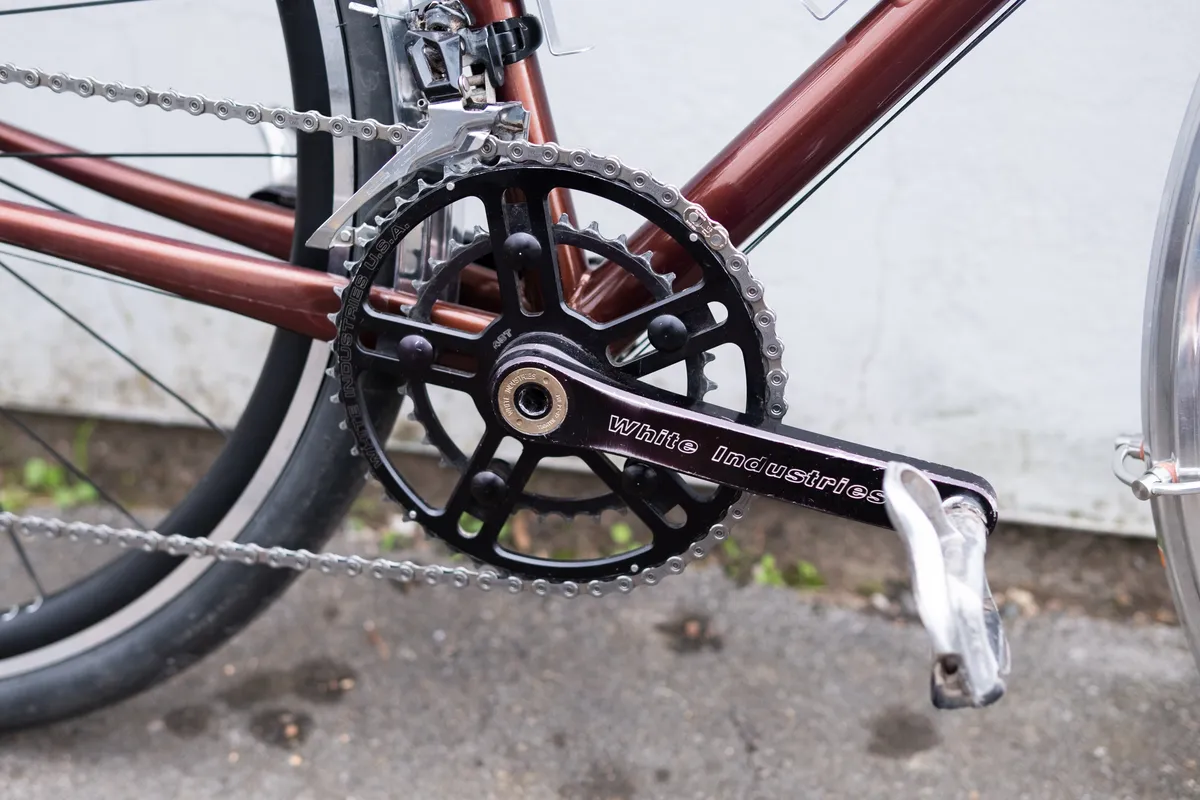
The crankset spins on an Enduro Bearings MaxHit BB. This uses the external cup of the bottom bracket as the outer race of the bearing, enabling Enduro Bearings to spec larger ball bearings and improve sealing.
Like the crankset, the Ultegra RX derailleur has been swapped between a few bikes now. I like a clutch-equipped derailleur, even for road riding, because they reduce chain slap and improve chain retention.
The Dura-Ace shifters are a daft and unnecessary indulgence – 105 would have been a far more appropriate option. I have, at least, damaged them symmetrically, having now crashed onto the driveside and non-driveside of the two bikes these have been fitted to.
The 44/34t crankset is paired with an 11-32t cassette. I should have specced an 11-36t cassette for sub-1:1 gearing but… well this is what I had in my box of spares.
Knackered wheels and versatile tyres
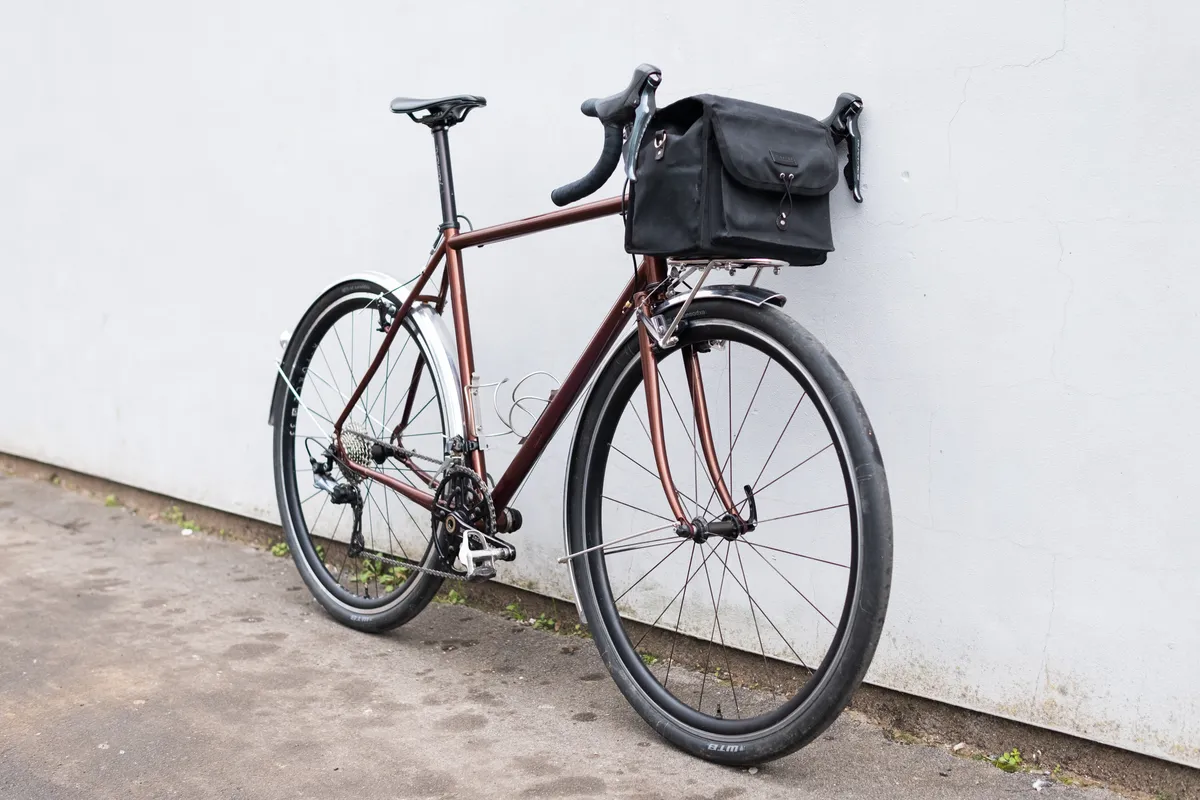
The rear wheel is a stock Hunt 4 Season Aero. The front is a bespoke build with a SON Deluxe dynamo hub laced to a matching rim. Both rims are nearing the end of their life and will soon be replaced by something a little wider.
Note some of the photos show the bike built with an AForce wheelset, which I initially built the bike with.
I started with a pair of 36mm-wide WTB Exposure tyres, but have since swapped to 40mm WTB Byways in preparation for some Gravel Lite™️ adventures. These are, of course, set up tubeless.
I’ve paired both setups with Vittoria Air Liner Gravel tyre inserts. I’m undecided on whether or not I like these.
They calm the handling on bumpy terrain and I can belt the bike into a kerb carefree, but feel they may be impacting cornering stability. More testing is required.
Bar-bag optimised finishing kit
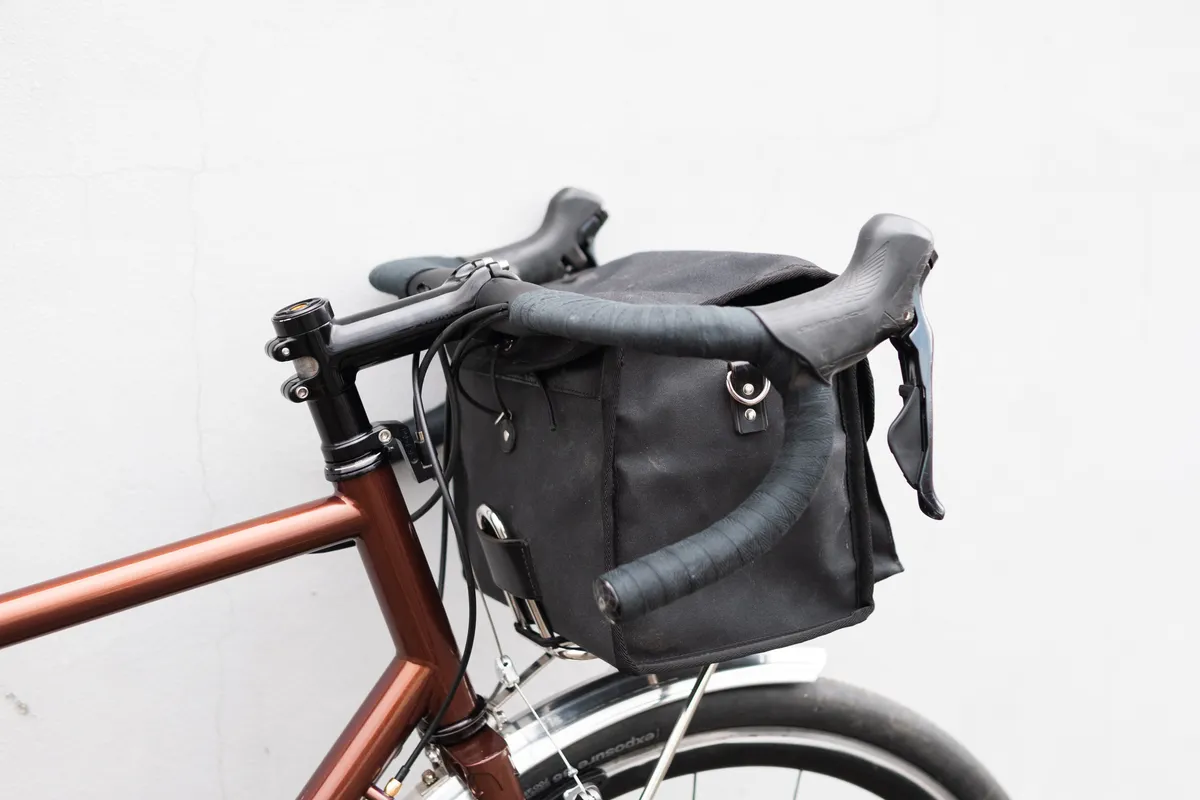
The finishing kit has also been inherited from the Mr Pink.
At the centre of this is the Bontrager Elite Aero VR-CF handlebar.
A narrow alloy handlebar with aero tops and internal cable routing may seem like an unusual choice for a grotty trundle wagon, but there’s a rationale behind the choice.
The exceptionally long 93mm reach of the Elite Aero VR-CF bar means I can use a shorter stem for an equivalent saddle-to-hoods position.
This results in the tombstone (the supporting strut located at the back of the rack) aligning with the faceplate of the stem, so the back of my bar bag is positioned squarely with the cockpit. This means I can lash the bag to the bars when required for a more stable fit.
Tucking the cables away inside the bar also prevents them from fouling the bag.
Despite the fact it’s horribly uncomfortable on rough roads, I refuse to give up on cotton bar tape – it looks so cool!
My sensitive editor’s hands also hate the clammy feel of synthetic tape when sweaty. Cotton tape, by comparison, is comfortable in all conditions.
I’ve already professed my love for the Pro Stealth saddle at length, so to see another one specced here is no surprise.
Accessorise me
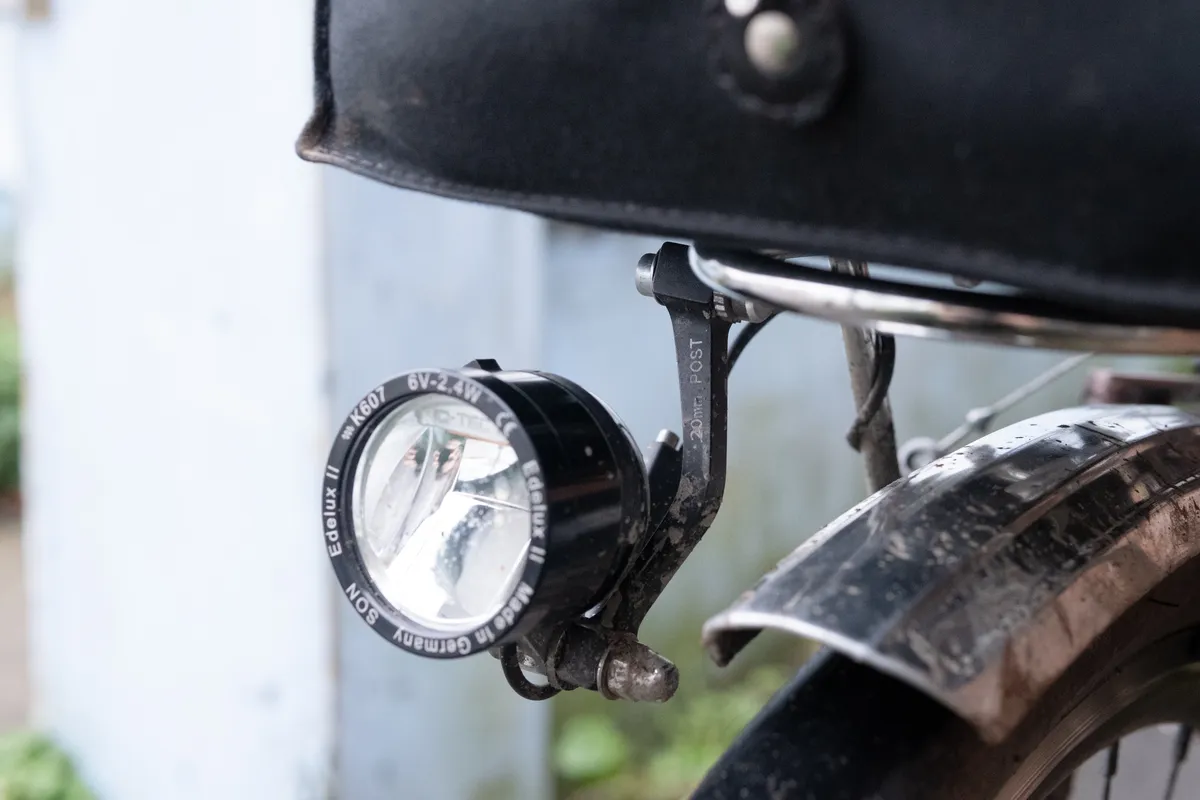
Mudguards, racks and dynamo lighting were musts for this bike.
Velo Orange alloy mudguards take a few hours to fit well, but the pay-off is great. They are far sturdier than plastic guards, silent and can be repaired.
The neat little front rack is also from Velo Orange. This second-generation rack features an adjustable tang, which makes it far easier to fit than the fixed tang of old.
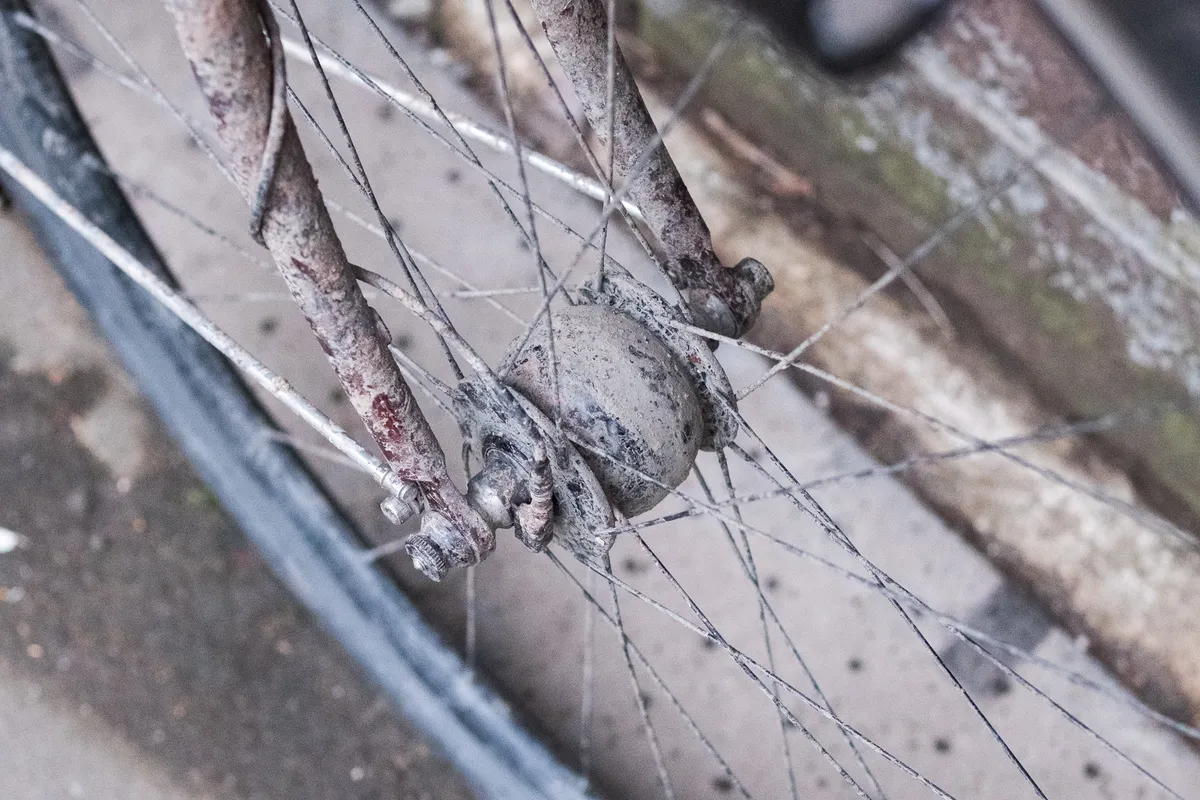
The SON Edelux II dynamo headlight is swapped between three of my bikes (I really ought to buy another).
I have used a fair amount of dynamo kit and rate SON’s the highest – it’s slightly more expensive than most of its competitors but is, in my experience, the most reliable.
The bike I’ve always wanted
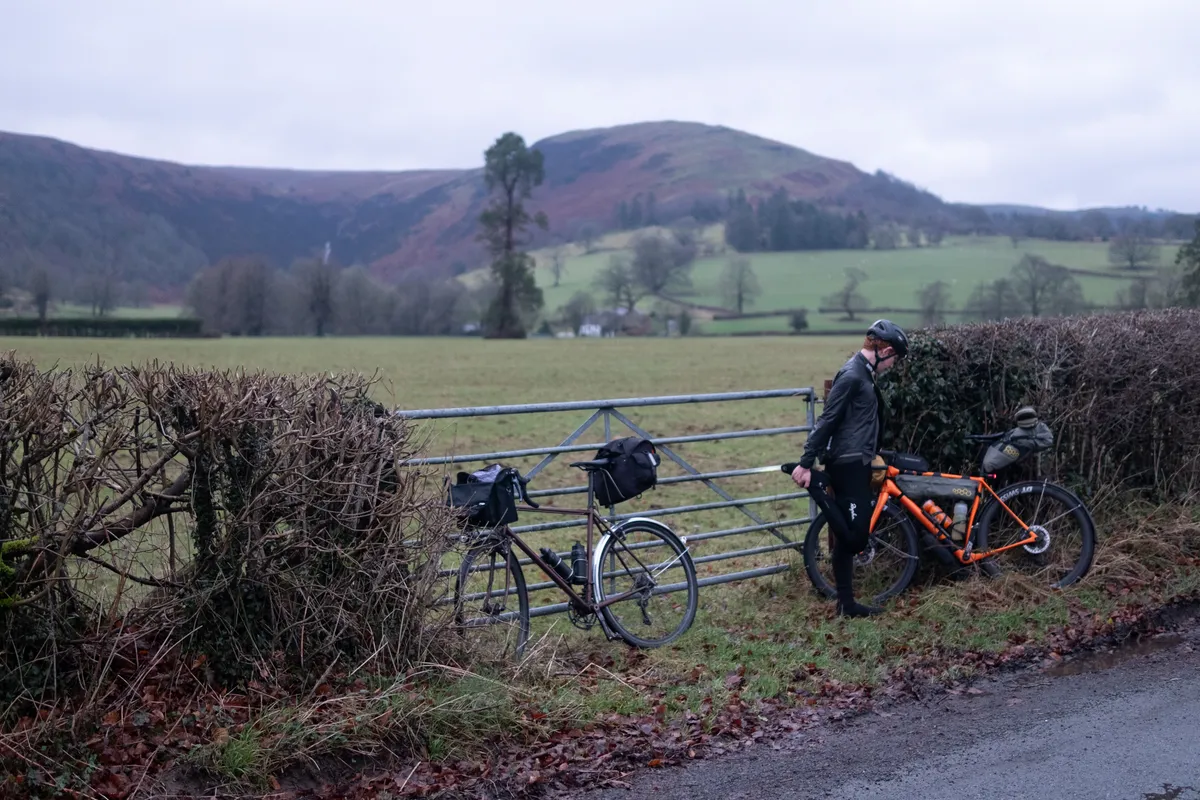
After a protracted build, I finally finished the bike in January of this year.
I inaugurated the bike with a wonderful three-day jolly around mid-Wales with BikeRadar’s very own Felix Smith.
Taking in beautiful roads, horrible hike-a-bikes and light-gravel diversions between cheap accommodation, this is exactly the sort of riding I had in mind for Brown Bike, and it excelled.
I spent too long jamming sticks into the Mr Pink’s mudguards trying to dislodge layers of mud. Despite dragging the poor thing through hub-deep bogs, Brown Bike’s wheels continued to spin freely through the generously roomy mudguards.
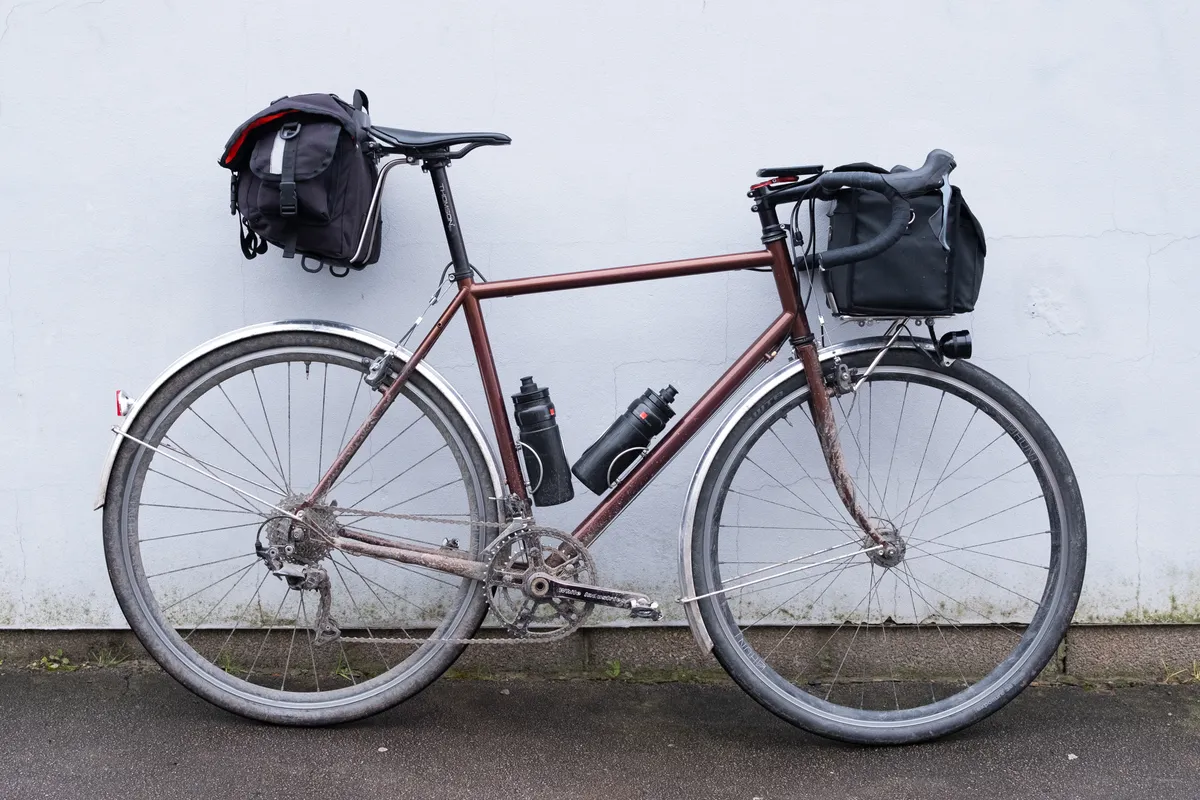
Even with the Carradice saddle bag fitted, the bike feels stable. If I’m ever riding with a heavier load, I can supplement the Bagman rack with supporting struts fitted to eyelets on the seatstay positions specifically for this purpose.
I've also appreciated the ability to swap tyres to suit my mood. I reckon I can squeeze in a slick 45mm-wide tyre at a push.
Overall, I’m delighted with my brown dream wagon. Commissioning and building a custom bike was also really fun – far more exciting than any other bike I’ve built.
Here’s to many years of sparkly brown adventures.
Jack Luke's custom BrocBikes all-road bike
- Frameset: Custom BrocBikes frameset, Columbus Zona tubing
- Rear derailleur: Shimano Ultegra RX
- Crankset: White Industries R30
- Shifters: Shimano Dura-Ace R9100
- Brakes: Shimano CX-50
- Wheels: Hunt 4 Season Aero w/ SON Deluxe front hub
- Tyres: WTB Exposure, 36mm/WTB Byway, 40mm
- Stem: Specialized S-Works Alloy, 110mm
- Bars: Bontrager Elite Aero VR-CF
- Saddle: Pro Stealth Superlight
- Seatpost: Thomson Elite
- Mudguards: Velo Orange Alloy with SimWorks x CatEye reflector
- Bottle cages: Hulsroy Bottle Cages
- Rack: Velo Orange Randonneur front rack
Jack’s Brown Bike – your questions answered
I invited BikeRadar’s Instagram followers to ask any questions about my bike. While I’d love to respond to them all, I was overwhelmed by your interest in this daft bike. Here’s a selection of some of the best questions.
Lasagna4dinner asks…
Why not go for 650b wheels?
On the face of it, 650b wheels would be a good choice for this bike. However, the availability of high-quality tubeless 650b tyres is limited compared to 700c tyres.
Also, as mentioned, I have mountains of perfectly good 700c components, including more tyres than I’ll ever realistically wear out in my lifetime.
While I’d like to ride a classic 650b randonneur bike one day, frugality and pragmatism overruled here.
Gershon_P asks…
How did you settle on the geometry? I feel so lost when reading those charts
This is an unhelpful answer but, primarily, through experience.
I’m fortunate to have ridden many bikes. And, with that experience, I knew exactly what I wanted from the bike in terms of ride quality.
If you aren’t similarly blessed with countless bikes, a bike fit is the best place to start.
The ride characteristics of any bike matter for nowt if it doesn’t fit you.
With that information in hand and, ideally, with an example bike you can point to, an experienced bike builder will be able to realise your vision in steel.
gareth_lunn asks…
Can you take it off any sweet jumps?
If by sweet jumps you mean hopping off 6in kerbs and worrying about the contents of my bag ejecting onto the road, yes.
Matthew.john.k asks…
Were you tempted to use full silver components?
Yes! I dithered endlessly about this, swinging wildly from building new wheels and buying new finishing kit to making do with what I had.
In the end, a mix-up resulted in me ending up with these silver guards, and I took the plunge mixing black and silver components – usually a bike build no-no in my eyes.
The resulting build works far better than I hoped, and I’ve enjoyed the admiring comments directed at my shiny guards.
Fill.liggett asks…
What do you keep in your bag?
For day-to-day riding, I pack snacks, spares, a repair kit, a camera and, almost always, an insulated jacket into my wonderful bespoke C. Brenn bag. I can’t express the delight of thrilling smugness I get when stopping at a cafe with a down jacket to pull on.
However, bear in mind I built this bike with the dream of taking it on light overnight jollies. I much prefer the ease of use offered by a boxy rando bag for this type of riding compared to contemporary stuff-sack style bikepacking bags.
christ_of_matt asks…
Why not use mini V-brakes?
Great question!
A bit of background: ‘full-size’ (long-pull) V-brakes, as used on mountain bikes of old and some modern touring and hybrid bikes, use a different cable-pull ratio compared to cantilever or caliper road brakes (short pull).
Mini V-brakes are, as the name suggests, a smaller version of a conventional V-brake. The reduced arm length means the cable-pull ratio is the same as, or similar to, short-pull brakes.
This comes at the expense of reduced clearance, with the straddle cable sitting closer to the tyre.
Because I intend to run wide tyres and full-cover mudguards on this bike, I wasn’t convinced mini-Vs would provide sufficient clearance, so I opted for cantilever brakes.
As an aside, we have a set of ‘full-size’ Shimano XT V-brakes on our tandem. They are tremendously powerful and easy to set up. If they were compatible with these shifters, I wouldn’t think twice about using them.
Simonvonbromley asks…
Why brown and when are you going to slam that stem?
You have been reported to human resources for internet bullying.


