Reader writes: Swapping disc brake rotors is a pain — any reason why I shouldn’t use a drill to speed things along?
The short answer to this question is no.
The long answer is that you should be mindful of your mechanical aptitude, lest you wind up with stripped bits.
(A third answer: Life would be much easier if Shimano’s Center Lock design was an open standard…)
Few parts of a bicycle require the use of a power tool, hence some home mechanics’ reluctance to employ one for a bicycle-related repair. But rotor installation and removal is far from rocket science. Of course, you’re dealing with the spinning steel discs that you rely on to bring you to a stop, so you should still proceed with a bit of respect for the task at hand.
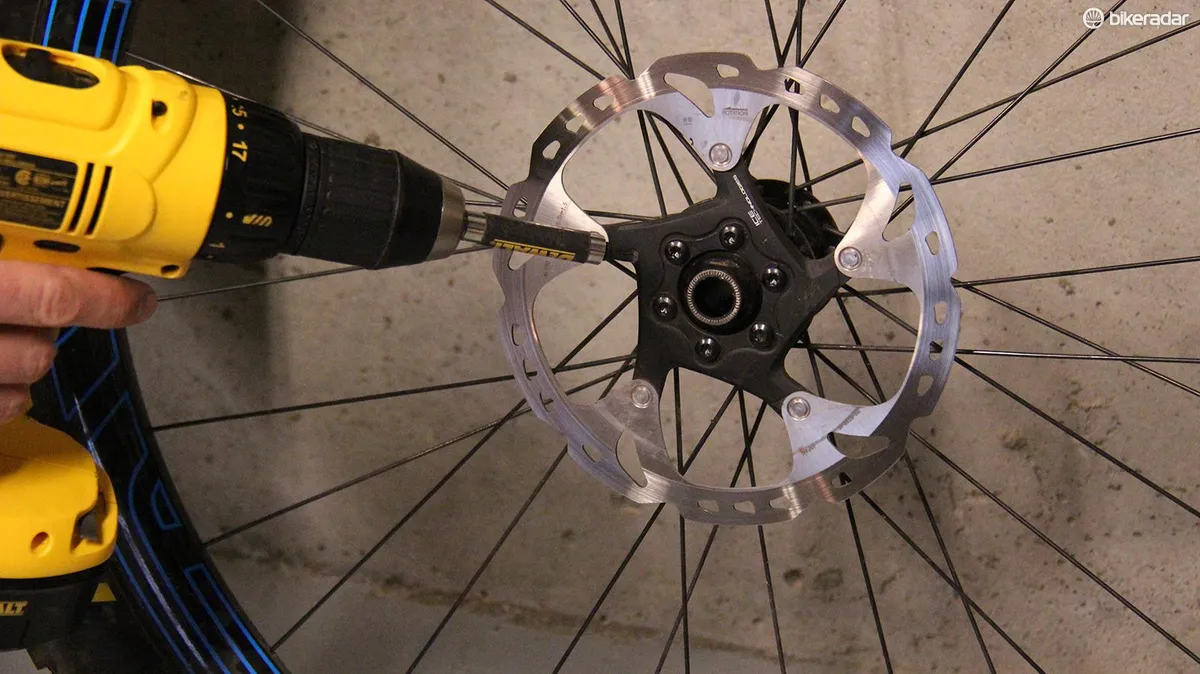
Changing a disc brake rotor with an electric drill
Level of difficulty: Easy
Time required: 5 min
Tools needed:
- Drill with an adjustable clutch
- Torque wrench
- T25 bit
Start off by setting up your drill for disc-brake duty. Acquire a quality T25 torx bit. I can’t stress this enough: don’t use cheap bits. The few dollars you save will come back to bite you with broken bits and striped bolts.
Use a drill with an adjustable clutch (also called variable speed) so you don’t risk over-tightening or stripping the bolts.
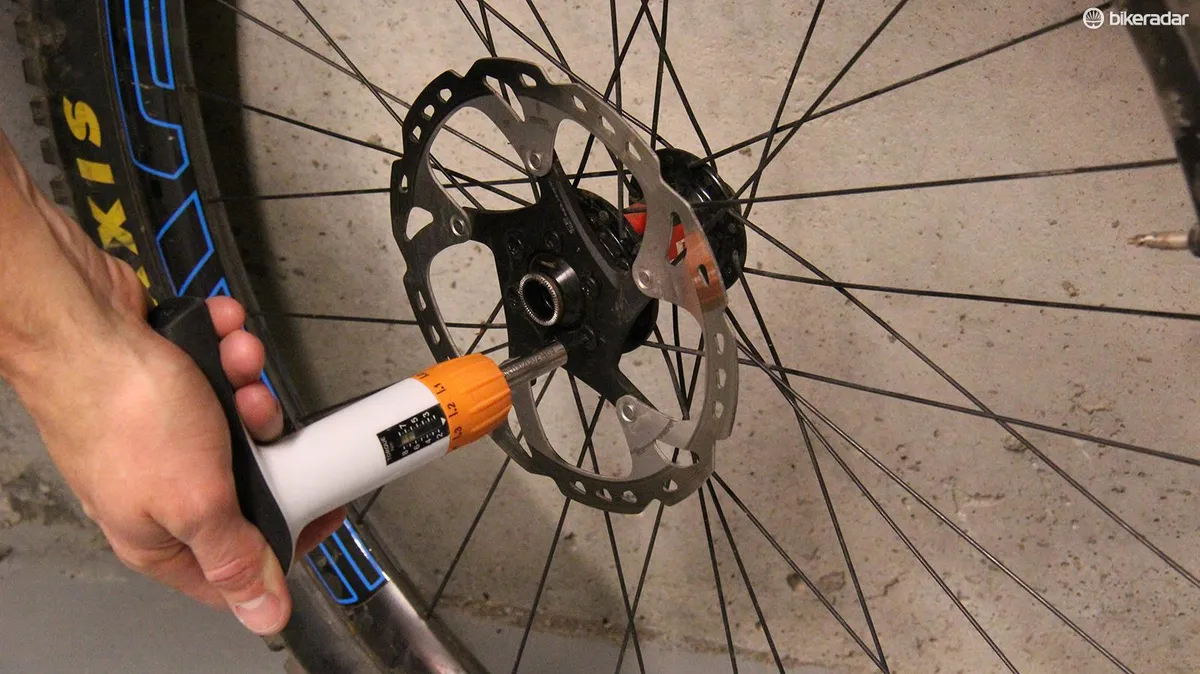
Before you actually tighten down the bolts, use the variable clutch adjustment to find the setting on the drill that matches up with the recommended torque for your rotor bolts. Like most other fasteners used on your bike, rotor bolts have a recommended torque. SRAM/Avid states that its rotors should be tightened to 6.2nm (55 in lb), while Shimano recommends 2-4nm (18 - 35 in lb) for its rotors. Unlike seatpost binder bolts and stems, getting it close enough will be good enough, so long as you don’t go overboard.
Start with the clutch set in the lowest setting and work your way up until you reach the recommended torque for your rotors, use a torque wrench to check the torque as you go.
Be sure you check the torque as you install your rotor bolts
Once you find the power setting on your drill that corresponds to the recommended torque for your bolts, make a mark on the setting or dial, so you can quickly find it the next time you need to swap rotors.
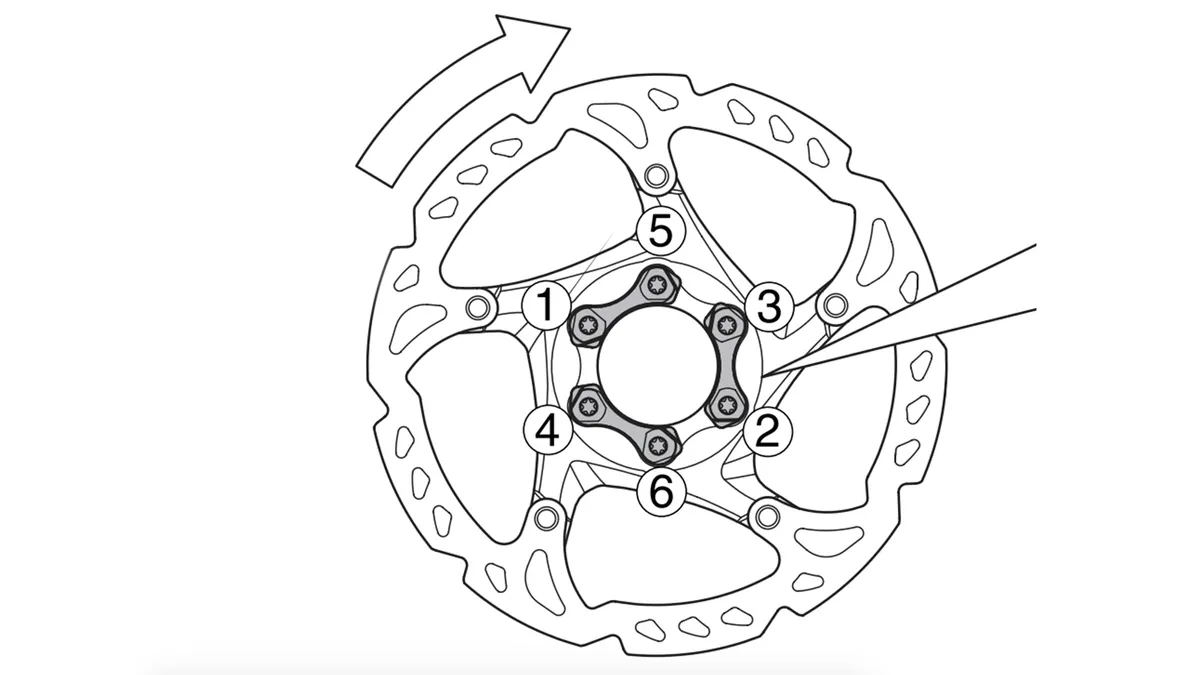
Install your rotor bolts in this pattern. This ensures a uniform distribution of load mounting surface
Why might you need to swap rotors, you ask?
Well, if you take a spill and knock a rotor out of true you can often salvage it by trueing it with an adjustable wrench, or a specialty tool such as Park Tool’s DT-2 rotor truing tool. Most brake companies also recommend swapping rotors if you are switching from organic to metallic pads or vice versa — this helps to keep braking performance quiet and consistent, though it’s also not essential for safe operation.
Still have disc brake installation questions?
Here are some other articles to get you up to speed.