Squealing, chattering and weak brakes can be dangerous. Follow these steps to minimise your stopping problems and maximise your braking power.
1 Play it safe
Check your cables. Look closely along their lengths, paying attention to the areas around the anchor bolts, barrel adjusters and entry points on the brake lever barrels. Frayed strands of cable inner should be replaced. Outers should have no cracks in the plastic coating or kinks in the coiled armature.
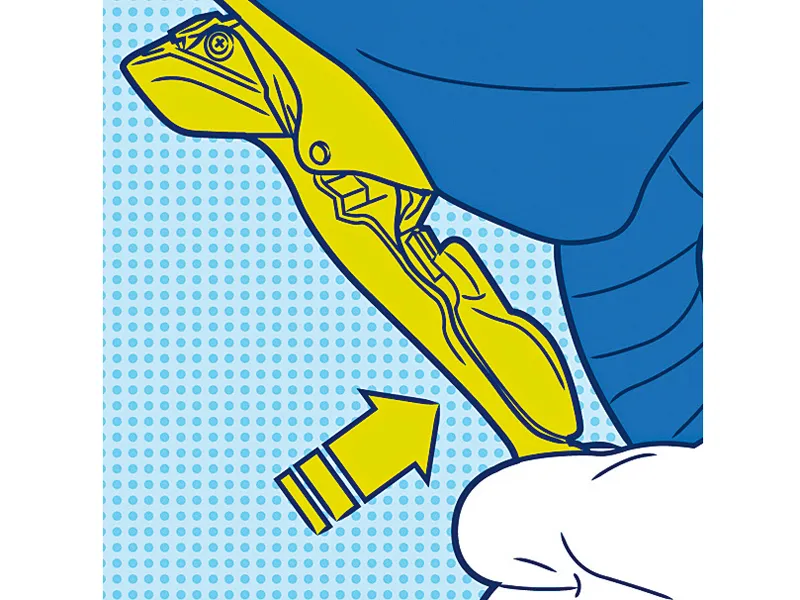
2 On your marks
Check levers and shift paddles don’t strike the bar before the brakes are locked fully. The levers along the bar’s curve can affect travel and left and right orientation. Higher up, the drops give more room. Inner shifter paddles should move to the outside when the blade’s body is positioned correctly.
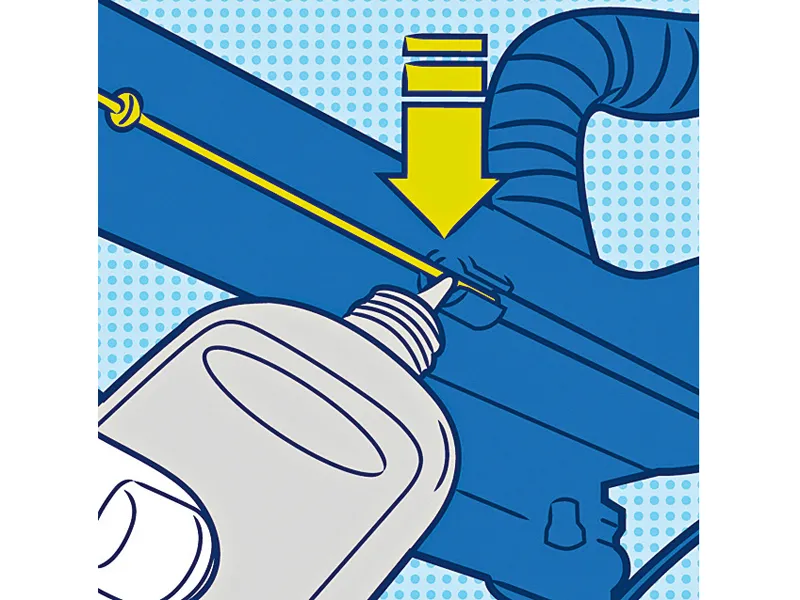
3 Slip and slide
Get your bike upside down and squirt light oil on the cables. Check there are no obstructions to movement, such as kinks in the outers. Brake levers should snap back freely. Put a shot of lube on all pivot points of the calliper, especially the barrel adjusters and spring-retaining notch.
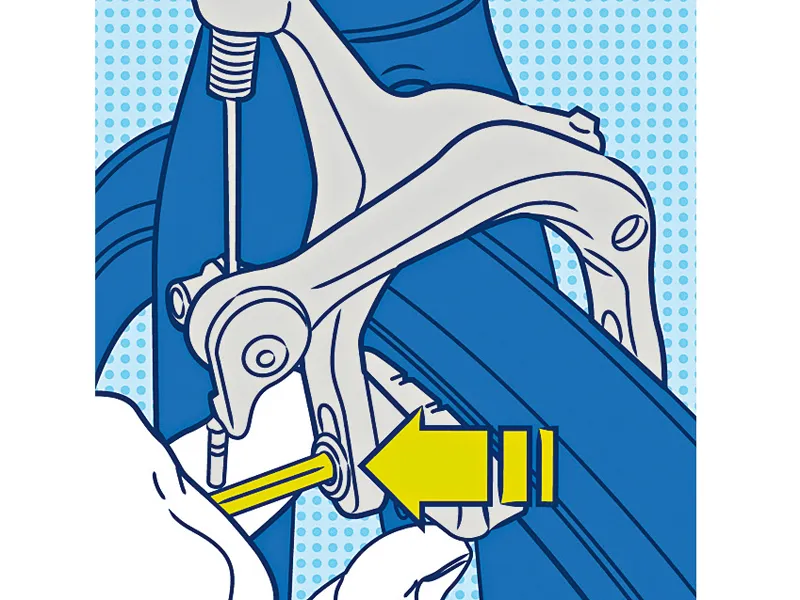
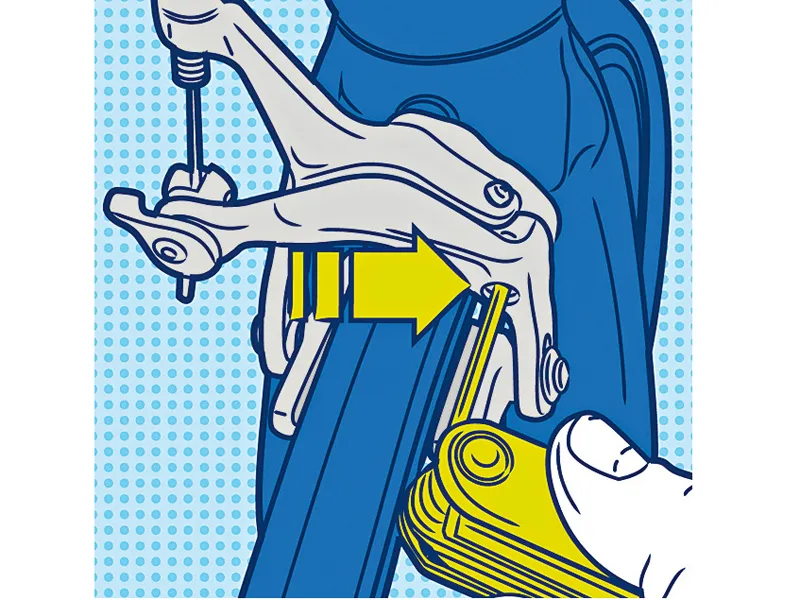
4 Tighten things up
If you want your braking to be silent and strong, make sure that everything is tightened. Apply the lever firmly, then rock the bike backwards and forwards. Movement of more than 2-4mm is excessive. Check all pivot bolts are snug, including the central incasso nut (the one holding the brake to the frame).
5 Get dressed up
Clean all the braking surfaces for maximum power. If you have material on your pads, the glazed area can be dressed with a file. Remove the ridges and pick out any embedded rim matter. Use fine sandpaper to rough the metal up gently, then wipe with methylated spirits or rubbing alcohol.
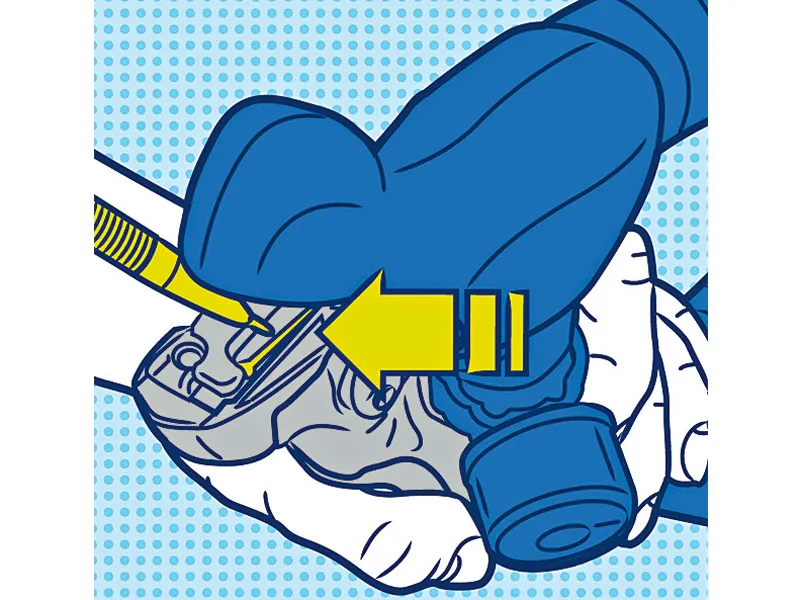
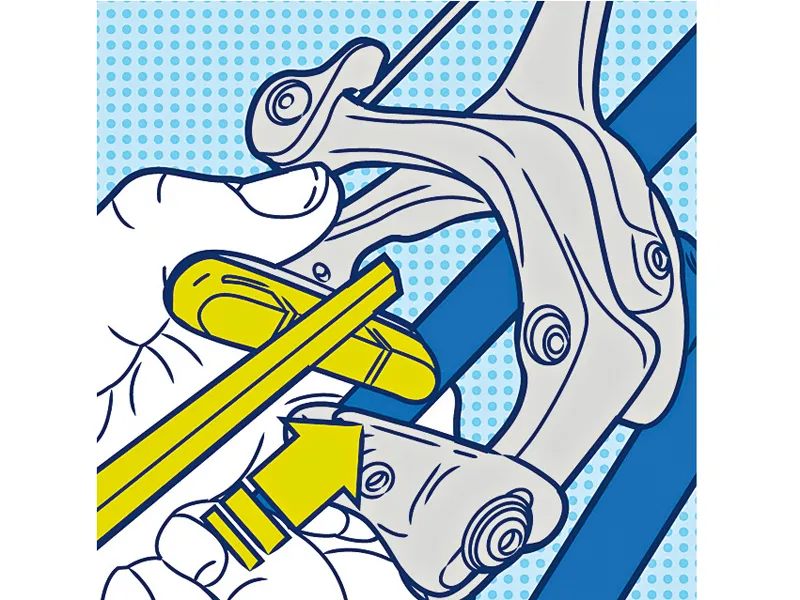
6 Out and in
Swapping inserts on carrier-type pads can be tricky; the old ones have a habit of getting stuck. A shot of WD-40 will help them slide out and replacements glide in. Wipe off any excess. Using a 2mm Allen key, remove the retaining grub screws before banging them out with a screwdriver, as pictured.
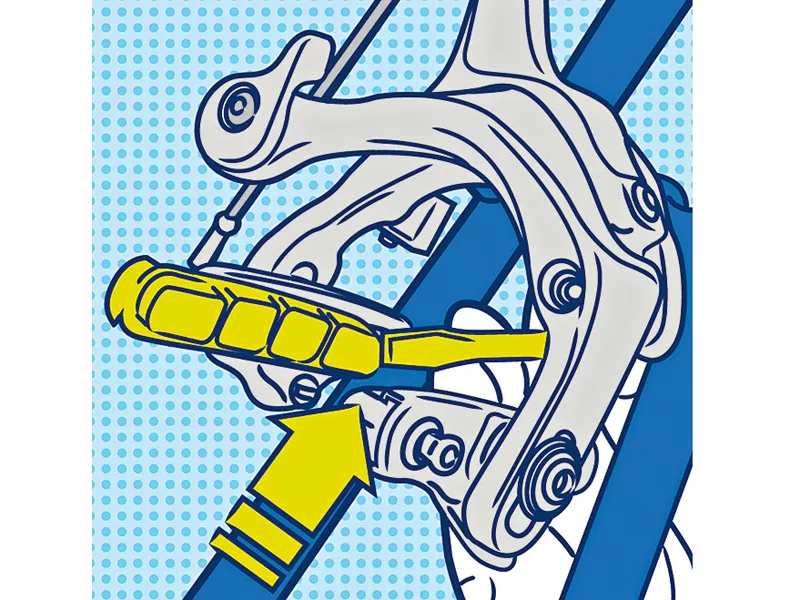
7 Toe the line
To prevent squealing, the front of the pads should contact the rim first. Many brakes have pad carriers with a concave and convex washer setup, allowing multidirectional adjustment. On good models, toe-in might not be required; drawing the pad flat against the rim could result in better braking.
Quick fix tips
Tooled up: You’ll need a 2, 3, 4 or 5mm Allen key and possibly a T25 Torx, plus a file, sandpaper, lube, cleaner (or Finish Line’s combined 1-Step Cleaner and Lubricant) and a rag.
Crimp cables: Make sure you don’t stab yourself on a frayed cable; cap it with a crimp cover. Replace the cable if the strands are broken.
Get oily: You can loosen seized-up barrel adjusters with WD-40. Spray and leave for a few minutes, then hold them gently with pliers and rotate in and out by an eighth of a turn until free.
Clean and lube: Finish Line’s 1-Step is ideal for brake pivots, bolt threads and cables. Spray and wipe off to clean; spray and leave on to lube.