

Metal and water rarely mix well, with all sorts of molecular hissy fits causing corrosion as soon as the two of them get together. Add a bit of council road salt and the gritty, muddy and often acidic evil that forms the average winter trail surface into the mix, and things degenerate rapidly.
Steel rusts solid, aluminium goes grey and powdery and magnesium can throw all sorts of spectacular foaming-at-the-mouth reactions if left unprotected for long.
With that in mind, follow our simple guide to get your bike ready for winter trail conditions. You could save yourself a whole lot of trouble later on.
TOOLS REQUIRED:
- Anti-seize paste
- Pedal wrench or 6/8mm Allen key 4 and 5mm Allen keys
- Torx T25 key
- Carbon assembly paste
- Electrical tape
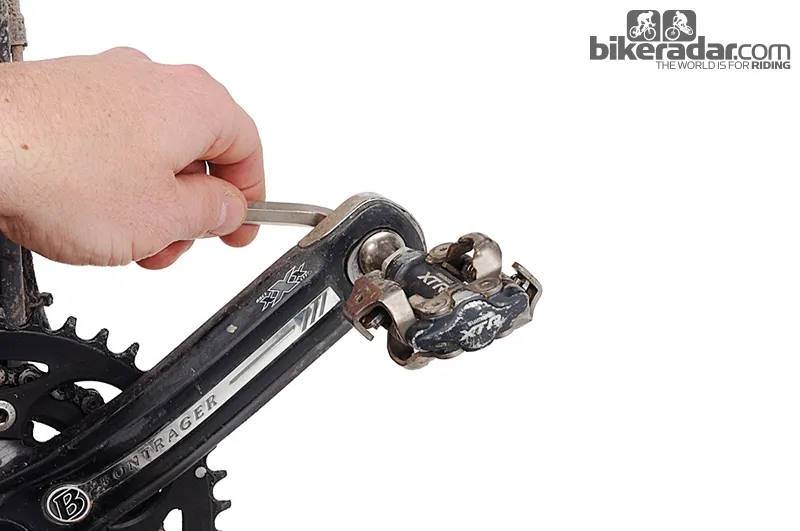
1 REMOVE PEDALS
Many pedals currently on the market use a 15mm pedal spanner for removal, or you’ll find an Allen key recess on the pedal axle. If the latter applies to your pedals, a long 6mm or 8mm Allen key makes removal easy.
Whichever system your pedals use, remember that the removal process is identical. Whichever pedal you are working on, undo towards the rear wheel – the left pedal has a reverse thread.
2 LUBE AND REFIT PEDALS
Once the pedals are removed from the cranks, give the threads on the crank arm and the pedal axle a wipe with a lint-free rag. Check for visible signs of damage to the threads that may cause problems when you re-install.
Apply a layer of anti-seize to the pedal and crank arm threads. Most manufacturers label pedals ‘left’ or ‘right’ to help prevent confusion as to which one goes where. When you’re refitting, tighten towards the front wheel.
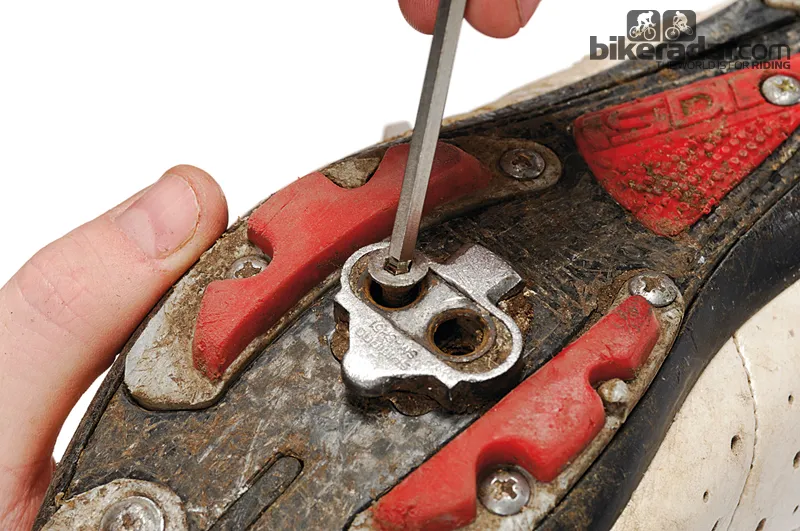
3 CHECK YOUR CLEATS
Cleats take lots of abuse, which goes unnoticed and can cause real headaches if they get stuck in place. To remove them, use an Allen key (usually a 4mm) and undo the bolts anti-clockwise. If the cleats are drastically worn then removal can be trickier – in some cases having to resort to cutting or even drilling the cleats off the shoes. This can damage the sole so avoid letting it get to this stage by periodically checking their condition.
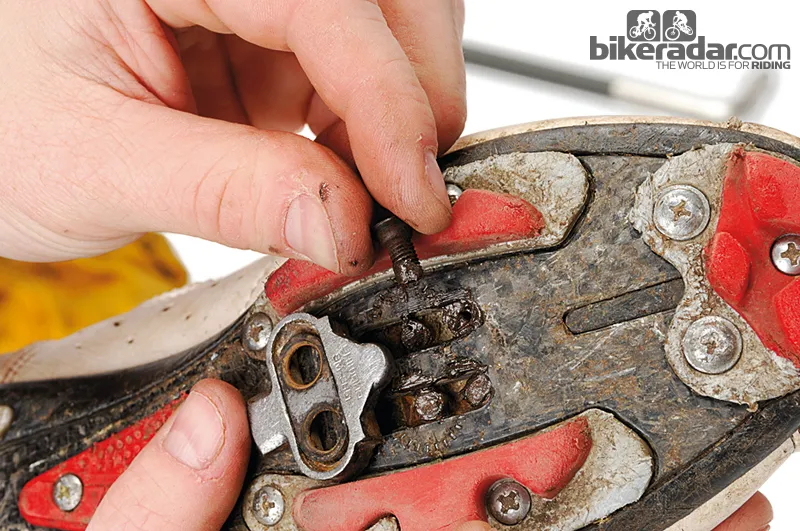
4 REFIT OR REPLACE CLEATS
Once you remove your cleats, wipe the threads with a lint-free rag and put anti-seize on the cleat bolts and the threads in the shoe plate. Shoes usually have four bolt holes in the sole plate for a range of adjustment, and despite only using two, it’s worthwhile to apply anti-seize to all four.
This can prevent unwanted water making its way into your shoes. If your cleats took a lot of work to remove, then fitting a new set may be a wise move.
5 CARE FOR THE SEATPOST
Dirt has an innate ability to get into areas where you don’t want it. Your seat tube can often fill up with mud, grit and water which, when combined, can hold your seatpost firmly in place. This can cause cosmetic damage when you adjust saddle height, and in extreme cases the seatpost can become stuck in place. This is not a good scenario to be in, so every so often remove your seatpost from the bike. Remember: prevention is the cure.
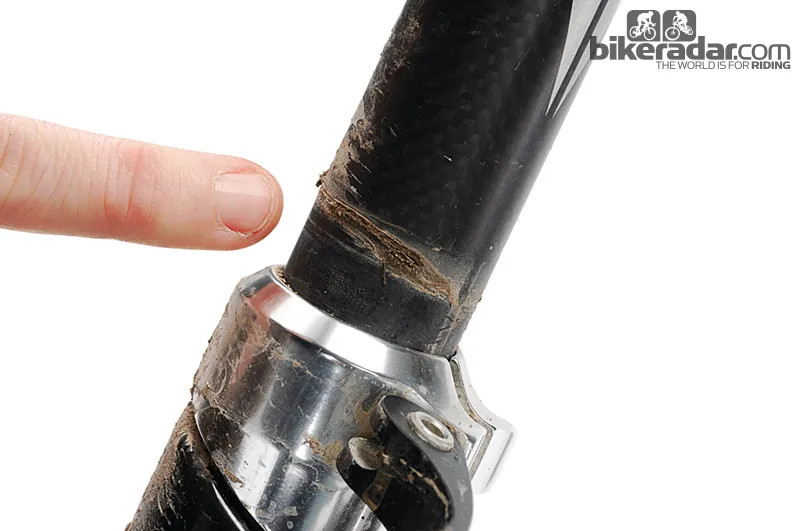
6 CLEAN THE SEATPOST
Once your seatpost is out of the bike, wipe as much of the grease, mud, grit and general grime off it as possible, and the same goes for the inside of the seat tube. Apply a layer of anti-seize to the rim of the seat tube and to the lower section of the seatpost itself.
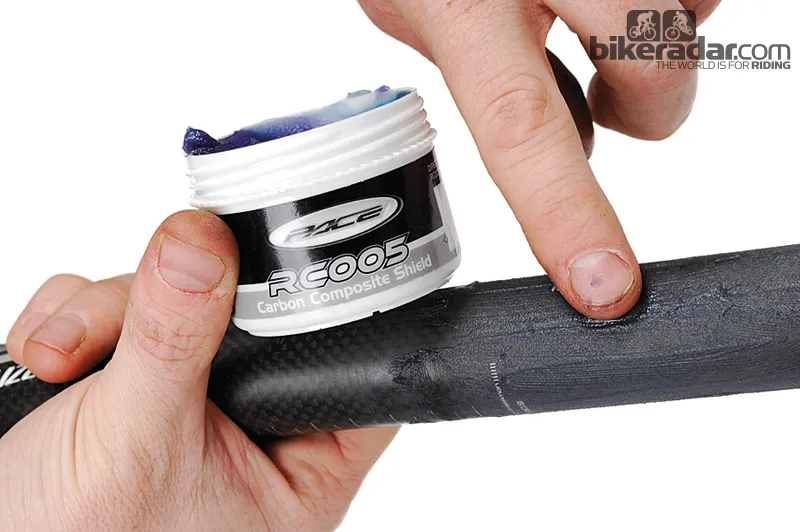
If you have a carbon fibre seatpost or frame, then don’t be tempted to use grease or anti-seize on it; instead, try using carbon assembly paste that is specifically designed for the job.
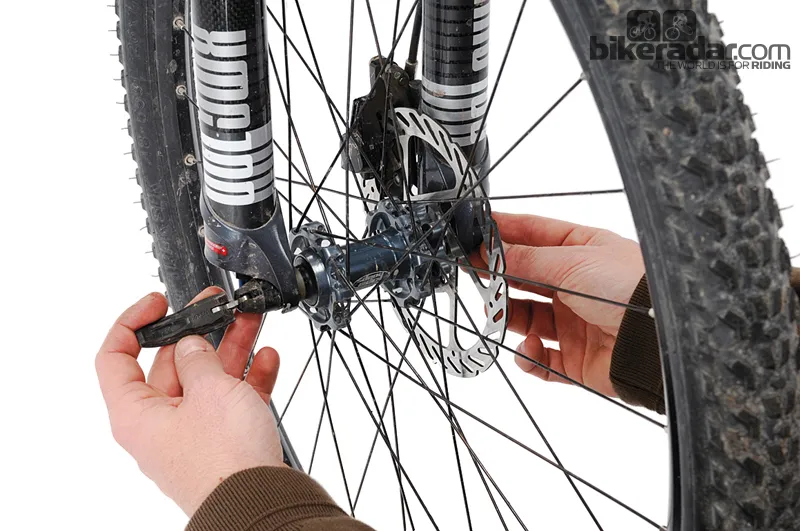
7 REMOVE SKEWERS
Skewers perform a vital role in the function of a bike, but are often left to sit untouched for years. Undo the quick-release by pulling it away from the spokes, just as you do when removing your wheels for punctures.
Hold one end in place while turning the other end of the skewer anti-clockwise. Eventually the non-levered end will unscrew all the way off. Be careful not to lose the springs that sit at either end of the skewer, though.
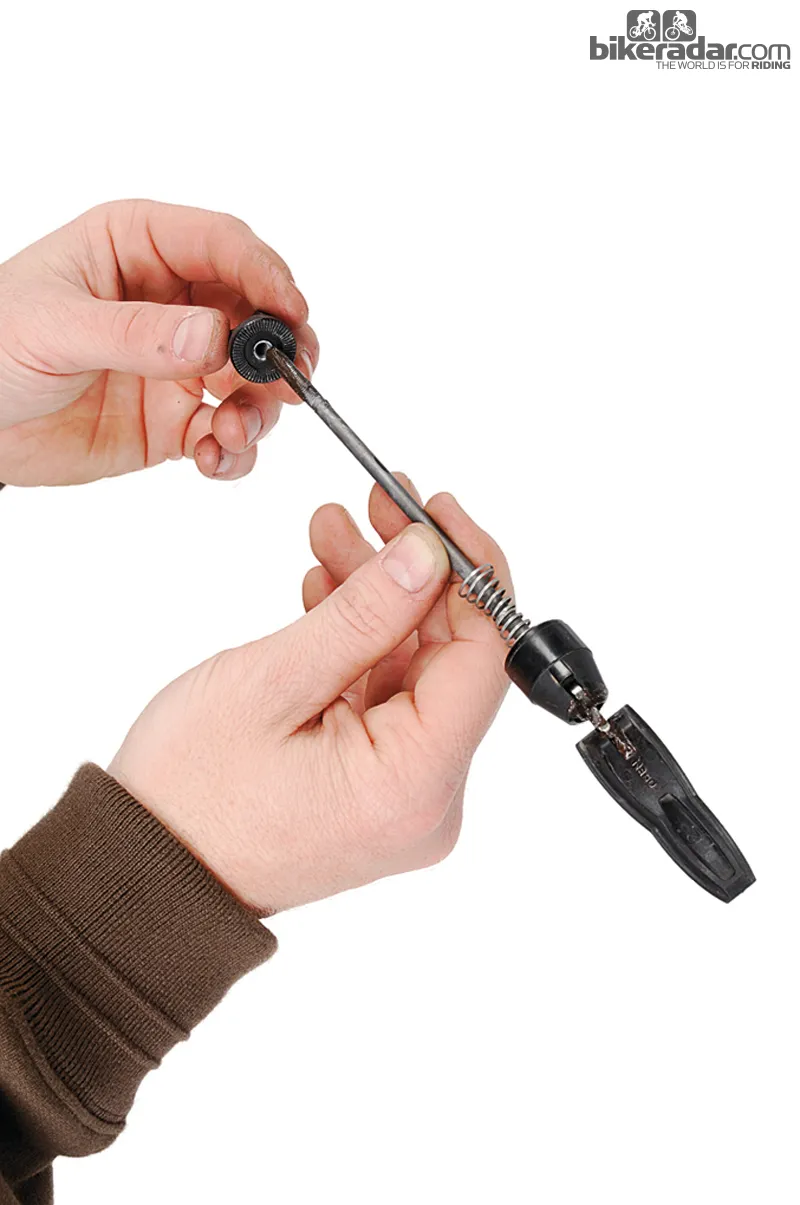
8 STOP SKEWERS SEIZING
Once the skewer has been removed from the wheel, wipe it clean with a rag and apply a fresh coat of anti-seize to the main body. Put a blob on the threaded end of the skewer, as this will get spread down the shaft when the skewer passes through the axle and will prevent the threads seizing in place. If you do drop the springs, they fit with the wider section facing outwards from the centre of the skewer.
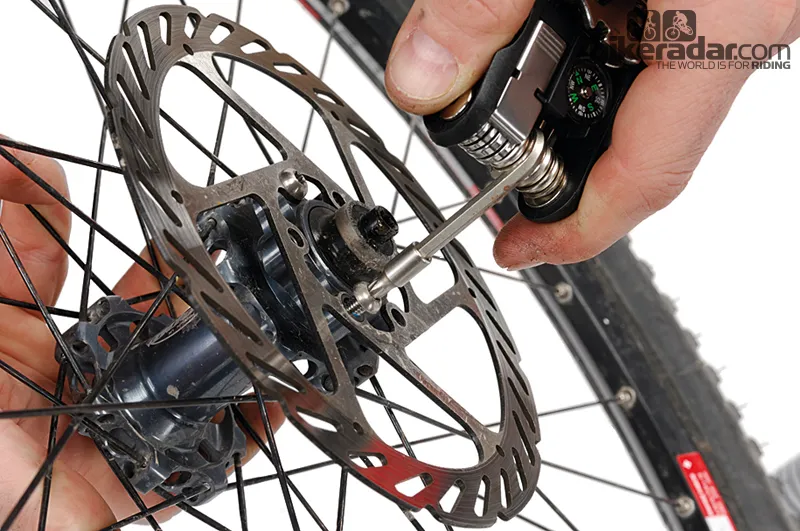
9 ROTOR BOLT CONDITION
When you have the skewer out, it’s a perfect opportunity to check your rotor bolt’s condition. If your bike has a six-bolt rotor then use a Torx T25 or appropriate size Allen key to undo the bolts. Once they are out, apply some Locktite to the threads and refit. If it’s a centre-lock rotor, use a cassette removal tool to undo the lockring and apply anti-seize to the splines before refitting, avoiding getting any on the rotor itself.
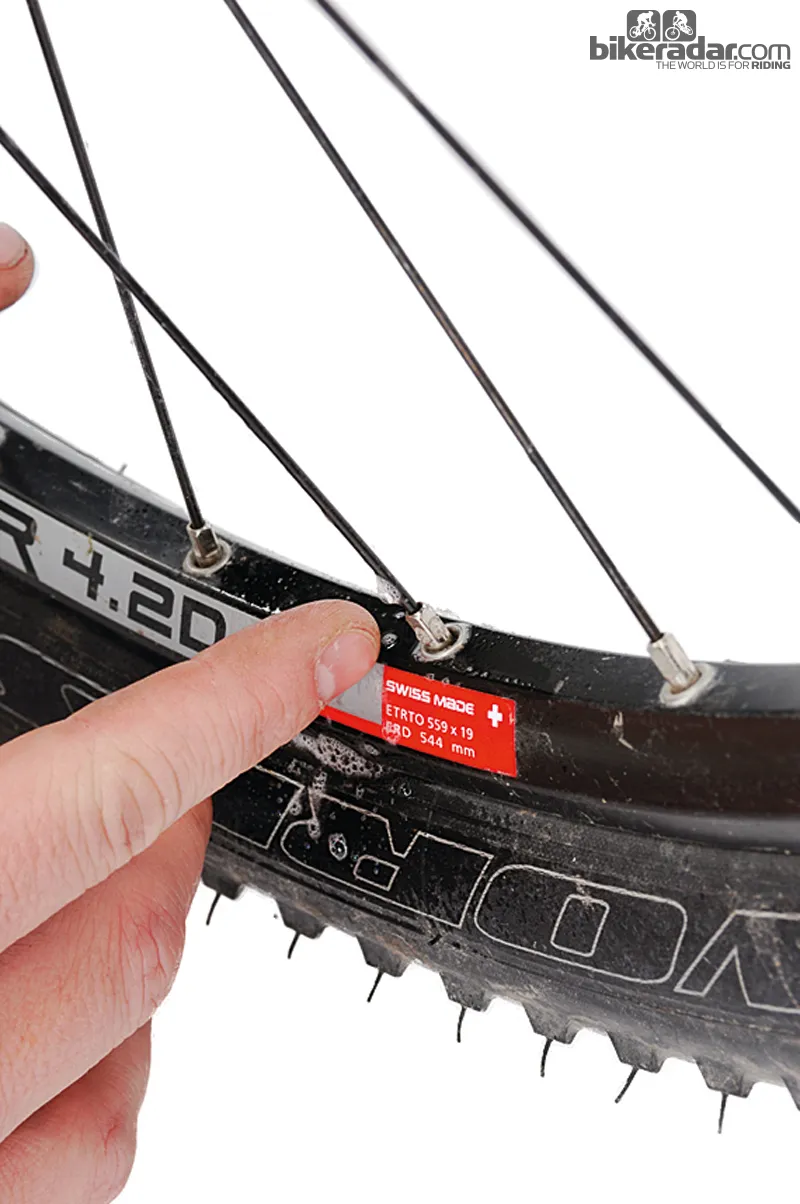
10 SPOKE/NIPPLE LUBRICATION
Wheels get submerged in puddles and mud, so it’s no surprise when a nipple gets stuck in place. Before riding through the winter, take some chain lube and drop a small amount onto the spoke, just above the nipple head. This will run down, coating the spoke threads and helping to prevent them from fusing with the nipple. Leave it to soak for a while then wipe off the excess so as not to attract dirt.
11 CHAINRING BOLTS
Drivetrain wear is a given consequence of riding bicycles, and at some point you will need to replace a chainring. Wear rates increase during winter, so to remove your chainring bolts you will need a 5mm Allen key/Torx key and a peg spanner.
The peg spanner sits holding the rear of the bolt still when you try to undo it from the front. With the spanner properly in place, turn the bolt anti-clockwise so that the two parts separate.
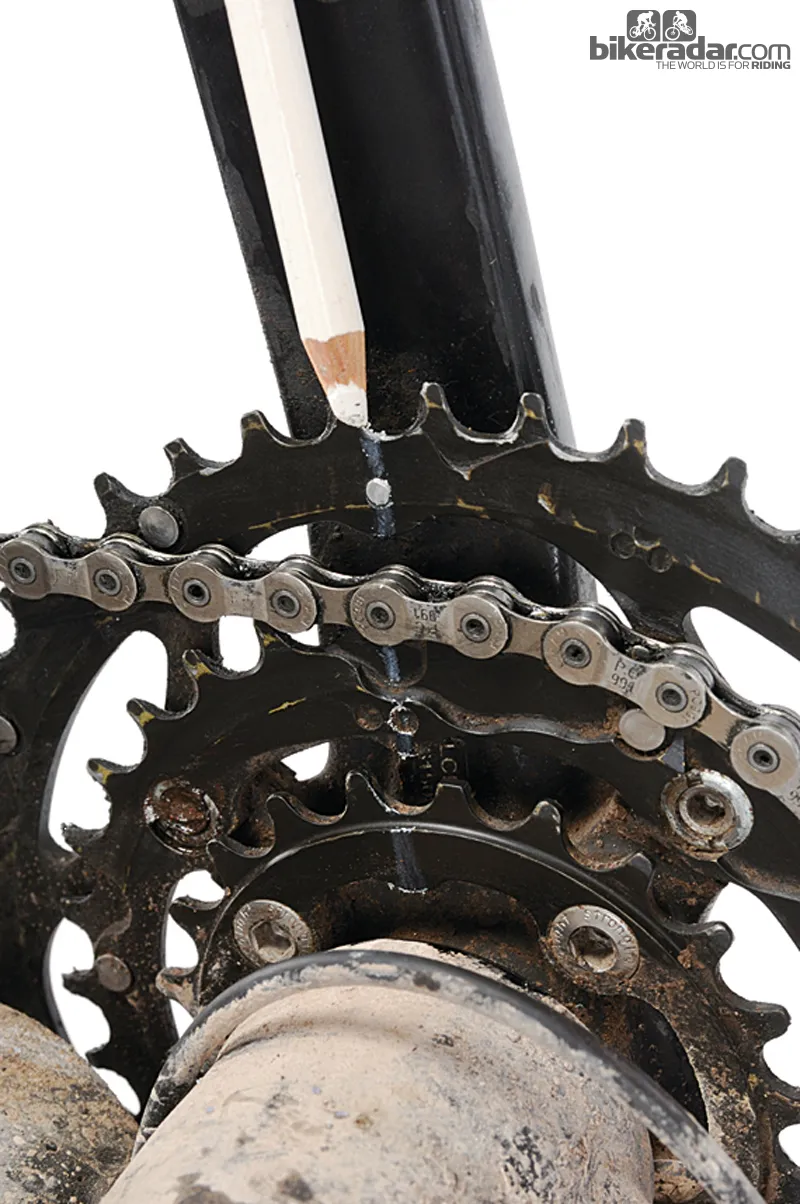
12 APPLY ANTI-SEIZE AND RE-INSTALL
Once a bolt has been removed, clean and anti-seize it ready to reinstall. Removing all the bolts allows you to wipe the chainrings clean of excess dirt that’s built up. When you re-install chainrings, ensure they are mounted the right way round.
The text referring to its size is stamped on the inside of each ring. On the outer chainring there is a peg sticking out, which should sit under the crank arm.
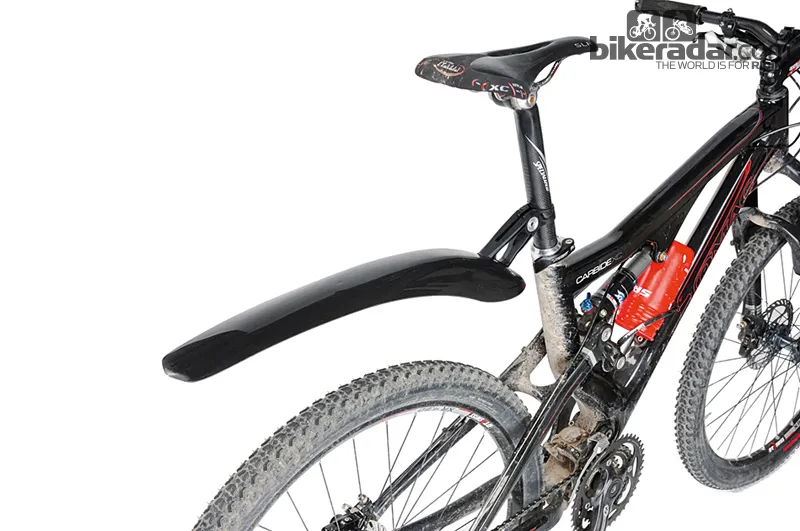
13 ADD A MUDGUARD
Some might frown at it, but fitting mudguards to your bike can really help to ensure you and your bike stay cleaner in the worst conditions. Clip-on mudguards usually provide the most versatility, but choose a shorter mounting bracket on a rear mudguard if you have a small frame or run a low saddle height to stop it sitting too close to the rear tyre. Some brands also make mudflaps to stop mud spraying onto rear shocks.
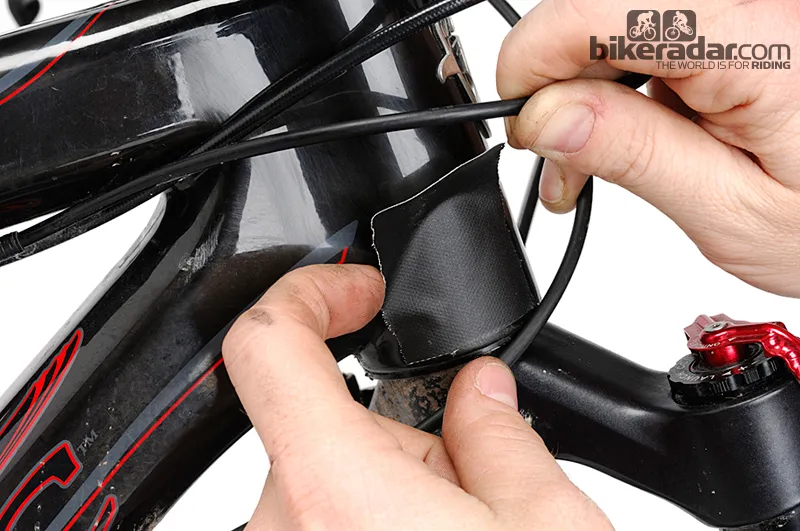
14 PREP THE FRAME AND SEATPOST
Before installing your mudguards, protect your frame from the abrasive effects of winter. Dirt can and will get everywhere, especially between frame tubes and gear/brake cable housing contact points. Head tubes are a particular area to protect. You can use clear adhesive tape or neatly cut gaffer tape. Although gaffer tape is waterproof, you may find that it will eventually wear through.
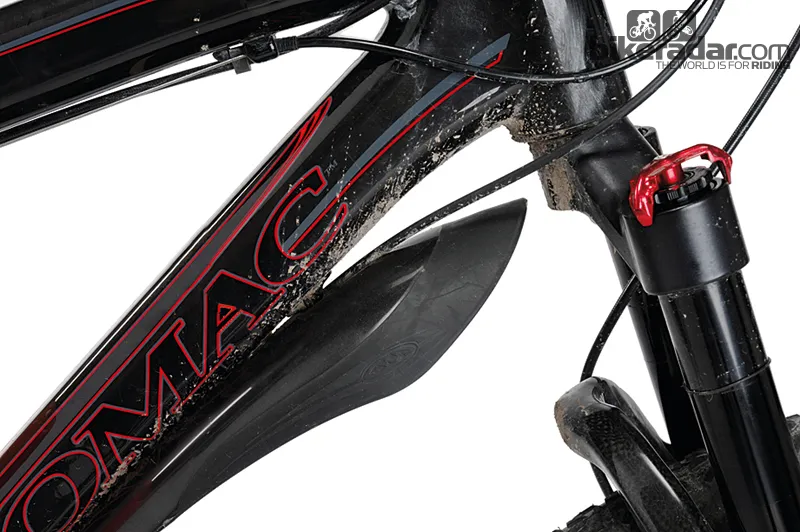
15 FRONT MUDGUARD POSITIONING
Many front mudguards are held in place by elasticated ties. They allow you to attach a mudguard to even the most unusual tube profiles. If the frame doesn’t have mounting bosses, position the mudguard close to the front end of the bike – but leave a gap between the leading edge of the mudguard and the head tube. If it is mounted too close, mud will build up, rubbing against the headset and causing damage.
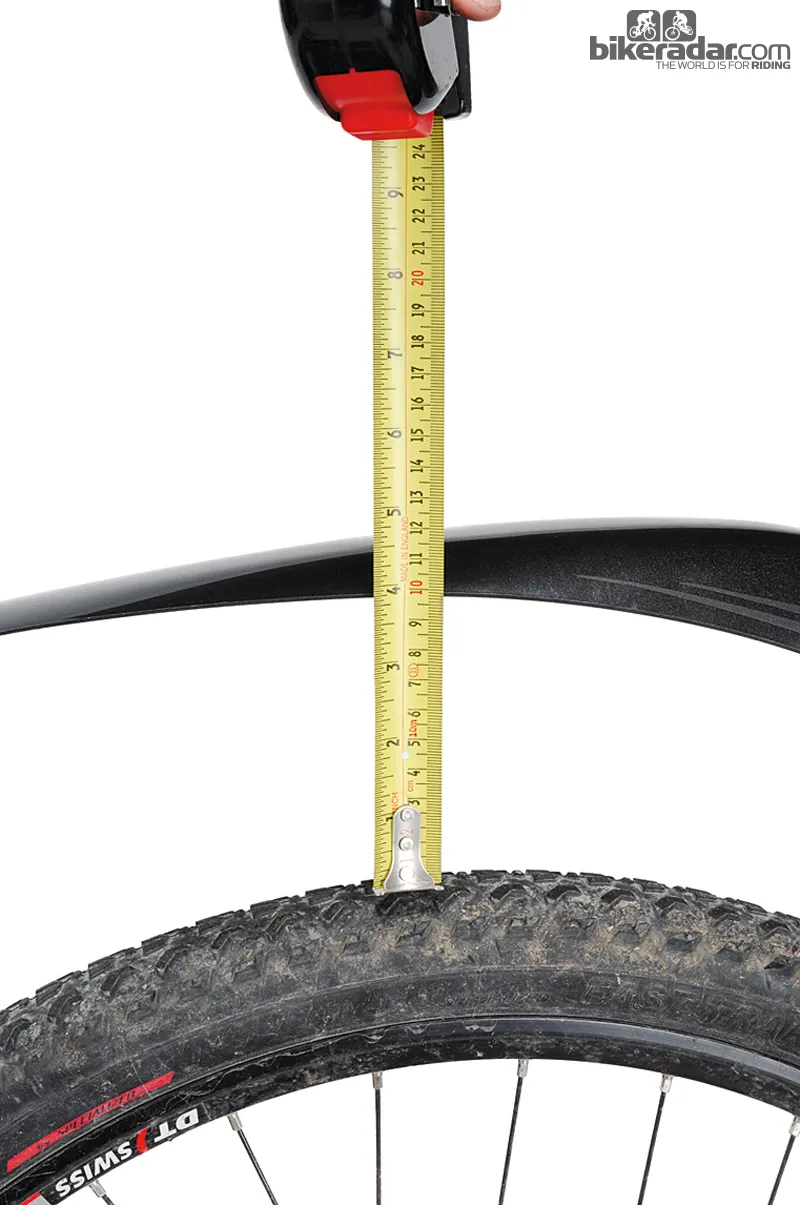
16 REAR MUDGUARD INSTALLATION
Rear mudguards may be angle-adjustable, so ensure the underside clears the tyre by several inches. Positioned too high, mud will spray over the top; too low and it will catch the tyre or clog up quickly. If you drop your saddle height during rides or have a full-suspension bike, mount the mudguard further up the seatpost so that it doesn’t interfere with the tyre when the saddle is lowered or the rear shock compresses.
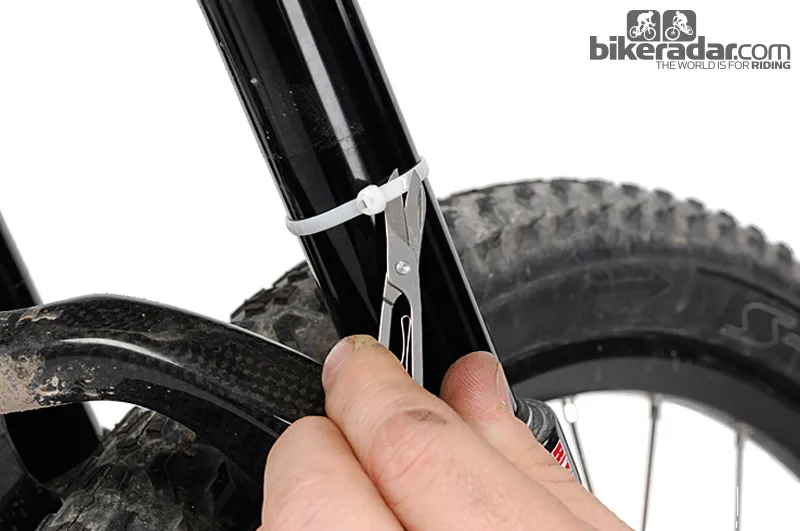
TOP TIPS
Remove cable ties from your fork stanchions because dirt can build up underneath and cause wear. Zip ties are a great way to measure sag when setting up forks, but remove them straight after it’s done. The scratches and gouges they cause are not good and a zip tie is a whole lot cheaper to replace than your fork stanchion.
When installing carbon fibre parts, use a carbon assembly compound to help stop your bars or seat post slipping. Don’t use regular anti-seize.
Wet weather riding can result in water seeping through the eyelets of your wheel rims. This adds excess weight, perishes rim tape, can seize nipples in place, and makes puncture repairs a real mess. Next time you puncture, take the opportunity to wipe any excess moisture out from inside the tyres and rim tape.