

Fitting Campagnolo Ergo levers can be tricky but this guide should go some way towards demystifying the process.
We covered indexing derailleur adjustments earlier this year, so have a look at that article too. Combined, these two guides should keep you out of trouble when tackling this project.
The new Ergo levers present a few challenges that didn’t crop up on last year’s models, so we’ll focus primarily on the small details and idiosyncrasies.
In addition, it’s useful to know that Campag levers are now in their third incarnation, so we’ll refer to the new ones as mark IIIs, last year’s models as mark IIs and the originals as mark Is.
Remember to hand over the reins to a professional mechanic if you’re in any doubt about the end result, especially for the brakes or when joining the chain.
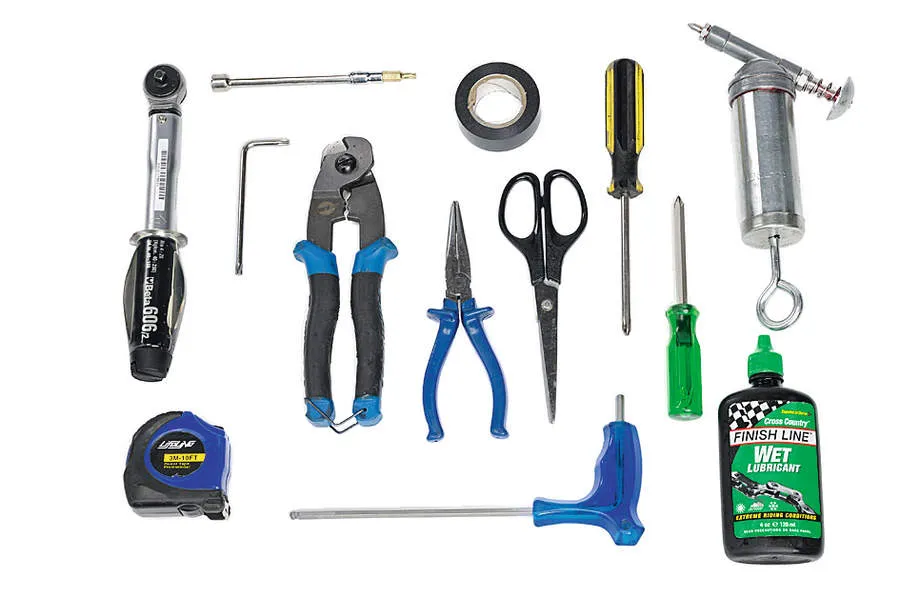
Tools required
- Sharp cutters and needle nose pliers
- Flat and Phillips screwdrivers
- 5mm Allen and T25 Torx keys
- A sharp poking device
- Oil and grease
- Electrical tape or stout duct tape
- Sharp medium file
- Torque wrench with T25 Torx socket (optional)
Step-by-step: Fitting your Campag Ergo levers
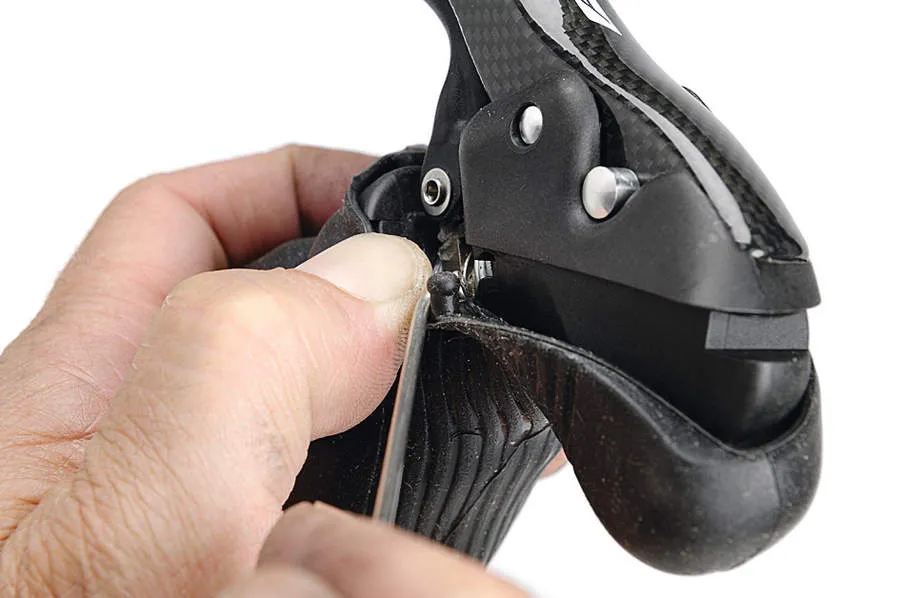
1 Peel back the hoods
We’ll assume that your derailleur and chain are correctly installed already. Before sliding the levers onto the bars, you’ll need to peel back the rubber hoods to gain access to the T25 Torx nut that tightens the clamp. Be careful – they’re easy to rip and expensive to replace. A number of rubber nibs hold everything in place, so make sure to prise them out carefully before peeling the hood back using a spoke head or small hooking device. They need to be pulled back far enough from the front and rear to gain access to the soft and vulnerable alloy Torx nut. The older mark II hoods are mercifully easier to deal with and require only a 5mm Allen key, but go easy on them anyway.
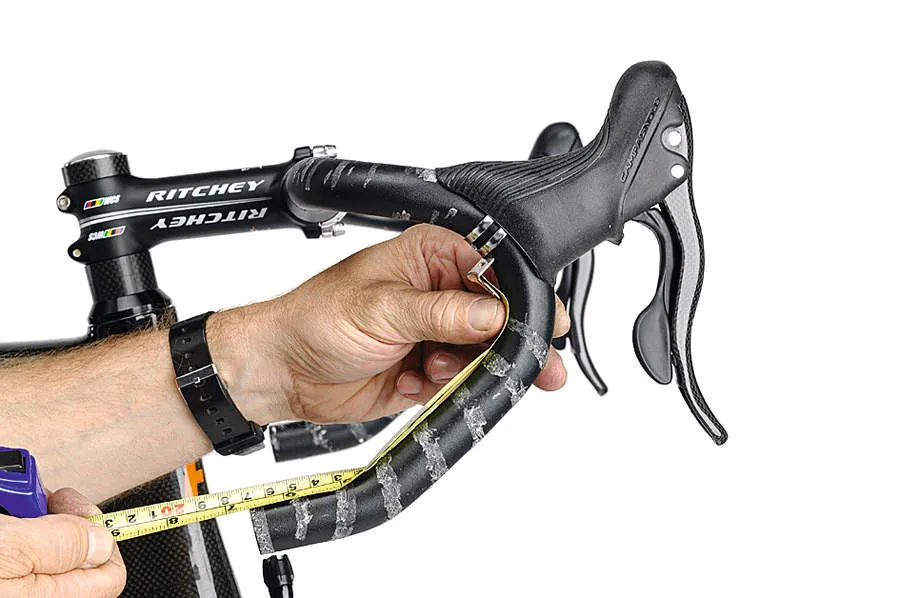
2 Position levers evenly
Now use either a tape measure or a ruler to ensure even positioning of the levers. Release enough clamp tension to allow the lever body to slide easily past any sharp bends in bars. Don’t force it if it gets stuck, because the inner edges can crack. You might have to completely unscrew the clamp, particularly on bars with multiple anatomic bends. Make sure the T25 key is fully inserted; a heavy coating of factory threadlock makes clamp nut removal a challenge, but stick with it. The newest levers come with a shim for longer reach and bigger hands; place this between the bar and lever body before final positioning. It’s unlikely these will see much use, though, since the normal reach is considerable.
3 Tighten correctly
Tighten the bolt finger-tight in order to allow some movement of the lever. Straddle the bike and get everything even. Ensure the levers are high enough to benefit from a comfortable hood position created by a flat transition from the bar to the tops. The lever body is shaped to fit at the most acute bar section. If you position it over the broader portion of the bend lower down, where the bar radius is too large, the composite body can be damaged when tightened. Using a torque wrench, if you have one, torque to about 10Nm. Alternatively, tighten with your Torx key to the point where the levers can’t be moved using your full body weight – ensure your bars are firmly clamped when you try this, though.
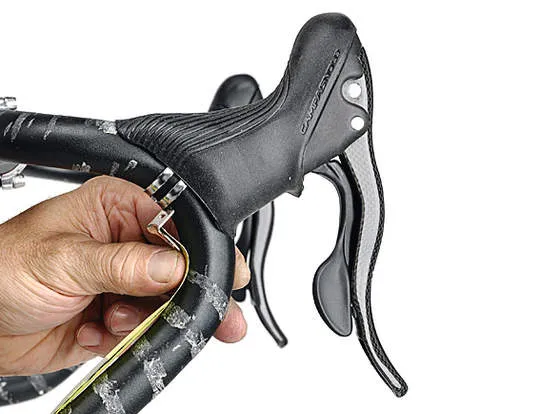
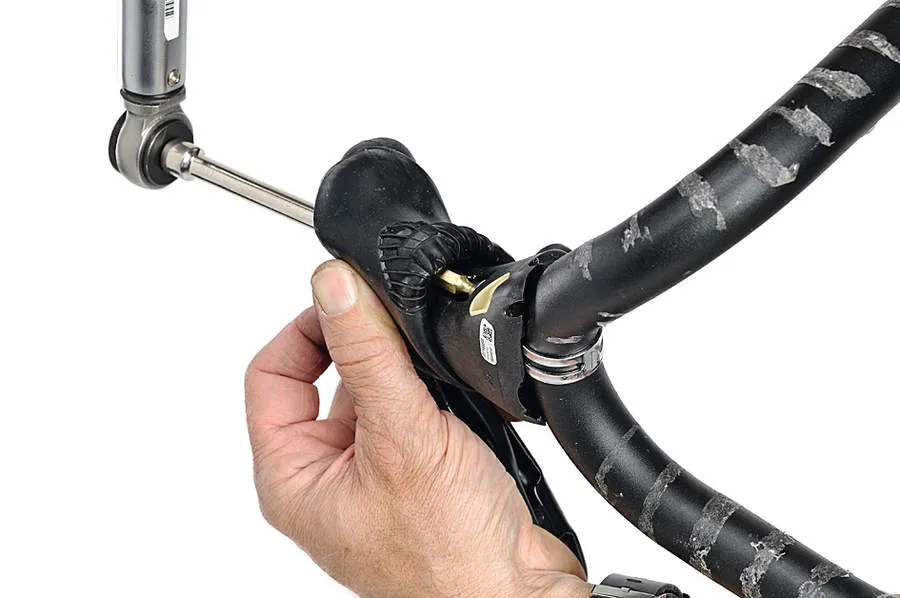
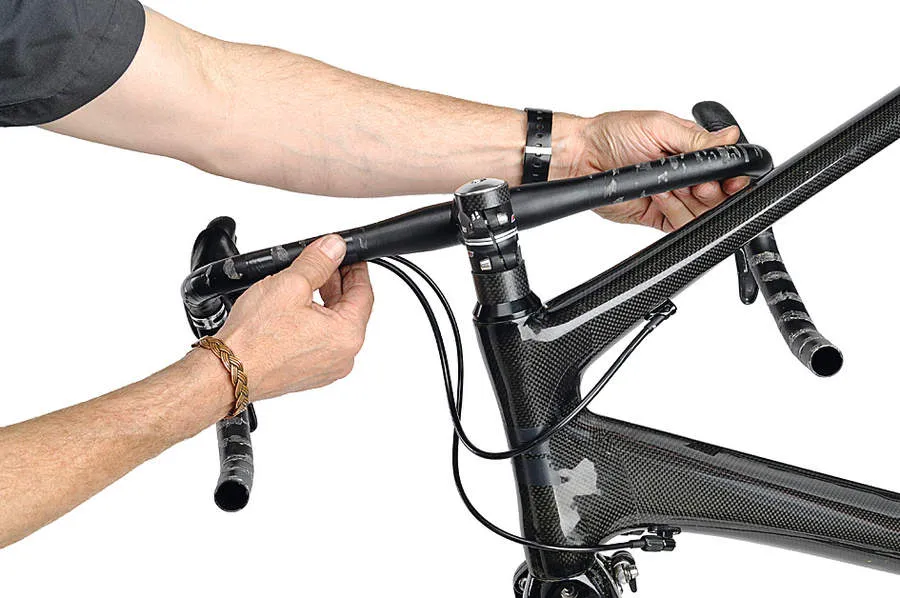
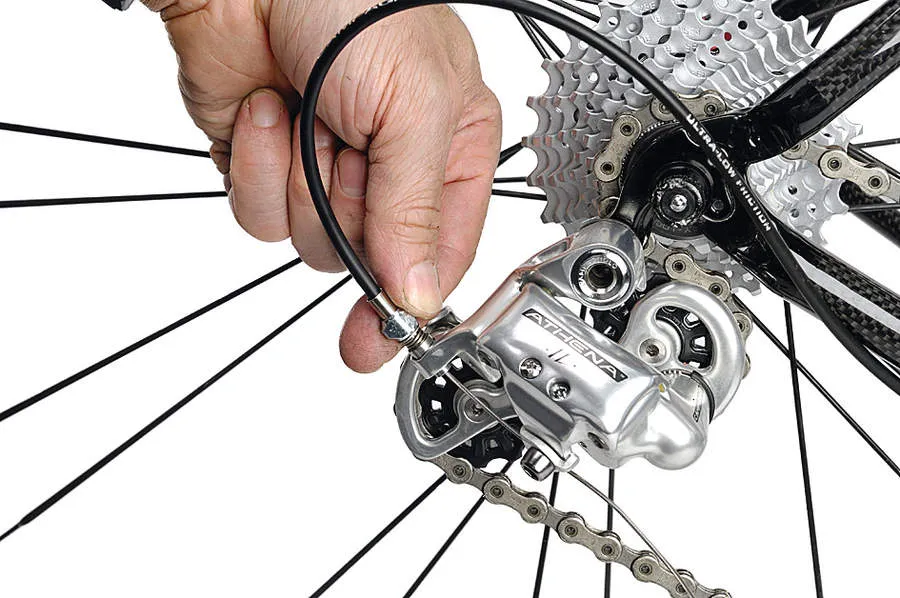
4 Thread cables
Inserting the cable into the lever body can present a few challenges, one of which is deciding how to get the cable through the body and into the outer without leaving a kink, which could affect the indexing performance. This wasn’t a problem on the mark II 10-speed Ergos, where the outer nestles further into the body and provides a change of direction for the inner as it leaves the wind-up plate/actuator. On the new 11-speeds, pull the cable down as near to its leading end as possible (as pictured); any kinks left in the cable can then be trimmed off when finishing. All irregularities or kinks put into the inner when threading it through will adversely affect shifting accuracy.
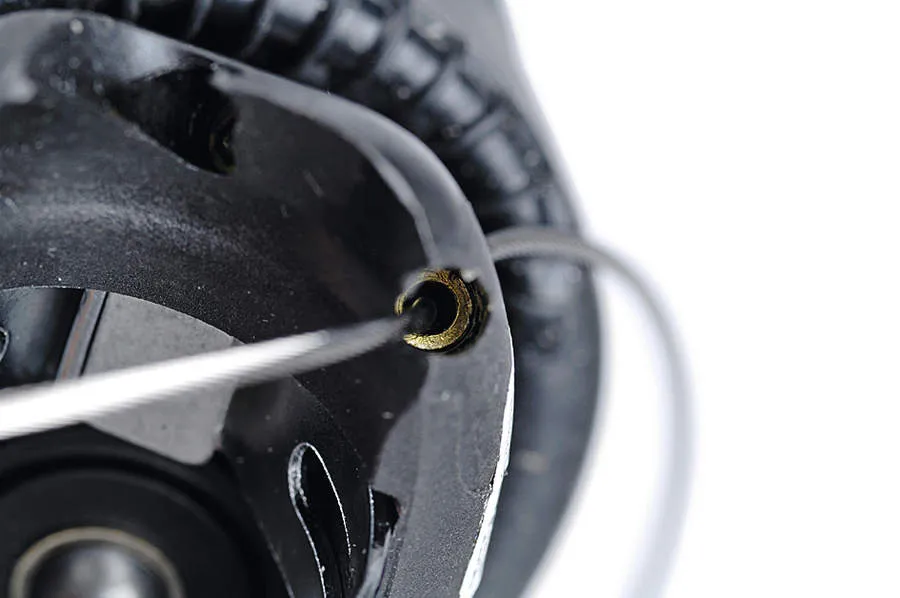
5 Beware of the O-ring
This little o-ring (pictured) is lightly pressed into the lever body and can become dislodged when you’re pushing the cable through. It’s an important friction-reducing element, but one that’s easily lost if the tip of the cable catches its edge while you’re working. Also, watch out for the pale yellow Teflon insert in the previous step; it’s irreplaceable, so don’t let it fall out of the body and disappear between the floorboards. Route cables with either both at the front, or the brake at the front and gear at the back. No ferrules are required going into the mark III body. Mark IIs do require them, but don’t try jamming a 5mm brake ferrule into the 4mm gear opening.
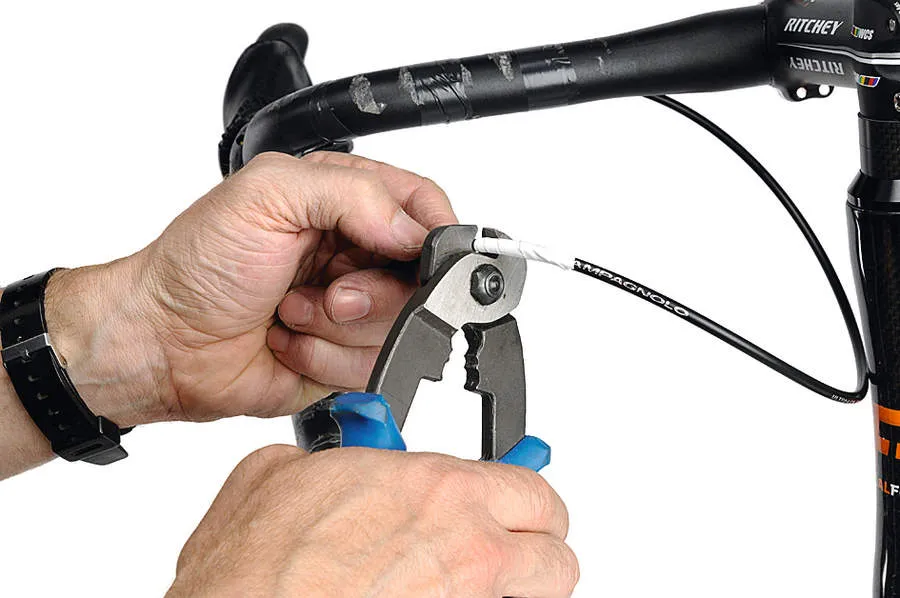
6 Cut outers to size
The plastic casing used for the compressionless outers is often brittle, especially when cold, and may fracture if cut improperly. So, wrap the end with a few turns of stiff tape before cutting. Use a medium file to square off the ends while held firmly between your fingers. Follow with a poking device to ensure the Teflon liner isn’t blocking the end. We’ve mentioned that Campy mark II levers require a ferrule into the bodies, but the new mark IIIs don’t, so the cut has got to be clean and square. It’s imperative to get the lengths right in order to accommodate turning the bars. Any cable outers cut too short will affect performance; the outer and inner can bind and actuate brakes, especially when manoeuvring at low speed.
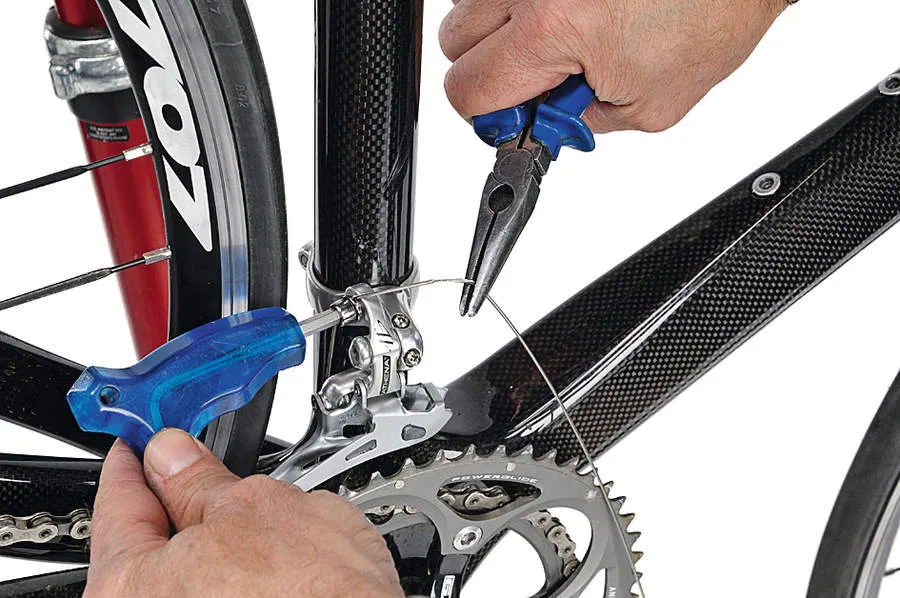
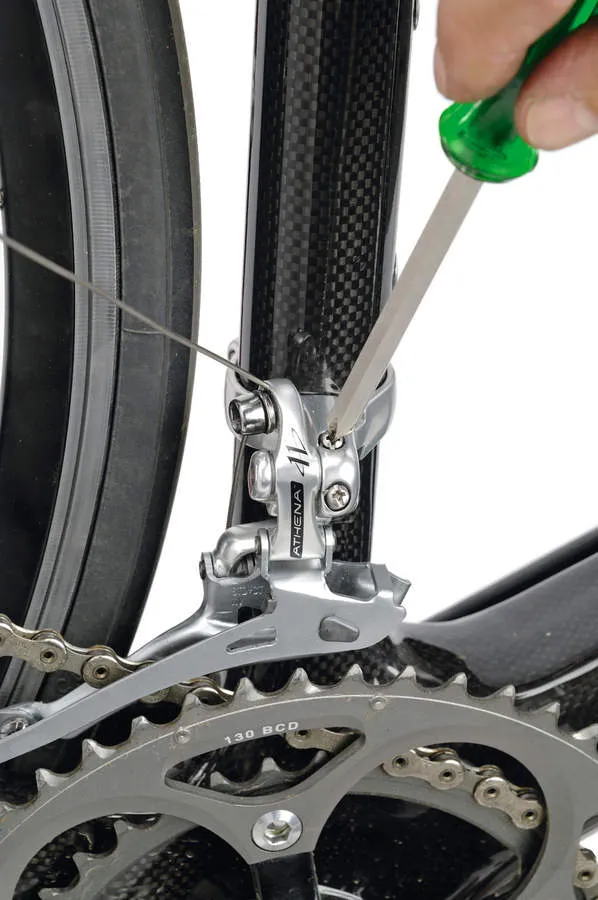
7 Anchor cables
The photo above shows a good way of getting your cables taut before making fine adjustments using barrel adjusters. Put a drop of oil on the anchor bolt threads first – if dry, they can get stripped and might not hold the cable with sufficient force. The bottom bracket guide is absolutely critical to the correct operation and accuracy of indexing. Ensure it’s lined up to provide as straight a cable run as possible on the way to the derailleurs. It must be completely seated against the bottom bracket shell, with no gaps. Make sure the radius of the shell matches the curve of the guide. A large guide meant for a carbon or aluminium frame will sabotage your shifting on a steel frame with a small bottom bracket shell, and vice versa.
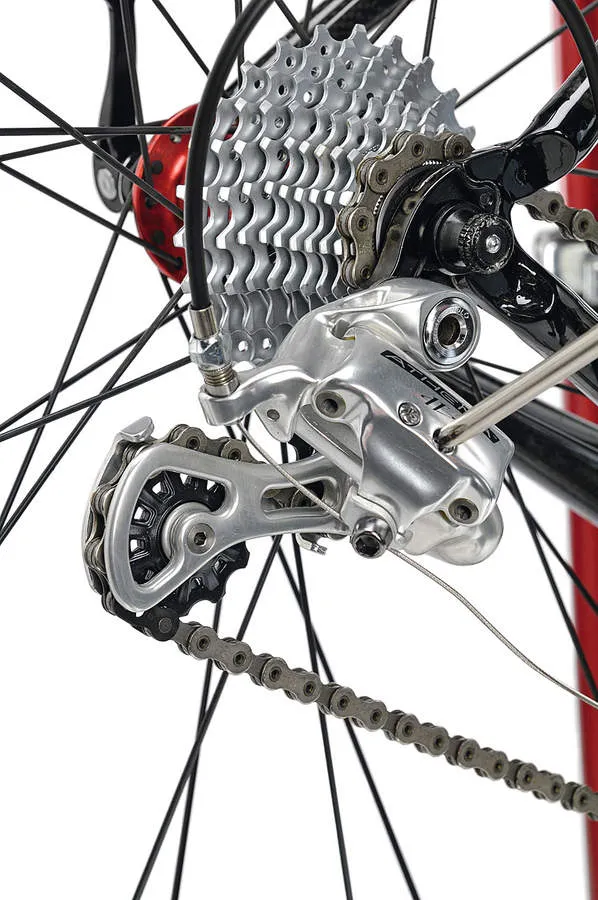
8 Adjust stop settings
You can make an initial rough adjustment by actuating derailleurs by hand first. Once the cables are fastened, make more precise adjustments. The high gear (small cog) screw is on the right of the rear mech, while the large cog screw is on the left. For the front mech, high gear (big ring) is the bottom screw, while low (small ring) is the top one. Get behind the bike and examine the top jockey wheel: it should stop directly below the large and small cogs without being able to push past these settings, but give it a good shove or tug to make sure. The gap between the lower edge of the front changer cage over the teeth on the big ring should be about 3mm. Setting stops is critical to prevent over-shifting into spokes or other damage.
9 Barrel adjusters
Indexing adjustment is done with the down-tube barrel adjuster for the front mech and using the rear derailleur’s own adjuster. After setting your stop screws, set the rear derailleur onto the smallest cog and move the shifter for the first click; the chain should shift to the second cog without hesitation. Turn the adjuster barrel counter-clockwise about half a turn if it doesn’t and try again. Repeat for the rest of the gears. If over-shifting occurs, slacken the cable by turning the barrel clockwise. For the chainset, set the limit screws for good shifting without any chain drop-off. Note that the final outer click of the front shifter, on the furthest outward cage position, has a tendency to slip if the cable and stop screw are too tight.
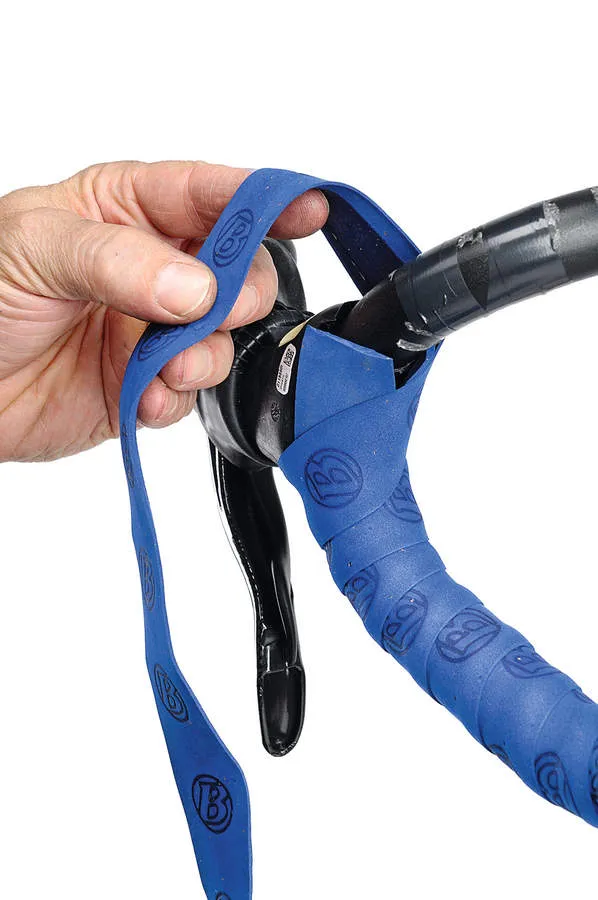
10 Tape, test, retune
Tape firmly with the winding sequence around the lever as pictured. Place separate pieces of tape vertically on either side of the lever to conceal the band. With taping completed, reinsert all the little rubber nibs in their respective holes on the body. This will ensure the hoods don’t drift, which could interfere with the operation of the return lever mechanism. Ensure everything is tight, and take the bike to a safe, traffic-free zone for a test ride. Slam on the brakes and work the shifters. Make sure you can lock up the rear wheel and that the chain doesn’t drop off when shifting. Readjust as required using the barrel adjusters on the brakes and gears. Don’t get your hand caught in the front wheel if you do this while riding, though.
