


Gears not shifting as well as they should? We show you the tricks you need to keep them clicking cleanly into place.
Before working on your gears, clean both derailleurs in situ with a degreaser. An old electric toothbrush is useful for getting at all the difficult spots.
Lube the main parallelogram pivots with PTFE or Triflon based lubricant. Clean the chain with an in situ chain-cleaning tool. Use a top quality chain lube and lube the rollers of the chain.
Don't apply lube to the outside of the chain. If using a spray lube, put a newspaper behind the chain to prevent lube getting on your wheels. Wipe off any excess.
1] Problem: Chain comes off or won't go on to big chainring
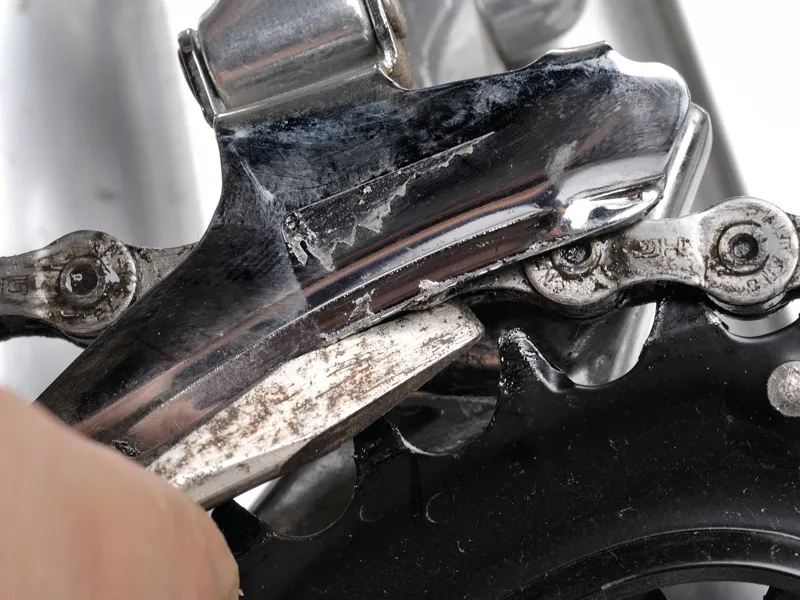
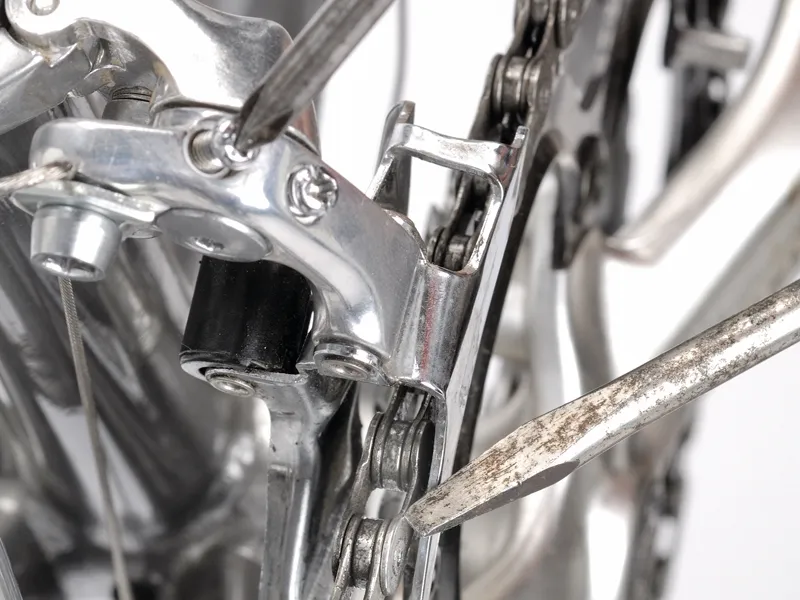
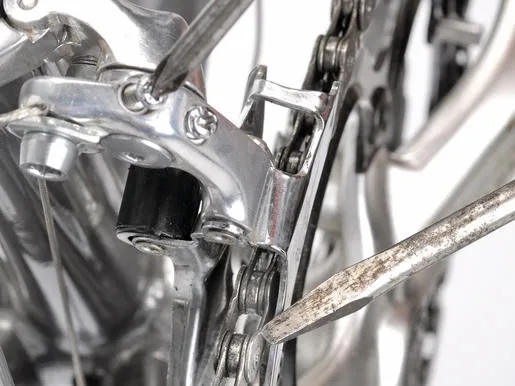
Check that the derailleur cage clears the top of the large chainring's teeth by about 1mm. If necessary, slacken the derailleur mounting bolt by about two turns and move the derailleur up or down to correct its height.
Set the derailleur cage so that a centre line through the cage runs parallel to the chainrings. Tighten the derailleur mounting bolt and check that the derailleur cage does not touch the outer chainwheel. Slacken off any down-tube or cable adjusters by turning them fully clockwise. The outer limit screw is normally the high gear stop (large chainwheel).
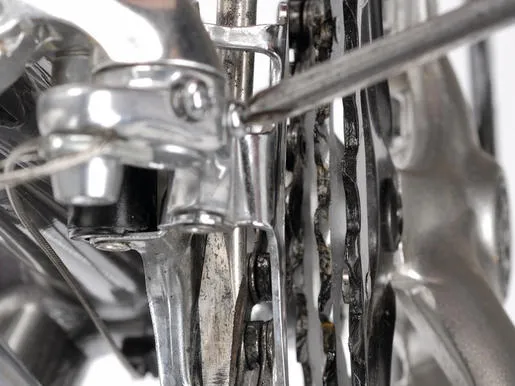
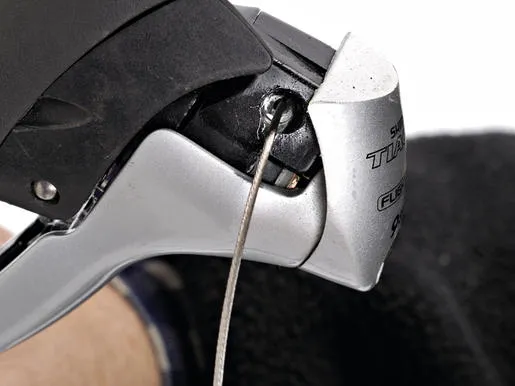
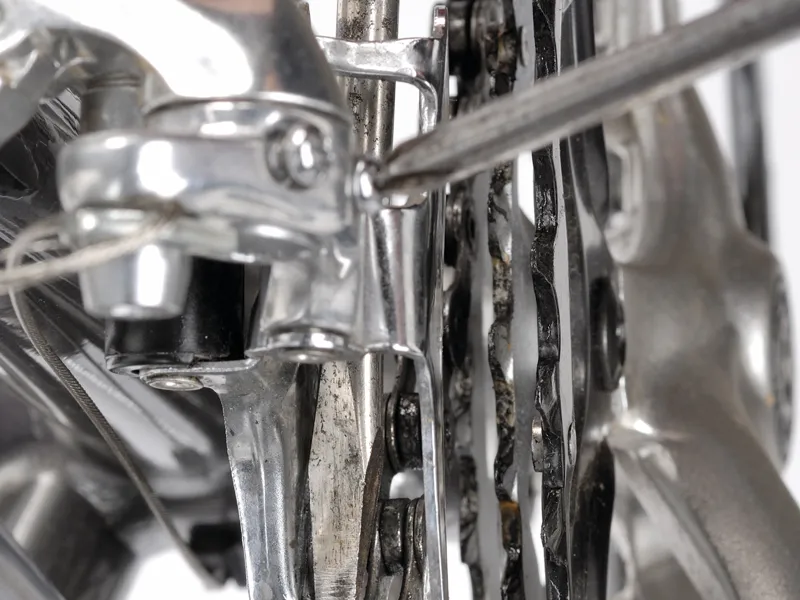
Shift on to the smallest chainwheel. Slacken the gear cable fastening bolt, pull the gear cable taut and refasten the cable fastening bolt. Shift on to the smallest sprocket and large chainwheel. Adjust the high limit screw so that the outer plate of the cage is about 1mm from the chain. Shift into the smallest rear cog.
Repeatedly shift on to the biggest chainring, adjusting the high limit screw half a turn at a time until it does so without hesitation, but does not overshoot the largest ring.
2] Problem: Chain comes off or won't go on to small chainring
Check the derailleur position, as in section 1. Slacken off any down tube or cable adjusters by turning them fully clockwise. Shift on to the smallest chainwheel and large rear sprocket. The inner limit screw is the low gear stop. Adjust this screw so the inner plate of the cage is about 1mm from the chain.
Check that, under repeated shifting from the largest to the smallest chainring, the chain shifts without hesitation but does not overshoot the small chainwheel inwards. If necessary, adjust the low gear limit screw half a turn at a time either to make the shifting cleaner (anti-clockwise) or to prevent overshifting (clockwise).
Many front derailleurs won't shift on to the small chainwheel under a heavy pedalling load, even when correctly adjusted. Coat both spindle threads with anti-seize grease and refit.
3] Problem: Chain rubs on derailleur cage on middle chainwheel of a triple

Move the chain onto the middle chainwheel (by moving one click upwards from the small chainwheel) and largest rear sprocket. Adjust the cable tension with the down-tube adjuster so that the clearance between the derailleur's cage inner plate and the chain is between 0.5 and 1mm. Click the front STI lever one click so the chain moves outboard a little. With the rear derailleur, select the smallest rear sprocket.
Check that there is about 1mm of clearance between the chain and inner plate of the derailleur cage. If there is not, readjust the cable tension (an eighth or quarter turn) of the down-tube adjuster. Then recheck the clearance when the front derailleur is in the inner trim position, and with the chain on the largest rear sprocket.
4] Problem: Chain comes off or won't go on to small rear sprocket

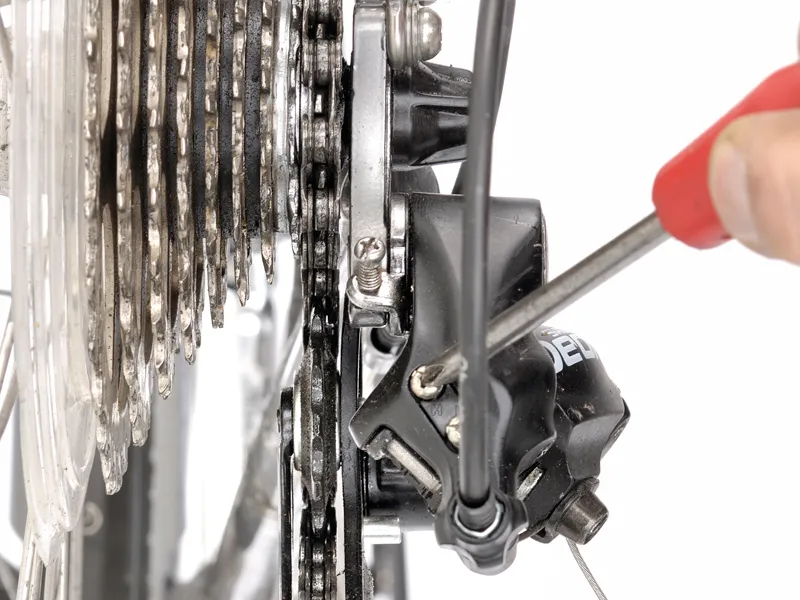
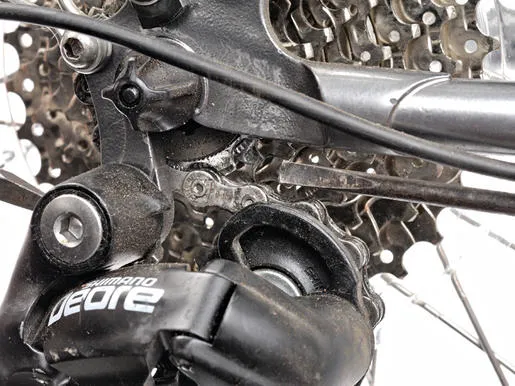
With the chain on the largest rear sprocket and smallest chainwheel, check the upper derailleur pulley is as close as possible to the large sprocket without fouling the sprockets (turn the B-screw, which controls the derailleur body angle, out nearly as far it'll go). Check for fouling of the other gears, tightening the B-screw if necessary. Move the chain to the smallest rear sprocket and middle chainwheel.
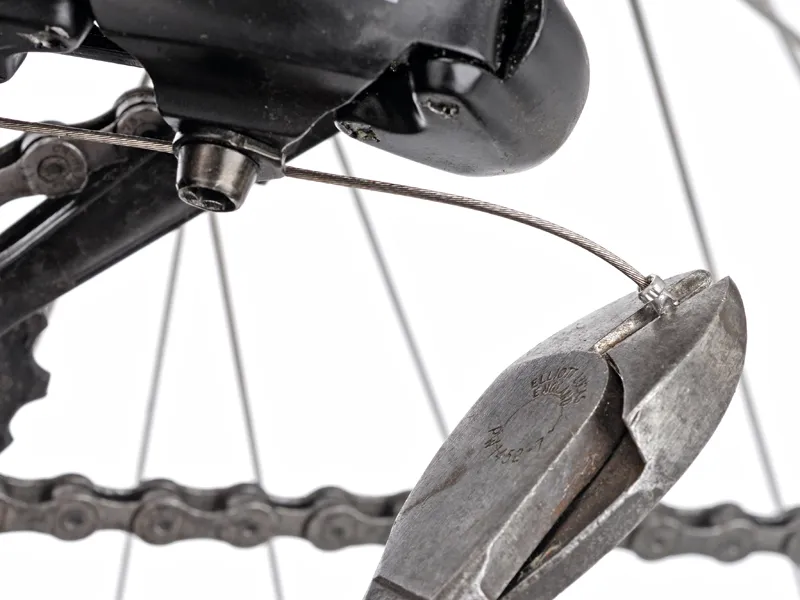
Back off the cable adjuster on the down-tube completely. Turn the cable adjuster fully clockwise and back off one complete turn anti-clockwise. Loosen the inner cable clamp. The high gear (small sprocket) limit screw is the upper one. Visually check the upper derailleur cage pulley is in line beneath the smallest rear sprocket. If not, adjust the limit screw. With pliers, pull the inner cable taut and tighten the cable clamp. Adjust indexing as in 6.
5] Problem: Chain won't go on or comes off large rear sprocket or chain/rear derailleur catches spokes

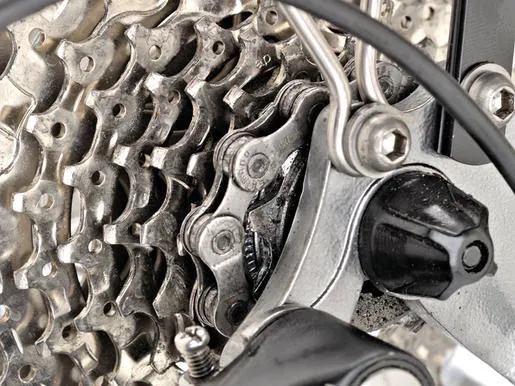
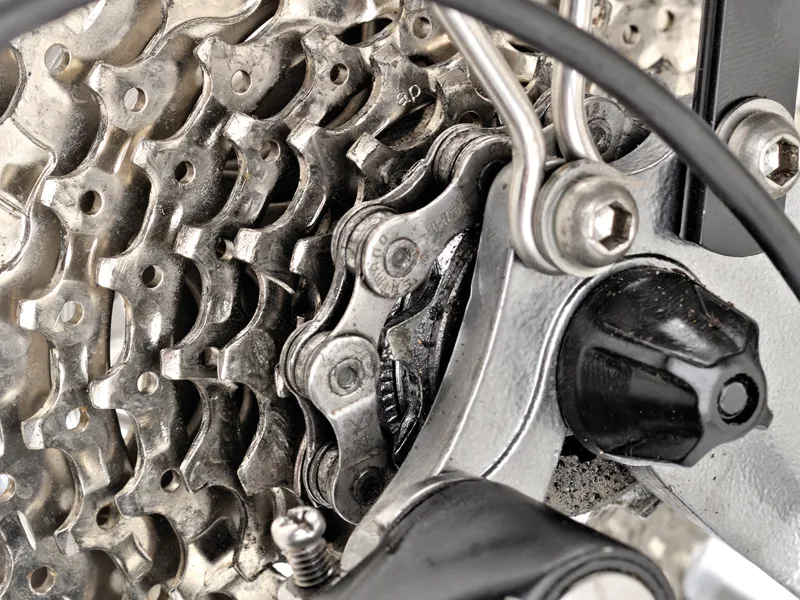
Shift into the lowest gear (largest rear sprocket). Visually check that the upper derailleur cage is in line beneath the largest rear sprocket. If it is not, adjust the limit screw until the pulley is exactly in line with the sprocket. Now shift to a couple of higher gears and back again to check that the chain does not overshift the largest rear sprocket. Screw in low gear adjuster on rear derailleur (lower screw) an eighth of a turn at a time until it no longer happens.
6] Problem: Rear derailleur doesn't change gear when selected or changes two gears at a time, or indexing is imprecise
Possible cause: Rear gear cable tension needs adjusting
Select top gear, turn the pedals forward and select the next gear. If the chain doesn't move smoothly to the next sprocket, turn the adjuster anti-clockwise half a turn at a time until it does. Select the next largest sprocket and check that the chain will move cleanly to it. If not, turn the cable adjuster anti-clockwise a further quarter of a turn at a time until the change is clean.
Check that the upward shifts (to smaller sprockets) are still okay. If not, back off (turning clockwise) the cable adjuster until the shifts are correct. For 10-speed, select the second smallest sprocket. Press the STI lever just enough to take up the slack and turn the cranks.
If the chain shifts to the third smallest sprocket, turn the adjuster clockwise until the chain returns to the second sprocket. If no noise is heard at all, turn the adjuster anti-clockwise until the chain hits the third sprocket and makes a noise. Return the lever to second gear position; if the chain continues to rub on the third sprocket turn the adjuster clockwise until the noise stops. Check the rear derailleur now works correctly across the full range of the cassette.
Possible cause: Hanger alignment is incorrect (special tool required – only for the more experienced)
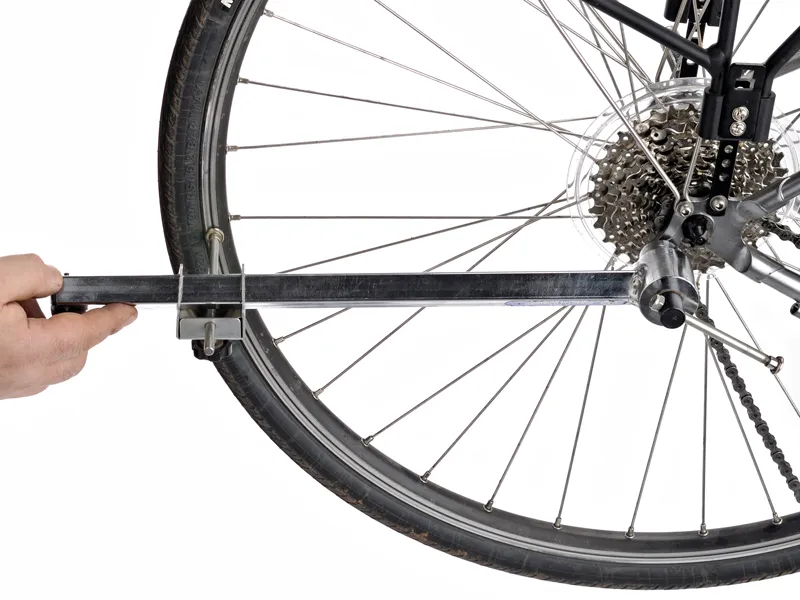
Incorrect rear derailleur hanger alignment is a common cause of gear indexing troubles. To correct the alignment, screw the special tool to the derailleur threads in the hanger. Adjust the pointer so it is in line with the rim and about 2mm above the rim. Rotate the pointer of the tool to the twelve, three, six and nine o'clock positions of the rim. The pointer should be at the same height above the rim at all positions.
To correct any misalignment, use the tool to bend the hanger so it is perfectly aligned at all four points. If you do not have the tool or have an aluminium or carbon fibre frame, you should take your bike to an experienced bike shop for a hanger alignment check.
Possible cause: Cables need replacing
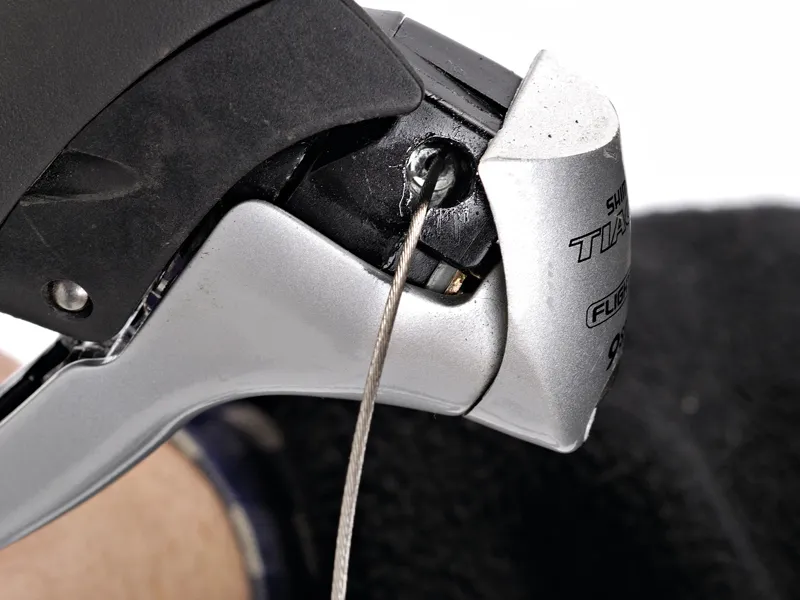
Use the old outer cables as a guide for the new outer cable lengths – the length to the stops on the frame must be enough that the bars can be turned without tugging the cables. Use sharp cable cutters to trim the outer gear cable. The end may become slightly flattened, so squeeze it back into shape. Use a file to get the end as flat as possible and then open the liner up with a sharp point before fitting the ferrule. Select top gear. Back off all the cable adjusters. Loosen the cable clamp bolt and push the inner cable out through the shifter. Feed the new inner gear cable through the shifter lever and housing and through the first section of outer cable. Continue feeding the inner cables through the stops, bottom bracket guides and outer cable. Check that the ferrules are fitted and properly seated in the stops. Attach the inner wire to the derailleur clamp and, pulling the inner cable taut, tighten the clamp bolt. Adjust rear cable tension as described previously.
7] Problem: Chain jumping on sprockets
Possible cause: Chain tension needs adjusting
See 6] Cable/cassette needs lubrication/replacement
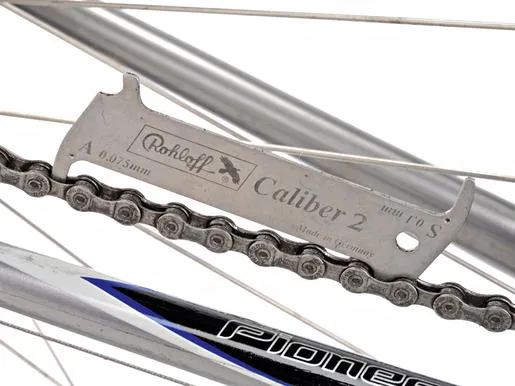
Possible cause: Chain is worn

Check the chain for wear with a chain wear checker tool, or use a steel rule and measure the chain's pin to pin distance over 24 links. If it's greater than 308mm, the chain is worn and needs replacing. Replacing the chain a little earlier, at 306mm, will probably obviate the need for a new cassette. Chain replacement is dependent on chain type.
Possible cause: Cassette is worn
If the chain is worn beyond the above limits, the cassette will probably be worn excessively as well and will need replacing at the same time as the chain. Slide the correct lockring tool into place and check that it is properly engaged in the splines. Refit the quick release and tighten sufficiently to keep the lockring tool fully seated in the splines of the lockring.
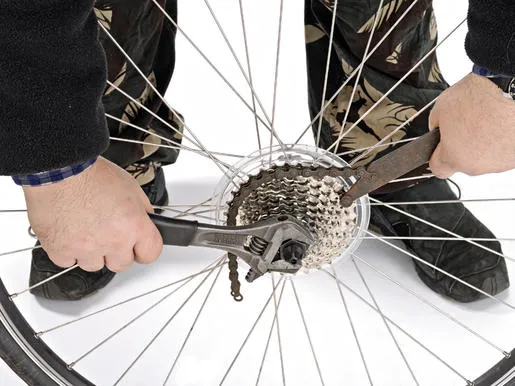
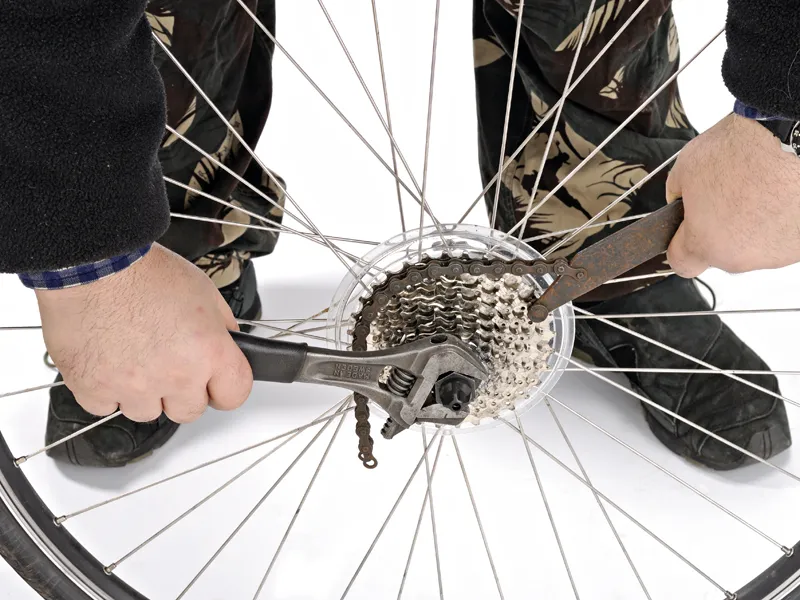
With the wheel vertical, place the chain whip on the left side of one of the larger sprockets. It should be positioned so that its handle is just above the horizontal.
Make sure that the chain is securely wrapped around the sprockets' teeth and that the short piece of chain on the chain whip is also fully engaged. Put a little pressure on the chain whip's handle to tension the chain. Fit a large adjustable spanner to the lockring tool so that its handle is horizontal or just above on the right-hand side. Push down on both the chain whip and adjustable spanner firmly. The lockring should loosen easily. Take care not to let the chain whip slip.Remove the wheel's quick release. Loosen the lockring completely and remove it.
To fit a new cassette, align the triangular mark on top of the cassette body with the widest spline and slide on. It is very important to ensure that the spacers and shims all go in their correct position – it is easy to check by eye that all the sprockets are spaced identically apart.