

At the hands of an over enthusiastic jet wash or GT85 user, it's remarkably easy to kill your freehub in no time at all. Once water and dirt find their way into the internals of your freehub and strip any lubrication away, your bike will begin to sound like an old, rusty lift.
- This hubsmith hub brings all the clicks to the yard
- 5 ways to make your old bike feel like new
- Handy essentials for the home workshop
Fixing this problem requires some special tools and a little extra know-how. But if you follow our step by step guide below, you should be able to service your own freehub. As always though, if you're in any doubt don't hesitate in taking your poorly wheel to your local bike shop to have a pro look at it.
Although the guide below only covers Shimano and Campagnolo freehubs, the techniques described can be applied to many different hubs on the market.
How to service your freehub
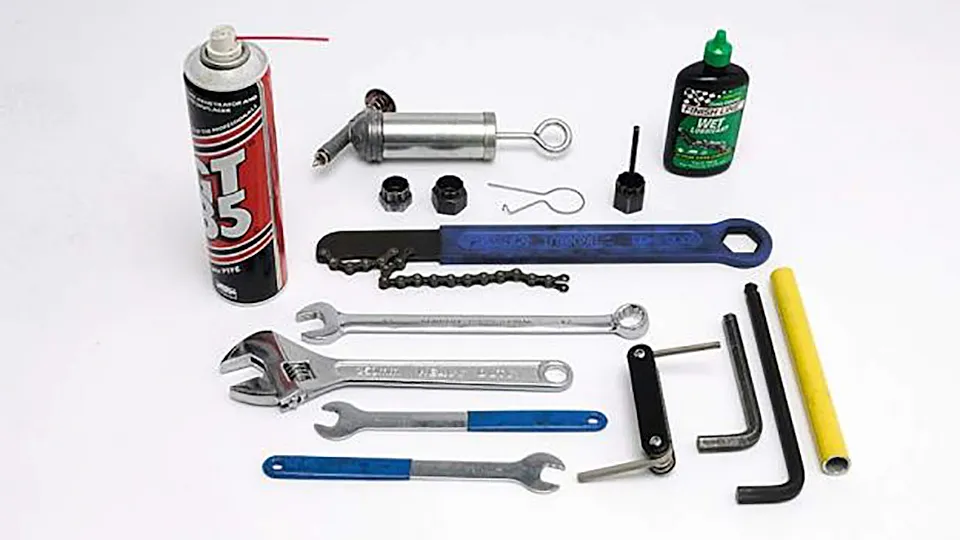
What you'll need:
- 10mm and 12mm Allen keys
- Allen key multi-tool
- Extension tube/bar
- Chain whip
- Lockring remover
- Cone spanners
- 17mm spanner
- If you have a Campagnolo hub, you'll also need a Campag' pawl holder
Servicing Shimano (sealed) style freehubs
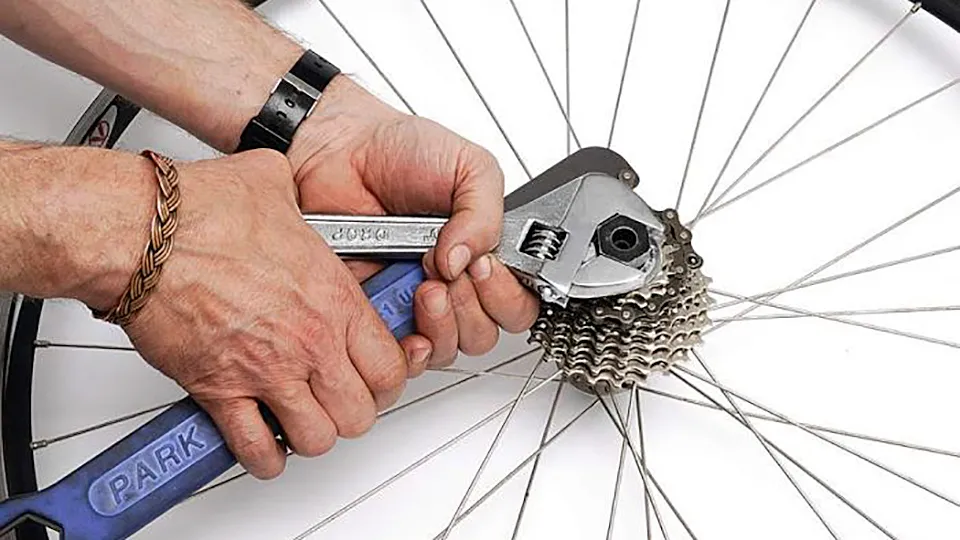
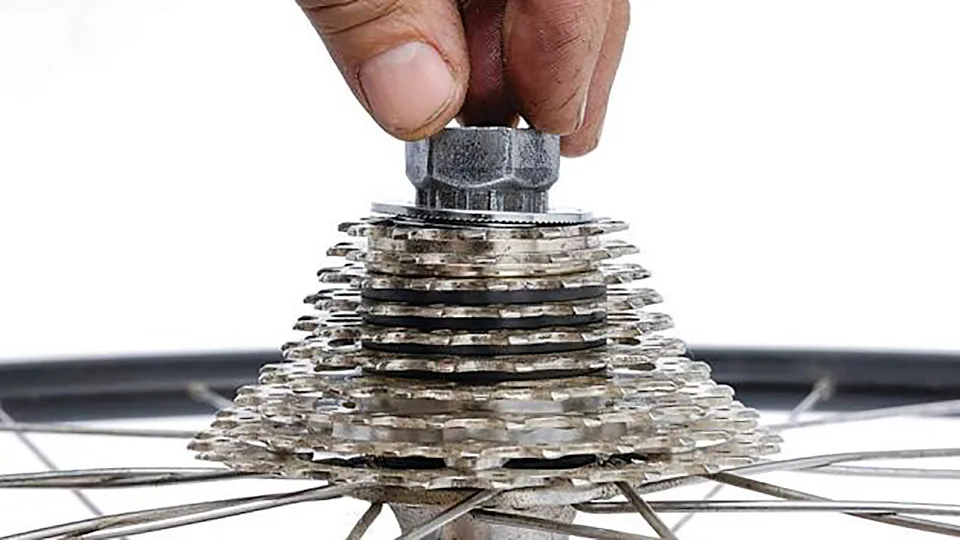
Step 1: Remove your cassette
Remove the rear wheel and stop the cassette from spinning using a chain whip. Wrap the chain whip in a clockwise direction on the cog which allows for maximum chain wrap.
Insert the cassette lockring tool and align a longish spanner to the left of the chain whip handle, close enough to enable a two-handed grip. Now squeeze firmly, unscrewing lockring and cogs.
The very small gap between the cassette lockring and the axle locknut can prevent certain splined tools from fitting correctly, but a Shimano or Park tool should always work.
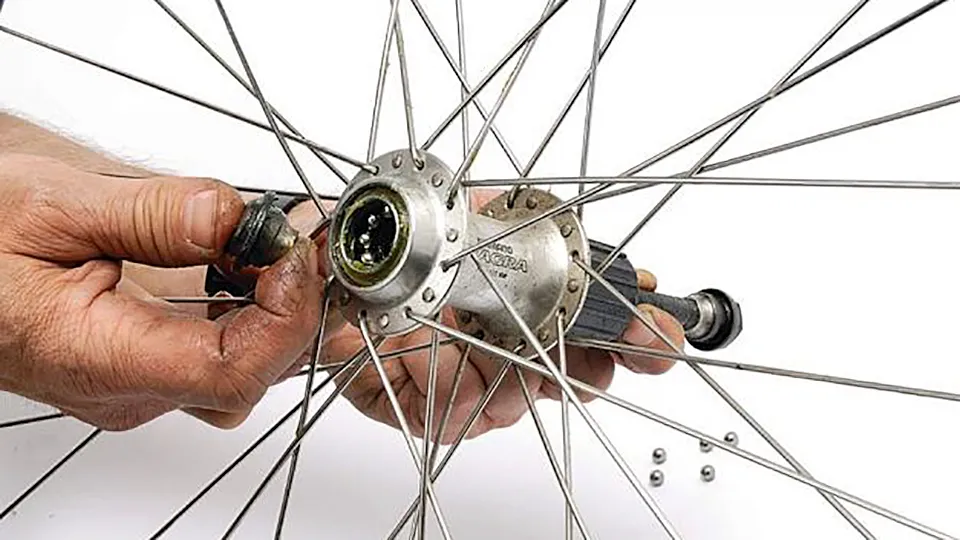
Step 2: Remove axle and ball bearings
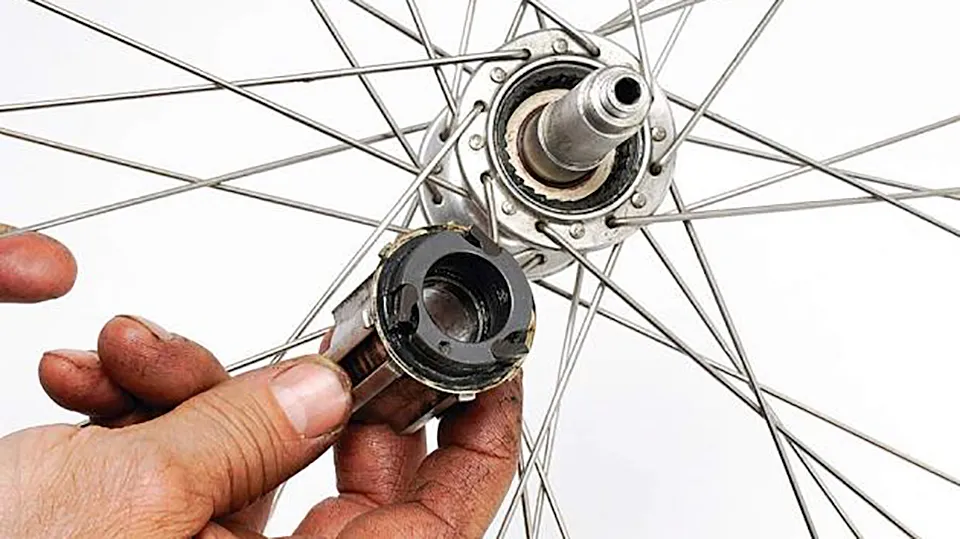
Check the freehub for wear to see if it needs replacing or just cleaning and relubing. To do this, firmly grab the splined body and give it a wiggle. If it moves more than a couple of millimetres side to side, replace it. Otherwise, a good clean and oil will do fine.
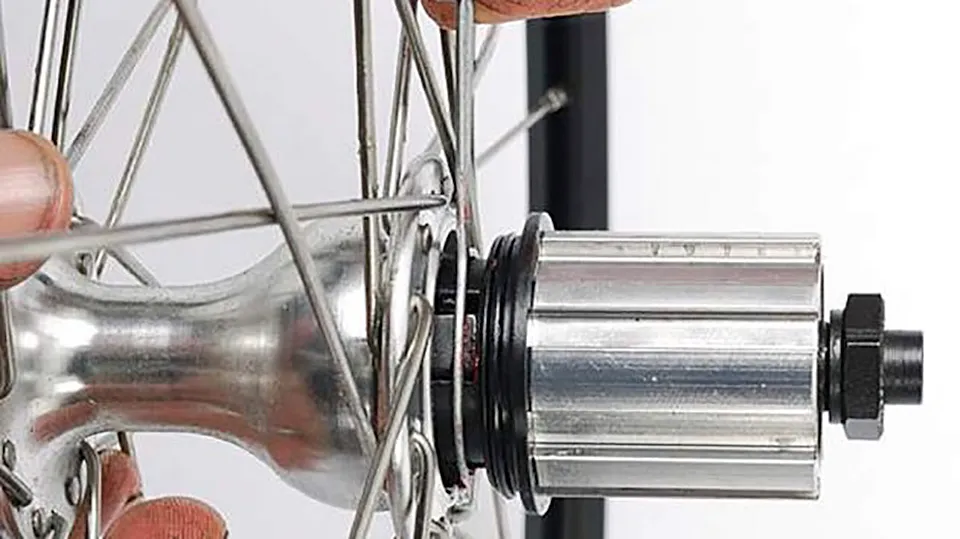
Slip a 14 or 15mm cone spanner onto the left (non-drive side) cone, and break loose the (usually) 17mm left locknut with a spanner. Unscrew the locknut, then the cone and withdraw the axle assembly, catching the loose balls on a clean rag.
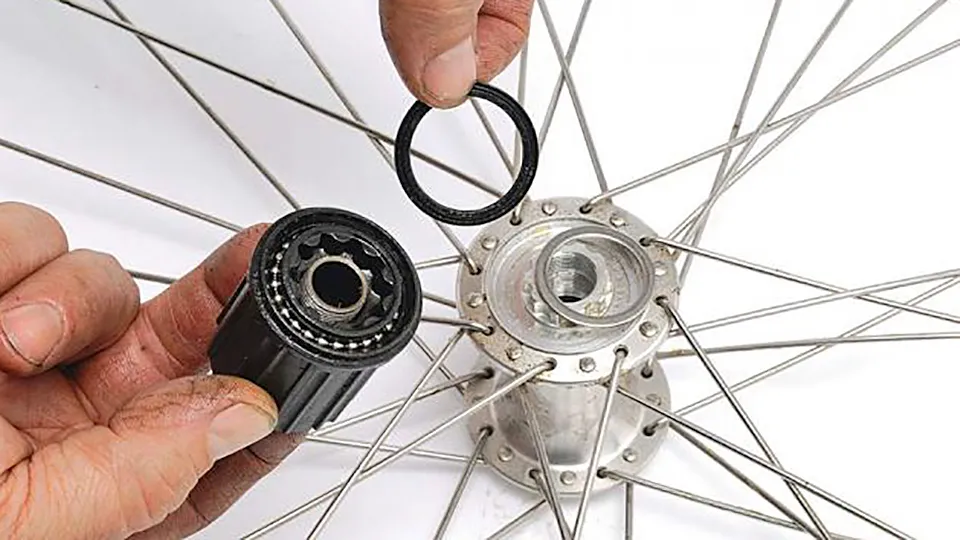
Step 3: Removing the freehub body
To get to the back of the freehub body and remove the seal for cleaning — or to simply replace it — it first needs to come off. Insert a 10mm Allen key into the hollow tube-like bolt holding it in place from the right (drive side) and turn counter-clockwise. You will likely have to use a fair amount of muscle power to dislodge the bolt. It might help to use a small extension bar to make the Allen key handle longer.
Shimano lookalike freehubs, made by companies such as Joy Tech can be a bit trickier to remove as the retaining bolt will often be removed from the left side of the hub. This will require a longer, more stout Allen key.
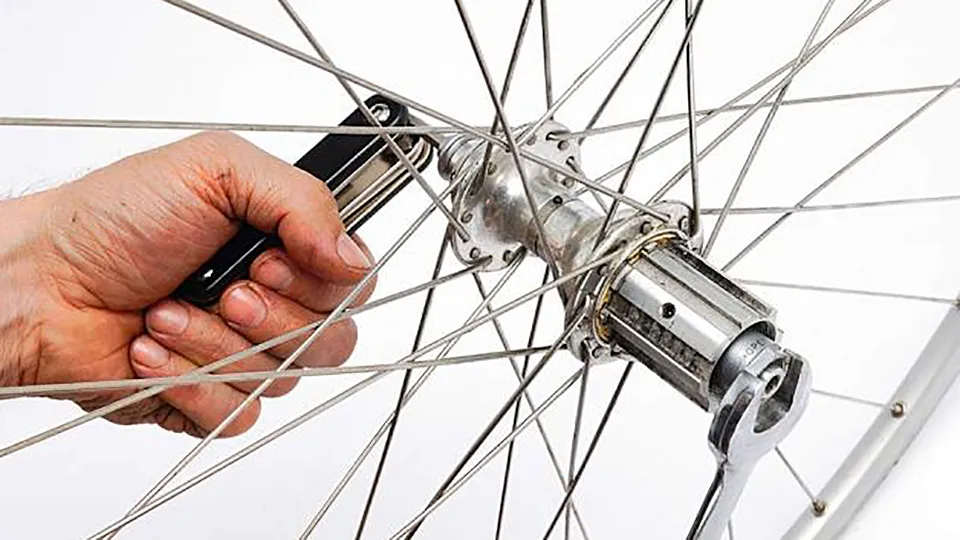
Step 4: Flush twice
Wearing goggles, grab a can of GT85 or WD-40 and spray the freehub's internals until any roughness is reduced. Follow this with a generous application of wet lube. Let it drain, wipe off the excess and make a final application. Then carefully re-insert the seal.
Grease the splined interface on the hubshell and re-install the freehub body. Re-torque the bolt firmly. Wipe away any excess oil before reassembling the axle and bearings by reversing the previous steps, ensuring the bearings are clean and greasy. See our in-depth guide on how to service hub bearings here.
Some Shimano clone freehubs will use 7/32in balls and a slightly different shaped cone on the drive side and a standard cone and 1/4in balls on the non drive side. Don’t mix them up!
Servicing Campagnolo freehubs
Step 1: Remove the freehub body
For new Campagnolo Centaur, Chorus and Record hubs, immobilise the axle from the left side using a 5mm Allen key. Now, with a 17mm spanner, turn the right side locknut clockwise and remove it. The freehub assembly should come away with a firm tug, leaving the axle assembly in the hub. The pawls and spring will remain in place.
Mirage and Veloce hubs, along with older style Chorus and Record hubs, might require that you loosen a small grub screw first. This is located on the right locknut. On more recent versions it’s no longer present, so you can remove the locknut on the right using a 17mm wrench whilst immobilising the axle from the left with a 5mm Allen key or a second 17mm wrench.
Step 2: Campag old style vs. new style
On current Mirage and Veloce hubs, the left locknut might release first. This should pose no problems as the axle and freehub will slide right off with a firm tug. Do this over a rag to catch any parts as the springs and pawls are likely to go flying off.
There are two types of springs currently in use; multiple small coil springs and single-circle clip springs. The former are found in older Hope and older Campagnolo hubs. The latter is used in newer hubs from Hope, Campagnolo and a host of other manufacturers.
Note the disassembly order, paying particular attention to orientation and shape of the internals. In particular, note the orientation of the edge that engages the drive ring and pawl seat.
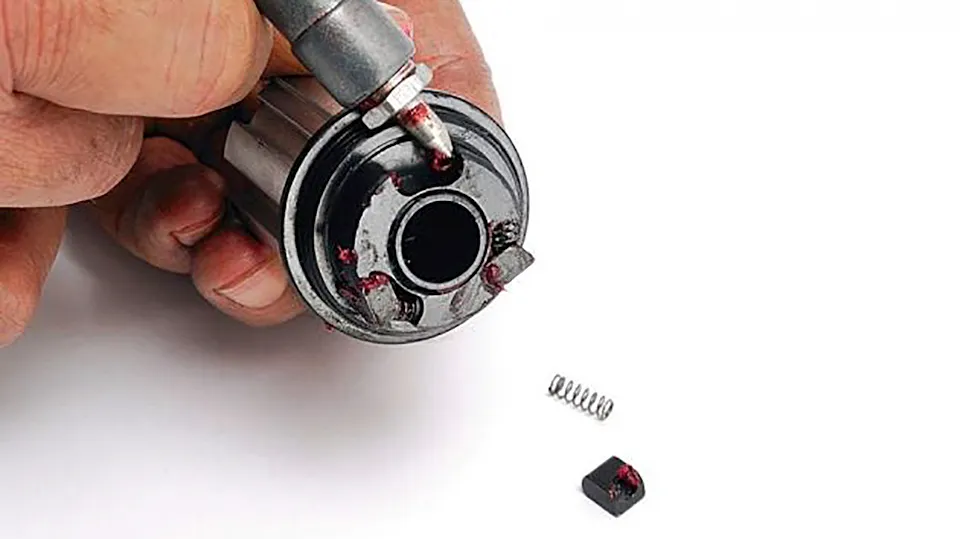
Step 3: Lube it up
Squirt a few dabs of light grease onto the drive ring and make sure there’s a small dab of grease between the pawl base and seat. This is the spot subjected to the greatest level of load and friction in a hub. Considering the entire brunt of each pedal stroke is channelled through these small contact points, they deserve and require your love and attention.
Dab a bit of grease into the spring seats to help hold them in place. Squeeze a few drops of oil onto the drive ring. Ensure any seals are seated correctly, using your fingernail to ease the thin rubber edge into its groove. With O-ring seals, pay particularly close attention to avoid pinching and displacing them when reinserting the freehub body.
Step 4: Tricky bits
Wrap the compression tool around the pawls with the hook facing outwards then carefully slide the freehub body back onto the axle, partially inserting the pawls into the ring drive but allowing enough space to remove the tool. Unhook it and pull it down and away, while gently pulling it apart. The freehub should drop into place. If you're struggling, try turning it counter-clockwise whilst inserting it as this will help nudge the pawls into place.
If you don’t have a compression tool, a length of strong sewing thread will do. Wrap it a couple of times over the compressed pawls, then over itself. Once the body is partially inserted, you should be able to gently pull the thread free with a tug. Install the locknut.
Step 5: Tighten the lockring
Before tightening, ensure the cassette lockring is correctly threaded with your fingers as they’re very easy to cross-thread. Torque the lockring to the manufacturer's specifications and you're good to go.
