Moving from flat pedals to cycling with clipped in with cleats and clipless pedals is a major step for many cyclists.
These pedal systems use a cleat that binds easily with a corresponding pedal body. They are used across cycling disciplines, including road, gravel riding and mountain biking. But cleats, pedals and cycling shoes are often tailored to the specific demands of each riding style.
The term 'clipless' can be confusing because you 'clip in' to these pedals. However, the term comes from clipless pedals not having the toe clips (or straps) that professional cyclists and amateurs alike used to use to hold their feet in place.
In this guide, we’ll take you through everything you need to know about cycling with cleats, from the advantages and disadvantages to the different types of cleats and how to use clipless pedals.
You can use the links below to jump to relevant sections:
When did people start cycling with cleats?
Cleats came to cycling in 1984 when Look applied its step-in ski-binding technology to bikes.
Bernard Hinault rode Look's design to Tour de France victory in 1985 and there was no going back.
Now, cycling with cleats is pretty much the norm in road cycling and many off-road riders use them, too, making clipless pedals and cleats arguably one of the top cycling innovations of all time.
Is it better to cycle with cleats?
Some say cycling with cleats improves pedalling efficiency because clipless pedals encourage you to engage your foot through the whole pedal rotation, rather than just pushing on the pedals on the downstroke.
On the flip side, some studies have shown nobody really pulls up on the pedals in any useful way, and improved efficiency from cycling with cleats might just be a sensation.
Having said that, clipless pedals stop your feet from sliding around, which is important if you're pedalling at higher cadences, sprinting, riding in the wet or – for some riders – riding off-road. On that note, we've got a guide on clipless pedals vs flat pedals, exploring the pros and cons of each.
Cycling with cleats can also be more comfortable, especially on long rides, because your foot is held in the right place and you won't have to adjust the position.
Despite being a rite of passage for many cyclists, using clipless pedals for the first time can be intimidating, so we've put together this guide to explain the different cycling cleat types, which clipless pedals will suit your riding style, how to use cleats and finally some tips to keep in mind.
Before we get started, if you're looking to upgrade your pedals, or you're buying clipless pedals for the first time, we've got full guides to the best road bike pedals and best mountain bike pedals.
What type of cycling cleats do I need?
Broadly, clipless pedals use either two-bolt cleats or three-bolt cleats. Which option you go for will likely depend on the type of riding you do.
Two-bolt cleats
Two-bolt cleats, as their name suggests, have two points of attachment to the soles of your shoes.
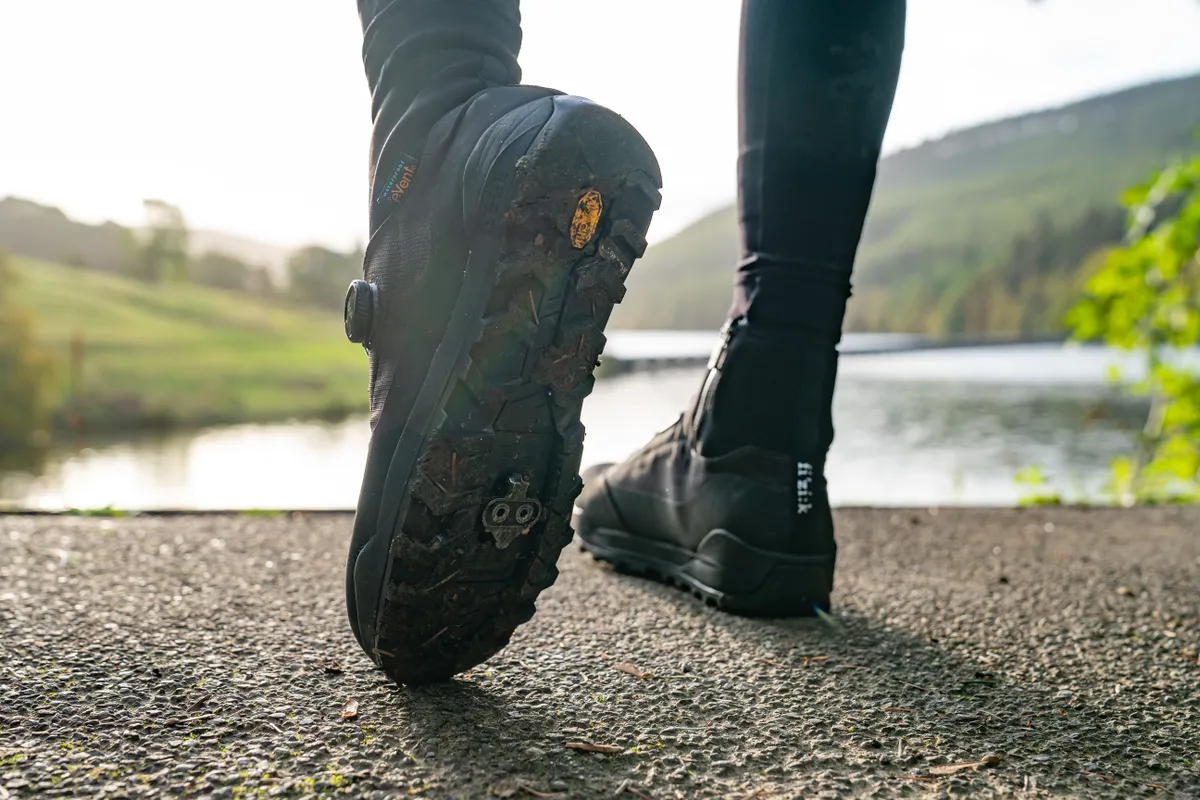
They are made of metal and are used mostly with double-sided mountain bike pedals. Two-bolt cleats are often small, enabling cycling shoes designed for these cleats to have an outer sole with treads around the edges. This also means the cleat is recessed into the shoe’s sole.
This makes walking in shoes for two-bolt cleats easier than with three-bolt cleats, so they’re typically used for mountain bike shoes, gravel bike shoes and shoes for commuting, which are all likely to see some off-bike action.
Two-bolt cleats are typically used with pedals with double-sided entry. This makes clipping into and out of these pedals easier than other clipless pedal designs because you don’t have to worry about whether the pedal is the right way up.
Three-bolt cleats
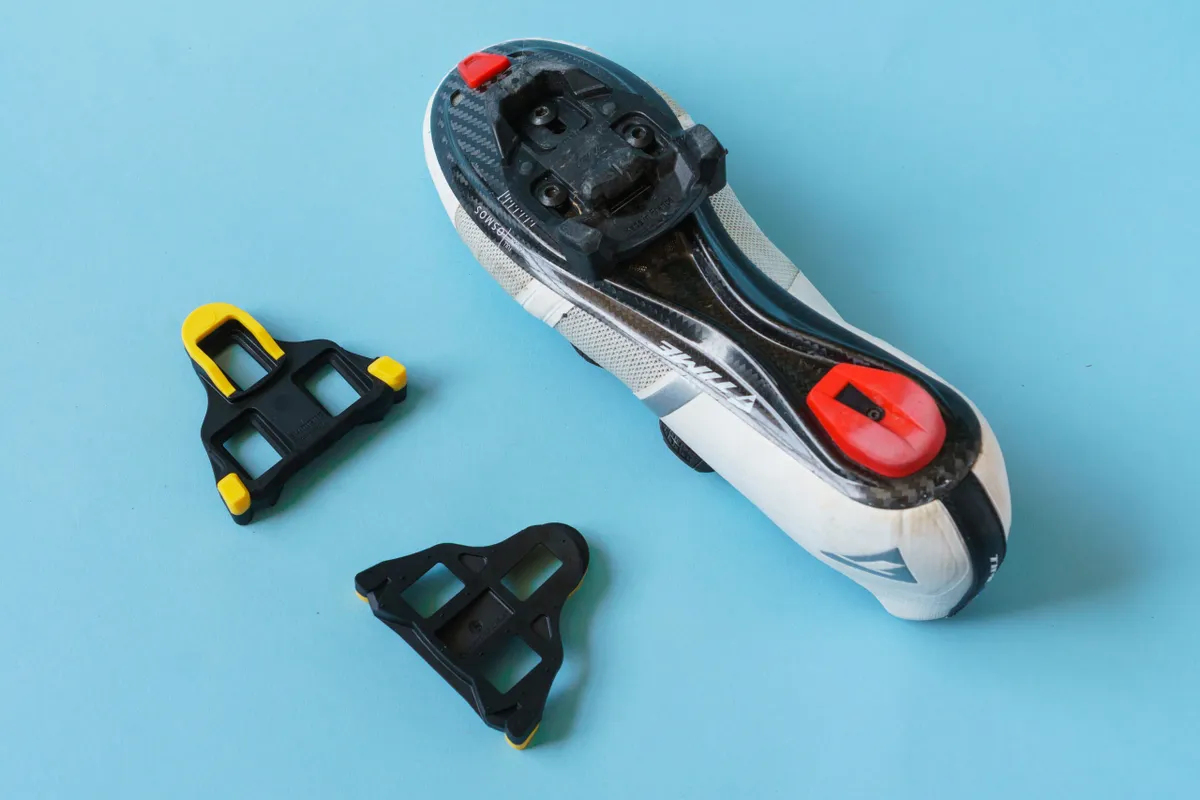
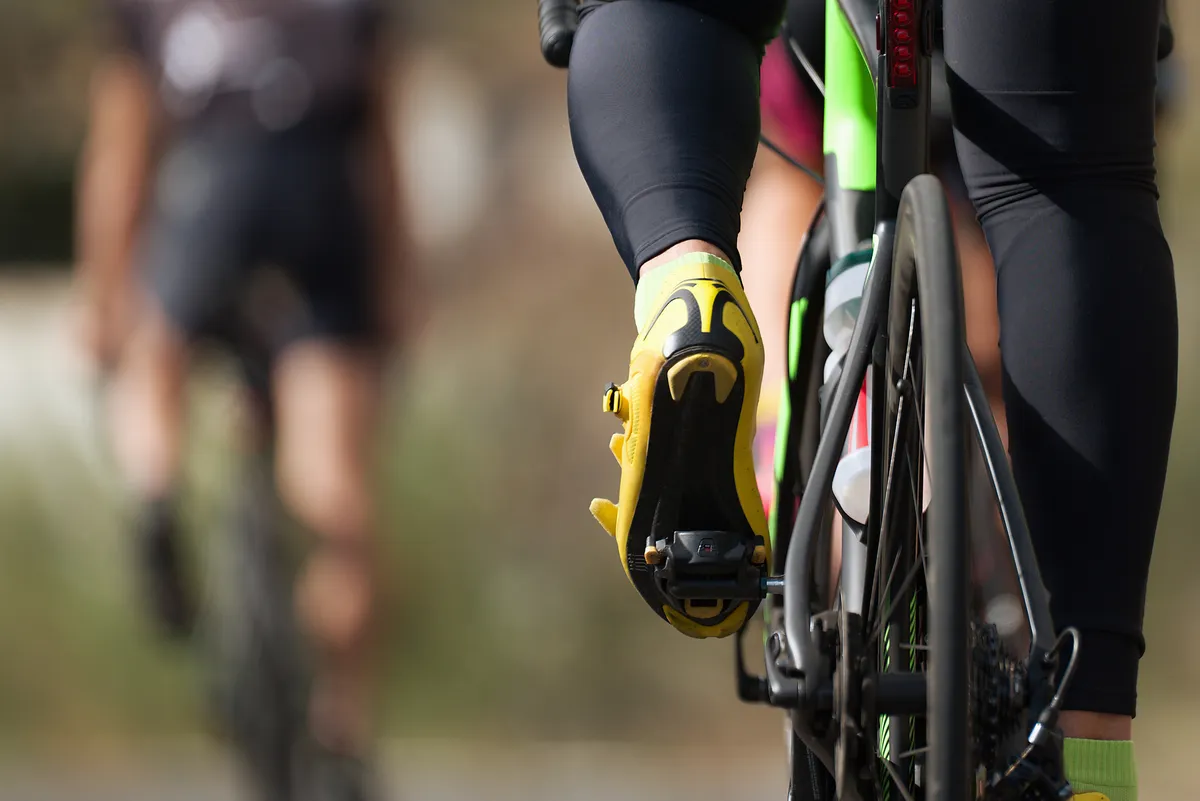
Road cycling shoes are usually designed with three bolt holes in their soles to fit three-bolt cleats. These cleats are a lot larger than two-bolt cleats and usually made of plastic. The larger cleat gives a broader attachment point between the shoe and the pedal, adding stability and potentially greater power transfer.
Most shoes designed for three-bolt cleats have a smooth sole, which makes walking in them harder.
Pedals that pair with three-bolt cleats are single-sided, which makes clipping in when you start off more tricky than two-bolt cleat systems because you have to flick the pedal over to engage with the cleat. It’s quickly learned, but more difficult for beginners.
There’s no reason why you can’t use two-bolt cleats and pedals on a road bike. They’re also likely to be an advantage if you’re planning to go touring, or for walking around a coffee stop in wet weather.
Different clipless pedal systems
Once you’ve decided between two-bolt and three-bolt cleats, you need to decide on which specific pedal system to use. There are several different systems, which are not compatible with each other.
Shimano SPD
Shimano SPD is the predominant two-bolt pedal system used by the majority of off-road riders. Its small metal cleats clip into pedals that are usually double-sided and have an adjustable spring tensioner at their rear end that alters the release tension, making it harder or easier to clip in and out.
You can buy different SPD cleats, which allow either single-angle or multiple-angle release of the cleat from the pedal. We’ve got a separate article on Shimano SH51 vs SH56 cleats that explains the difference.
SPD pedals are sold by a number of brands, not just Shimano. These include Ritchey and Look.
Crankbrothers

An alternative two-bolt system, Crankbrothers cleats are metal and similar to Shimano SPD cleats, but they fit into a wide metal bar sprung across the pedal.
In the minimalist Eggbeater pedals, this gives you four points of entry into the pedal and excellent mud-shedding ability, although foot stability isn’t as great as with Shimano SPD pedals.
You can’t alter release tension with this system, although Crankbrothers cleats are available with different release angles. Crankbrothers also makes pedals with a two-sided body, such as the Mallet, which improves foot stability.
Shimano SPD-SL
Shimano’s second pedal and cleat system is the road-going, three-bolt Shimano SPD-SL. This uses a large triangular plastic cleat, which can protrude beyond the sides of narrow road cycling shoes. You can buy Shimano SPD-SL cleats with different amounts of float, which are colour-coded.
There’s a wide attachment surface between the cleat and the shoe, with an adjustable spring-release mechanism at the rear of the pedal.
Look Keo
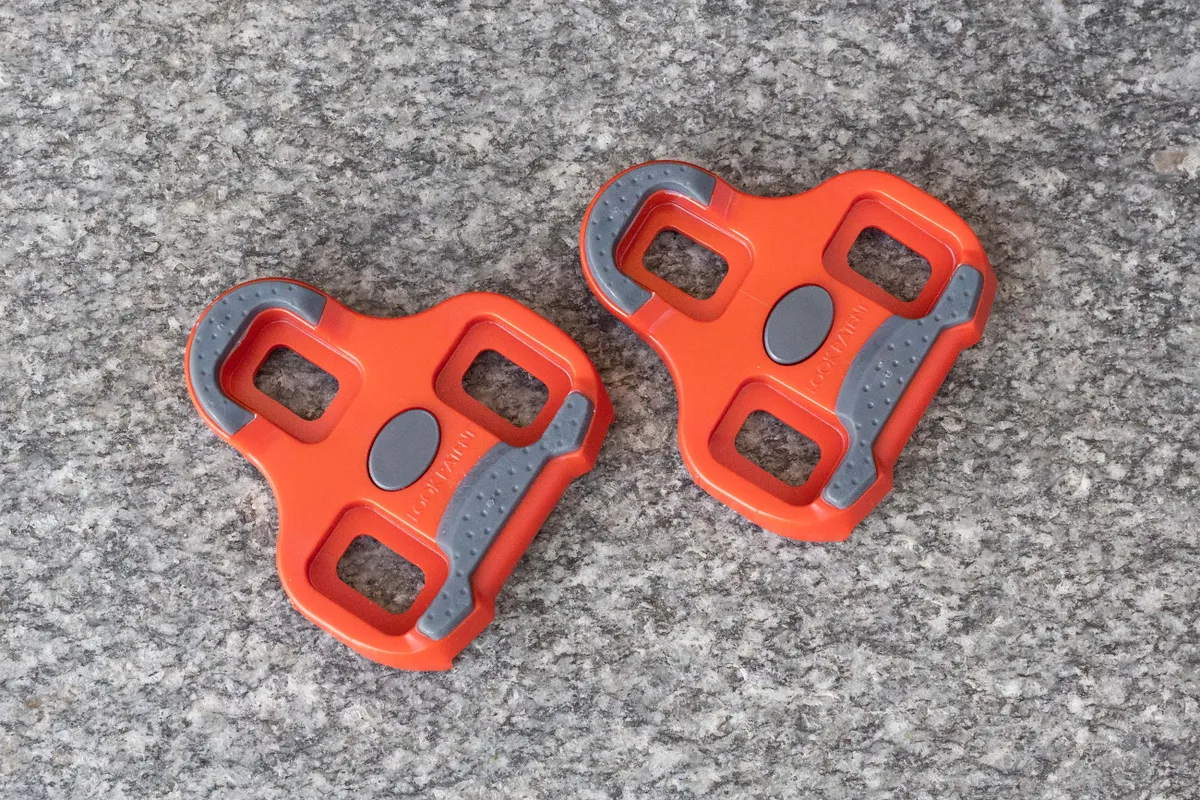
A competitor to the Shimano SPD-SL system (which Look actually pre-dates), the Look Keo pedal system also uses plastic three-bolt cleats.
As with Shimano SPD-SL, you can buy cleats with different amounts of float. The cleats are slightly smaller and narrower than Shimano cleats.
Some Look Keo pedals have an adjustable spring-release system similar to Shimano’s at the rear of the pedal. Another type, named Keo Blade, have a carbon leaf spring under the pedal body that holds the release mechanism closed. You can also buy Look-compatible pedals and cleats from other brands.
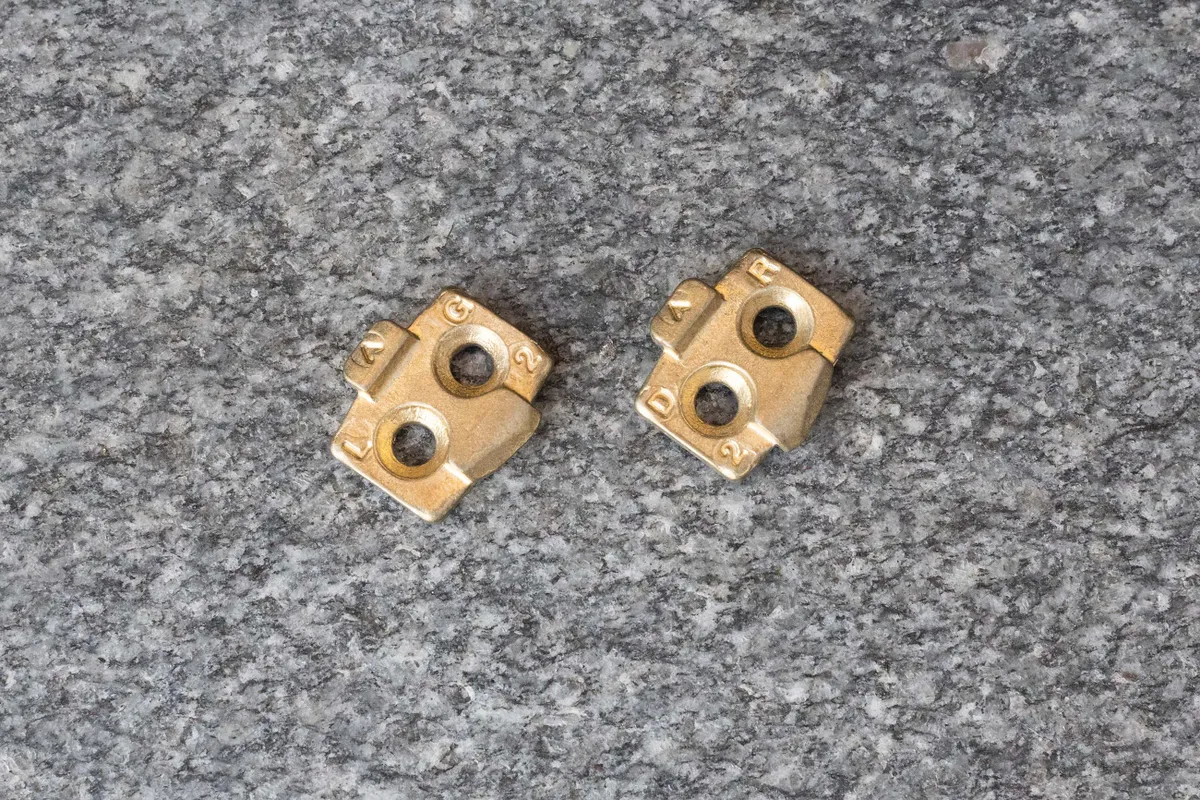
Wahoo Speedplay
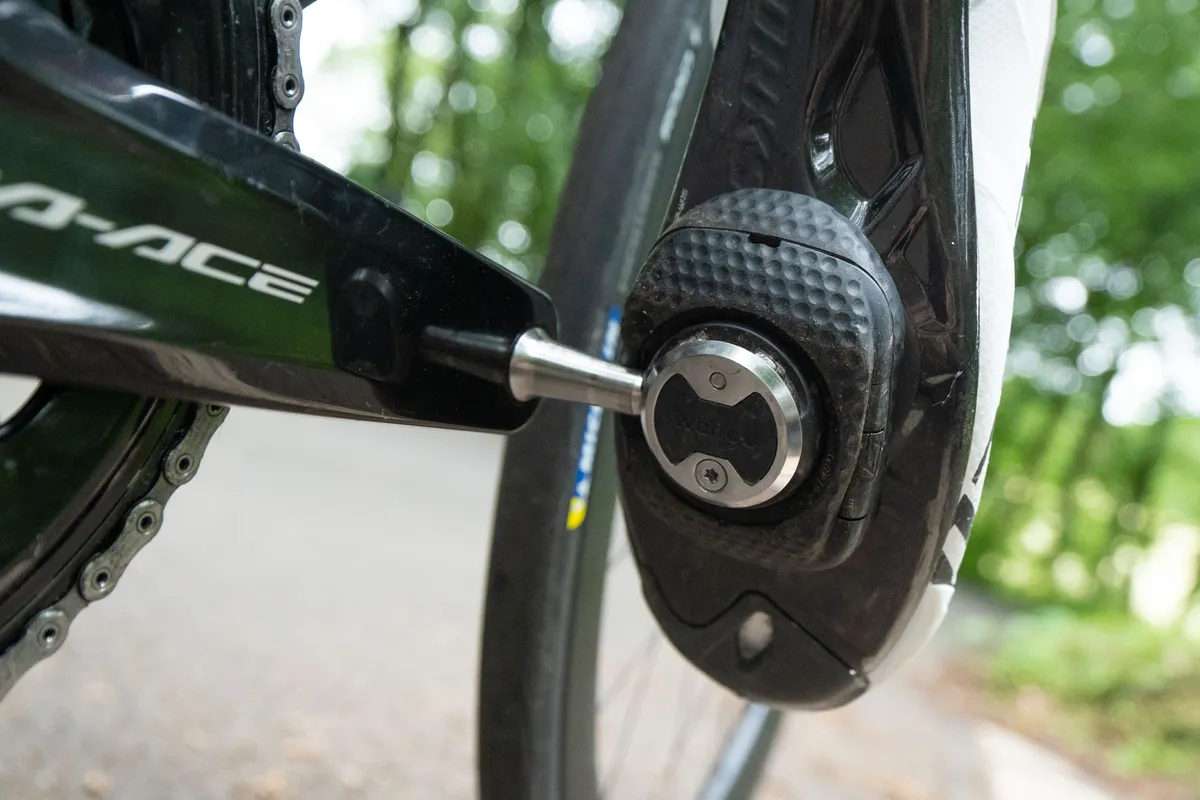
Making things even more confusing, although like Look and Shimano it’s another road-going system, Wahoo Speedplay cleats have four points of attachment to the shoe.
There are a small number of shoes that have drillings for four bolts, but the more usual approach is to use the adaptor supplied with the pedals to attach the Wahoo Speedplay cleat to a three-bolt shoe.
In this system, the Wahoo Speedplay cleat holds the adjustment mechanism that determines float between the shoe and the pedal, with small screws that allow for precise tuning of the float angle.
Most Wahoo Speedplay pedals are double-sided. You can’t alter the release tension with the Speedplay system.
Time
Time, now owned by SRAM, is a minor player in both off-road two-bolt and road-going three-bolt pedal systems.
Its two-bolt system uses a metal cleat that’s held in place by a sprung retainer at the front of the pedal body.
Three-bolt Time pedals use a plastic cleat. Its three-bolt road pedals have a rear retainer, but unlike other designs, this stays in the open position until you clip in. Like Look Keo Blade pedals, there’s a carbon leaf spring under the pedal body that tensions the release mechanism.
How to set up cleats on cycling shoes
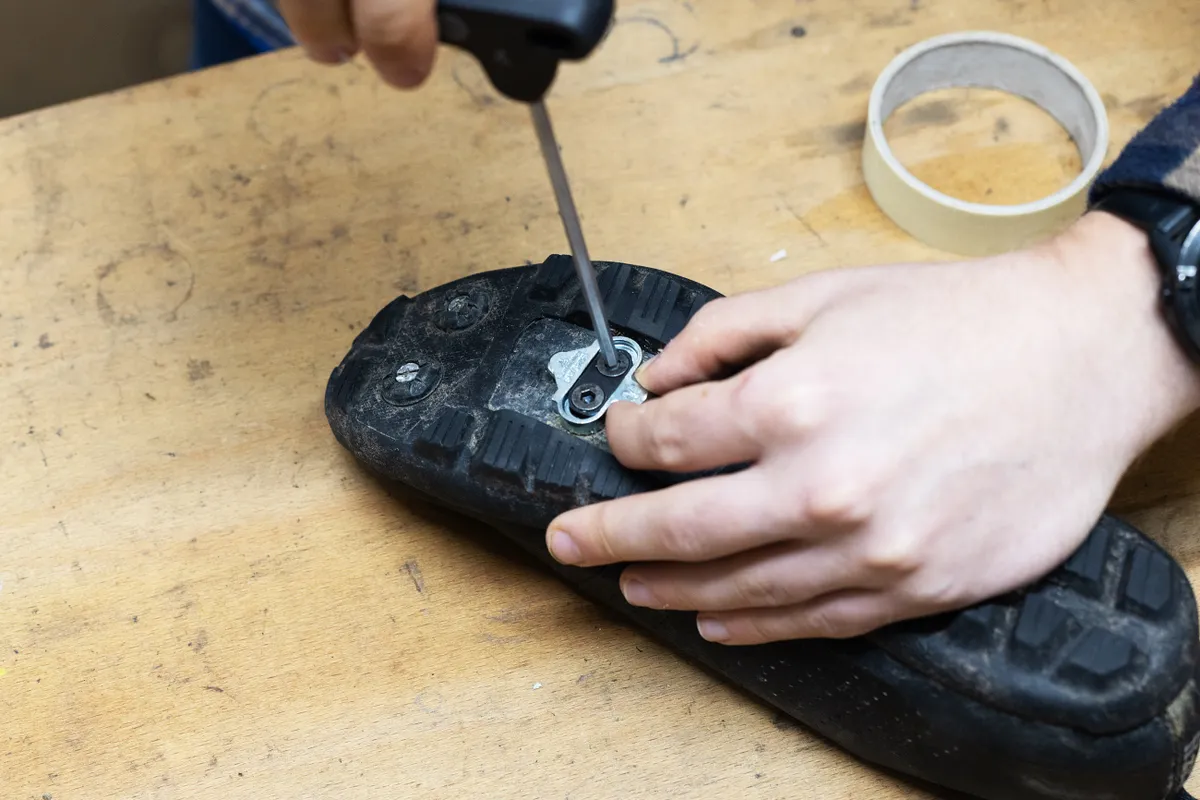
We’ve got a lot more on how to install and adjust cycling cleats, but the key thing is to set them up loosely and see how it feels as a first step.
The key things to get right for you are the forward/aft positioning of your cleats, the side-to-side placement, or stance width, and the toe in/out.
The usual starting point is to position the cleat under the ball of your foot and in line with your shoe. You may find you naturally ride either toe in or toe out, in which case you can adjust the cleat angle. You may also find you prefer the cleat further forward or aft.
You’ll also need to change your pedals to your new clipless pedal system. On your first few rides, take an Allen key so you can adjust your cleat position if it doesn’t feel comfortable.
A good bike shop can help you fix the cleats to your shoes correctly, although they might charge you for a bike fit. You might find you need to adjust your saddle height as well to get comfortable.
How to cycle with cleats and clipless pedals
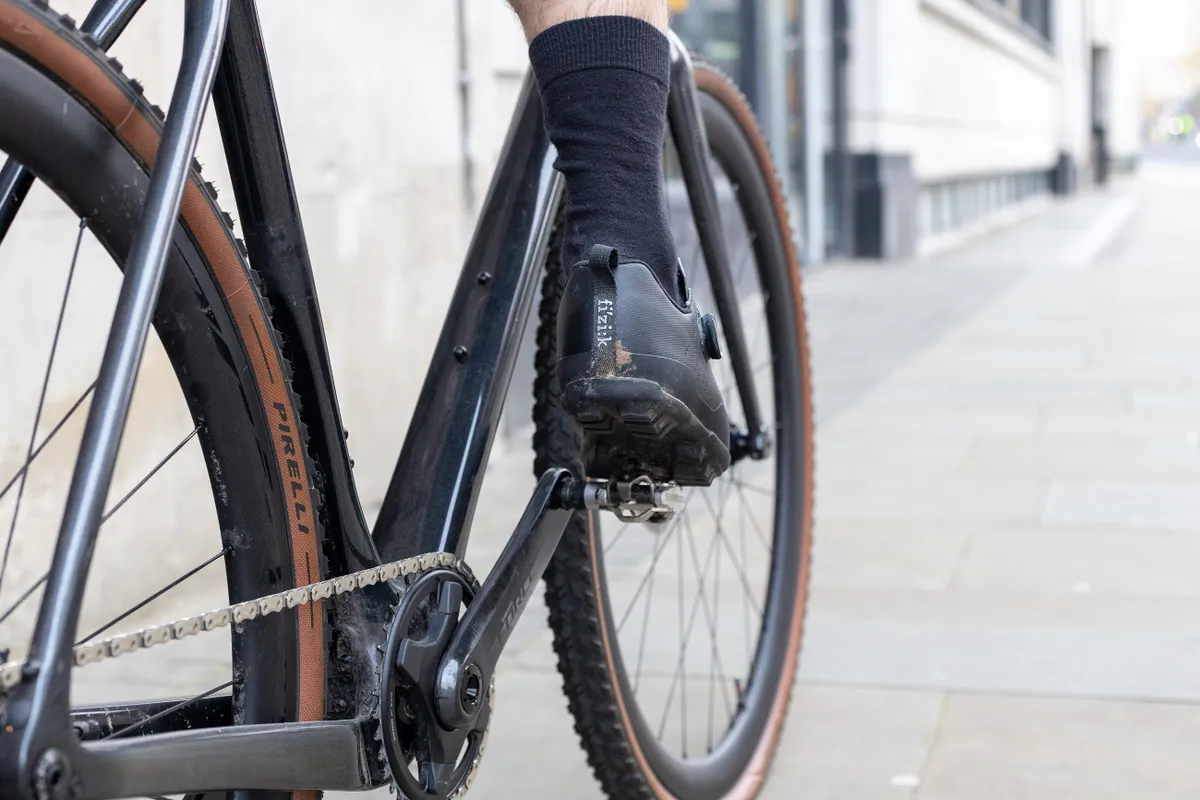
Despite different cleat and clipless pedal designs, the technique for using clipless pedals is virtually the same across brands and types.
You clip yourself into the pedal by sliding the front of the cleat under the catch on the pedal and pressing down hard with your heel. When you clip in, you should both hear and feel the engagement.
To release your foot, twist your heel out to the side. With some practice, you'll be able to do this consistently.
The best way to practise is to start by leaning against a wall, clipping in and out of the pedals until you get the hang of it. Then progress to a quiet road or, better yet, a smooth, grassy area.
Beware of sudden stops in an urban area, such as junctions, narrow streets (where traffic is reduced to a single lane) and traffic lights. You'll find that it's best to unclip your feet before you reach junctions and traffic lights.
And don't worry if you do fall off as you get used to using cycling shoes with cleats. It's happened to the best of us!
9 tips for cycling with cleats
1. Try double-sided pedals first
If you’re nervous about full-on roadie pedals and you’re primarily a commuter, we’d recommend pedals that you can clip into from either side — double-sided pedals.
Pedals that you clip into on one side but have a flat platform on the other are also handy if you would like to also sometimes ride in ‘normal’ shoes.
2. Slacken off the spring tension
Before you jump on your bike, don’t forget to first slacken off each pedal’s spring tension as far as it will go, so it’s as easy as it can be to clip out when you need to. You can then begin to tighten the pedals once you're confident clipping in and out.
3. Practise unclipping while holding onto a fence
Don’t try unclipping both feet at the same time. If you’re at all unsure, practise unclipping while holding onto a fence, or in a doorway or narrow hallway. Try to use a quick, clean, positive outwards swivel of your heel rather than a gradual, slow movement.
4. Anticipate
Anticipating when you'll need to put a foot down to stop and unclipping beforehand is a good habit to learn, and will possibly save you from falling over.
5. Touring or MTB shoes are great for stop-start commuting
A touring or mountain bike shoe with a knobbly sole makes a great commuting choice because you can apply pressure on the pedal without fear of your foot slipping off, no matter how the pedal happens to be aligned. This is particularly handy if your ride means you need to keep clipping in and out at traffic lights.
These shoes also make for easier walking than road shoes, which is ideal for going into your workplace or when you're locking your bike up.
6. Don't walk too far in road shoes
If you intend to do some walking in your cycling shoes, a mountain bike or gravel shoe almost always has a recess along the middle of the sole for the cleat, so it won’t skid noisily on the floor and there’s less risk of slipping.
The recess also helps guide your cleat into place.
7. Keep an eye on cleat wear
Keep an eye on cleat wear in your shoes, particularly if you're using plastic three-bolt road cleats. If the cleats wear down, they can feel loose in the pedal, so you won't be getting the advantages of using them. Most cleats have wear markers and you can get cleat covers for easier walking too.
8. Keep it clean
Don’t forget to look after your clipless system – a lack of maintenance could stop you from clipping in or out smoothly and cause a fall.
Beware of getting your pedals clogged with dirt too.
9. Check the lugs
If you’re having trouble engaging the pedal, check the lugs on your shoes aren’t getting in the way.
You may need to cut back some of the rubber around the cleat for added clearance.
Is it time to replace your cleats?
There will inevitably come a time when you need to replace your cleats due to wear.
Many factors can contribute to cleat wear, such as mileage, walking in cleats and riding conditions.
You should be able to tell that it's time to replace them when it becomes harder to clip in and out of the pedal – or they even unclip unexpectedly.
For more guidance, check out our guide to when you should your replace your cleats.