Knowing how to remove and change bike pedals is a key skill for any cyclist, especially if you're assembling a new bike or want to try out riding with clipless pedals.
In this step-by-step guide, we talk you through the tools you need to change the pedals on your bike, including how to identify your left and right pedals, how to remove old pedals and, of course, how to fit new pedals.
Tools required to change bike pedals
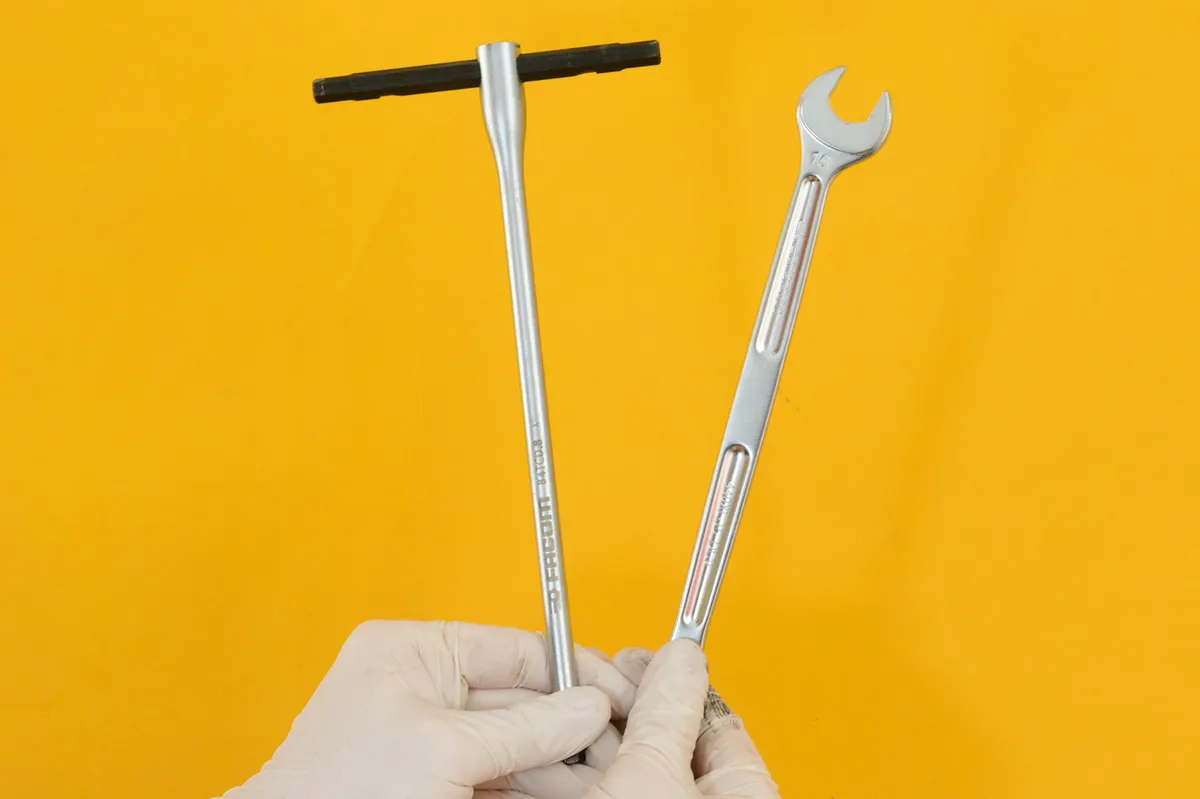
Most pedals are fitted and removed using either a 15mm spanner or an 8mm hex / Allen key.

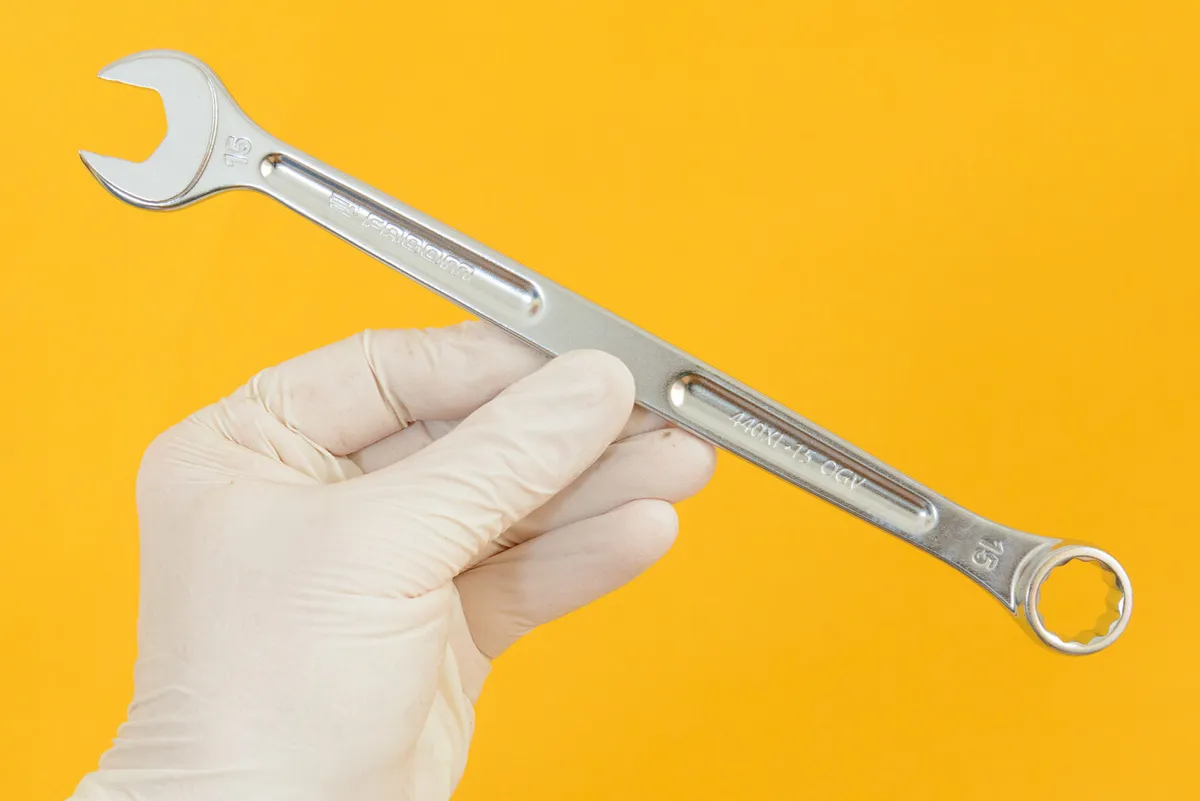
If your pedals have parallel faces on the spindle between the pedal body and the crank, you will need a 15mm spanner.
Any 15mm spanner will work provided it’s not too fat to fit between the crank and pedal body. You may struggle to fit an adjustable spanner in there.

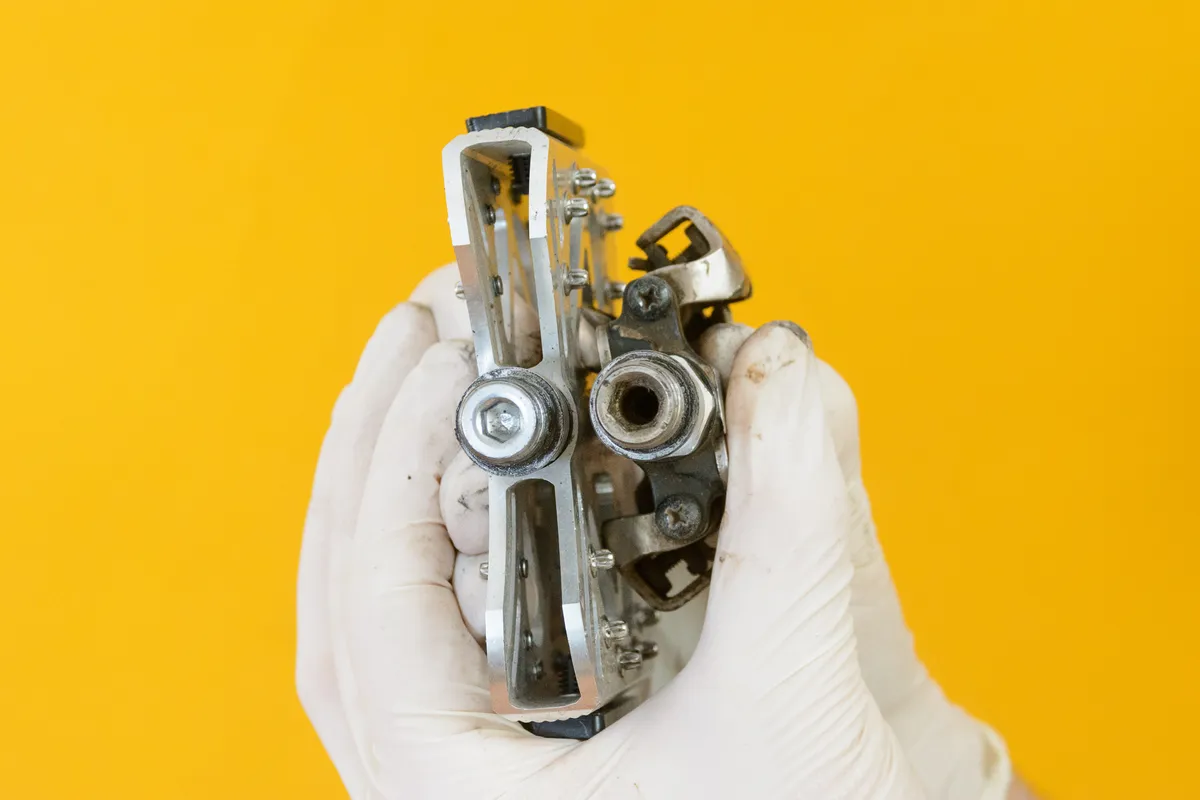
Some pedals, such as more expensive Shimano pedals, have a larger locking nut next to the wrench flats. These are used to access the internals of the pedal for servicing – don’t get confused by this.
Some very old pedals may have 9/16in pedal flats. You are very unlikely to encounter this on anything but the oldest bikes and, given 9/16in equates to 14.28mm, you might not even notice if using a 15mm spanner.
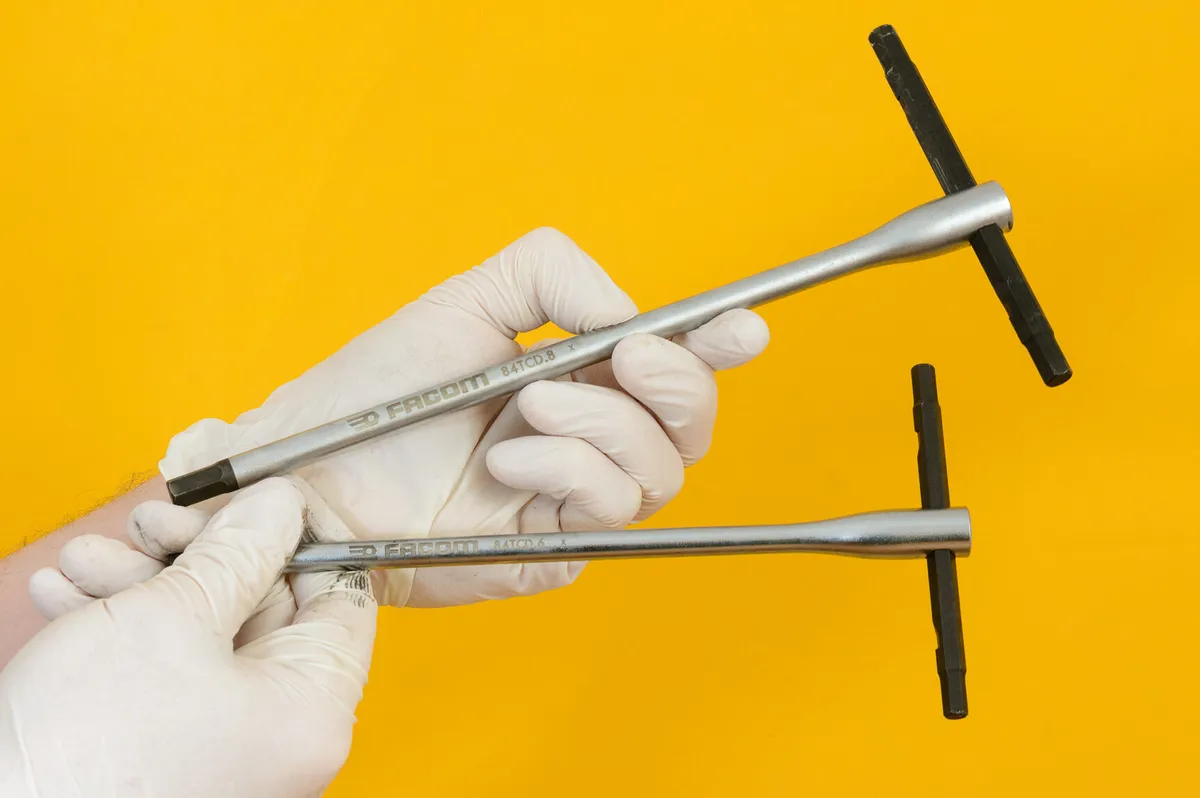
If your pedals have a hexagonal socket on the end of the spindle (when viewed from the inside of the crank), you will need an 8mm hex key. Some pedals use a 6mm hex key instead, but these are in a minority.
A hex key with a long handle is best for removing pedals, and a T-shaped hex key with a sliding end is ideal because it enables you to move the long part of the hex key to avoid the bike's chainrings.

Note you always fit or remove pedals from the crank end of the pedal spindle. If your pedals have a bolt, cap or screw on the outside end of the pedal spindle, this is only used to service the bearings.
Left vs right pedals explained – what are the differences?
Left and right pedals have different threads, and ensuring you are fitting the correct pedal to each side of your bike is key.
When removing pedals, you will always be turning the spindle of the pedal towards the rear of the bike.
The same is true for fitting, where turning the spindle towards the front of the bike will tighten the pedals onto the crank whatever side the pedal is on.
Before we go on, for the avoidance of doubt:
- The right-hand side or driveside of the bike is the side with the gears on it
- The left-hand side or non-driveside of the bike is the side without the gears
Right pedal threading

Right (driveside) pedals are always standard-threaded.
This means they tighten by turning the spindle clockwise and loosen by turning anti-clockwise. In other words, right to tighten, left to loosen.
Left pedal threading

Left (non-driveside) pedals are always reverse-threaded. This means they tighten by turning the spindle anti-clockwise and loosen by turning clockwise.
To be totally clear, this is the opposite of the driveside pedal (and pretty much every other threaded part you are likely to encounter on a bike or otherwise).
How to tell apart left and right pedals

Luckily, every pedal will come marked in some way to indicate whether it is for the left or right side of your bike.
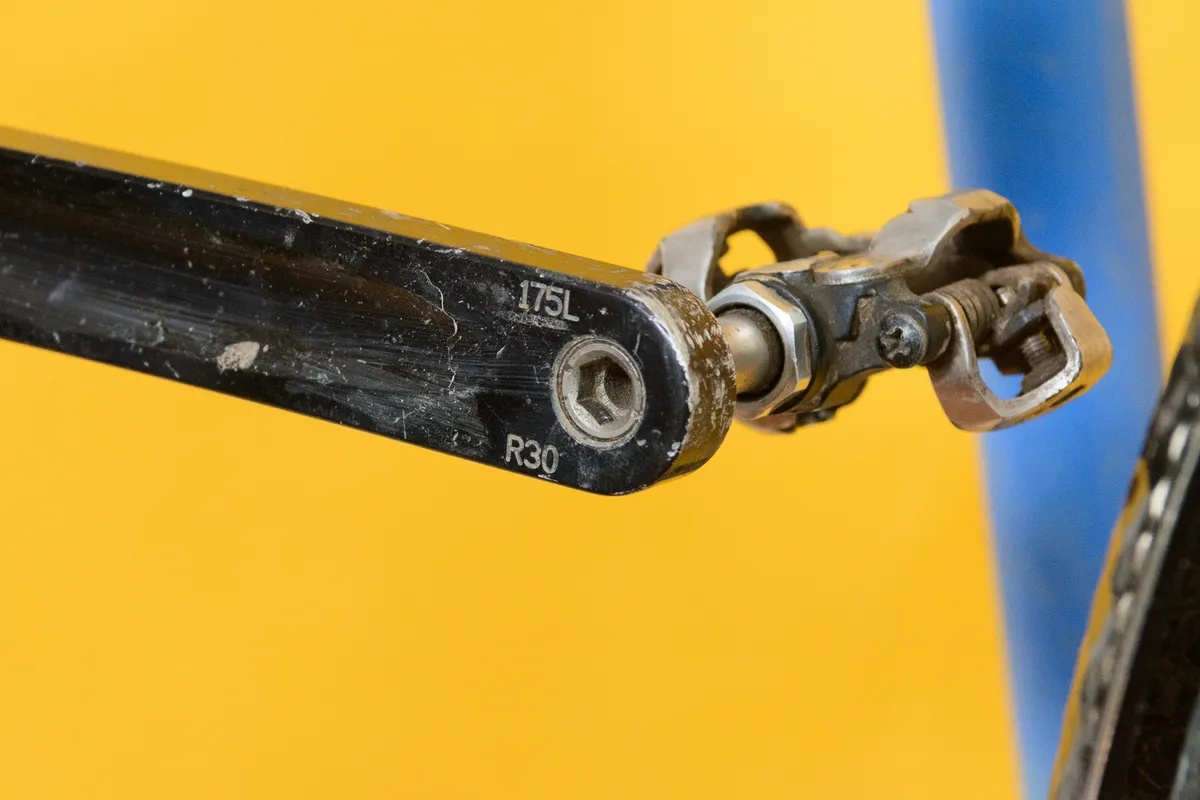
At its most basic, an L or R will be stamped onto the end of the spindle. It is also sometimes stamped onto the wrench flats of a pedal, or printed onto the body of the pedal.

If your pedal doesn’t have this, it may instead have a textured area next to the wrench flats to indicate it is the left pedal.

If your pedal doesn’t have this either, you can look closely at the threads of the pedal spindle.
A right pedal is standard-threaded and, looking at the threads, they appear to angle upwards to the right.
The left pedal is reverse-threaded and, looking at the threads, they appear to angle upwards to the left.
How to remove pedals from a bike
Step 1: How to remove the right (driveside) pedal from your bike

Rotate your crankset so, when viewed from the driveside of your bike, the right-hand crank is pointing roughly towards the front wheel (the three o’clock position).

If your pedals use wrench flats, place your spanner onto these so it is pointing towards the rear of the bike.
If your pedals use a hex key, place the short end of the hex key into the back of the pedal so the long section is pointing towards the back of the bike.

With your tool fitted, push down hard onto the tool, while holding the opposite crank, to loosen the pedal. You can then continue to unscrew the pedal by hand.
If your pedals weren’t greased when they were fitted, or if they just haven’t been removed for a long time, this may take a great deal of force.
If you cannot loosen the thread by hand, increasing your leverage carefully with an old pipe or similar implement can help.
If you do not have anything like this to hand, you can try placing the wheels of your bike on the floor and, with someone holding it steady, try using your foot instead to apply extra pressure.
Ensure your tool is very securely fitted to the wrench flat or hex socket before doing this. We also suggest you put a folded towel or old book beneath the pedal to protect your floor.
Step 2: How to remove the left (non-driveside) pedal from your bike

Viewing your bike from the non-driveside, rotate your left-hand crank so it is pointing towards the front wheel (the nine o’clock position).
Now, following the exact same steps as before, place your tool so it is pointing towards the back of the bike.
How to change bike pedals
Step 1: How to fit the right (driveside) pedal to your bike

If you have either a used pair of pedals or a used bike, thoroughly clean the threads on both the crank and the pedals. Grit or dirt can damage and wear out threads over time.
With the threads clean, apply a thin layer of grease or anti-seize to the threads on the pedal axle.

This step is absolutely vital. At best, fitting pedals with ‘dry’ threads can lead to them becoming extremely difficult to remove. At worst, if left long enough, your pedals and cranks could fuse together permanently.
Don’t be tempted to use anything other than grease or anti-seize here – chain lube or other oils won’t cut it in the long run.
Some cranks and pedals require you to fit a thin pedal washer onto the spindle before fitting. Check your bike or crankset owner’s manual if you are unsure.

With the pedal axle lightly greased, begin by threading the axle in by hand. The right-hand pedal tightens by turning the axle clockwise.
Continue threading the pedal by hand until it bottoms out on the crank. Once bottoming out against the crank, tighten up the pedal lightly with either your hex key or spanner.

Some pedals will have set torque they need to be tightened to, with Shimano recommending torques in the region of 35Nm to 50Nm.
Pedals that feature a right-hand and left-hand thread are self-tightening and unlikely to become loose once tightened.
Are you sure you’re fitting the correct pedal?
You may not be able to thread old cranks or pedals with dull threads by hand.
Before turning to your tools, first double-check you are definitely fitting the correct pedal – the left-hand pedal will not thread into the crank, and forcing it will cross the threads and destroy the bike's crank.
Even experienced mechanics can be caught out here if they’re in a rush, so take the time to check you’re doing it right.
Once you are 100 per cent certain you are fitting the correct pedal, you can try using your spanner or hex key to get things going.
Step 2: How to fit the left-hand (driveside) pedal to your bike
The process is exactly the same for the left-hand pedal but, because it's reverse-threaded, you tighten it by turning the spindle anti-clockwise.
Once you’ve fitted the pedals, wipe off any excess grease from the crank and you’re ready to ride.
Bicycle pedals we recommend and cycling cleat advice
If you’re looking for something new, check out our comprehensive guide to the best road bike pedals and best mountain bike pedals, as reviewed by our expert in-house testers. We've also got a full guide to the best gravel pedals.
If you are fitting your first set of clipless pedals, check out our guides on how to use clip-in pedals and how to set up your cleats.