
This is the ultimate guide on how to set up new cleats for cycling shoes and get the right cleat position, including two-bolt SPD and three-bolt SPD-SL cleats, Shimano, Speedplay, Crankbrothers and other systems.
There’s nothing more important than your feet when cycling. That may sound like a bold claim, but you generate thousands of pedal strokes in any given ride. And how do you deliver your effort? Through your feet, of course.
Cycling with clipless pedals and cleats can influence the comfort of your feet, ankles, knees, hips, lower back and everything in between.
Experienced bike fitters will tell you this is not the end of the list but that should be sufficient for you to take notice.
If you’re looking to invest in cleats and clipless pedals you can read our guides to the best road bike pedals and the best mountain bike pedals, as well as the best gravel bike pedals. If you’re not sold on clipless pedals just yet, check out our piece on flat vs clipless pedals.
Pedalling dynamics – a brief explainer
Before we dive into cleat setup, one of the main things to keep in mind when setting up cleats is pedalling dynamics.
Your foot experiences movement in all three planes when cycling, despite its fixed trajectory. In addition, the complex motion of the knee has to be taken into consideration.
The knee joint comprises four bones: the femur, tibia, fibula (technically speaking) and patella. It’s also an organised chaos of connective tissues, cartilage, menisci, fluid sacs and then some – it’s complex.
As such, its motion is also complex. It is not a simple hinge. Rather, it engages in a choreographed arrangement of gliding, translating, pivoting and rotating.
Although explaining the dynamics of the knee is too complex for this article, what is important to know is that it is complicated and there’s plenty of room for error, which might explain why you’re suffering from cycling knee pain.
Getting your saddle height right can also affect how much stress you’re putting on your legs and joints as you ride.
How to replicate cleat fit on your cycling shoes
If you already have your preferred shoe, pedal and cleat setup going that’s great. If you don’t have symptoms telling you otherwise, by all means, don’t fix what’s not broken.
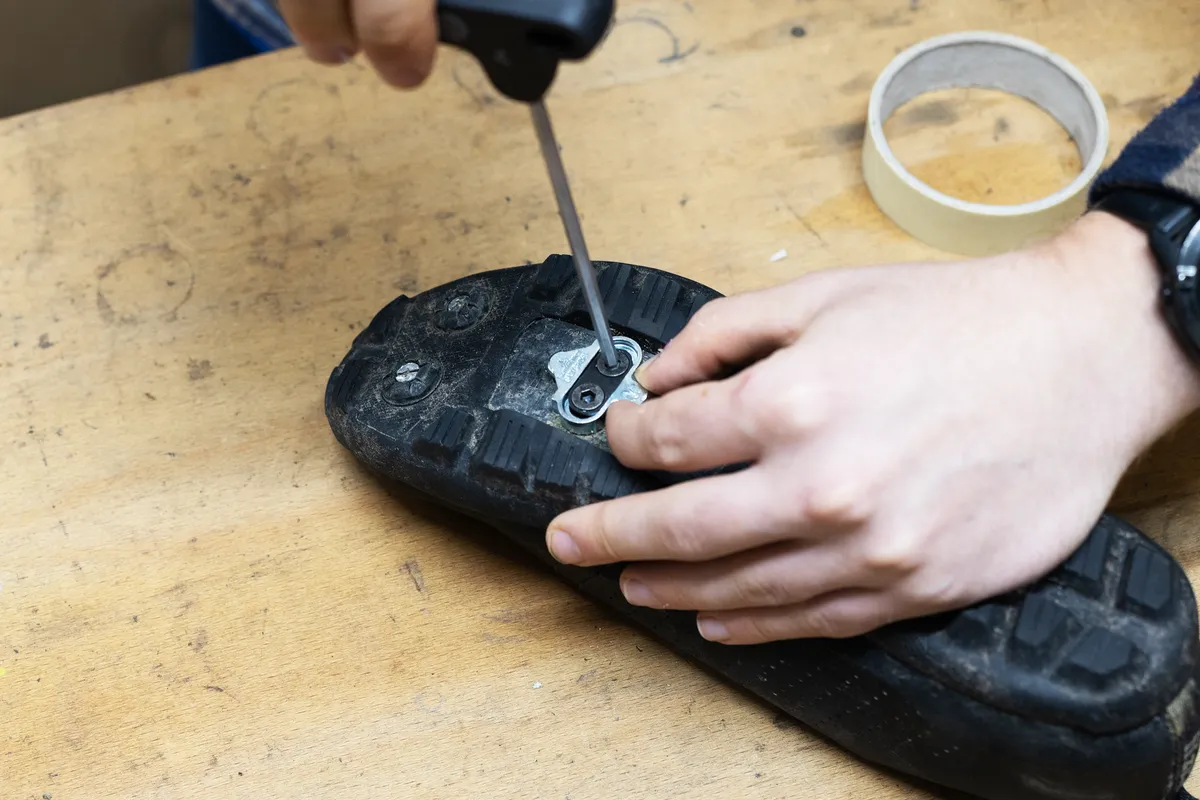
Recreating cleat placement using an existing shoe is simple with a Sharpie-style marker.
Trace the outside of your cleat on the bottom of your sole and you’ve got your template. Some folks just pick an edge or two, but covering the entire cleat surface prevents any uncertainty.
The marker method is pretty much foolproof, unless you’re finicky about marking the bottom of your shoes.
You can also use masking tape to replicate cycling cleat position, which avoids marking the sole of your shoe. Place small strips around the cleat before removing it and then use the tape as a guide to fit your new cleat.
Some companies, including Crankbrothers, offer template stickers that go over the existing cleat, which will help you avoid marking your shoes but is ultimately more fiddly.
Look cleat position can be replicated in some cases using what the brand calls a memory clip. This is a separate part of the cleat that's screwed into the central oblong bolt hole that is present in the soles of some road cycling shoes. You can just remove the worn-out cleat body and clip a new one into the memory clip, then bolt it in place.
New cycling cleats aren’t going to behave exactly like your old cleats. If you have a long-distance event coming up, the night before is not a good time to replace your cleats. Allow a few easy rides to get things sorted, adjusting the cleat position slightly if need be. Around 100 to 150 miles should be sufficient if all other things stay the same.
How to set up cleats on new shoes
If you’re new to cleats and clipless pedals or you’ve got a new pair of shoes, the best way to find the right cleat position is to remember these three axes:
- Fore/aft (sagittal)
- Float (transverse)
- Angular (frontal)
These axes, or planes, will have a big impact on your pedalling dynamics and will help you determine how best to set up your cleats, especially if you’re switching pedal systems or using new shoes.
So finding the right position on these three axes will help you find the right cleat position for you.
For clarity, fore/aft refers to how close to the heel or toe the centre-line of the cleat is located.
Float refers to the movement of the shoe once it’s engaged in the pedal body – the ‘heel-in’ and ‘heel-out’ motion – and the static orientation that allows it.
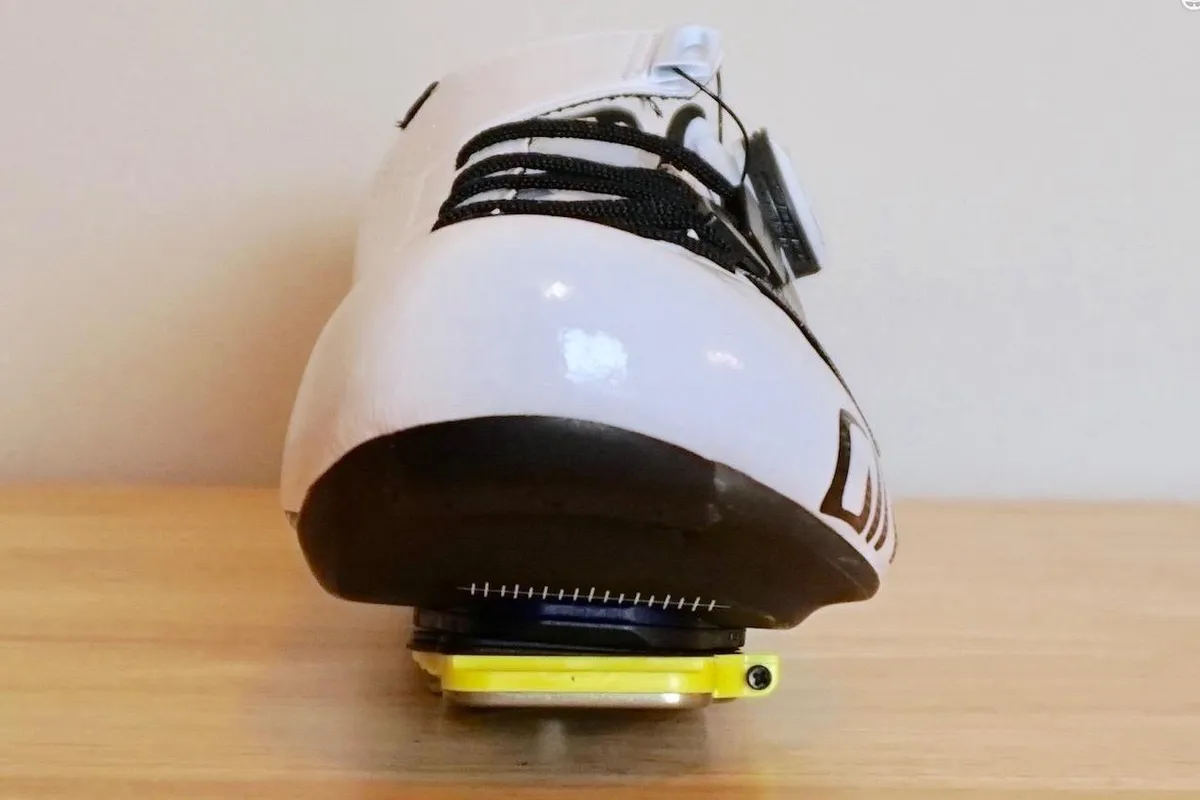
Last but not least is the angular position of the shoe compared to the pedal axle (aka ‘cant’, or ‘roll’, or ‘varus/valgus’).
Fore/aft cleat position
The fore/aft position of your cleat is potentially the easiest to set. It is the least likely of the three axes to lead to any injuries if it isn’t just right on the first try.
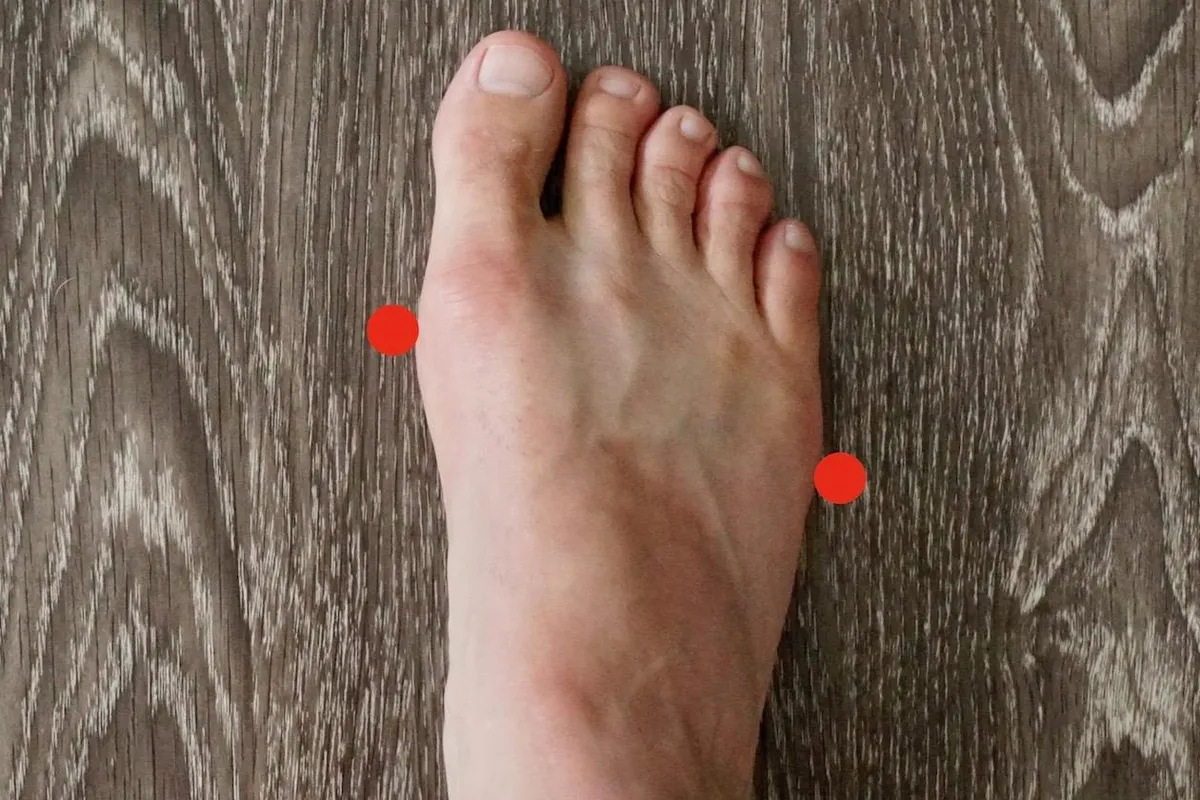
The most common methodology today is to set cleats in the area of the metatarsal-phalangeal joint (MPJ) of the third toe, based on a guesstimate.
Have a look at the image above that shows the MPJ of the first and fifth toes. Put your shoe on and find these two bony landmarks and make a small mark to indicate their location. Somewhere between the marks is the location to centre your cleat fore/aft as a starting position.
From there, you can fine-tune the position depending on what’s comfortable or your style of riding. For riders who engage in solo or long efforts – think triathlon or breakaway specialists – moving the cleat more towards the heel is better.
For riders waiting for that burst of sprinting power in the last 200 metres, moving things towards the toe allows for a bit more springing ‘snap’.
There are other ideas to consider. The evolution of this methodology was never based on research and has only been validated by research as an artefact of its use.
There is arguably room for improvement in this realm. Some progressive shoe manufacturers feel the same as they continue to move their cleat mounting holes further towards the heel.
How much float should my cycling cleats have?
Float and the rotational position of cleats is the next consideration, and this can be very tricky.
Not all pedals are created equal when it comes to float. Some offer no float and others as much as 30 degrees. Most people feel comfortable in the 6- to 9-degree range.
The amount of float in a pedal determines how much mobility your foot has when clipped in, with more float allowing greater movement.
Getting the right rotational position of a cleat on a shoe will mean you rely less on the float for your foot – and likely your knee – to stay comfortable on the bike.
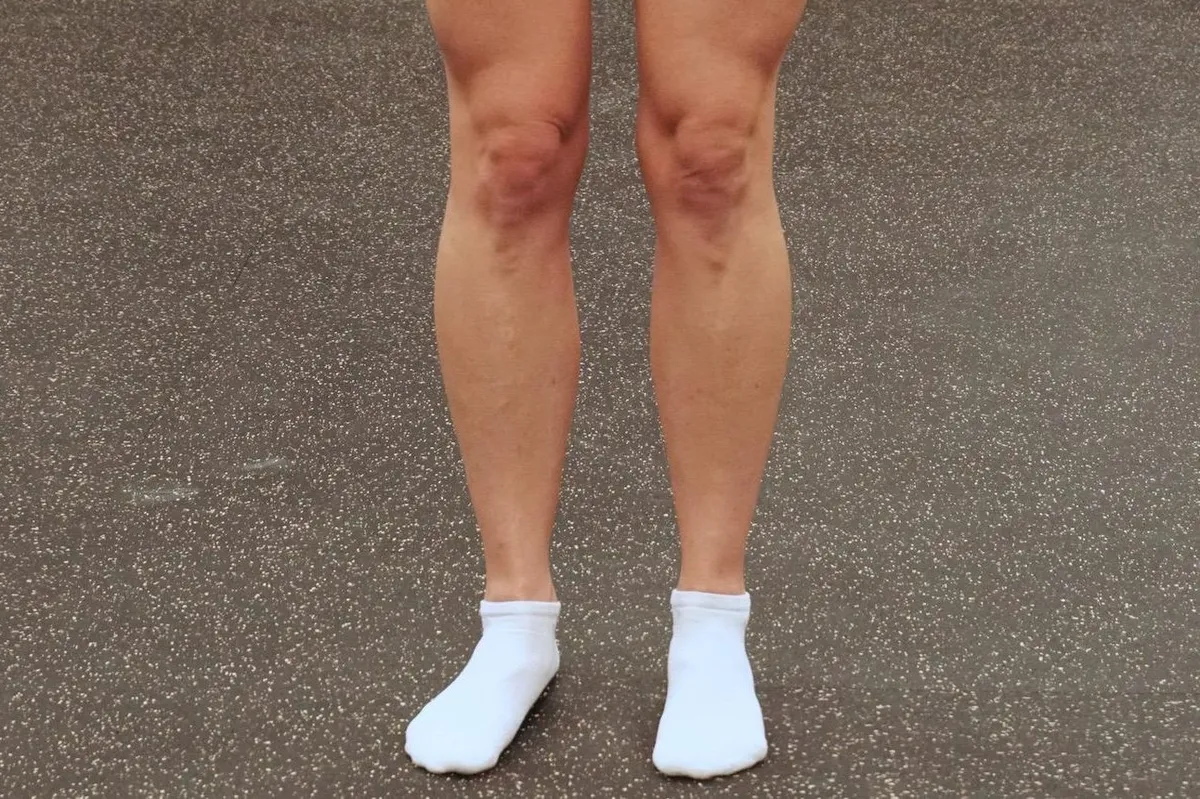
One way to establish the rotational position you need your cleats to be in is to start in a standing position and then march in place a few steps.
Once standing still, view the alignment of the kneecap and feet. Do they point in the same direction? Then look exclusively to the feet – are they pointed straight ahead or in one direction?
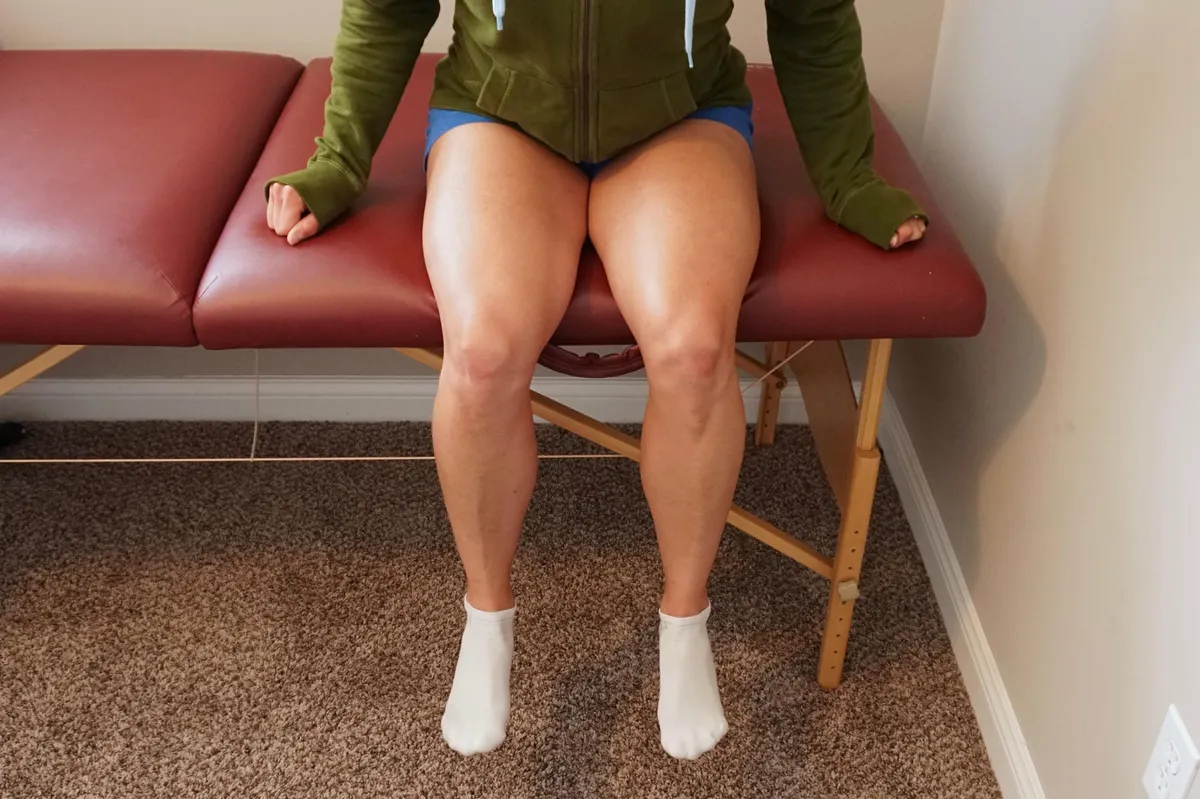
Another test: get into a seated position with your feet hanging off the edge of an assessment table or even a bedside.
Sit upright with the feet at 90 degrees to the tibia, then roll forward at the hip, do the feet rotate in or out?
Based on what is seen, set cleats to mirror the position of the feet or to facilitate the movement of the second test. Do some pedalling and see how it looks and feels. Do the pedalling feet look like the standing feet? What about the knees, do they have the same alignment they had when standing?
Medial or lateral knee discomfort as a very dull ache is a pretty good indicator you’ve not got it just right, yet.
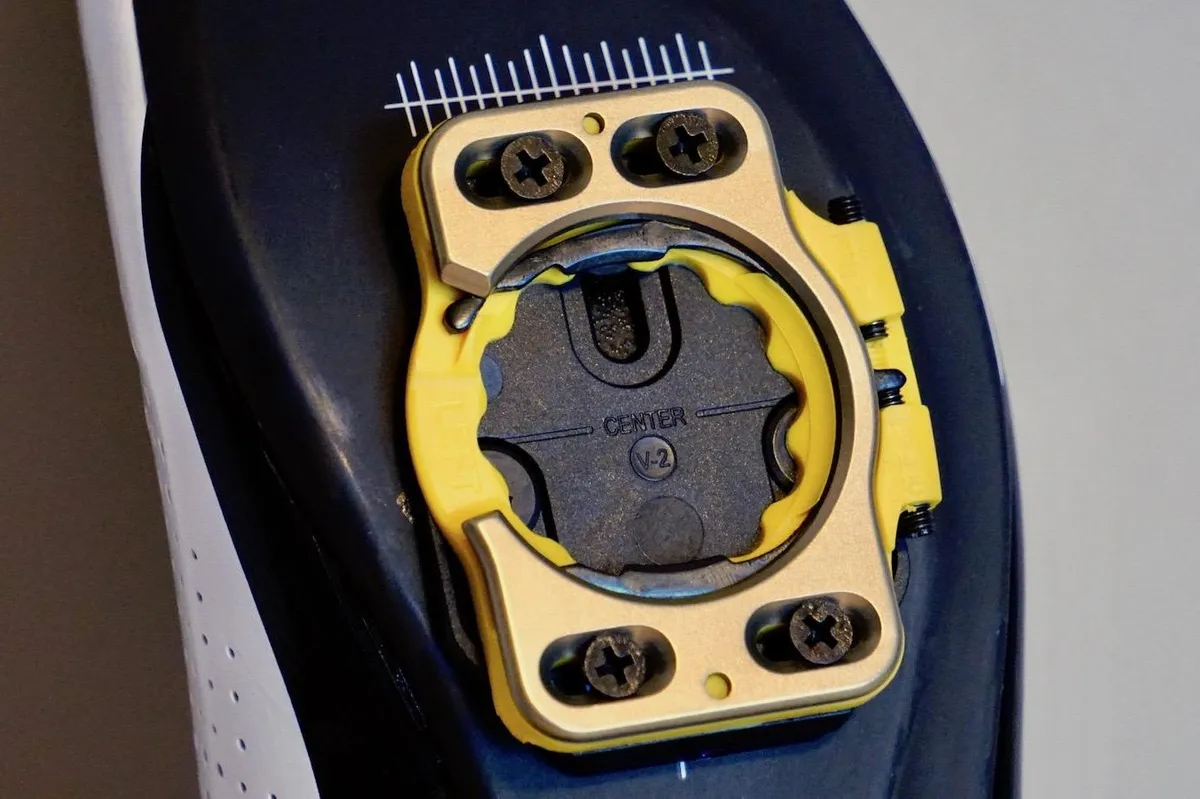
Pretty much every system is capable of the adjustments above, with accessories. Unfortunately, only one pedal system available today is capable of managing these planes independently. The keyword is ‘independent’.

Speedplay Zero pedals allow float to be determined once on the bike. This doesn’t affect your already determined fore/aft position (or stance width), which could be compromised in a three-hole system.
Shoe cant

Fore/aft and float are simple in comparison to varus/valgus, roll, cant, or whatever name you give it.
If your ankle is not vertically stacked, it is very likely that your entire foot has an angular component, and it will not sit flat on the pedal body. Due to the restrictions of the fixed trajectory, you’d be loading only one side of your foot, and this can be problematic.
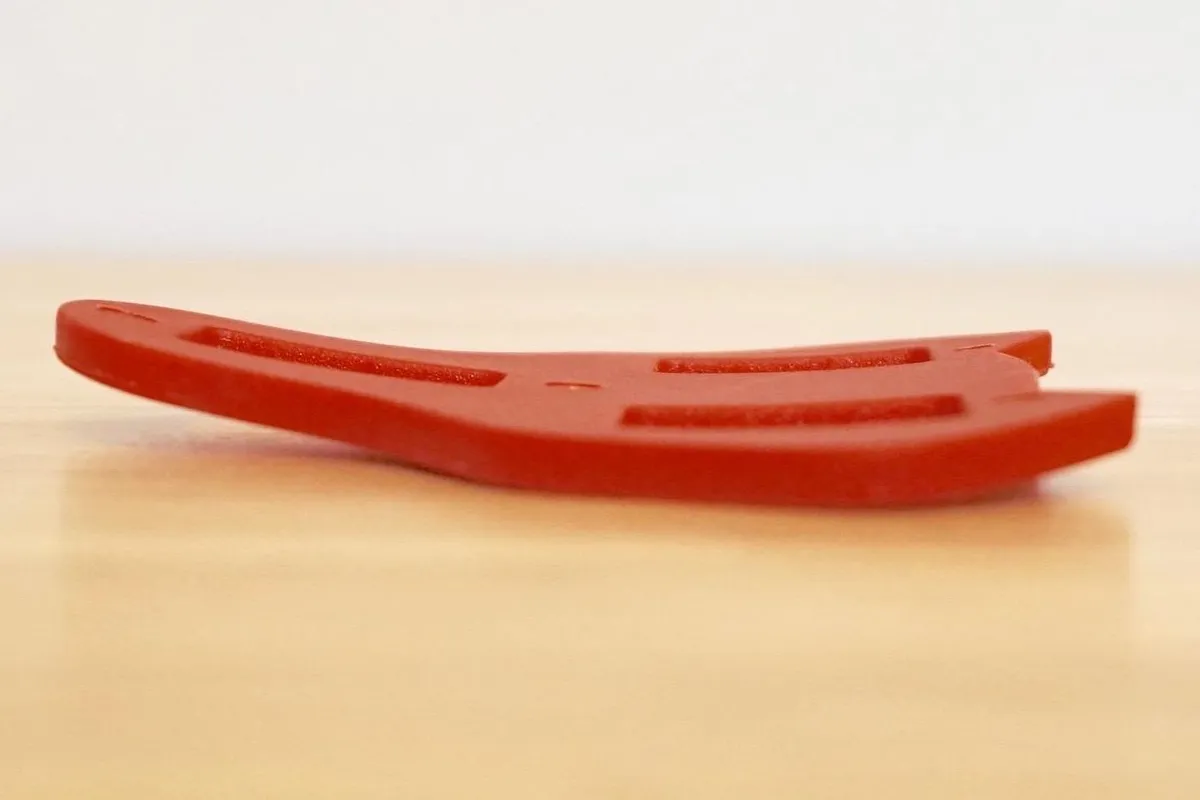
If you suspect your ankle is not vertically stacked, you may benefit from varus/valgus wedging.
Trying to decide whether you require varus/valgus wedging is no easy task, but the rationale behind cleat wedging is fairly straightforward.
By placing wedges between the shoe and the cleat, you can compensate for the uneven pressure distribution. This means your foot will feel more even pressure, and the manner in which you can deliver force to the pedals could be improved.
Again, this is an opportunity to complicate things for yourself, and it’s incredibly difficult to assess your ankle complex alone. With varus/valgus cleat wedging, we encourage you to seek feedback from a qualified professional.
Shoe cant is particularly an issue with three-bolt road bike cleats, where your foot is held in a more rigid position by the cleat. With two-bolt cleats, the angle of the foot is determined more by the shoe-to-pedal interface than by the cleat, although cleat wedges are available.
The good news is that off-road riding is much more dynamic than road riding and most riders don’t find they even notice a problem with cant, and subsequently don’t need it adjusting like they might on the road. It might be more of an issue for gravel riders though, who may not be shifting their position as frequently as mountain bikers.
Stance width
Beyond the three axes, it’s a good idea to consider your stance width.
Stance width is the term used to describe the distance between your feet when engaged in the pedals.
There really is no method for determining stance width. To some extent, it’s just trial and error. Pressure mapping can add a bit of science, but that’s a fairly uncommon piece of tech for anyone to have access to.
If you suffer from IT Band issues, increasing stance width can be a useful adjustment.
If you move your knees outward at the top of your pedal stroke, moving cleats out can be helpful.

If your stance width is wide (lots of space between your shoes and the crank arms) and your knees dive inward, try a narrower stance. Note this isn't a catch-all solution and there could be several other things going on.
Aside from fore/aft, float and canting, stance width is often overlooked, or a victim of the other three adjustments.
However, if you’ve maxed out cleat adjustment, several pedal companies purposefully offer different axle lengths to help (Speedplay, Keywin, Shimano and a few others).
Leg asymmetry
There's one last thing to consider: you are not symmetrical.
There is a vertical component to evaluate as well, and it will require knowledge of your structural and functional anatomy to manage.
Perhaps you don’t sit squarely on your saddle, or perhaps you have two different-length legs (functionally or structurally). There are vertical stack spacers available to help accommodate this.
While we strongly recommend professional advice, this won’t negatively influence you nearly as much as wedging if you’ve made a poor decision. At least not in terms of a physical manifestation of pain, but that’s not saying it doesn’t influence you, because it will.
If you think you’re overreaching on one side but the other side is better, try adding a spacer. If it feels smoother or more natural, go with it. If your body ends up telling you it’s no better than before, you’ll make an adjustment at the knee (or ankle) without even knowing, but remove the spacer if you don’t need it.
You’ll very likely need new bolts to accommodate your stack spacer, which aren’t expensive, and when it’s the right move are well worth the money.
Check your cleats for wear

Cycling cleats are a wear item, regardless of brand. The same can be said for pedals, with some holding up better than others.
Worn-out cleats will have an impact on pedalling dynamics and lead to discomfort if you don’t replace them soon enough. Be mindful and check cleats once a month to look for signs of wear – you don’t want to find yourself in a pinch the night before a ride.
Keep a record
It may seem like overkill, but keeping a record of how you’ve changed your cleat position (or any other position metric for that matter) is a wise idea. This can pay dividends if you try a new position and discover it’s not working for you.
Making changes and not documenting what you’ve done leaves you armed with only the ‘ignorant shrug’ as a tool of communication and it’s scientifically proven 100 per cent ineffective, 100 per cent of the time.
