Hydraulic disc brake systems absorb air over time, affecting performance and lever feel. If your brakes are feeling spongy or lack power, this can be a sign they require bleeding.
Brake bleeding is the process of replacing old brake fluid while removing any air bubbles in the system.
SRAM recommends bleeding its brakes annually or more frequently if you are riding aggressively and braking heavily.
In this guide, we’ll take you through the process of how to bleed SRAM road and mountain bike disc brakes.
Unlike when bleeding Shimano disc brakes, where you can sometimes burp-bleed them as a half-way house measure, this generally isn’t possible on SRAM. Therefore, it is generally best to perform a full bleed.
How to bleed SRAM disc brakes

This guide follows SRAM’s official method for bleeding road hydraulic disc brakes using Bleeding Edge and non-Bleeding Edge technology.
We’ll be demonstrating using a SRAM Red eTap AXS and a SRAM Rival eTap AXS brake.
The process is identical for all other SRAM road, gravel and mountain bike disc brakes, except SRAM’s mineral-oil based DB8 brakes.

With the exception of the aforementioned DB8s, SRAM brakes use DOT fluid, specifically the 4 or 5.1 variants, with the latter being the pinnacle due to its higher boiling point. As a result, we’d always recommend using DOT 5.1 fluid.
Unlike mineral oil, which is unregulated, DOT 4/5.1 is regulated, and is used in the automotive industry.
DOT fluid is corrosive – it can irritate your eyes or skin and cause damage to the paint or the finish of the components on your bike. Take care when handling it and have plenty of rags and isopropyl alcohol on hand to clean any spills.
Do not use mineral oil or a bleed kit that was used previously with a different fluid. You also must not use DOT 3 or DOT 5 fluid because they are not compatible. Using the wrong fluid will destroy the seals and lead to brake failure.

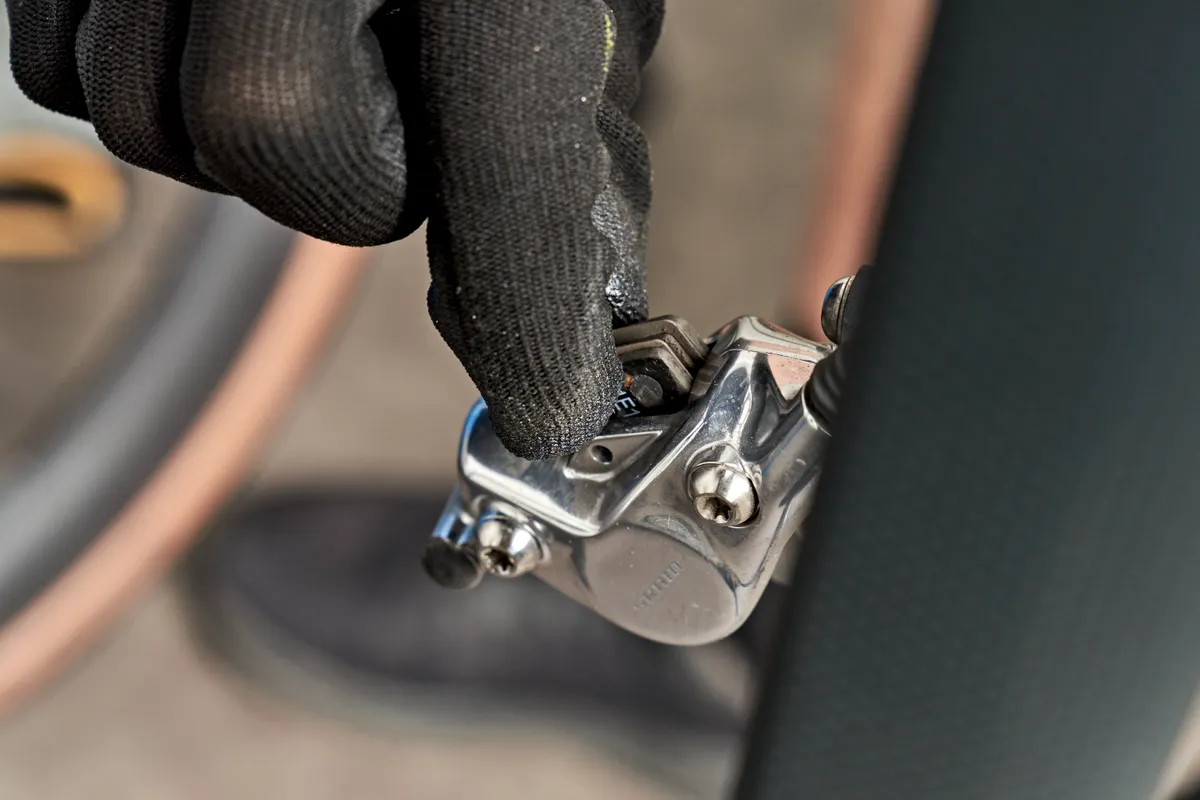
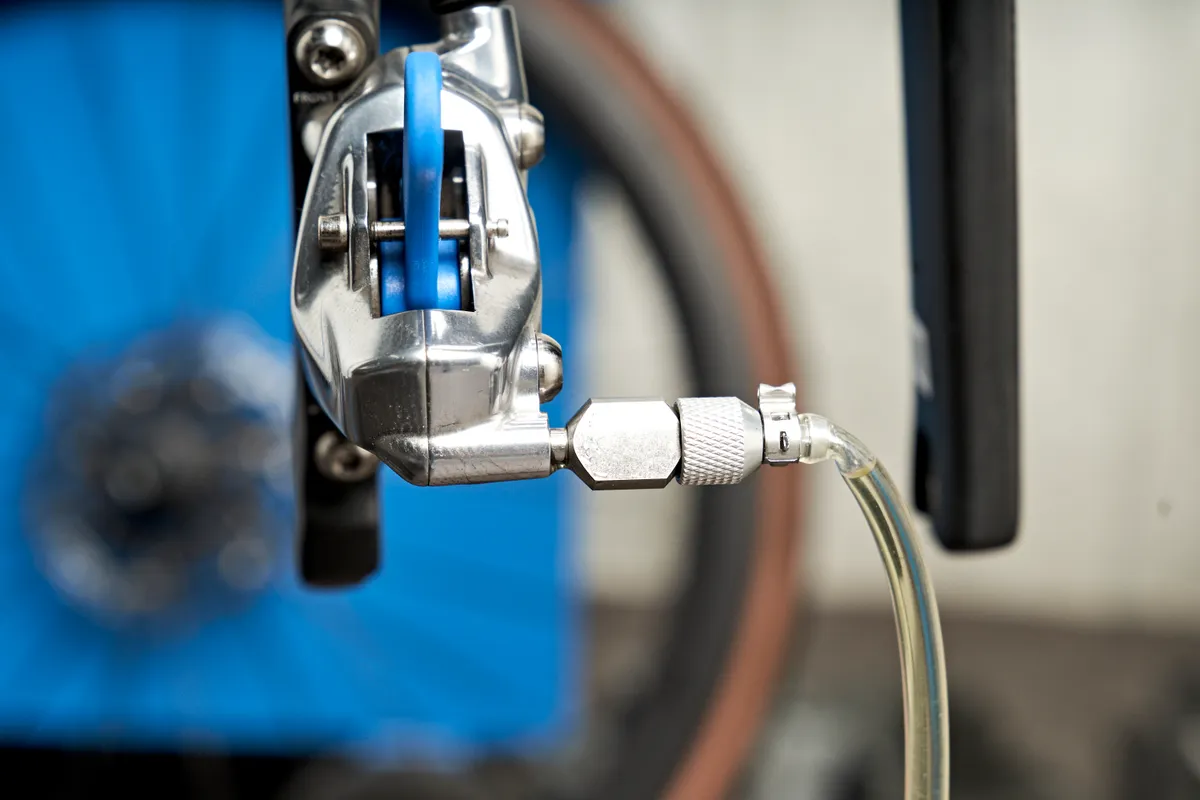
Before beginning the procedure, you’ll need to identify the bleed port type your caliper uses.
Calipers with a rubber bleed port cover denote it is a SRAM Bleeding Edge type, whereas calipers with a T10 torx bleed port screw use a threaded fitting.
SRAM Bleeding Edge represented a change to SRAM’s caliper bleed port standard and the threaded fittings won’t fit. The newer standard makes bleeding simpler because there is a reduced chance of fluid leaking.
Tools required
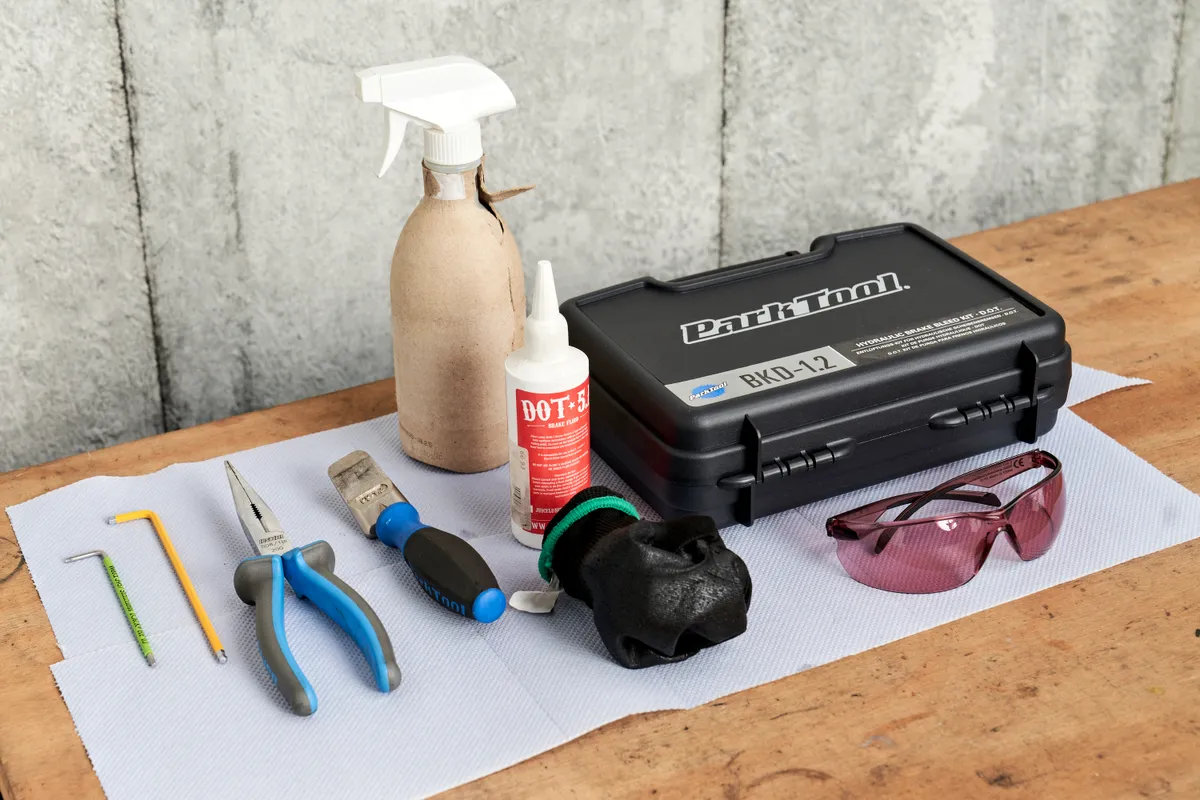
- Needlenose pliers and hex key to remove disc brake pads
- 4mm hex key (for Bleeding Edge calipers)
- 5mm hex key (for contact adjustment on drop-bar shifters)
- T10 torx wrench
- Isopropyl alcohol
- Safety glasses and protective gloves
- Shop towel/rags
- SRAM DOT 5.1 fluid
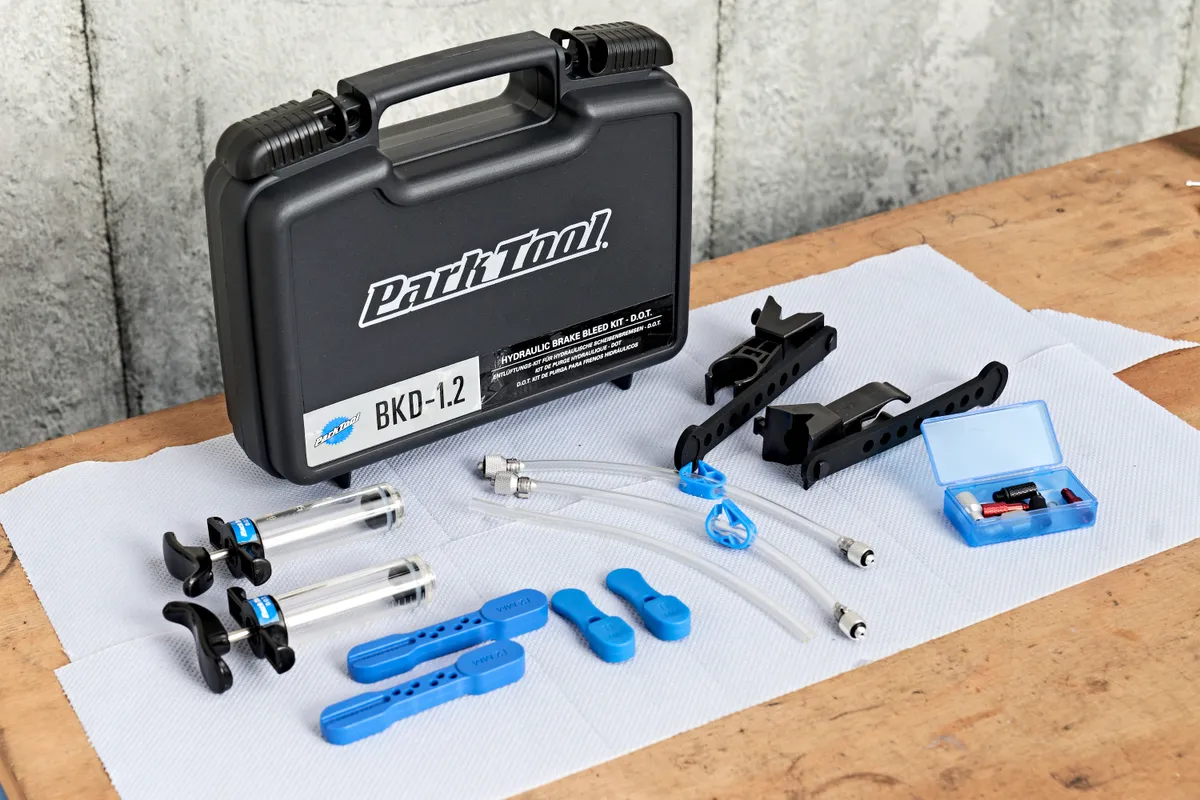
- A SRAM-compatible bleed kit
- Piston press (you could also use a plastic tyre lever)
- Bleed block
- Torque wrench and relevant sockets (recommended but not essential)
Step 1
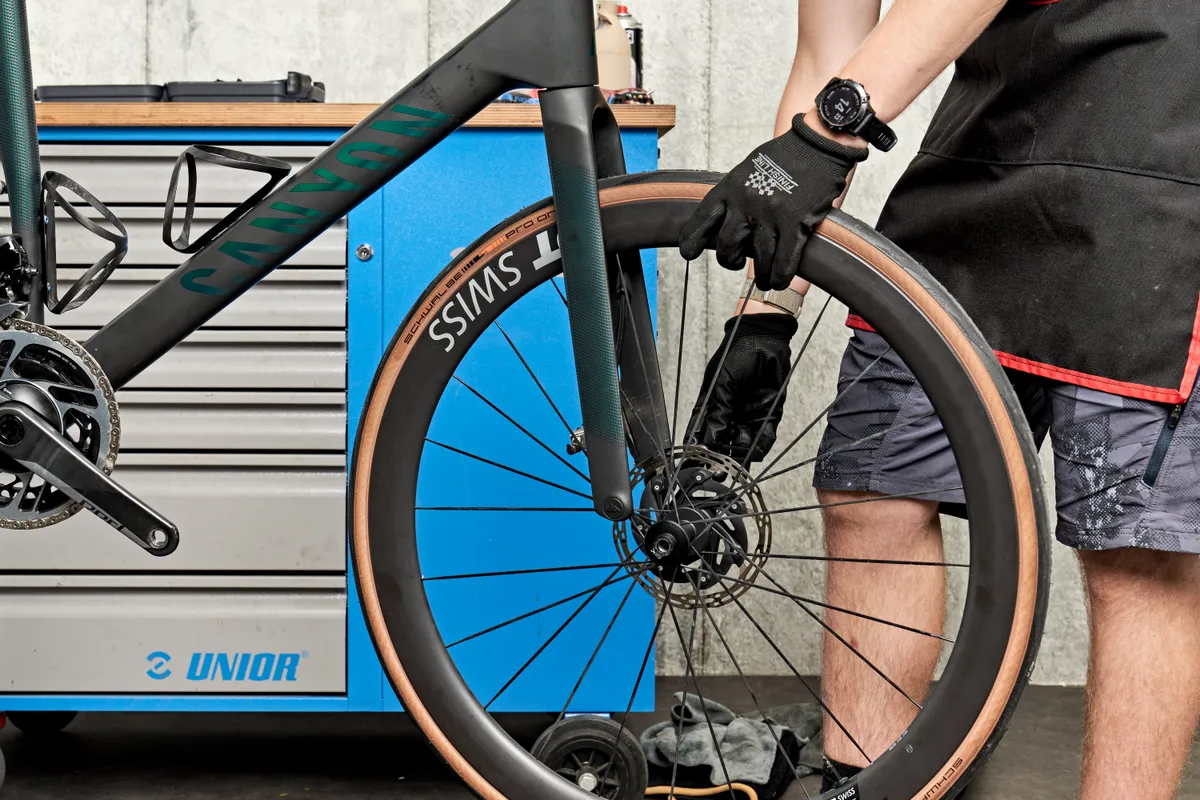
Install the bike onto a repair stand, making sure the brake levers are positioned so they are the highest point of the system.
If you’re bleeding a mountain bike brake, position the lever so it is level.
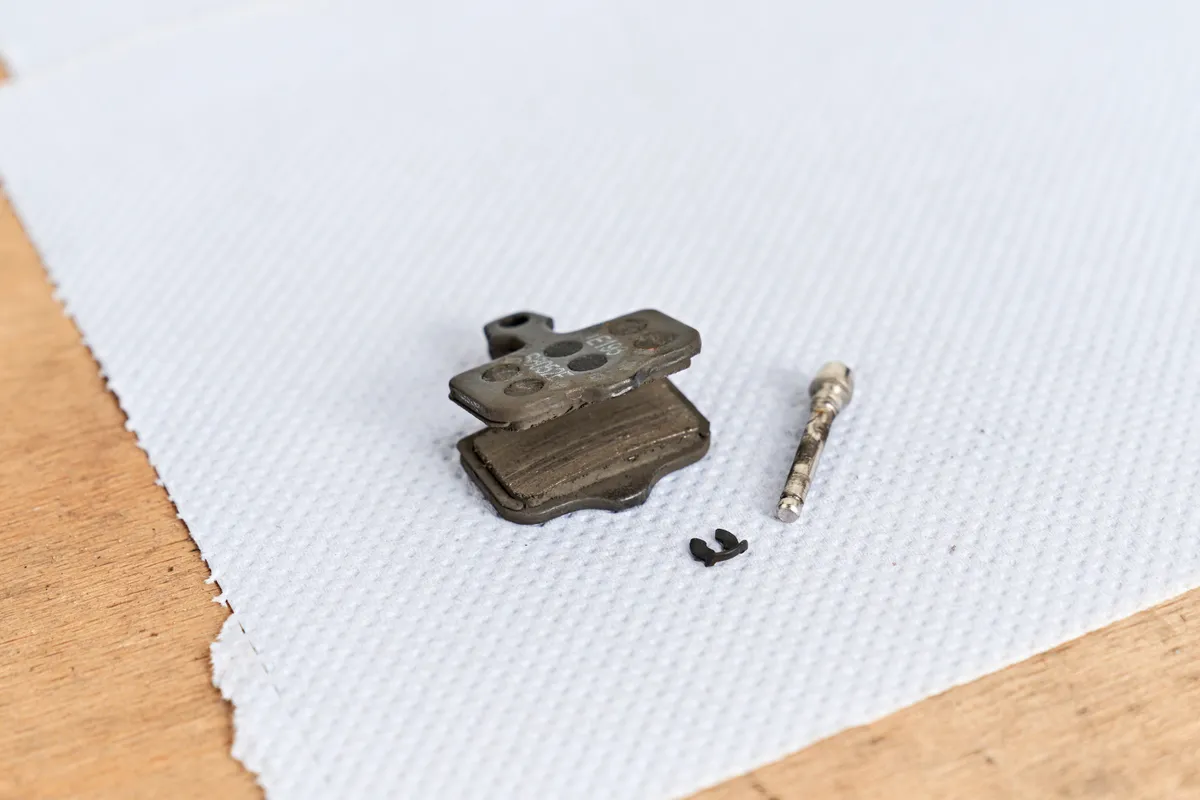
Remove the wheel and the disc brake pads. Put the disc brake pads in a safe space where they will not come into contact with any brake fluid.
When removing the pads, make sure you only handle them on the backing plate to reduce the risk of contamination.
Step 2

Push the caliper pistons back using either a piston press or a plastic tyre lever. Take care when doing this, especially on higher-end calipers, which use easily cracked ceramic pistons.
Install a compatible bleed block. If the bleed block doesn’t fit, the pistons are either not pushed back completely or it may be the system was over-filled previously.

If you are bleeding the rear calilper, you could consider removing it from the frame and letting it dangle vertically. This can make it easier for air bubbles to travel up to the lever.
If your brake has contact adjustment, wind it all the way in the opposite direction of the arrow. On a road bike shifter, this will be located under the lever hood.

If your brake has lever reach adjustment, SRAM recommends positioning it so the tip of the lever blade is between 75 and 80mm away from the centreline of the handlebar. If it’s outside of these measurements, make note of your current measurement so you can return it to the right place later.
If you are bleeding a time-trial lever, SRAM recommends fully removing it from the handlebar.
Step 3

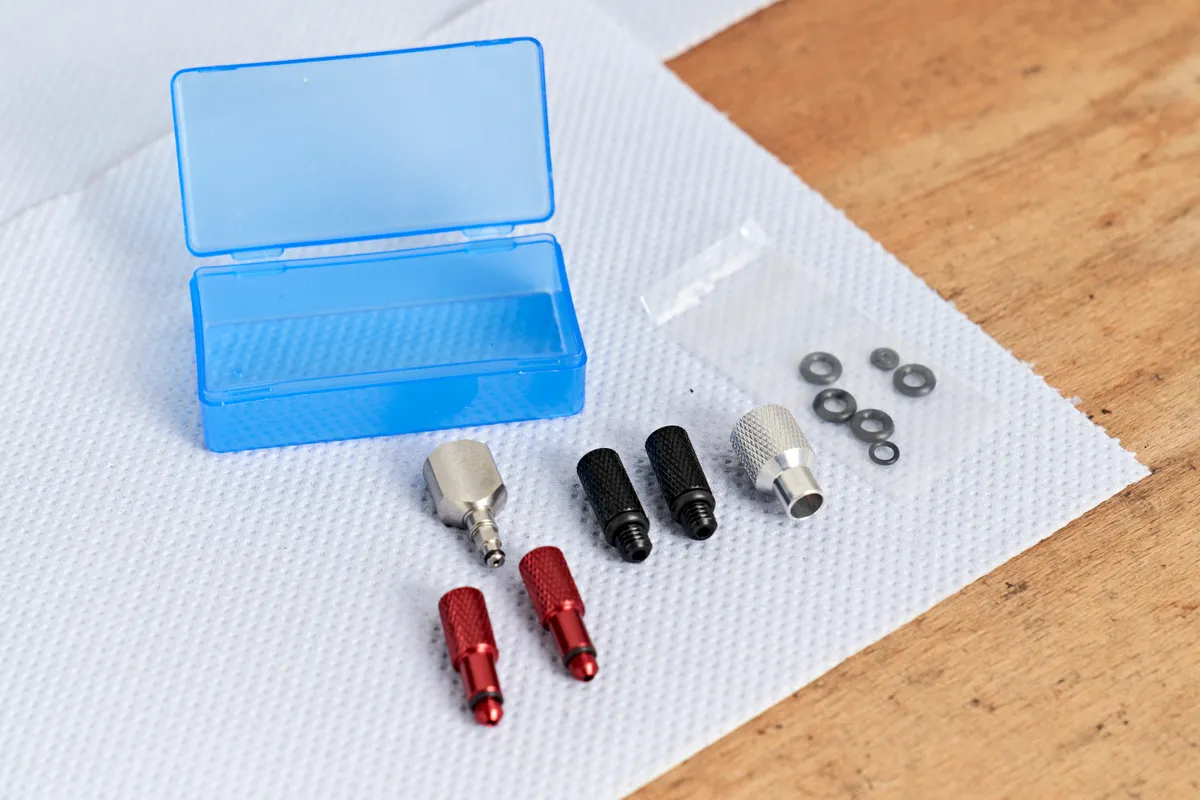
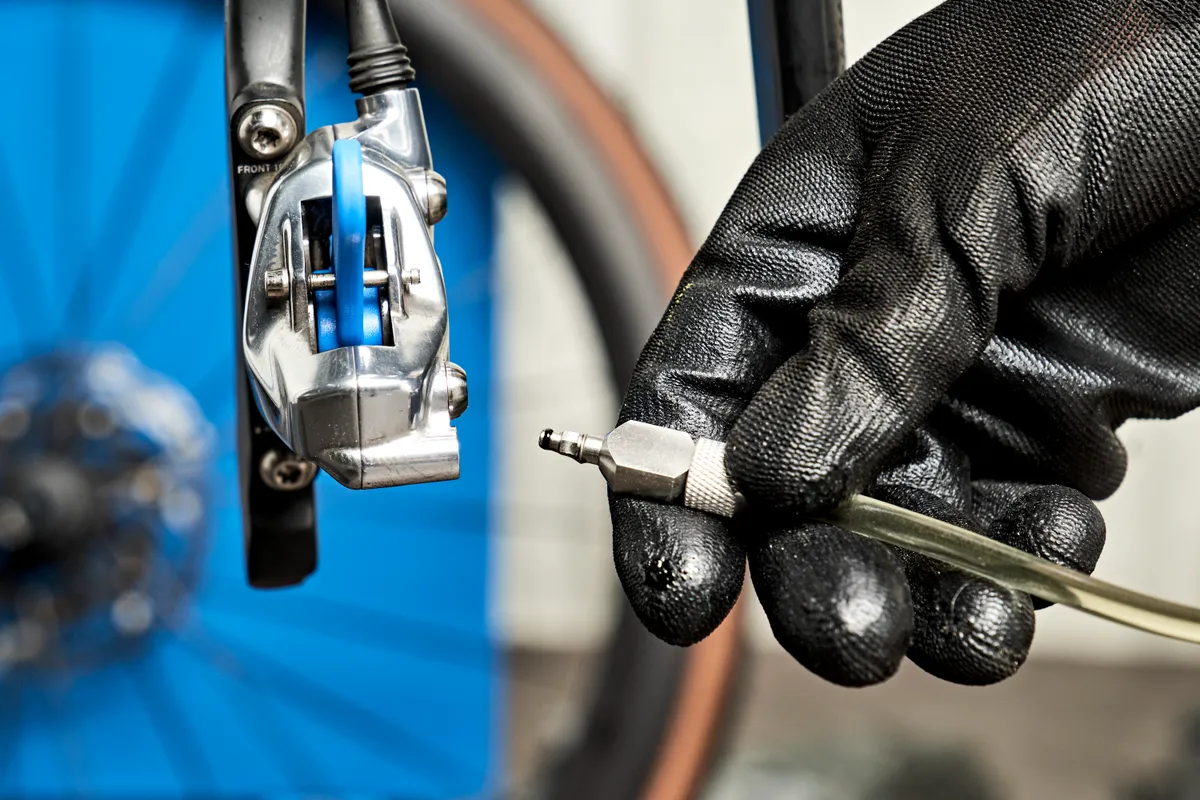
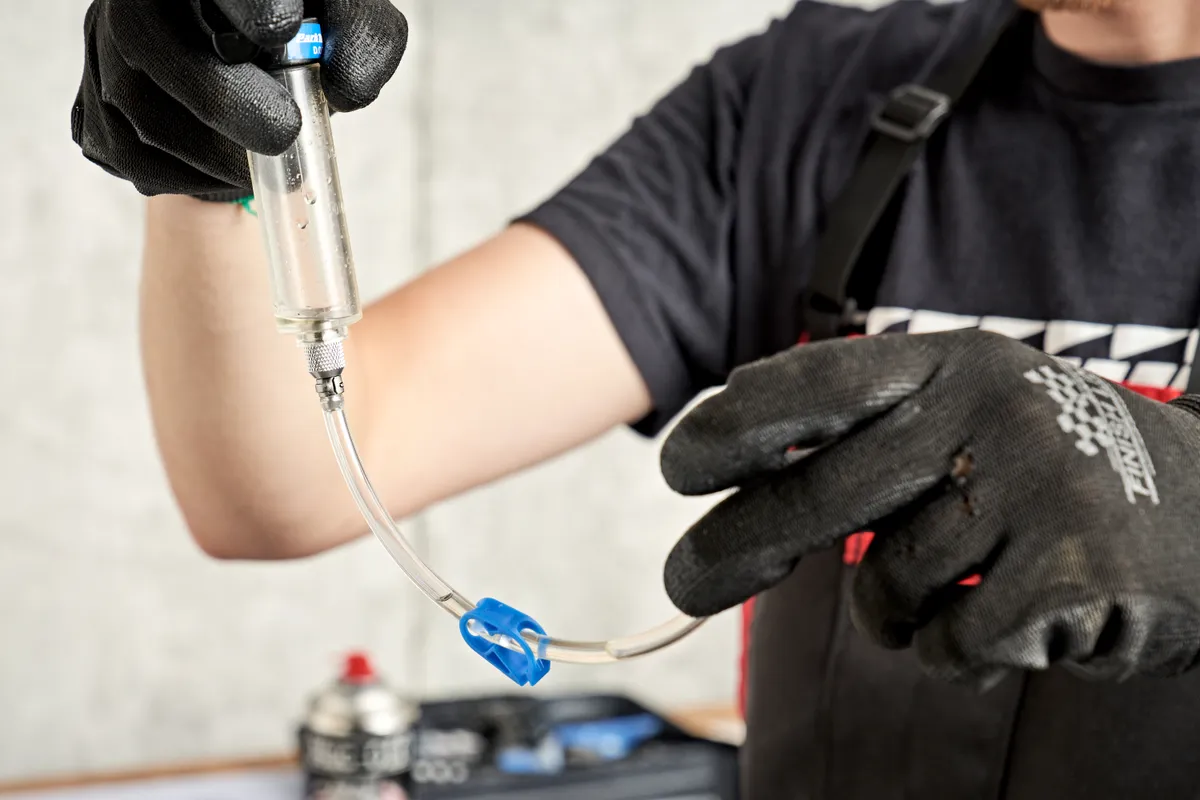
If your caliper uses a Bleeding Edge port, install a compatible adaptor onto the end of one syringe hose and a threaded fitting onto the other syringe hose.
If your caliper is not a Bleeding Edge type, you’ll need to fit a threaded fitting on both syringes.
The Bleeding Edge syringe will be your caliper syringe.
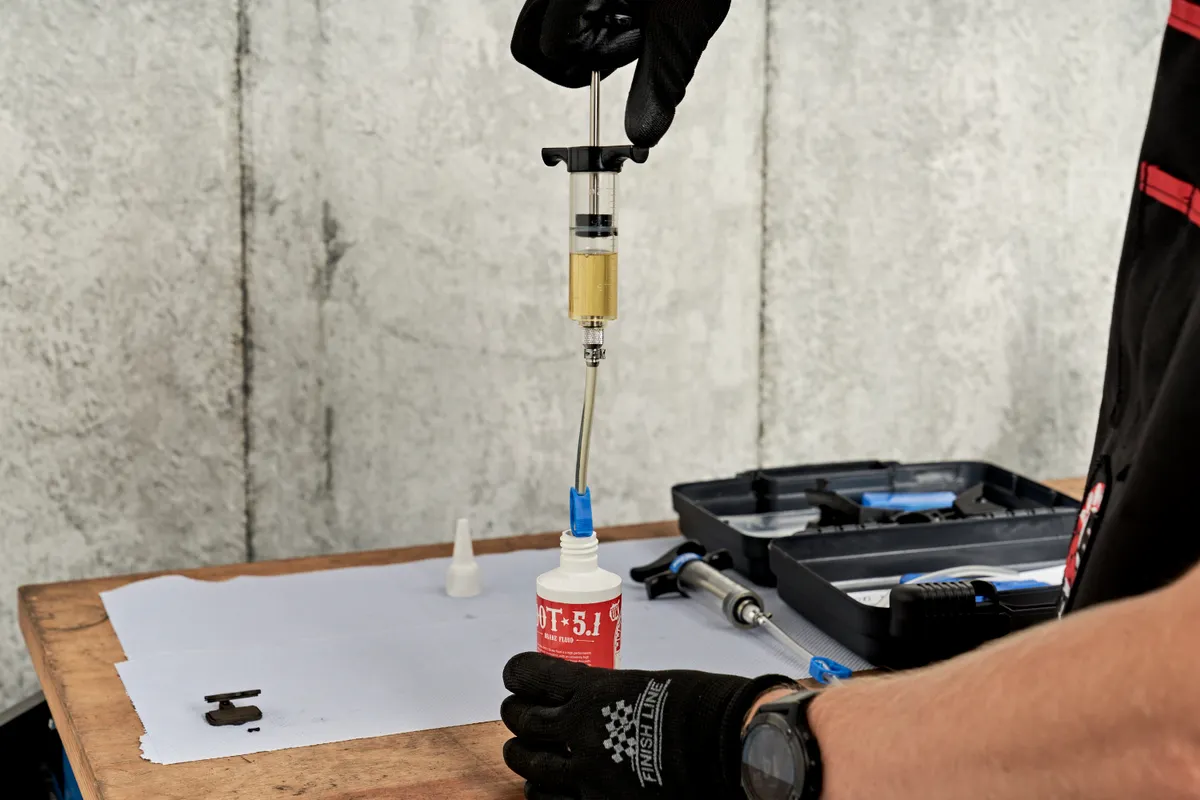
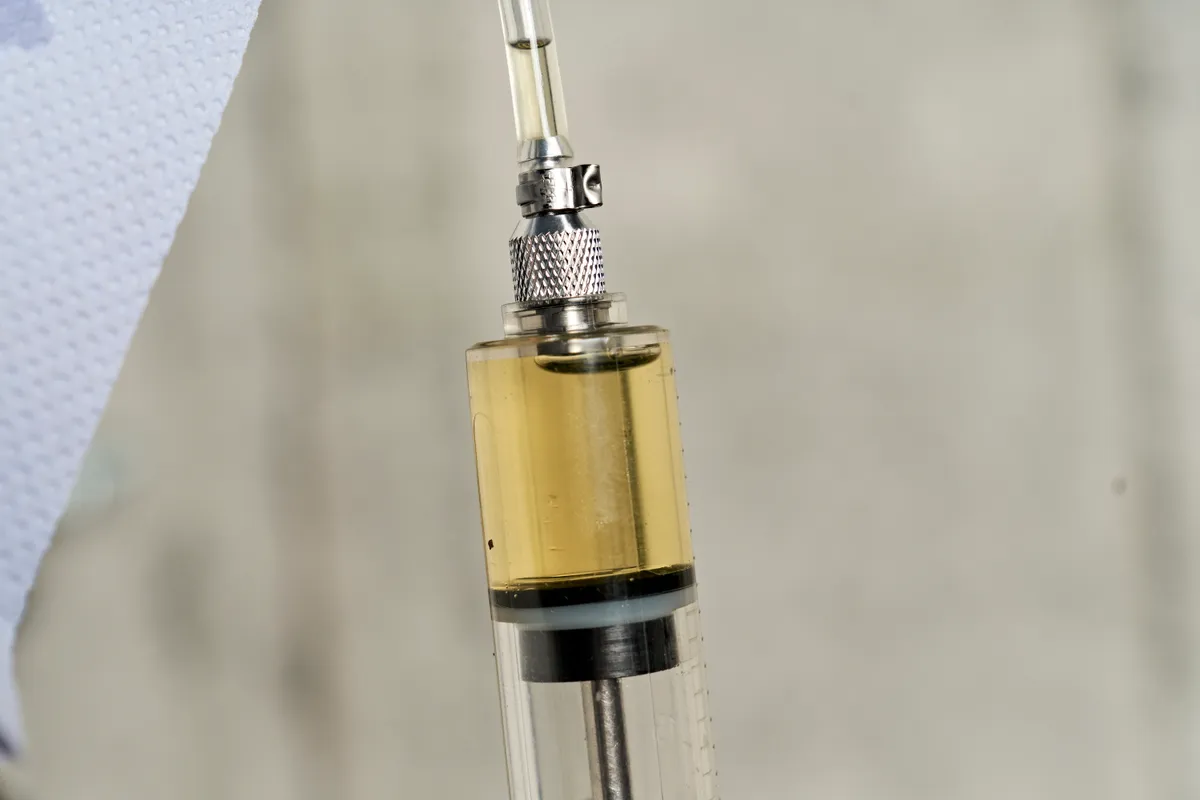
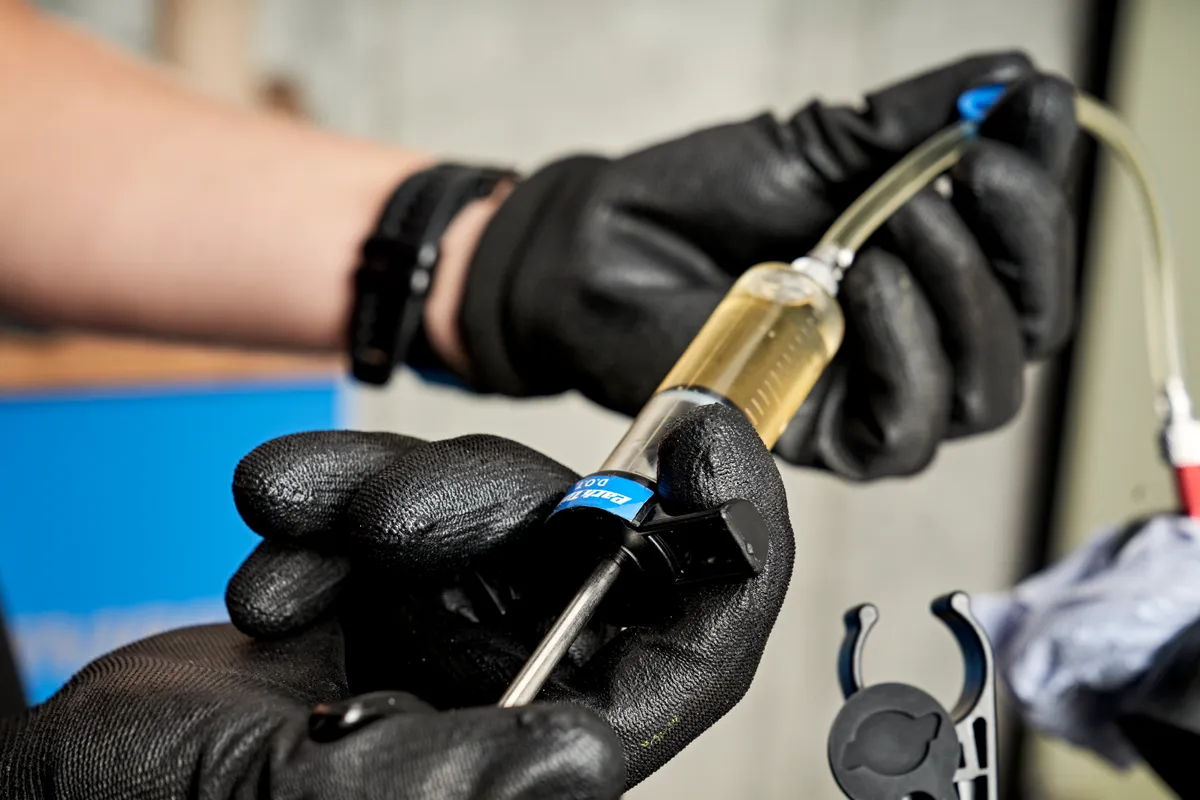
Fill the lever syringe ¾ full and the caliper syringe ¼ full.
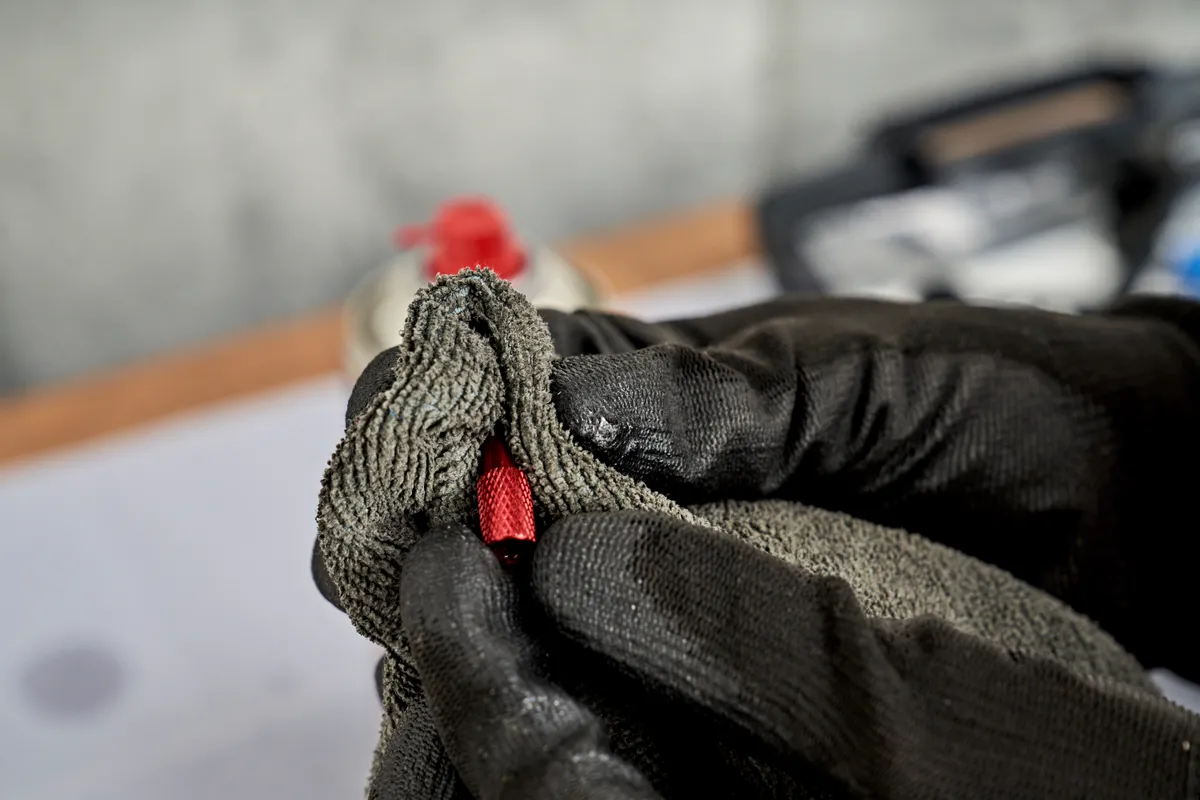
Make sure you eliminate any air bubbles to avoid introducing air into the system. Hold the syringe vertically, with a rag covering the tip and gently depress the plunger to remove the air bubbles.
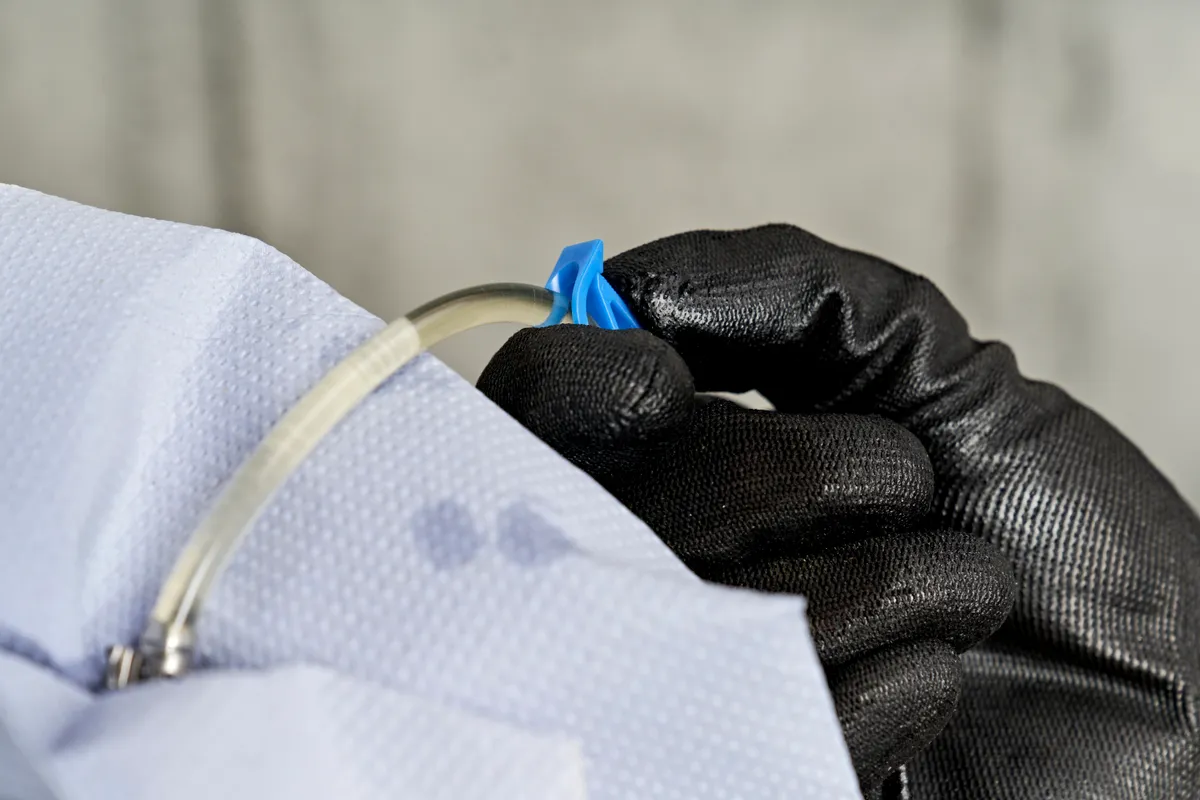
Close the syringe clamp.
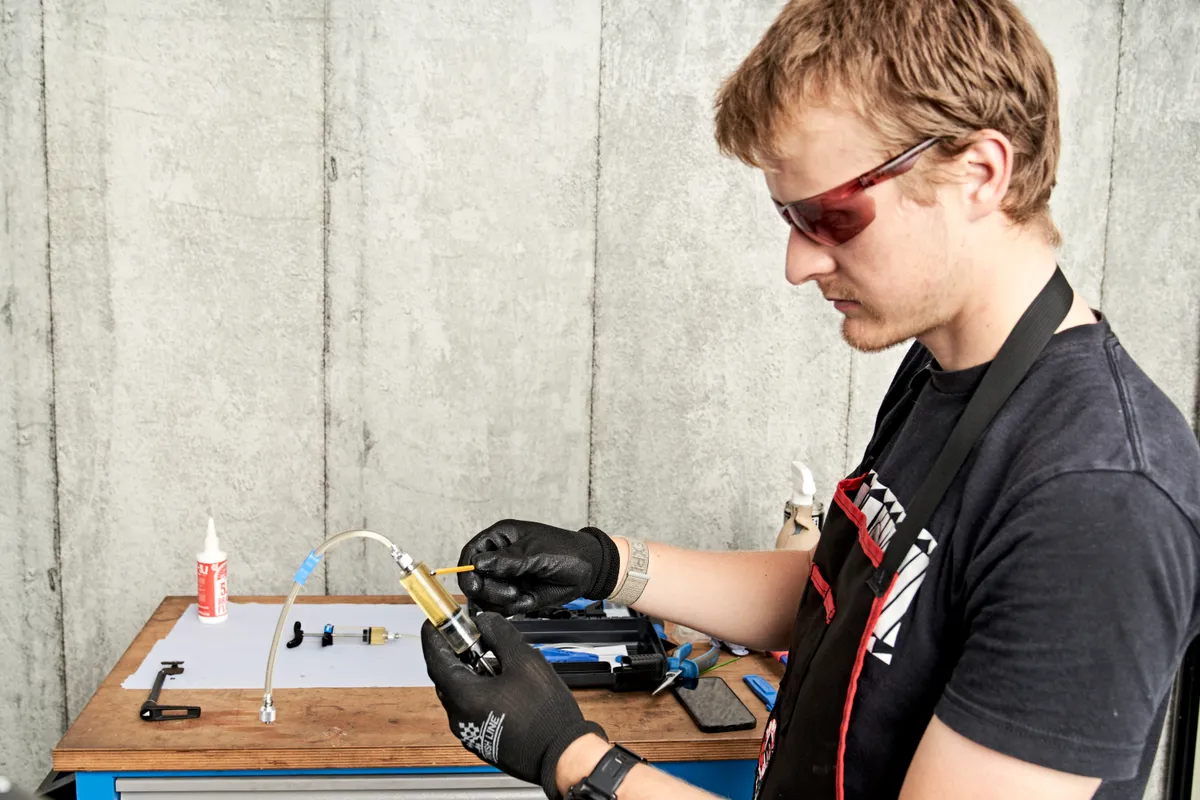
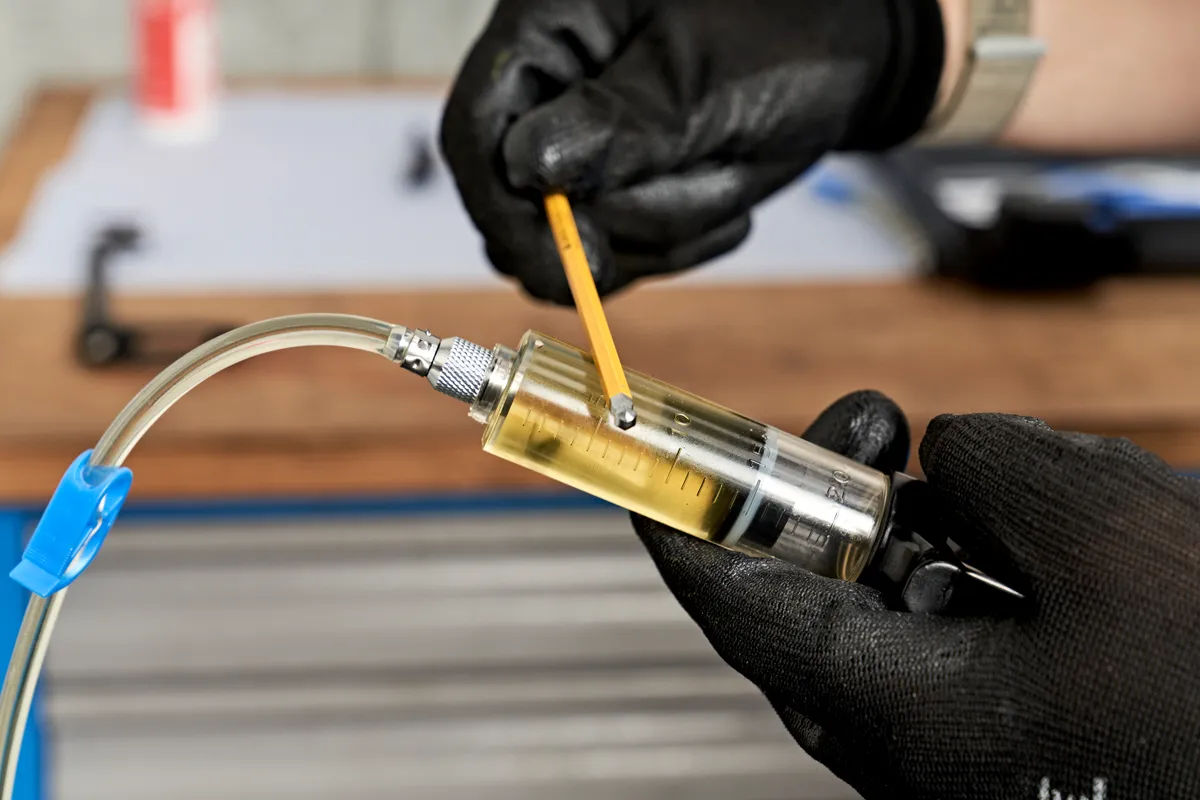
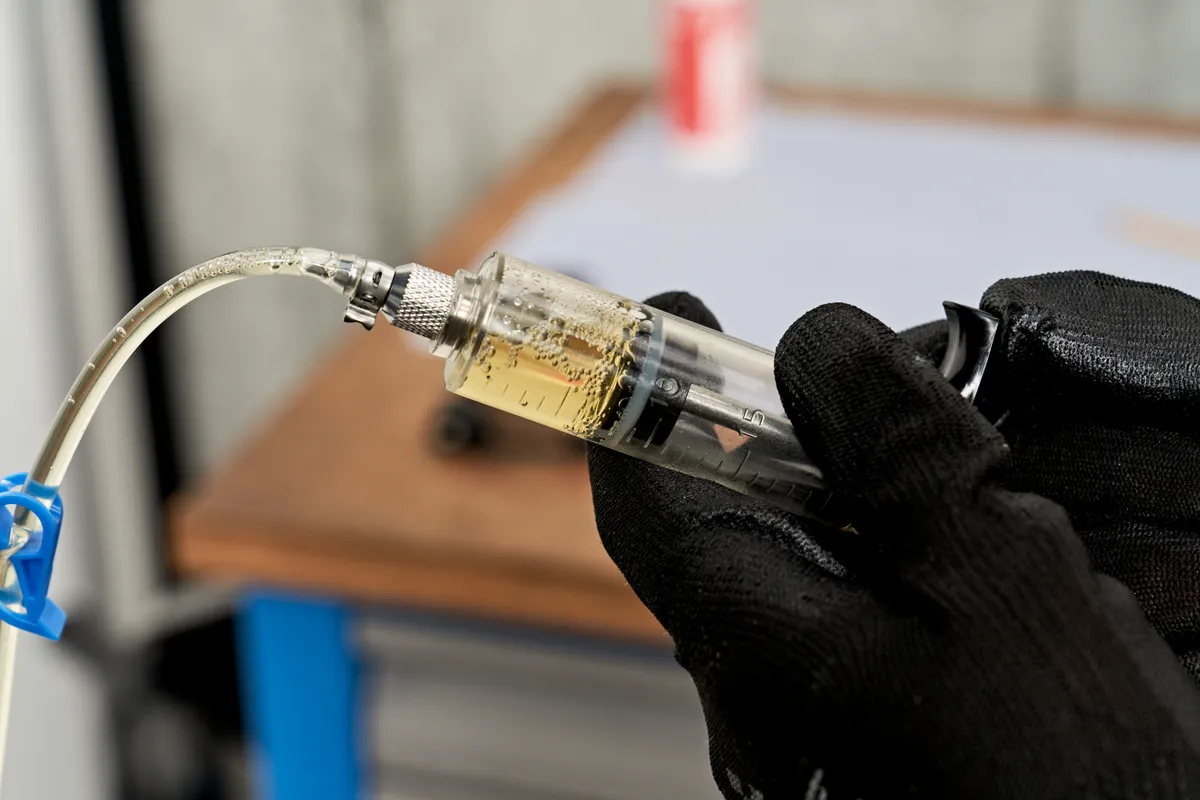

Now, lightly tap on the syringe with a hex key to encourage any more bubbles and eliminate them. It’s worth spending the time to get as many bubbles out as possible. This will result in a better bleed and brake feel.
Repeat this process for the other syringe.
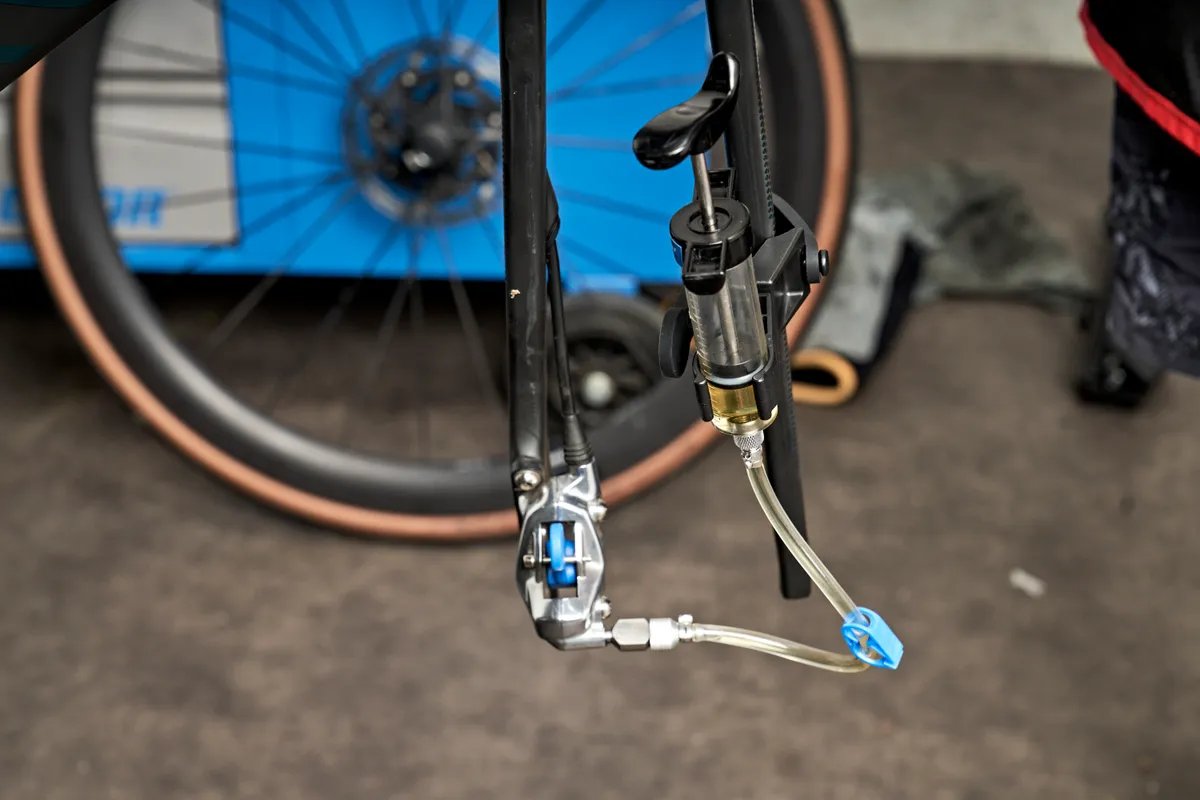
Step 4

We’d recommend tying some shop towel over the caliper and lever to catch any potential spillages.
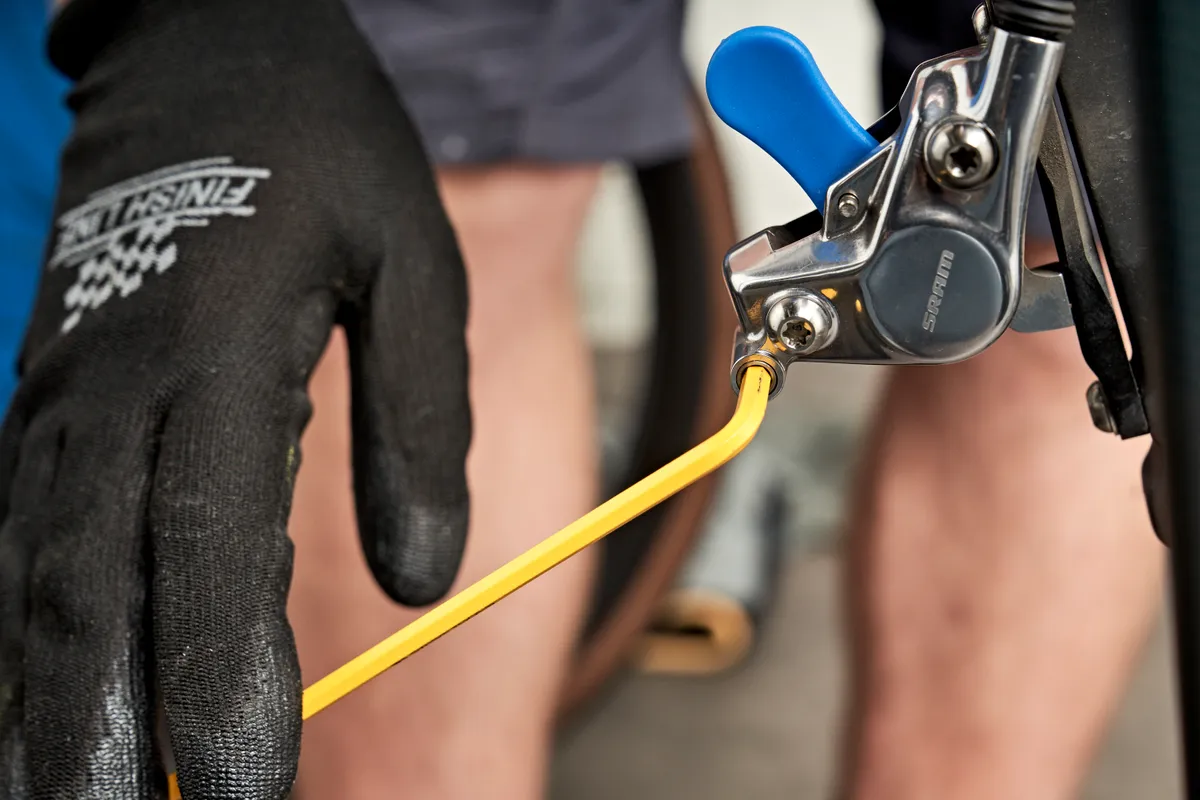
Attach the lever syringe, making sure to put the T10 torx bolt safely to one side. Wipe away any fluid that leaks out.
Repeat this process for the caliper syringe.
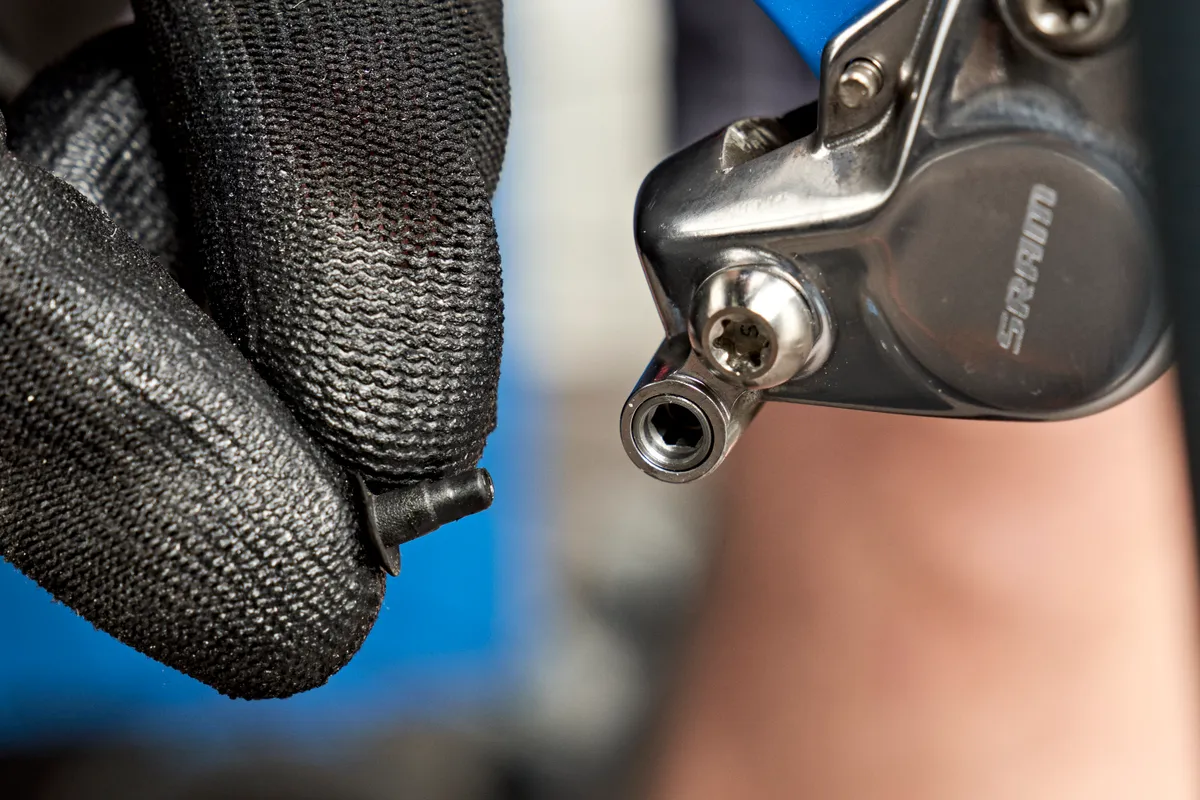
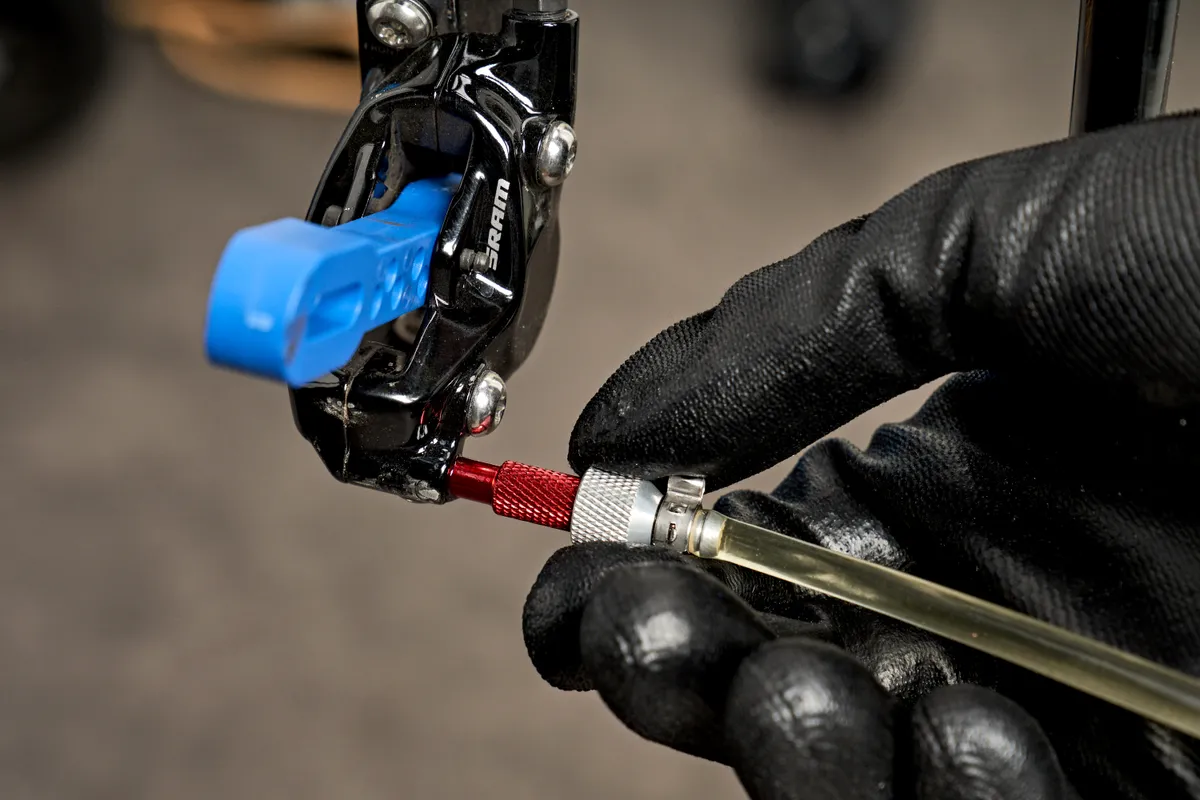
For Bleeding Edge calipers, remove the rubber plug and loosen the adaptor a quarter-turn with a 4mm hex key before gently retightening it.
Attach the syringe by pushing on the Bleeding Edge attachment until you hear a click and feel it locking into place.
Rotate the Bleeding Edge counter-clockwise one complete turn to open the system. SRAM says not to exceed two complete rotations.
Step 5

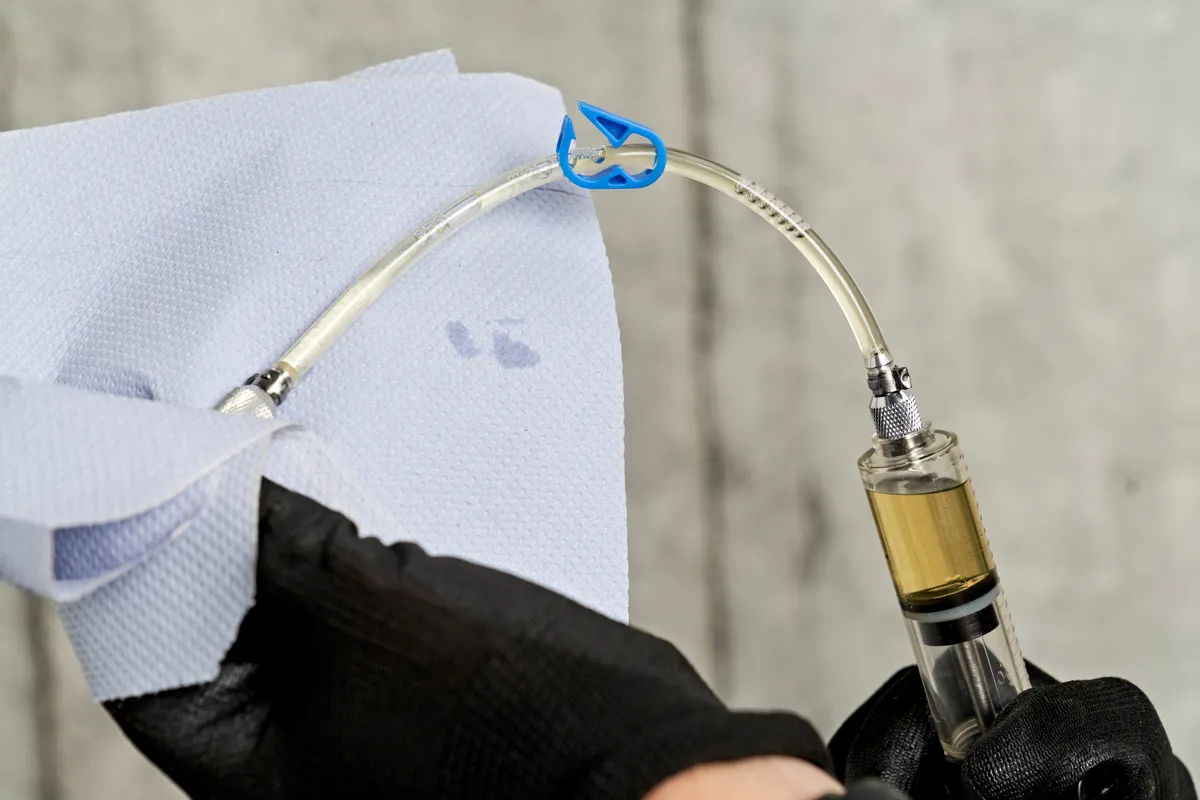
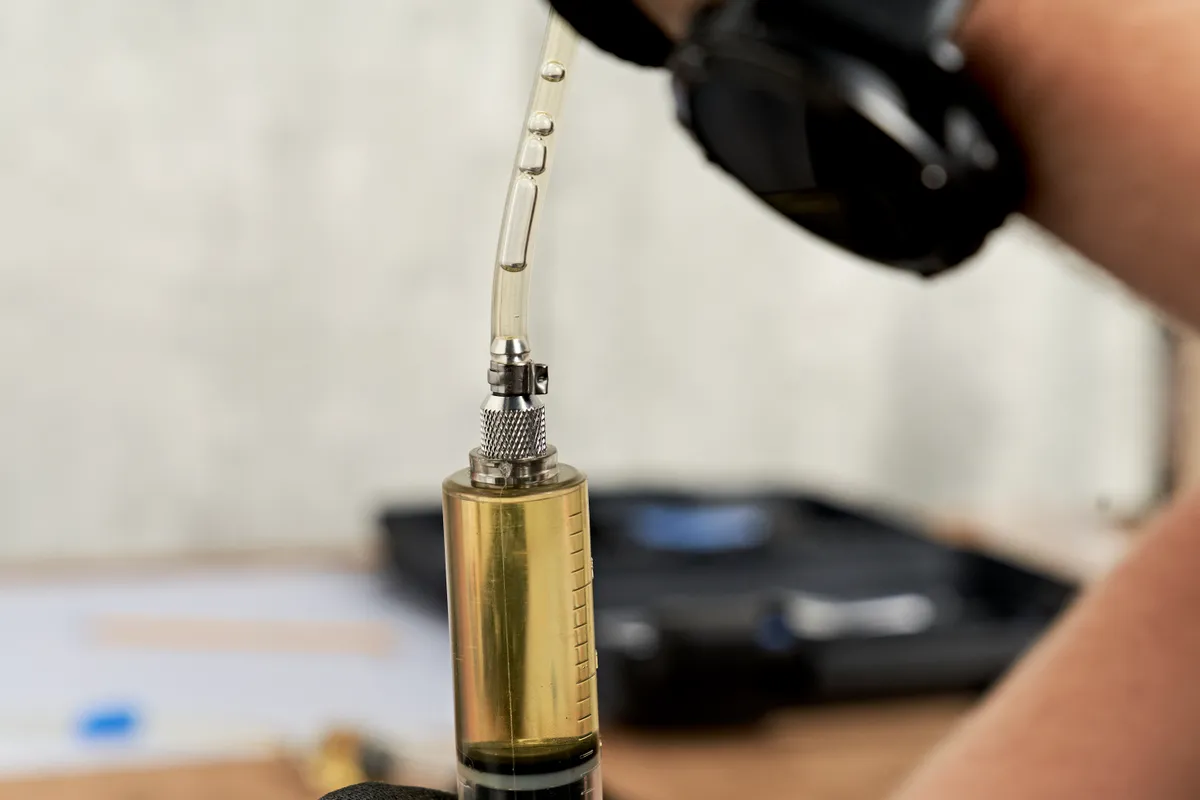
Open the clamps on both syringes. Push down on the lever syringe until the caliper syringe is approximately three-quarters full.
Make sure you don’t completely press the lever syringe down, otherwise air will enter the system and you’ll need to restart the process.

If the fluid going into the caliper syringe is discoloured, close the system and replace the fluid in the lever syringe until you’ve removed all of the old fluid.
You should see some air bubbles going into the caliper syringe.
Hold the syringes vertically to encourage the bubbles to go straight to the top. If they’re at the bottom, all you’ll do is push them back into the system.
Push the caliper syringe until it is a quarter full. You’ll likely see some bubbles entering the lever syringe.

Continue pushing and pulling between both syringes until you no longer see any air bubbles entering the system.
It’s a good idea to tap the hydraulic hose to encourage any rogue air bubbles out of the system.
Close the caliper syringe clamp and remove the syringe.
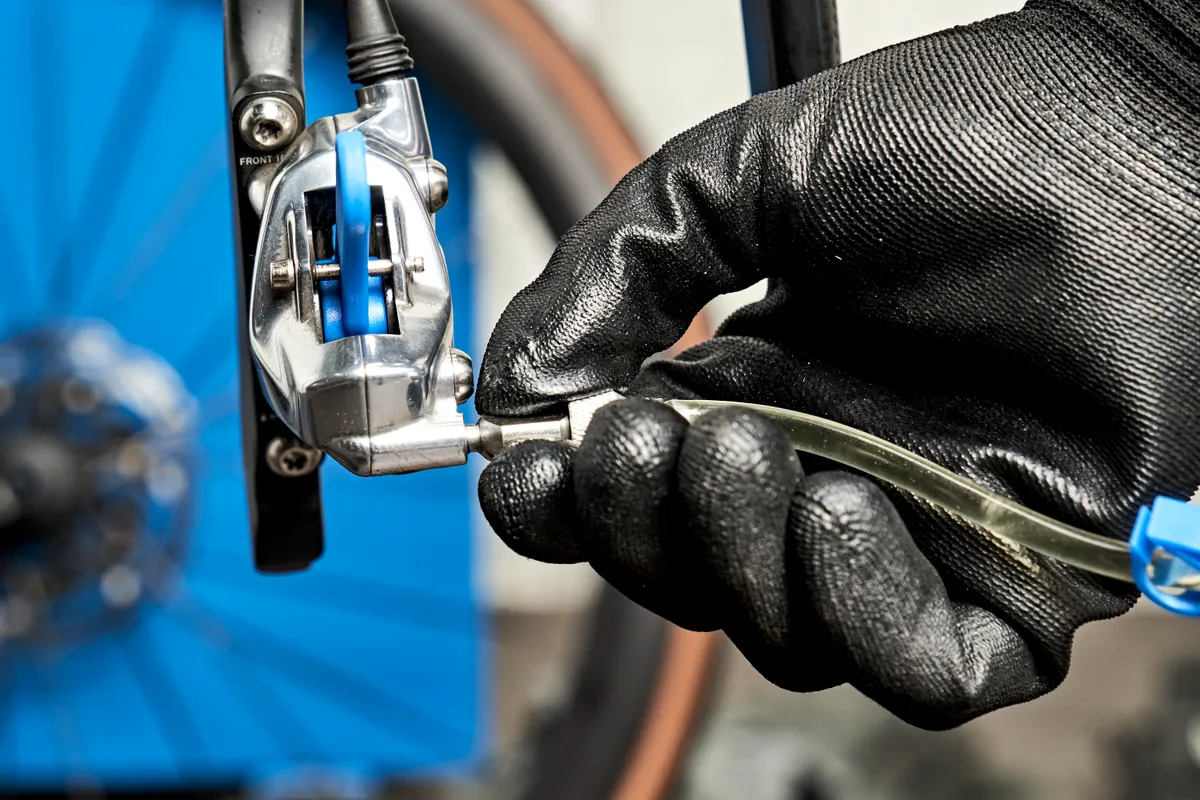
On Bleeding Edge, you’ll need to rotate the dial clockwise one full turn and then remove the syringe. SRAM recommends tightening the 4mm hex bolt to 1.5-1.7Nm.
Make sure you install the bleed plug over the 4mm bolt.
Step 6

Squeeze and release the brake lever. Pull up on the lever syringe to create a vacuum and then press down firmly to pressurise the system.
Repeat this process until you no longer see any air bubbles and then close the lever syringe clamp. As you’re closing the syringe clamp, apply gentle pressure with the plunger to make sure there is an optimum amount of fluid in the system.

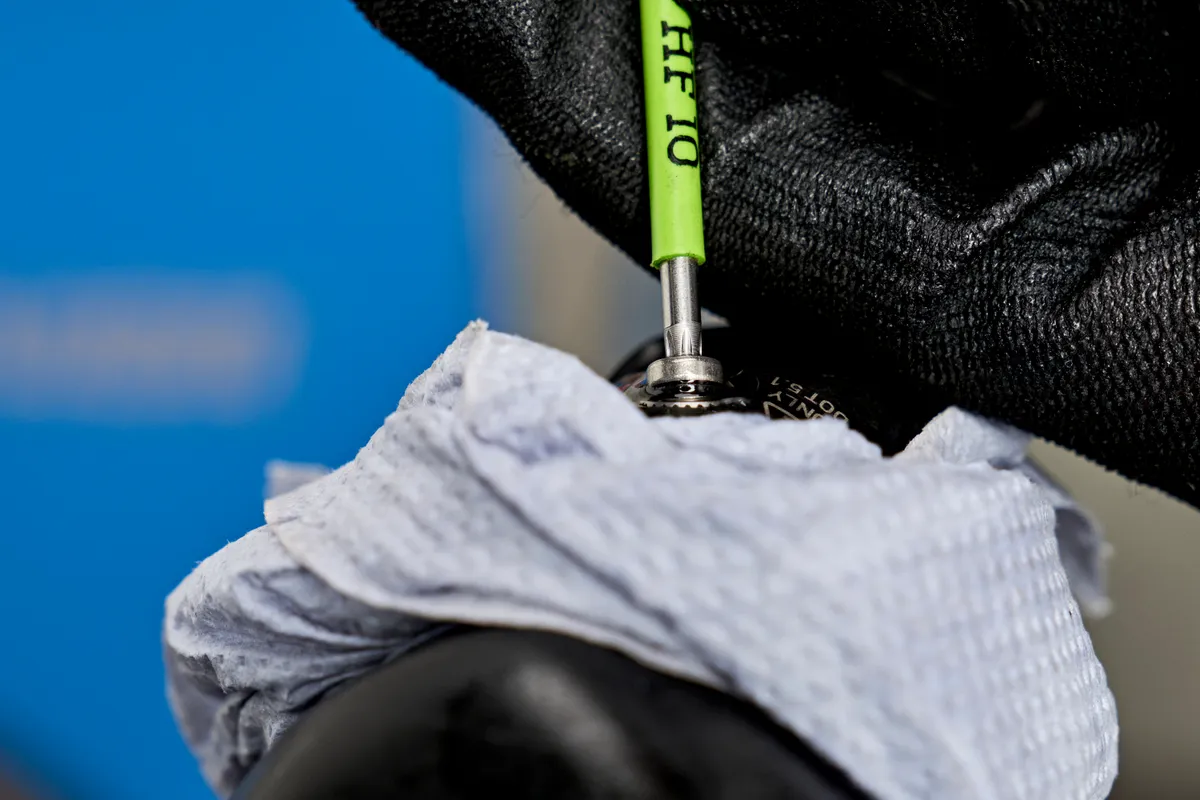
Remove the lever syringe, making sure to quickly replace the torx bleed bolt. If you have a torque wrench, SRAM recommends tightening it to a low 1.5-1.7Nm.
Step 7

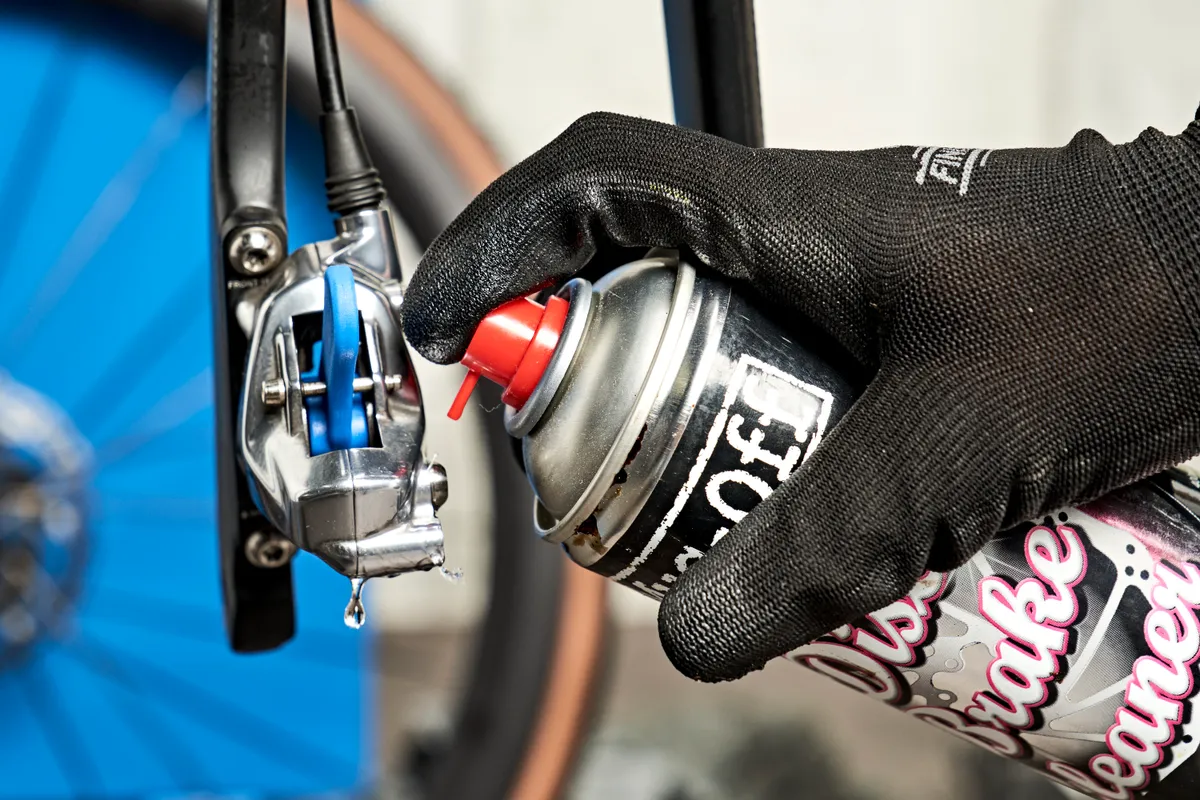
Thoroughly clean the caliper and syringe with isopropyl alcohol, making sure to clean the inside of the caliper too.
Once you’ve removed the bleed block, reinstall the brake pads. Before handling the brake pads, we’d recommend changing gloves just in case there’s any DOT fluid on them.

Install the wheel and check your work. You may need to realign your brakes.
It’s worth test-riding the bike in a safe, car-free environment before heading out on a ride.

Finally, make sure you thoroughly clean the brake bleeding kit with isopropyl alcohol.