Having the correct handlebar height is important to the overall comfort and handling of your bike.
It's one of the key things we do to make our test bikes fit and handle better, and adjusting it can help you achieve a more tailored position on the bike.
Racier riders will want to drop their handlebar for aerodynamic gains, while more relaxed riders may raise it for a less restrictive position.
In this guide, we will show you how to alter the bar height on modern threadless-style stems and headsets, as well as the older standard quill stems.
Below this, we detail reasons you may want to experiment with the height of your handlebar.
Navigation
How to adjust handlebar height on a threadless headset
Add or remove headset spacers
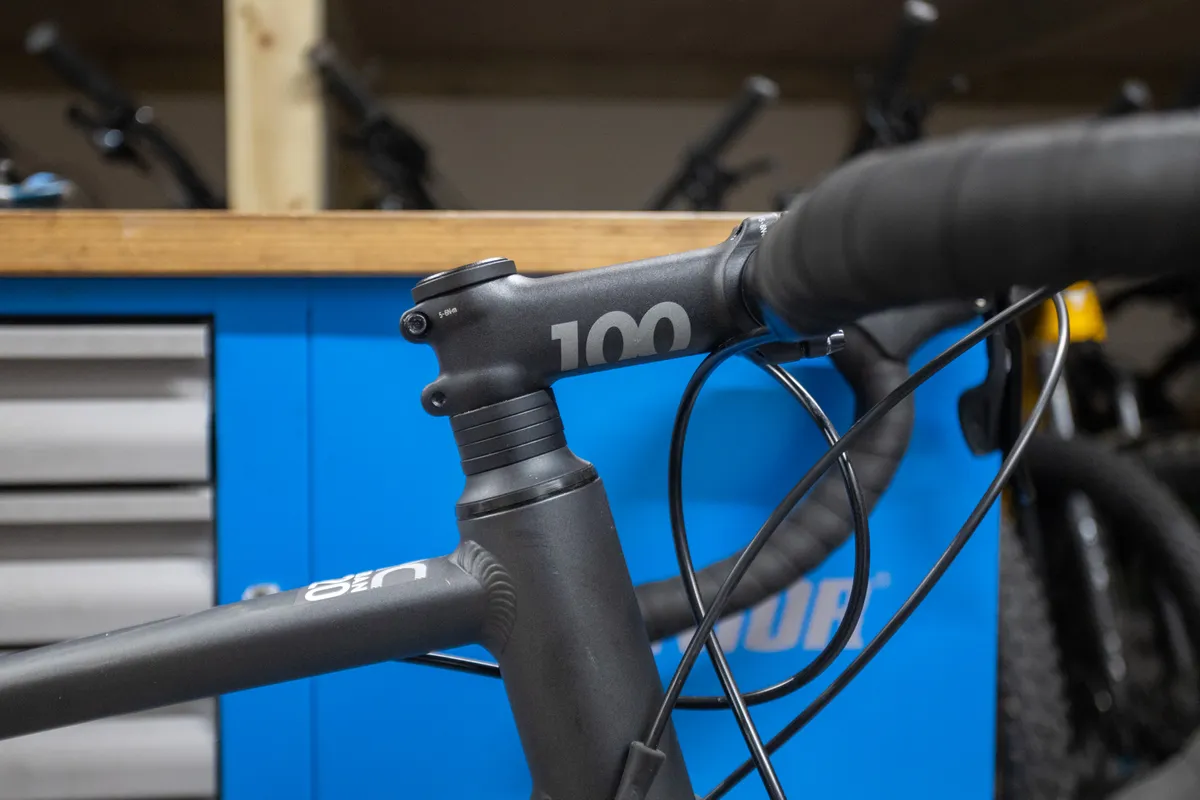
The first and easiest way to adjust handlebar height is by moving headset spacers.
Headset spacers sit on the fork's steerer tube and help pre-load the headset bearings during adjustment.
Generally, most bikes have 20 to 30mm of headset spacers that can be moved freely above or below the stem. All bolts in the stem are standard-threaded (i.e. ‘lefty-loosey, righty-tighty’).
It’s easier to perform this task with the bike on the ground rather than on a repair stand. It makes adjusting the preload on the headset bearings as accurate as possible and prevents the fork falling out of the frame.
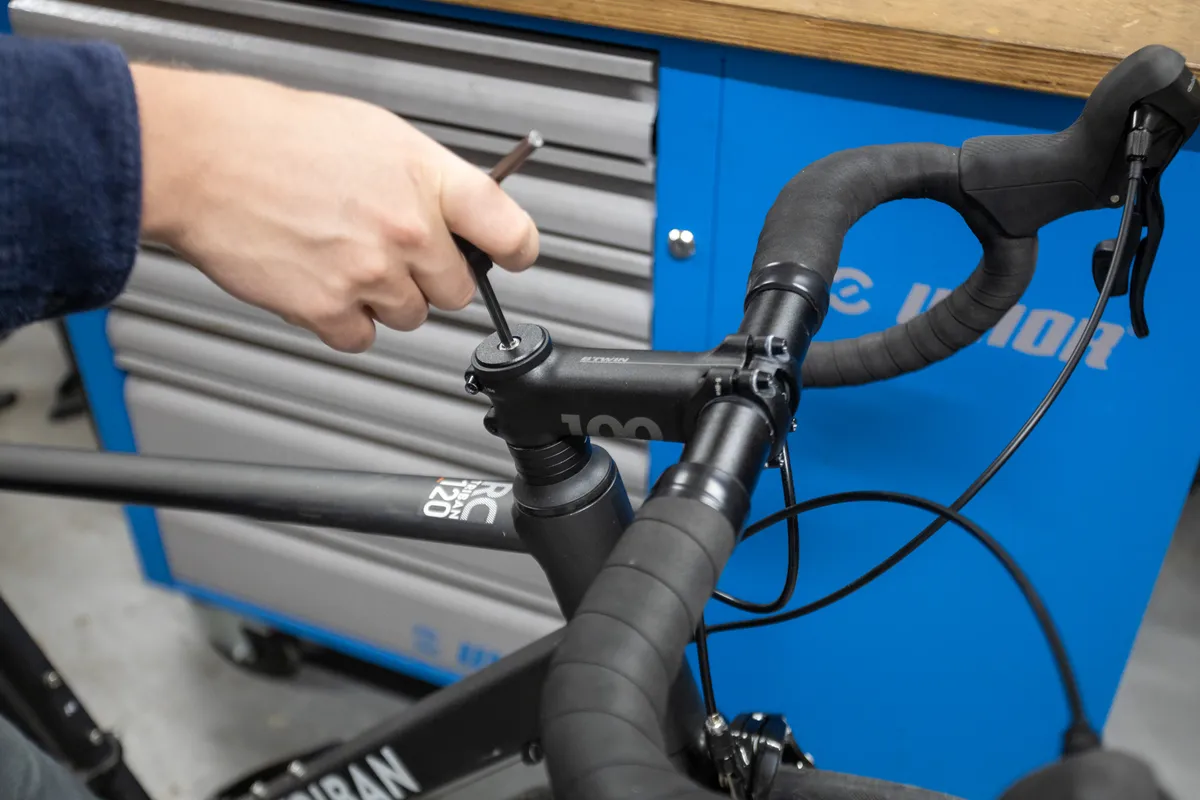
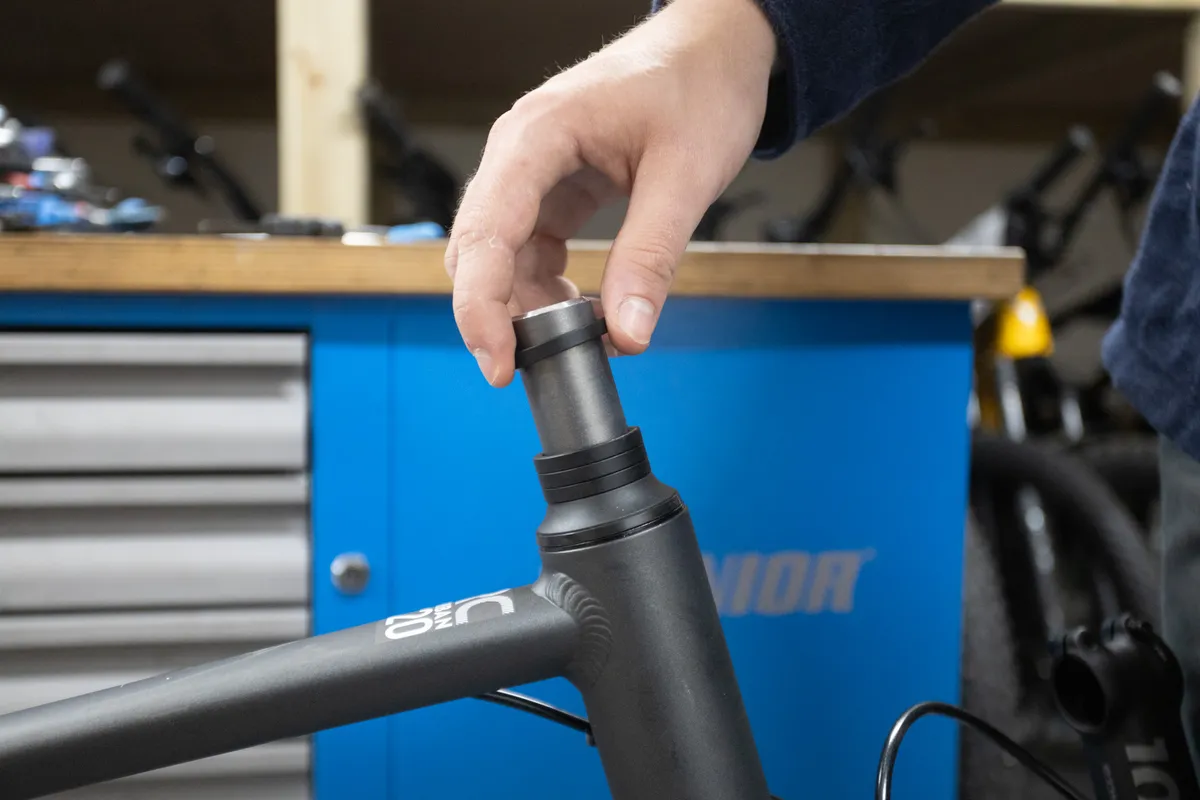
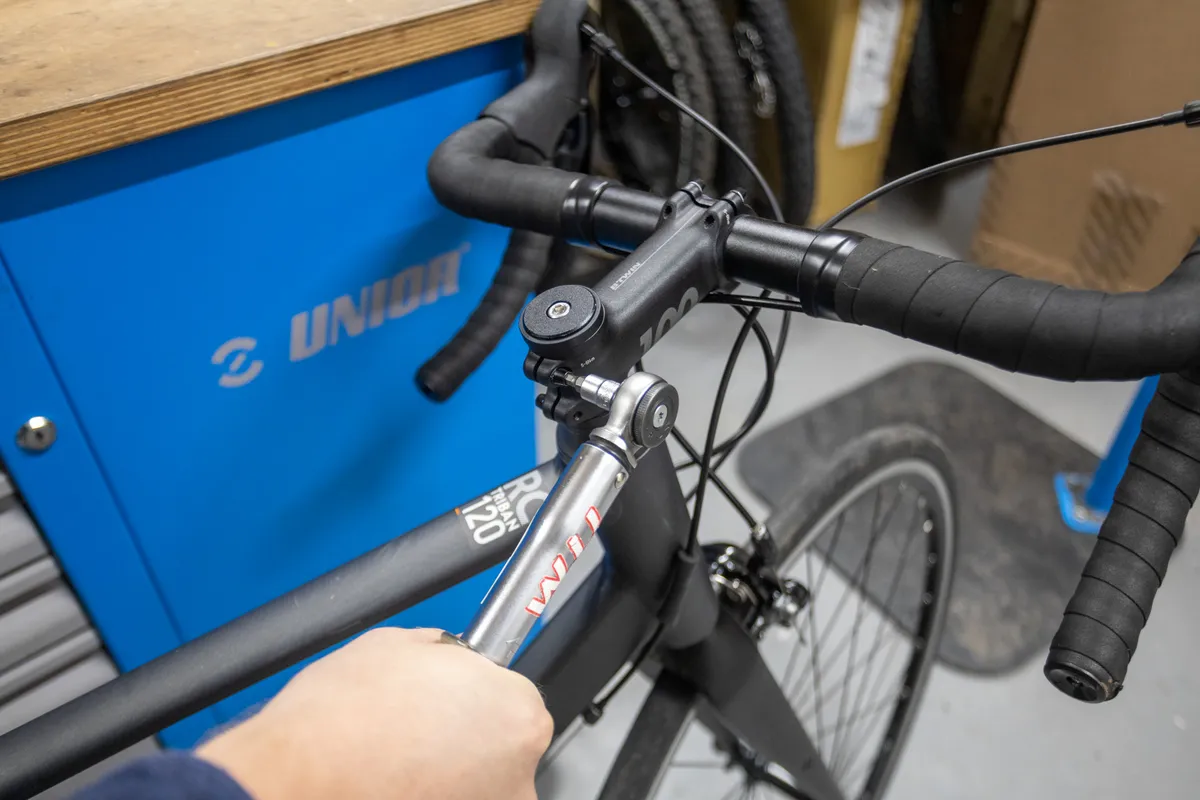
Step 1
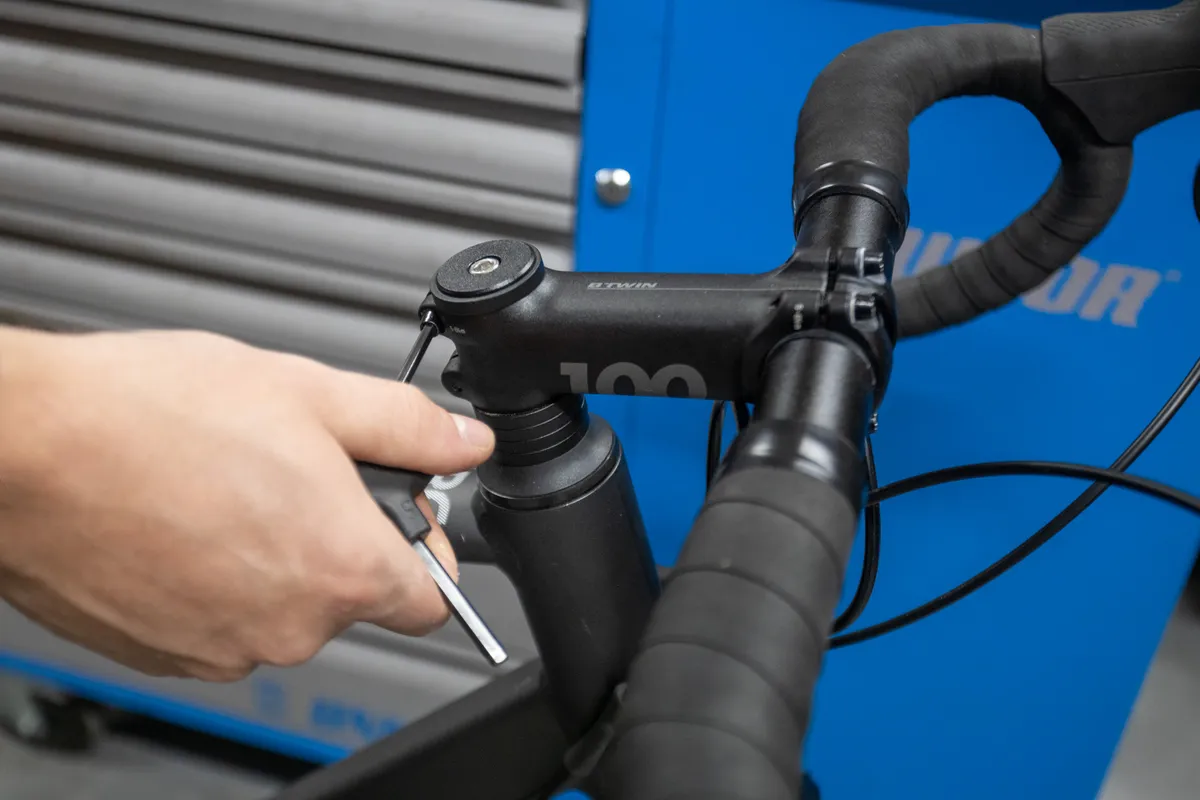
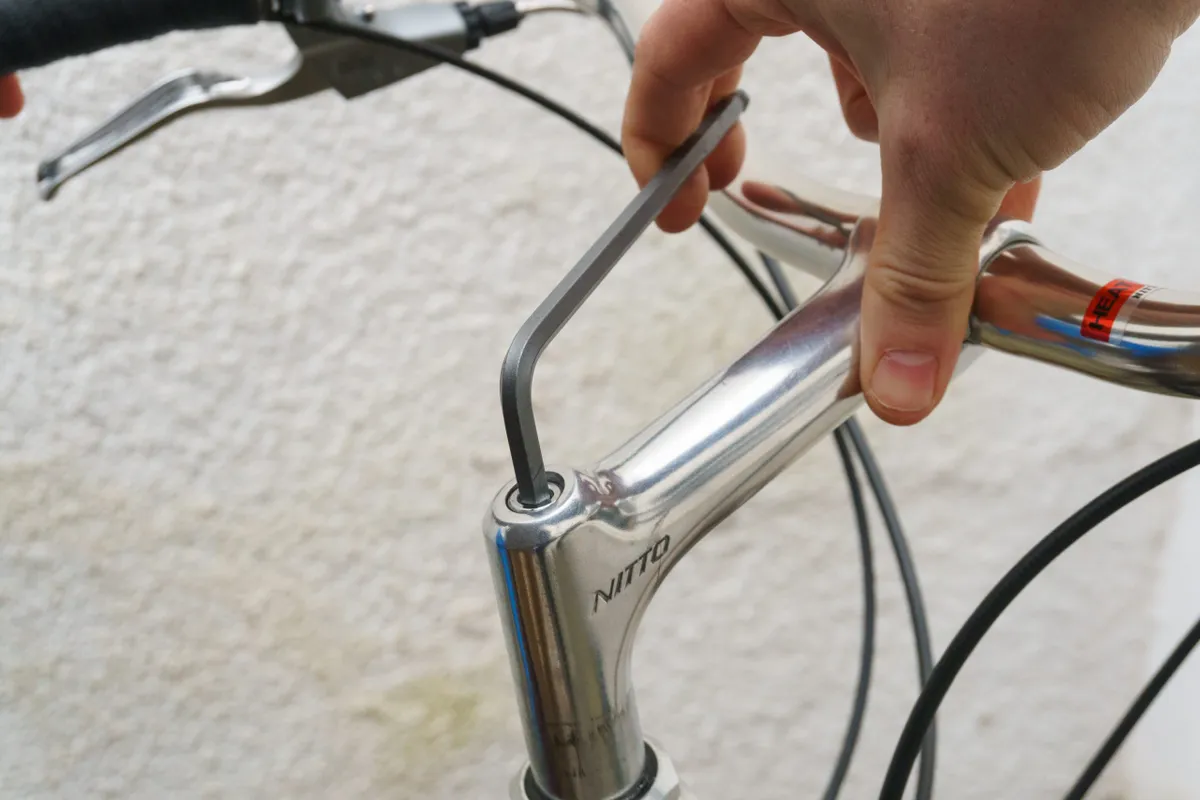
First, equally loosen the clamp bolts on the back of the stem. You don’t need to undo them fully – just enough so the stem is free to move.
Step 2
Remove the top cap that sits on top of the stem.
This is a good time to add a little fresh grease to the top-cap bolt, which can easily become seized in place.
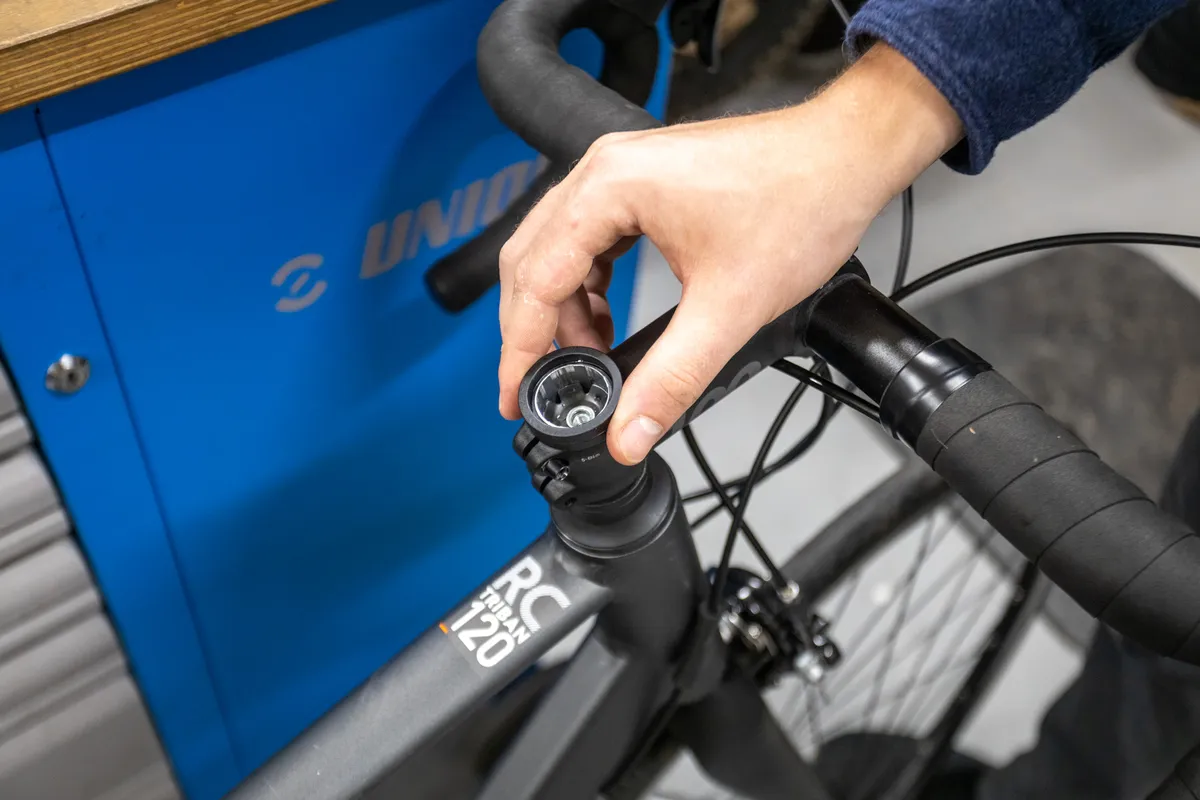
Step 3
Slide the stem off the steerer tube.
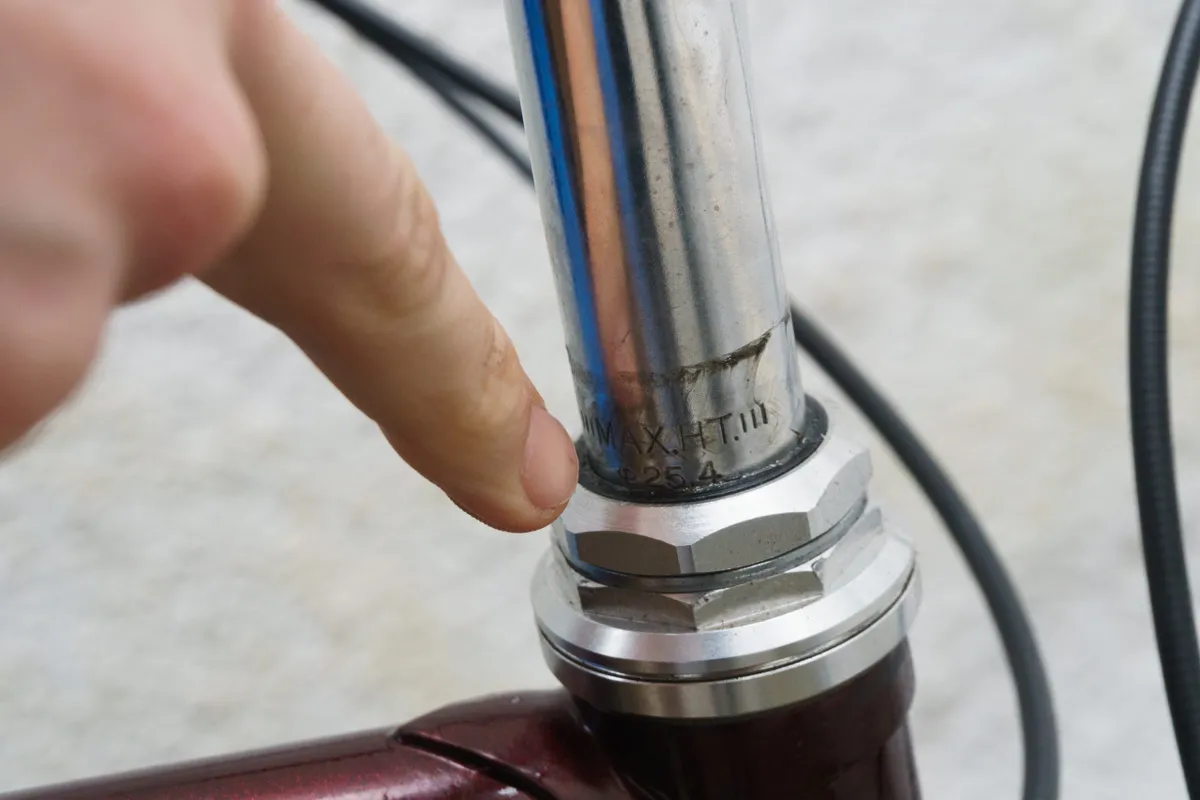
This is what the top cap and bolt look like when undone. These pieces thread into a star nut on a metal steerer tube or an expander plug on a carbon steerer tube.
Step 4
Decide how much you’d like to lower or raise your bar and add or remove the appropriately sized spacer(s).
Once you're happy with your position, it’s well worth cutting down the fork steerer tube to prevent any risk of injury from the tube in a crash.
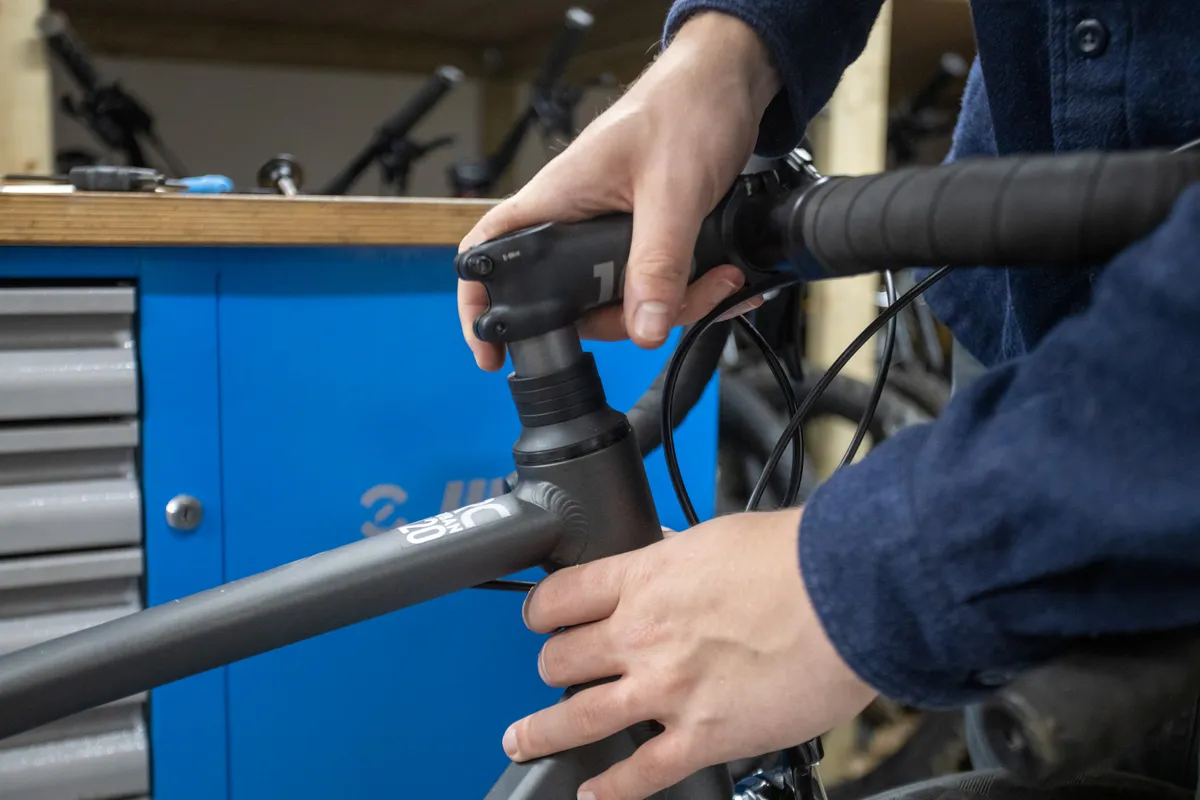
Step 5
Slide the stem back onto the steerer tube and replace the spacers you just removed into position above the stem.
Ensure there is a 3 to 5mm gap between the steerer tube and the top of your stem/spacer. This will ensure there's enough space for the headset top cap to clamp down and pre-load the headset bearing.
Step 6
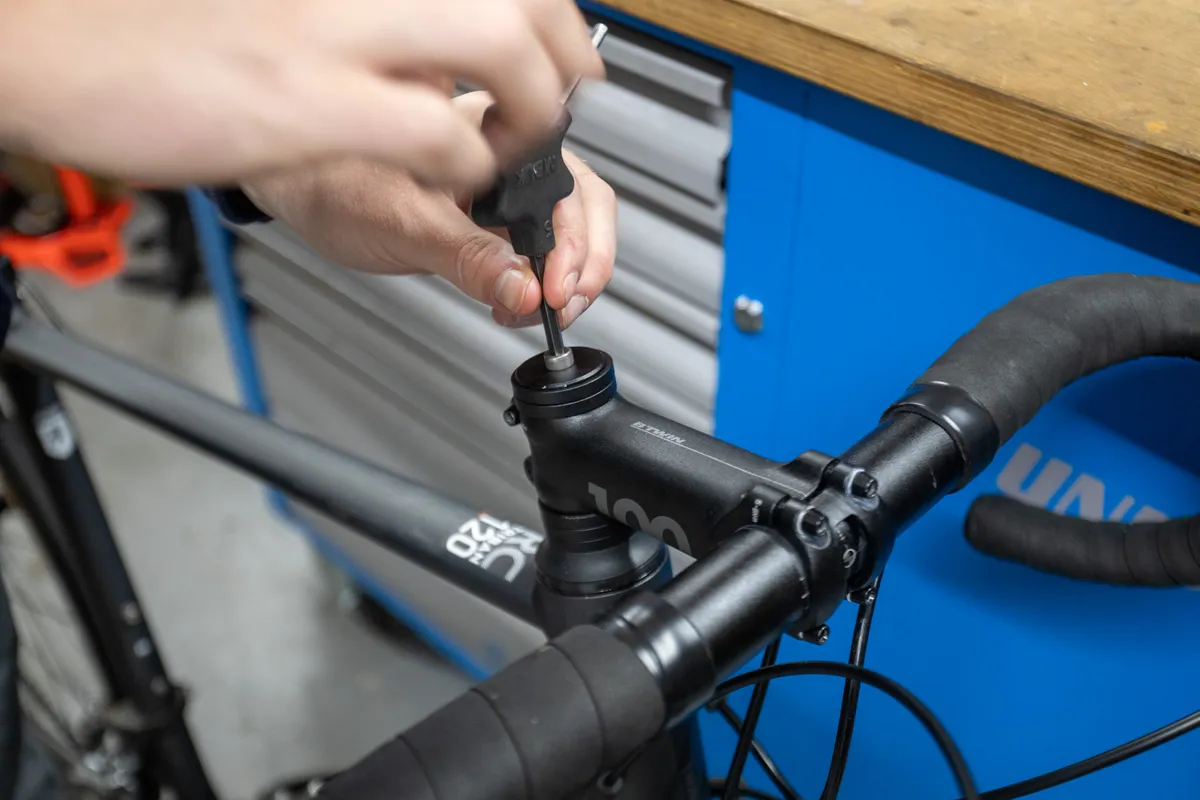
Now replace that top cap and bolt, and tighten until you feel some resistance. This top-cap bolt is used to pre-load the headset bearings.
Step 7
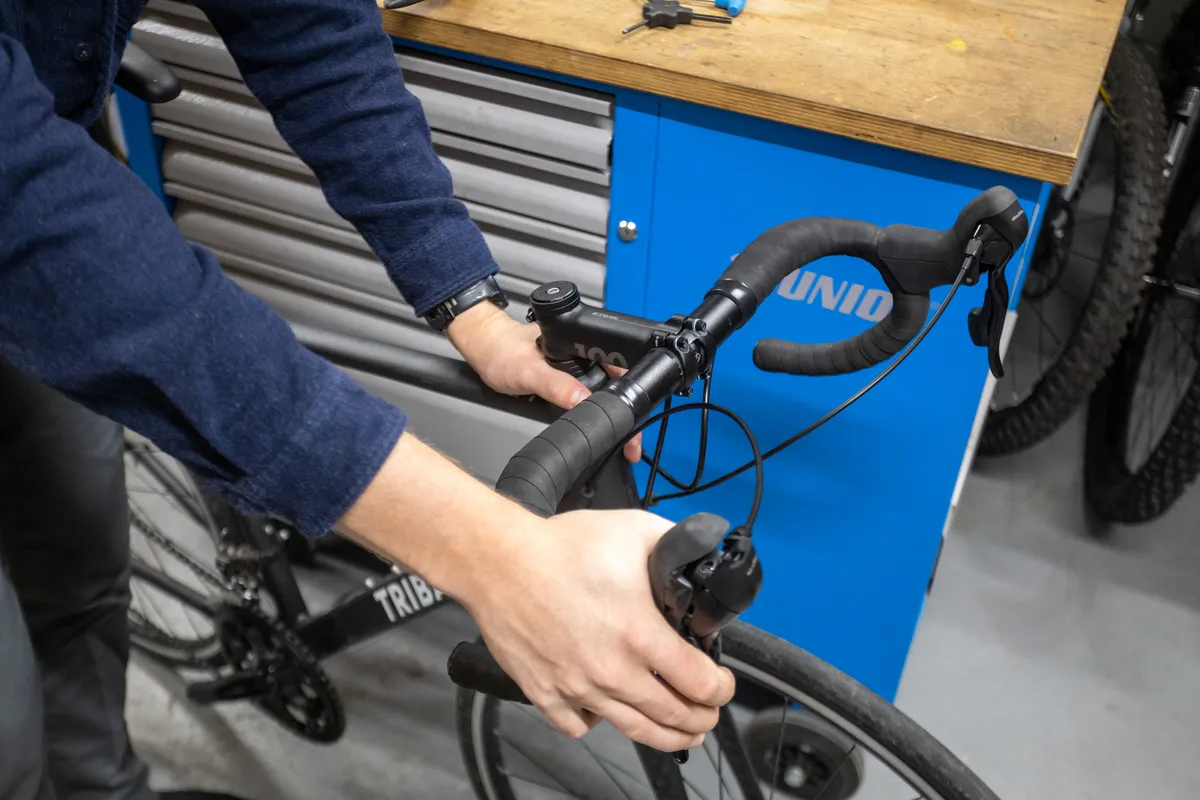
Next, align the stem with the front wheel, so the bar is at a right angle with the wheel. This may take some patience – it helps to straddle yourself over the top tube of the bike.
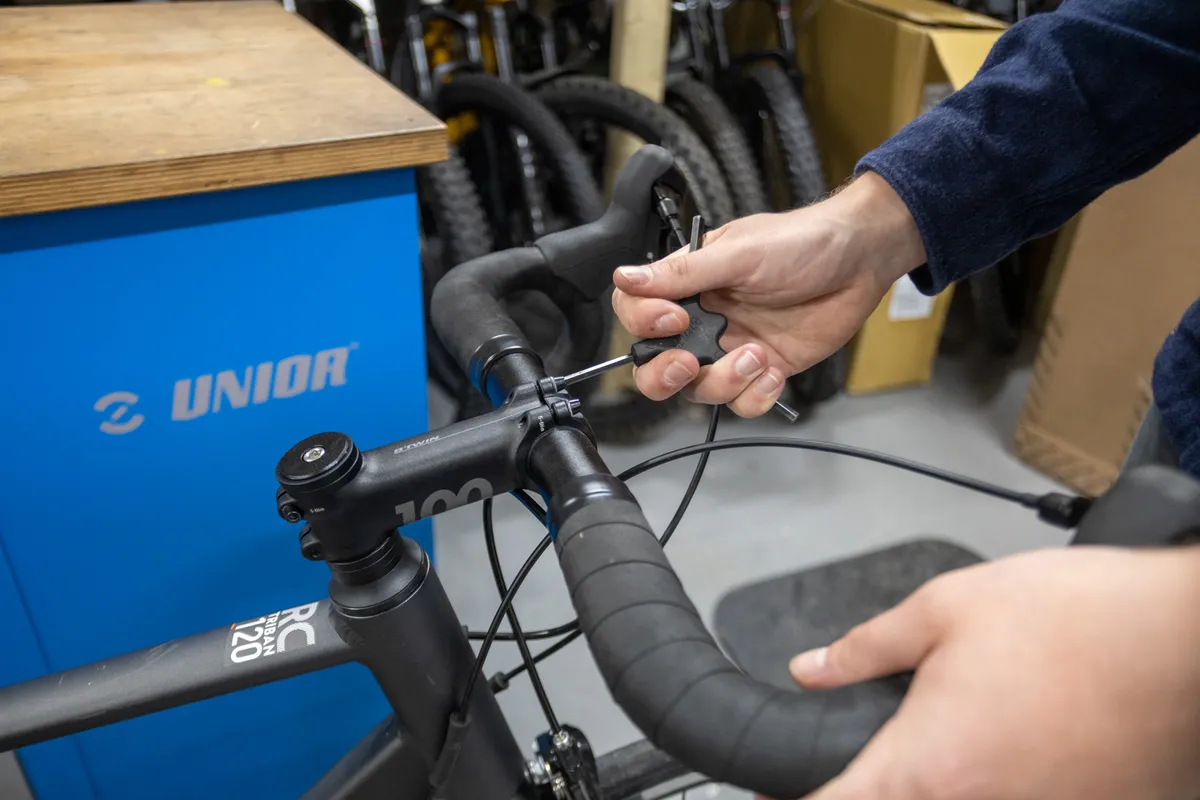
Step 8
Once the wheel and stem are aligned, torque the stem-clamp bolts evenly to the manufacturer's recommended value using a torque wrench. This is often around 5 to 8Nm.
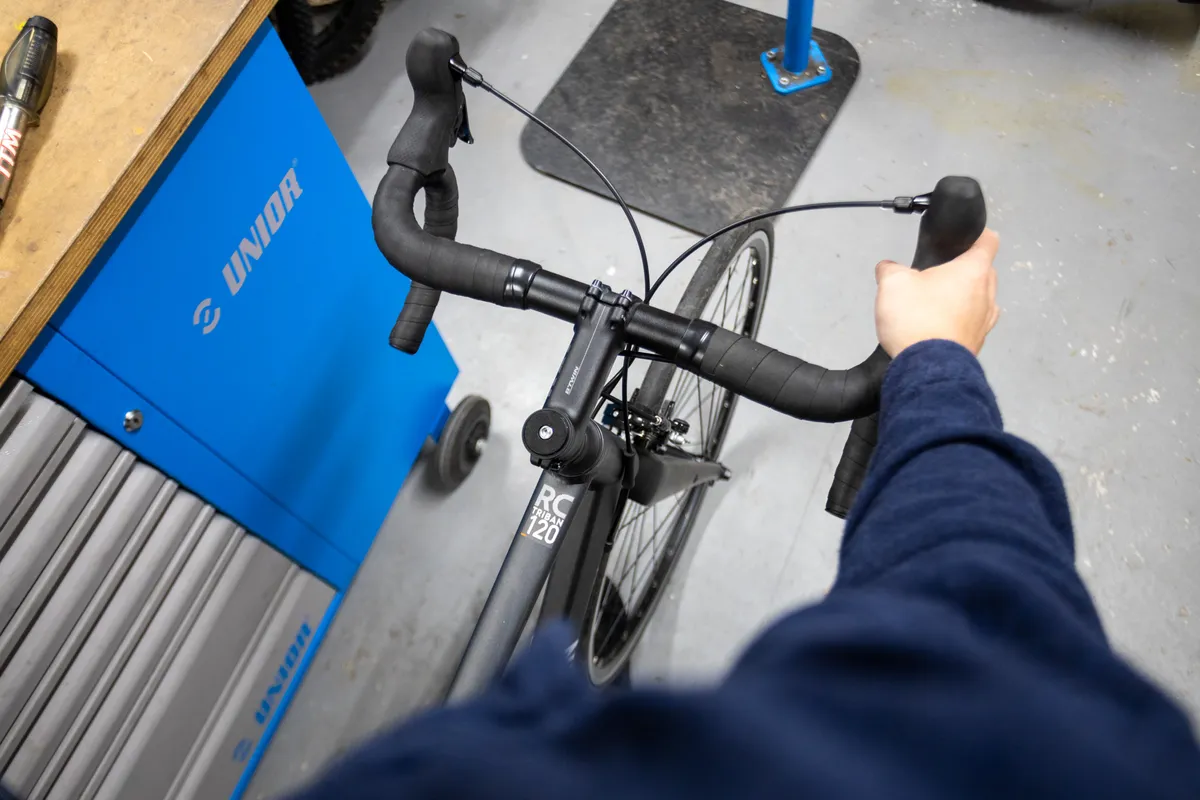
Step 9
Check your headset adjustment.
An easy trick to get this right is to hold the front brake and put one hand on the headset, then rock the bars gently back and forth. Feel for the steerer rocking back and forth inside the head tube of the bike.
If you feel this, loosen the stem-clamp bolts and tighten the top-cap bolt another quarter-turn, then re-torque the stem-clamp bolts.
Repeat until all signs of bearing movement have disappeared and the handlebars still turn smoothly. If you've tightened the bolts too much, you'll feel a tight spot when turning the handlebars.
If your headset feels rough, it may be time to service or replace your headset bearings.
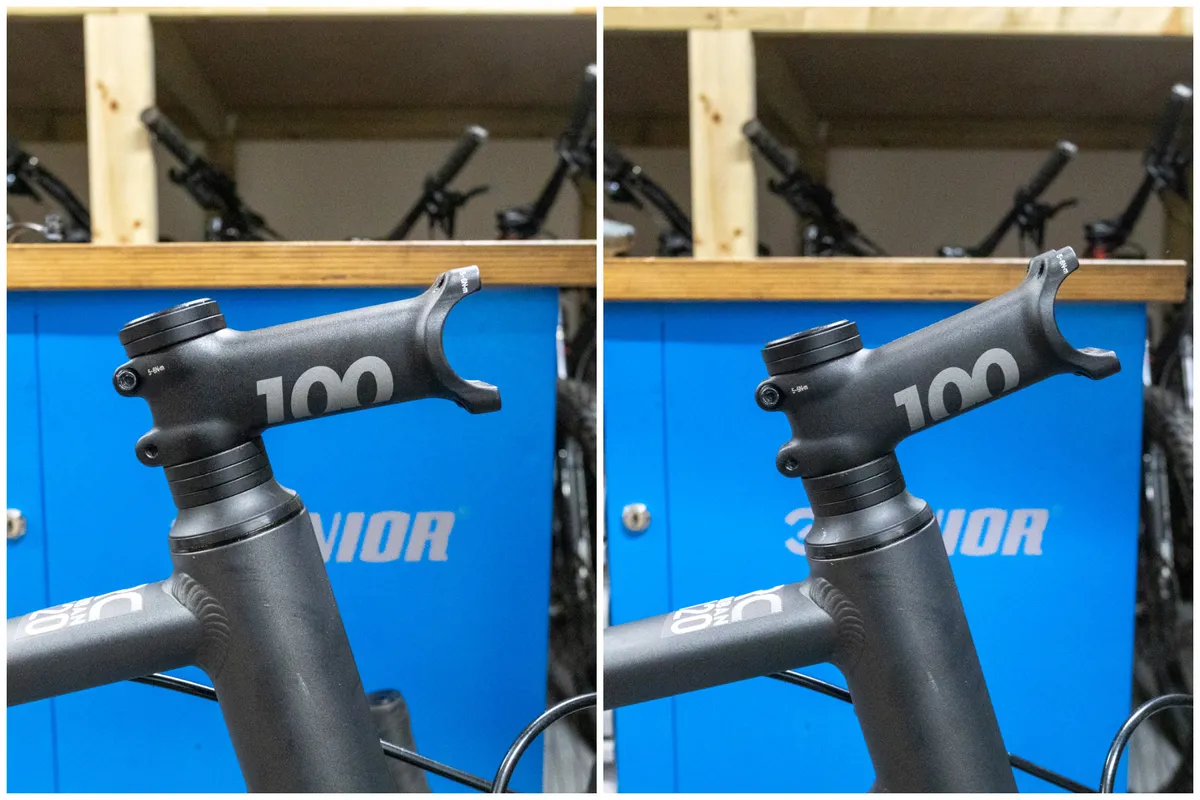
How to flip the stem on your bike

If spacers aren't enough to achieve the effect you want, you can flip the stem to make a further change to the bar height.
Most mountain bikes will be set up with the stem in a positive position, creating an upward angle, but you can use it the other way round.
This uses all the steps above with the addition of unbolting the handlebar from the front of the stem.
Step 1
With the bike’s wheels firmly on the ground, make a mental note of the handlebar angle and the brake lever angle.
Matching up a piece of masking tape on the faceplate and bars will make sure you get the angle spot on when refitting.
Evenly undo the bolts that hold the handlebar to the front of the stem. Remove the stem's faceplate and store it somewhere safe.
Step 2

Let the handlebar gently droop to the side and now follow the procedure for swapping spacers, outlined in steps 1 to 4 above.
Step 3
While the stem is off the bike, flip it over and then slide it back onto the steerer tube.
Step 4
Reinstall the handlebar, replicating the previous brake lever and handlebar angle.
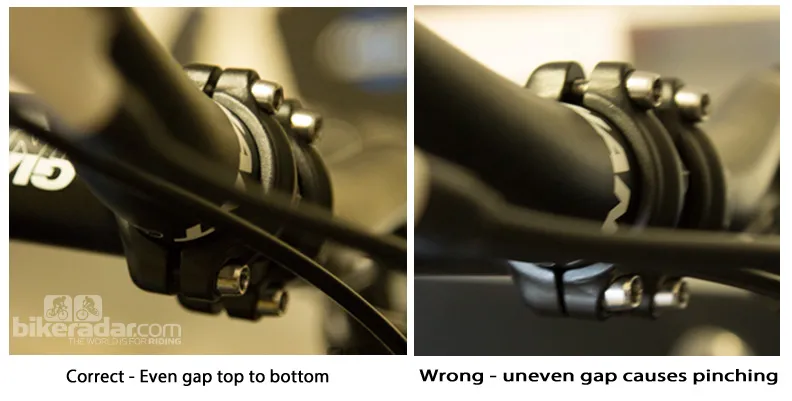
Tighten the faceplate to the manufacturer's recommended torque (generally between 4 and 8Nm). Ensure that all bolts are done up evenly, a little at a time, and that there is an even gap top to bottom with the faceplate once they're tight. If the gap isn’t even, the handlebar is being pinched.
While it's usually the case, it's not always suggested that stems should have an even gap at the top of the faceplate. Check your user manual if in any doubt.
Proceed with steps 3 to 7 above to pre-load the headset and tighten the stem.
How to raise the handlebar on a bike
You can raise the handlebar on your bike using the steps outlined above by moving the stem so it's above as many headset spacers as possible or flipping the stem.
However, if the handlebar is still not high enough for you, there are other steps you can take.
You can replace your stem with one that has a greater degree of rise (the angle of the stem relative to the steerer tube). Bicycle stems come in different amounts of rise, typically between six and twenty degrees.
You can also install a stem riser. This is an attachment that fits to the fork steerer. Stem risers effectively lengthen your steerer tube allowing you to have stem and handlebar higher.
Stem risers can put greater strain on a fork steerer, particularly if it’s carbon.
What if my bike is integrated?
Many of the latest bikes across riding disciplines feature integrated front ends, with cables and hoses running through the handlebar and stem, and into the frame.
As a result, these bikes often make lowering or raising handlebar height more complicated.
Lowering your handlebar on these bikes generally isn’t too difficult. Many brands have introduced split headset spacers, which can be removed without having to remove the stem entirely.
Raising your handlebar can be trickier. You’ll want to make sure there is sufficient slack in the cables and hydraulic hoses. If they are too short, they will need to be replaced to introduce the required length.
How to adjust the height of a quill stem
Quill stems were the norm before A-head/threadless-style stems hit the market. They are still commonly seen on bikes of all styles and disciplines.
Quill stems slide into the steerer tube of the fork and are secured with either an expanding bung or sliding wedge that presses against the inside of the tube.
Adjusting their height is slightly different – but arguably much easier – than a threadless stem.
Step 1
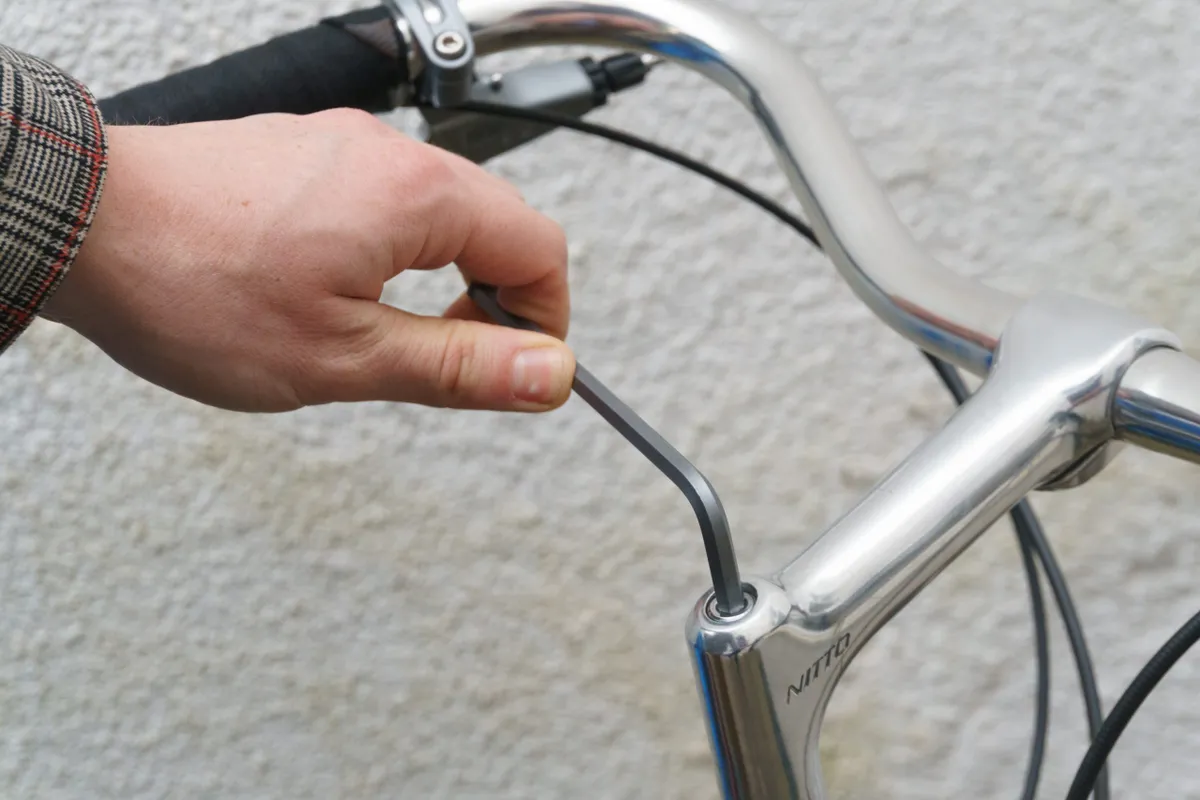
Begin by loosening the bolt on the top of the stem. Most use a hex head bolt, but some will use an external bolt.
Step 2
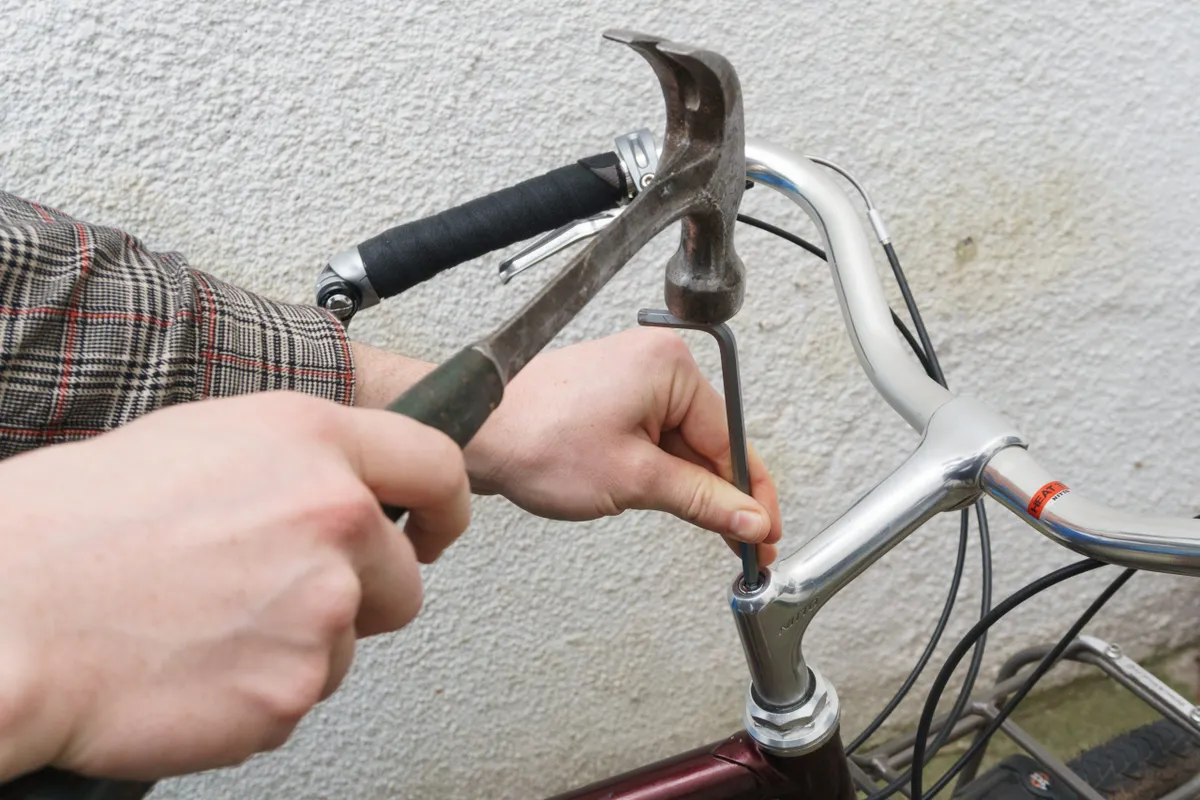
Once loosened, you may be able to move the stem freely.
If the stem hasn't been adjusted in some time, you may need to gently tap the bolt with a hammer to free the wedge or bung.
If the bolt is sitting proud of the stem, strike this directly. If it is flush with the top of the stem, you can use your hex key to gently tap the bolt.
Step 3
The stem can now be adjusted to your heart's content. Be sure to check for any minimum and maximum insertion marks on the stem and adhere to these.
It is good practice to periodically grease the shaft of a quill stem because they frequently seize if left dry.
Step 4
Once you have set the height of your stem and lined it up with your front wheel, you can re-tighten the wedge bolt to spec.
You’re now good to hit the trail and/or road to test out the bike's new handling characteristics.
It may take some trial and error along with patience to find that perfect height, but once you've got it, you'll be far closer to realising the bike's true potential.
Why would you want to change your bar height?

Riders will often experiment with adjusting saddle height, changing tyre pressure, bar angle and suspension settings, but few are aware of the benefits of adjusting bar height, despite the handlebar playing a crucial role in the way your bike handles.
Bar height is also known as saddle drop, which is the measurement of how far the top of the saddle sits above (or below) the bar.
Generally speaking, a lower handlebar height reduces your centre of gravity.
By placing more weight over the front wheel, you increase traction.
Additionally, a lower bar height provides a more centred position between both wheels to improve bike control, especially during climbing. These traits are even more noticeable off-road.
There is a limit; going too low can make the bike difficult to control. A lower handlebar can also negatively affect handling in steep terrain.
On the road, elite riders normally have a significant drop, where their bar sits below the saddle. This is typically done to provide a more aerodynamic position.
Recreational riders are usually best served by a handlebar that's in line with the saddle or above it. This usually gives a very comfortable position and is a good starting point for experimentation.
Fortunately, experimenting with bar height is easy and most often free, so you can adjust to your heart's content until you find the right position for you.