As a result of removing the hanger, no b-tension or limit-adjustment screws are needed; the distance between the cassette and derailleur is constant.
In doing so, however, SRAM needed to rethink the installation process. Their process simplifies installation vastly, without the need for measurement tools and chain-length calculations.
Instead, some simple and easy-to-follow steps are required to install either electronic AXS or mechanical T-Type Eagle Transmissions, and get the derailleurs performing correctly.
For more about T-Type Transmission, read our news story.
If you'd like to find out what it is like living with T-Type for six months and more than 1,000km of riding, check out Alex Evans' in-depth review.
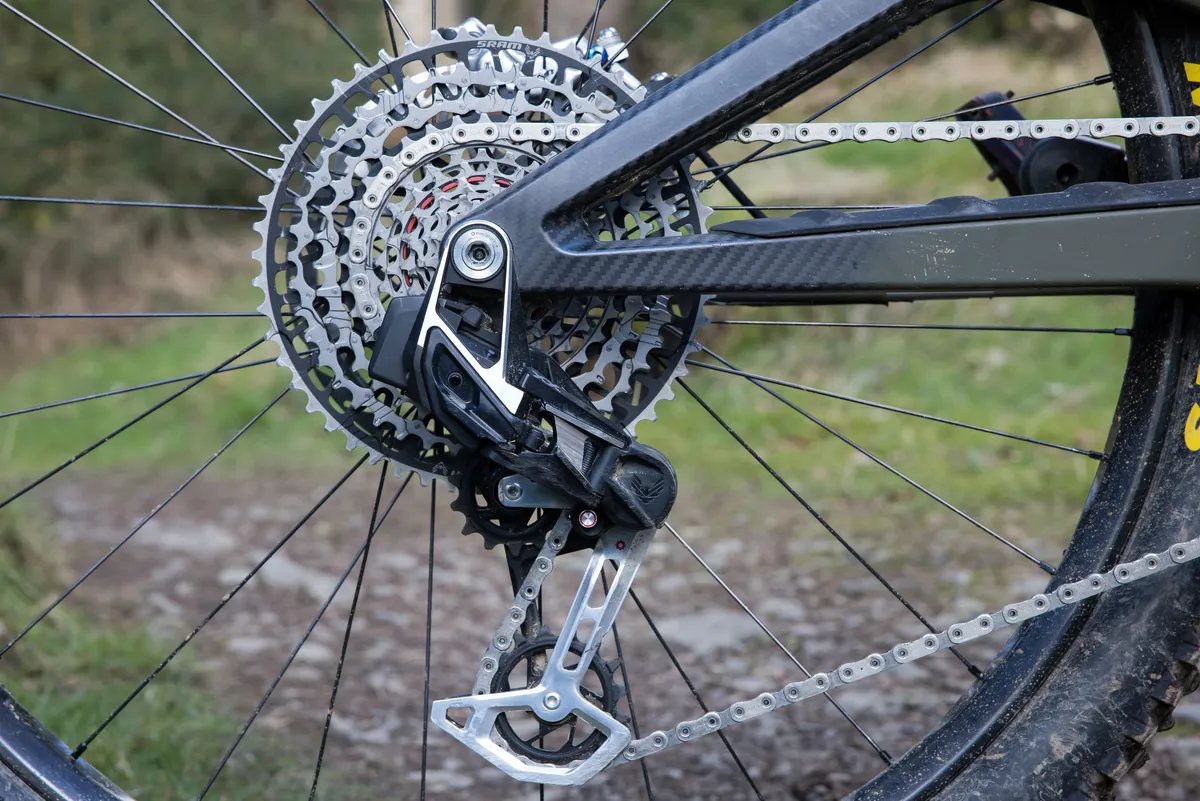
Steps to take before installing your T-Type Eagle Transmission derailleur
- Install the cassette, cranks, chainring and AXS Pod Controller following the instructions on SRAM's website. These are virtually unchanged from SRAM's Eagle drivetrain components
- Remove your bike's Universal Derailleur Hanger. The UDH's bolt uses a reverse thread, so turn it clockwise to loosen
- Make sure the derailleur's Setup Key is in the correct position for your bike. Consult SRAM's website for more information
- If you have SRAM Eagle 70 or Eagle 90 mechanical Transmission, scroll down for our specific guide
- If you have SRAM AXS Transmission, fit a charged AXS battery to the derailleur. All SRAM AXS batteries are compatible with T-Type
- Pair the AXS Pod Controller with the rear derailleur by following the instructions on SRAM's website
- Shift the derailleur to the correct setup gear, according to the instructions on SRAM's website for your bike
Installing the SRAM AXS wireless electronic T-Type Eagle derailleur
Installing the bushing frame insert
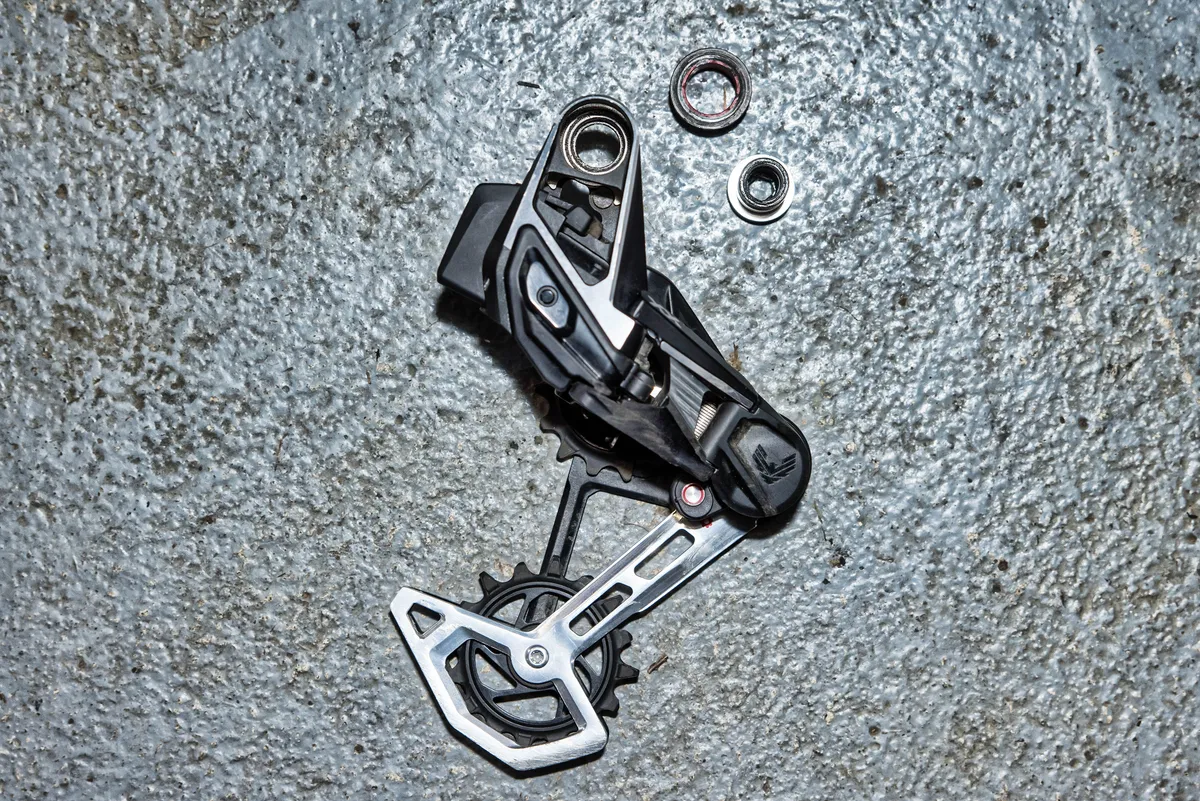
Remove the derailleur's mount bolt and bushing using an 8mm Allen key.
Clean the bike's Hangerless Interface and make sure there is no paint or other debris inside the dropout.
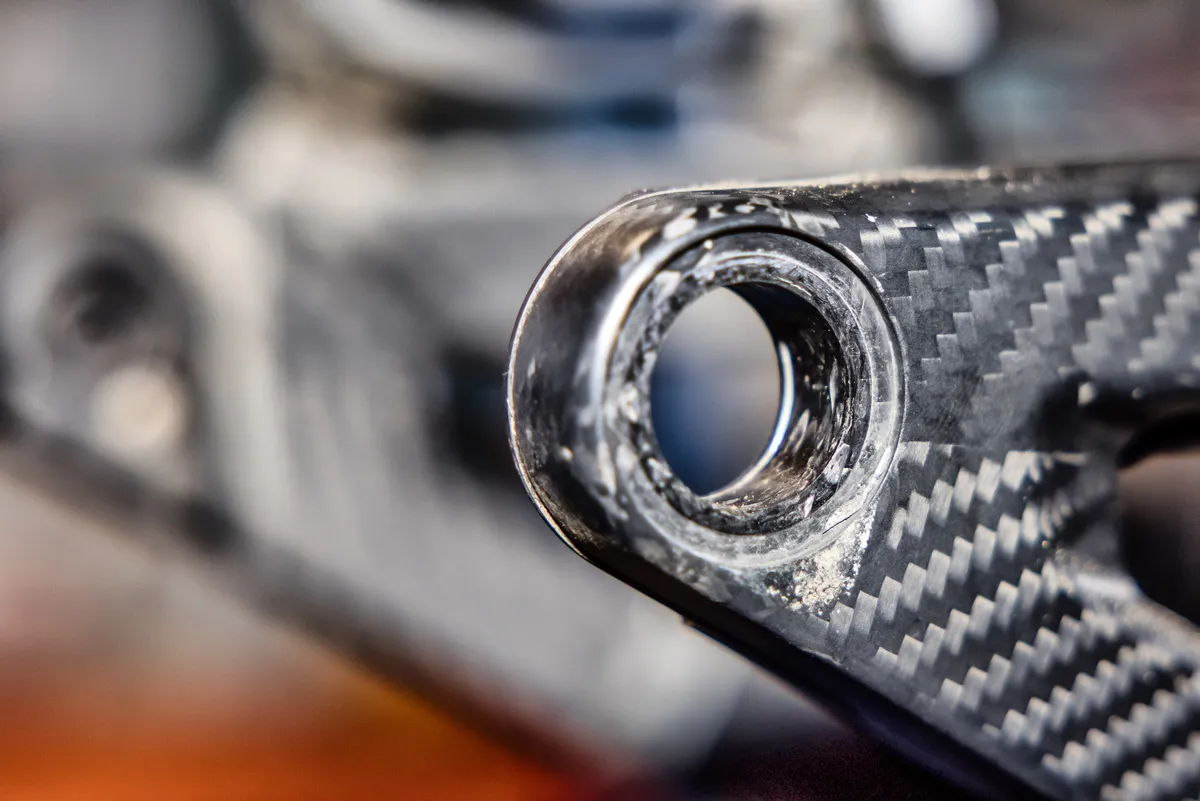
Do not grease the bushing or the Hangerless Interface.

Insert the bushing into the frame's Hangerless Interface from the outside with the lipped edge facing outwards.

Attaching the T-Type Eagle Transmission derailleur

Prior to installation, verify the knurled ring (that's on the inboard portion of the derailleur's Full Mount) is rotated fully clockwise on its stopper. The stopper has to be between the ring's two 'horns'.
Grease the derailleur's mount bolt threads and the underside of the bolt's flange.

Slide the derailleur's Full Mount over the bike's Hangerless Interface and Bushing Frame Insert, then install the derailleur mount bolt from the outside.
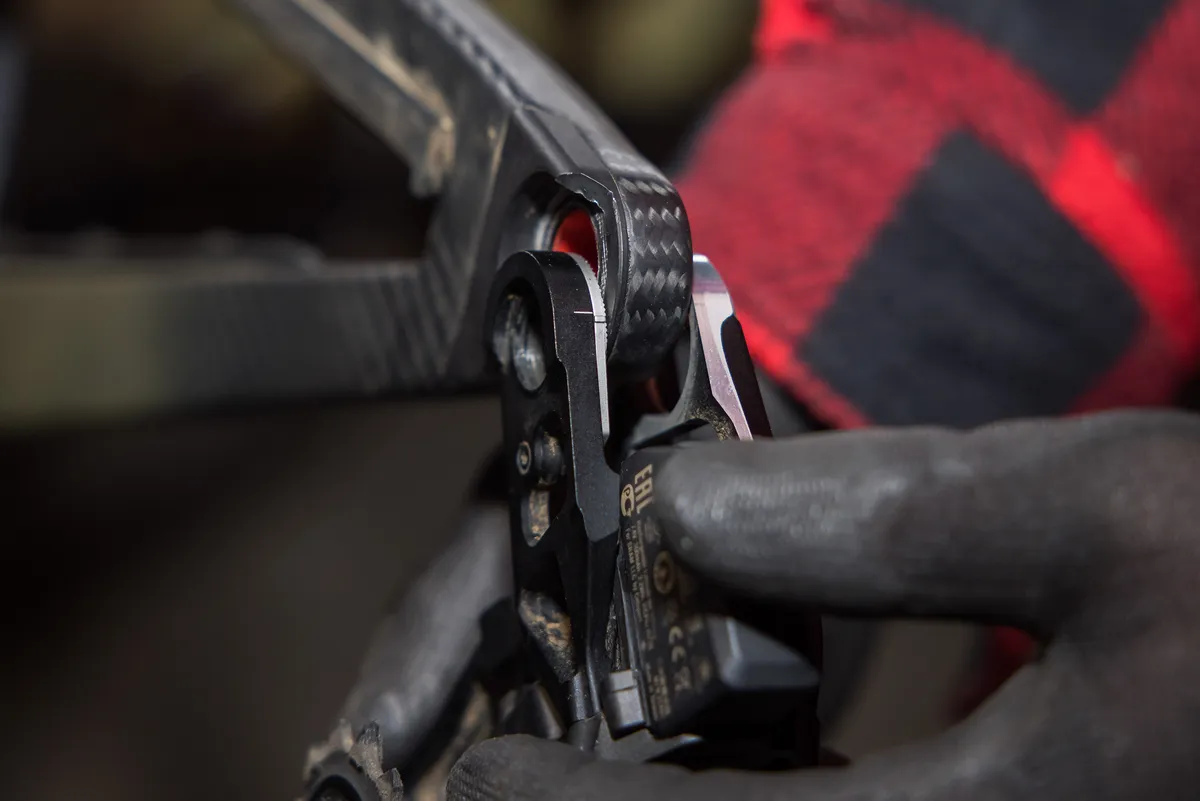
Tighten the bolt using an 8mm Allen key by turning it clockwise until it's snug.
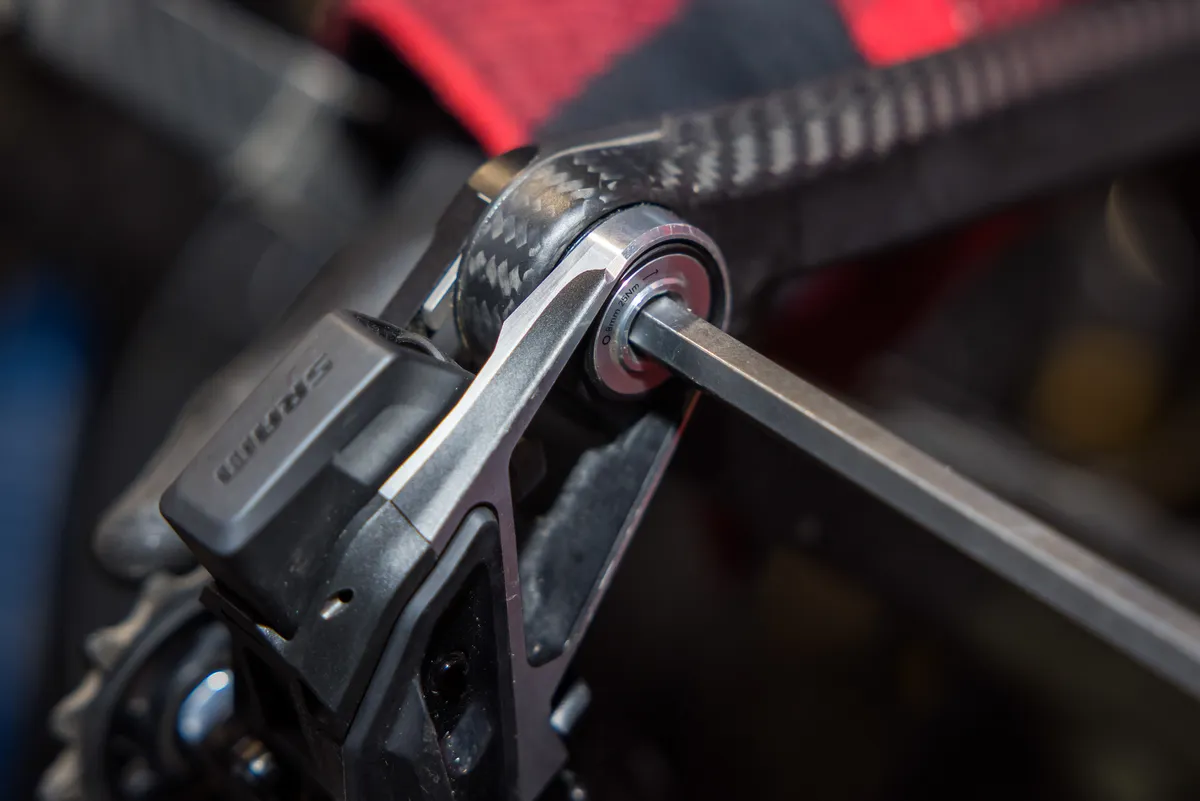
Next, loosen the mount bolt by one full turn counter-clockwise, using an 8mm Allen key.
Set the derailleur to its extended position by pushing the cage forward and locking it in place using the Cage Lock button.

Mounting the rear wheel
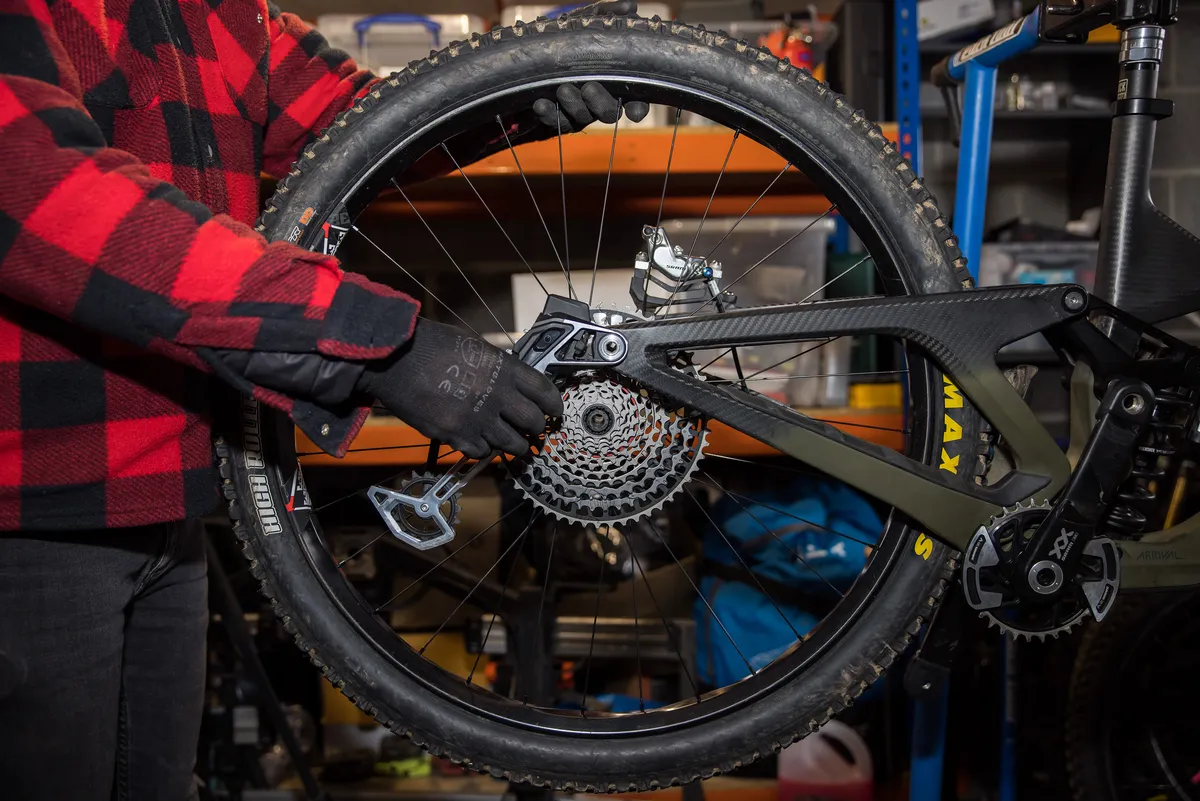
Grease the rear wheel axle threads prior to installation.
Install the rear wheel according to your bike manufacturer's specifications and tighten the axle to snug.
Loosen the rear wheel axle one full turn by turning it counter-clockwise.
Sizing and mounting the T-Type Eagle Transmission chain

Using SRAM's chain length chart, size your chain according to the instructions.
Chainring size and chainstay length will dictate how many links your chain needs.
| Chainstay length (mm) | 30T | 32T | 34T | 36T | 38t | 40T | 42T |
|---|---|---|---|---|---|---|---|
| 425 | 114 | 114 | 116 | 116 | 118 | 118 | 120 |
| 426 | 114 | 114 | 116 | 116 | 118 | 118 | 120 |
| 427 | 114 | 114 | 116 | 116 | 118 | 118 | 120 |
| 428 | 114 | 116 | 116 | 118 | 118 | 120 | 120 |
| 429 | 114 | 116 | 116 | 118 | 118 | 120 | 120 |
| 430 | 114 | 116 | 116 | 118 | 118 | 120 | 120 |
| 431 | 114 | 116 | 116 | 118 | 118 | 120 | 120 |
| 432 | 114 | 116 | 116 | 118 | 118 | 120 | 120 |
| 433 | 114 | 116 | 116 | 118 | 118 | 120 | 120 |
| 434 | 116 | 116 | 118 | 118 | 120 | 120 | 122 |
| 435 | 116 | 116 | 118 | 118 | 120 | 120 | 122 |
| 436 | 116 | 116 | 118 | 118 | 120 | 120 | 122 |
| 437 | 116 | 116 | 118 | 118 | 120 | 120 | 122 |
| 438 | 116 | 116 | 118 | 118 | 120 | 120 | 122 |
| 439 | 116 | 116 | 118 | 118 | 120 | 120 | 122 |
| 440 | 116 | 116 | 118 | 118 | 120 | 120 | 122 |
| 441 | 116 | 118 | 118 | 120 | 120 | 122 | 122 |
| 442 | 116 | 118 | 118 | 120 | 120 | 122 | 122 |
| 443 | 116 | 118 | 118 | 120 | 120 | 122 | 122 |
| 444 | 116 | 118 | 118 | 120 | 120 | 122 | 122 |
| 445 | 116 | 118 | 118 | 120 | 120 | 122 | 122 |
| 446 | 116 | 118 | 118 | 120 | 120 | 122 | 122 |
| 447 | 118 | 118 | 120 | 120 | 122 | 122 | 124 |
| 448 | 118 | 118 | 120 | 120 | 122 | 122 | 124 |
| 449 | 118 | 118 | 120 | 120 | 122 | 122 | 124 |
| 450 | 118 | 118 | 120 | 120 | 122 | 122 | 124 |
| 451 | 118 | 118 | 120 | 120 | 122 | 122 | 124 |
| 452 | 118 | 118 | 120 | 120 | 122 | 122 | 124 |
| 453 | 118 | 118 | 120 | 120 | 122 | 122 | 124 |
| 454 | 118 | 120 | 120 | 122 | 122 | 124 | 124 |
| 455 | 118 | 120 | 120 | 122 | 122 | 124 | 124 |
| 456 | 118 | 120 | 120 | 122 | 122 | 124 | 124 |
| 457 | 118 | 120 | 120 | 122 | 122 | 124 | 124 |
| 458 | 118 | 120 | 120 | 122 | 122 | 124 | 124 |
| 459 | 118 | 120 | 120 | 122 | 122 | 124 | 124 |
| 460 | 120 | 120 | 122 | 122 | 124 | 124 | 126 |
| 461 | 120 | 120 | 122 | 122 | 124 | 124 | 126 |
| 462 | 120 | 120 | 122 | 122 | 124 | 124 | 126 |
| 463 | 120 | 120 | 122 | 122 | 124 | 124 | 126 |
| 464 | 120 | 120 | 122 | 122 | 124 | 124 | 126 |
| 465 | 120 | 120 | 122 | 122 | 124 | 124 | 126 |
| 466 | 120 | 122 | 122 | 124 | 124 | 126 | 126 |
| 467 | 120 | 122 | 122 | 124 | 124 | 126 | 126 |
| 468 | 120 | 122 | 122 | 124 | 124 | 126 | 126 |
| 469 | 120 | 122 | 122 | 124 | 124 | 126 | 126 |
| 470 | 120 | 122 | 122 | 124 | 124 | 126 | 126 |
Brand new T-Type chains have 126 links, so count backwards along the chain to the number of links you need.
Chain lengths are specified in even numbers and you need to cut the chain with an 'open' end so the PowerLock can be installed later.
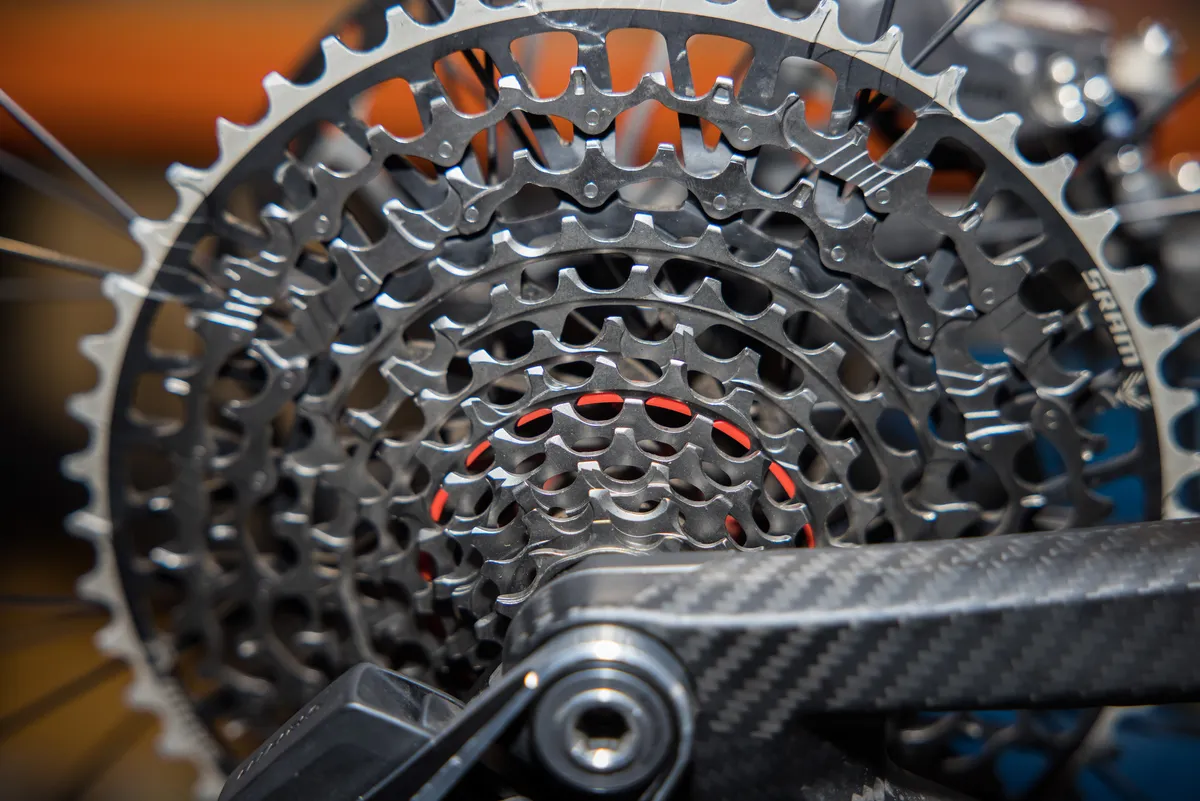
Place the correctly sized T-Type chain with its flat section facing away from the centre of the cassette on the cassette's setup cog, denoted by the red ring.
Some bikes need to use a different gear for setup. Consult SRAM's website or the Full Mount app to find out which setup cog is needed for your bike.

Pull each end of the chain together beneath the bike's chainstay.

Install the PowerLock with the flat portion oriented in the same direction as the chain.

Move the T-Type Transmission derailleur to the Setup position

Push the derailleur cage forward to release the Cage Mode button carefully.
Reposition the cage so the Cage Mode button locks into the Cage Setup position.
Rotate the pedal cranks forward until the PowerLock is above the centre of the chainstay.

Double-check the two halves of the PowerLock are installed and engaged correctly.

Use chain link pliers to lock the PowerLock, or apply the rear brake and push down on the pedal cranks.
The PowerLock should click into place.
Tightening the T-Type Transmission derailleur and rear wheel axle
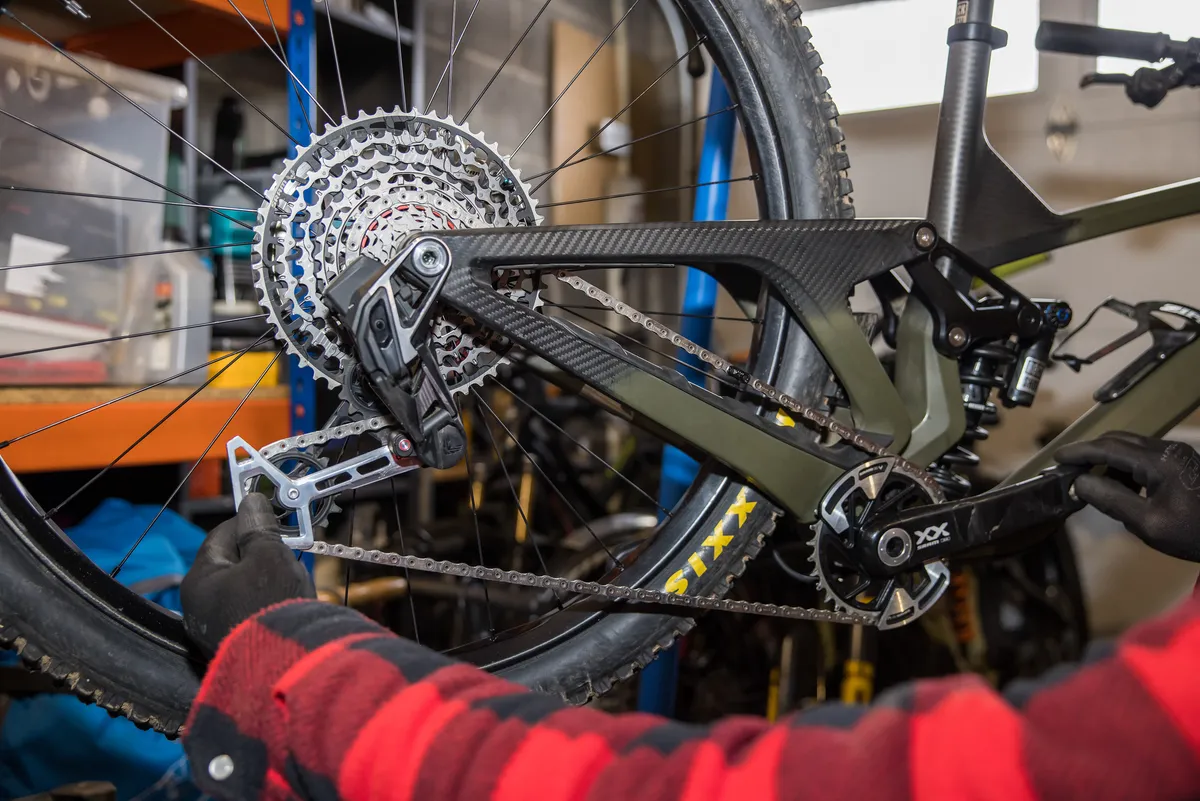
Prior to continuing, check the following:
- The rear axle and derailleur mount bolt are loosened from snug by one full turn
- The derailleur is in the correct Setup Key and Setup Mode for your bike
- The chain is on the correct Setup Cog for your bike and is engaged correctly on the cassette and chainring
- The PowerLock is closed; on full-suspension bikes, rear suspension is uncompressed with no sag, unless instructed otherwise on SRAM's website.
Pull back on the lower portion of the derailleur's cage until the chain is tight.
Continue to pull back while rotating the crank forward two rotations to confirm the chain stays in the Setup Cog.

While continuing to pull back on the derailleur's cage to keep the chain taut, tighten the derailleur mount to 35Nm with an 8mm Allen key.
If there is slack in the chain once you've tightened the derailleur, loosen it and perform this step again.
Make sure the knurled ring mark aligns with the mark on the derailleur's Full Mount.

If it does not align, loosen the rear wheel axle and derailleur mount bolt and rotate it clockwise so it's touching the knurled ring stop.
If you need to do this, repeat the above derailleur mount bolt tightening steps.

Tighten the rear wheel axle to the manufacturer-supplied torque.
Release the derailleur cage from Setup Mode to Ride Mode by rotating it forwards, then carefully letting it return to its unlocked position.
Final checks prior to riding

In a bike stand, rotate the cranks forward, shifting slowly through each of the gears.
To fine-tune gears, either use SRAM's AXS smartphone app or press the AXS button and upper or lower shifter button simultaneously to MicroAdjust the derailleur inboard or outboard.
Your SRAM T-Type Eagle Transmission is now installed and ready to ride.
How to install and set up SRAM's mechanical T-Type Eagle derailleur
If you like the T-Type standard but prefer a mechanical rather than electronic derailleur, you’re in luck: SRAM's Eagle 70 and Eagle 90 Transmission derailleurs are here.
These mechanical derailleurs use the same Full Mount design as the electronic Transmission ones, and the derailleur body features more replaceable parts than any other derailleur on the market – links, cages, skid plates and more.
However, their cable-pull ratio is different from existing SRAM mechanical shifters, so we’re sorry to say there’s no backwards compatibility here.
Once you’ve purchased your Eagle 90 Transmission (Eagle 70 is aimed at complete bikes, although individual replacements will be available), you will need to fit it – and this guide explains how.

Installing the SRAM mechanical Eagle shifter

Begin by fitting the shifter to your handlebar – use the supplied clamp or SRAM's Matchmaker system to bolt it to the brake lever.
Sizing the SRAM Eagle Transmission chain

Next, shorten your chain to the required length. You can ascertain the correct length by downloading the SRAM AXS app, finding the Full Mount Chain Length Guide and entering the information on your bike to find out how many links long your chain needs to be.
Preparing the SRAM mechanical T-Type Eagle derailleur

Use a small flat-bladed screwdriver to remove the Setup Key for the Cage Mode button from the derailleur.
Fit the setup key in position A or B according to what the SRAM AXS app says your bike will require. This determines the distance from the top jockey wheel to the cassette, which SRAM calls the chain gap.

Use the SRAM Full Mount app to find out which is the setup cog for your bike. It will be either the 21t (gear 7) or the 24t (gear 6).
Use your hands to push the parallelogram inboard until the hex cutout is visible between the fin cutout: this is the setup cog position.

Lock out the parallelogram with an appropriate Allen key. Use a 4mm key for a 21t (gear 7) setup cog and a 5mm key for the 24t gear 6 setup cog. Make sure it's seated properly into the hexagonal cutout.

Installing the SRAM mechanical T-Type Eagle derailleur

Remove the Universal Derailleur Hanger by turning the bolt clockwise and clean the mounting hole in the frame’s dropout.
Insert the bushing frame insert (the red top-hat insert that comes with the derailleur) into the dropout, ensuring you don't use grease.
Grease the threads on the mount bolt, then install the mount bolt and tighten fully before loosening it one full turn.


Rotate the knurled ring on the derailleur clockwise so that it is touching the stop.

Set the Cage Mode button into Open position, being careful of your fingers.
Installing the rear wheel and axle

Grease the thru-axle and install the rear wheel into the frame. Tighten the thru-axle fully, then loosen it one full turn.
Fitting the SRAM Eagle Transmission chain

Install the chain on the setup cog: the SRAM Full Mount app will confirm the setup cog as either the 21t (gear 7) or the 24t (gear 6).

Fit the SRAM PowerLock, ensuring the arrow points in the direction of drive. Push down on the crank while holding the rear wheel so that it snaps into place and is fully installed.
Tightening the SRAM mechanical T-Type Eagle derailleur and rear wheel axle

Release the Cage Mode button from the Cage Lock position and put it into Setup Mode. This is the middle position between locked and released.
Rotate the crank forward two rotations (while checking it remains in the setup cog). Tighten the derailleur mount bolt to 35Nm. If there is still slack in the chain, repeat the process.

The horizontal mark on the knurled ring should be aligned with the mark on the Full Mount derailleur.
If they're not aligned, loosen the derailleur mount bolt, push the knurled ring against the stop and tighten it again.
Tighten the rear thru-axle to the required torque. Release the Cage Mode button from Setup Mode.
Fitting the gear cable to the SRAM mechanical T-Type Eagle derailleur

Push the parallelogram inward to release your hex key and rotate the cranks so the chain moves to the smallest sprocket on the cassette.
Measure and cut the outer gear cable to length and feed it through your frame. Fit the ferrules and feed the inner through.
Rotate the barrel adjuster on the shifter fully clockwise.
Use the Cage Mode button to unlock the derailleur cage into Open Mode.
Route the inner cable through the plastic guide, and behind the tab underneath the clamp groove and the anchor bolt on the derailleur.
Set the shifter in gear 12 to release all the tension and pull the cable taut.
Release the derailleur from the Open Mode.
Tighten the cable clamp bolt to 4.5Nm, but do not push on the parallelogram.

Cut the excess cable, fit a cable end cap and crimp. Tuck any excess cable behind the actuation fin.

Setting up the gear indexing on the SRAM mechanical T-Type Eagle derailleur

To index the gears, confirm the cable tension is correct by cycling through the gears while turning the cranks.
Use the larger shift paddle to move the chain into gear 11 (12t sprocket). If it’s not shifting cleanly, or is noisy, adjust the cable tension with the shifter’s barrel adjuster.
Shift the derailleur all the way inboard into the largest cog, making small barrel-adjuster adjustments as needed. Then shift back to gear 12 (the smallest cog) to ensure shifting is crisp in both directions.

If the shifting is hesitant when moving up the cassette, turn the barrel adjuster anti-clockwise to add tension to the cable. If the shifting is hesitant when moving down the cassette, turn the barrel adjuster clockwise to reduce tension on the cable.
You have now finished installing your SRAM mechanical T-Type Eagle Transmission. Remove the bike from the stand and go riding.

