

CrankBrothers’ Candy mountain bike pedals are becoming more and more popular, so here's an easy step-by-step guide to servicing them.
- Time: 40 minutes
- Cost: £14.99
- Tools: Torque wrench; large flat-headed screwdriver; lithium grease; 6mm Allen key; small flat-headed screwdriver; CrankBrothers Candy rebuild kit; ratchet with 8mm bit; rag
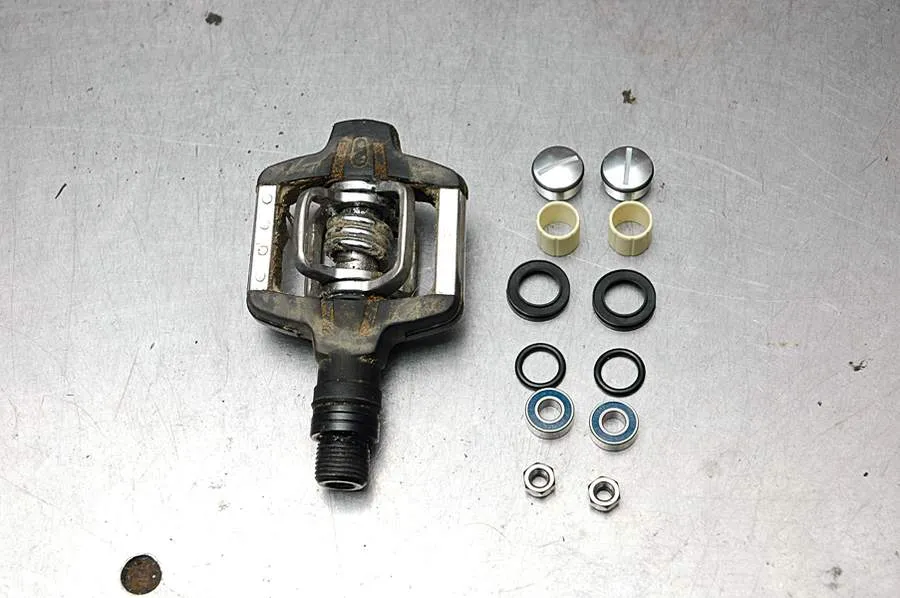
1 Remove the rebuild kit from the box and lay the parts out on a smooth clean surface. Familiarise yourself with the individual components and put them to one side before you get started.
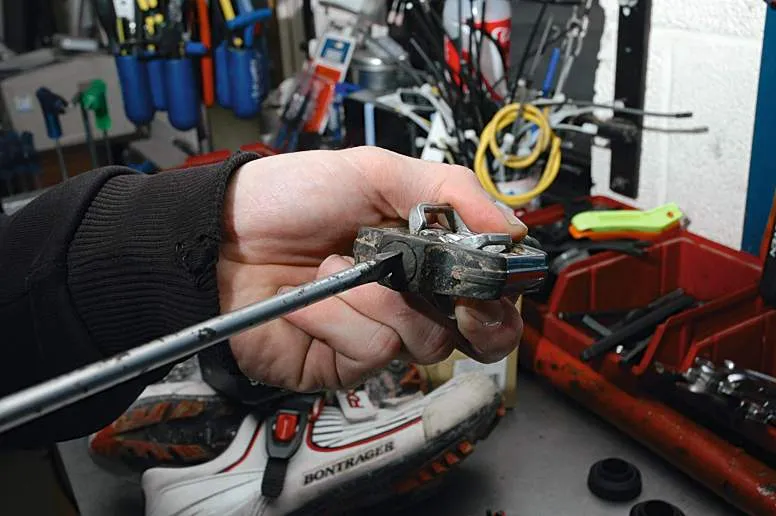
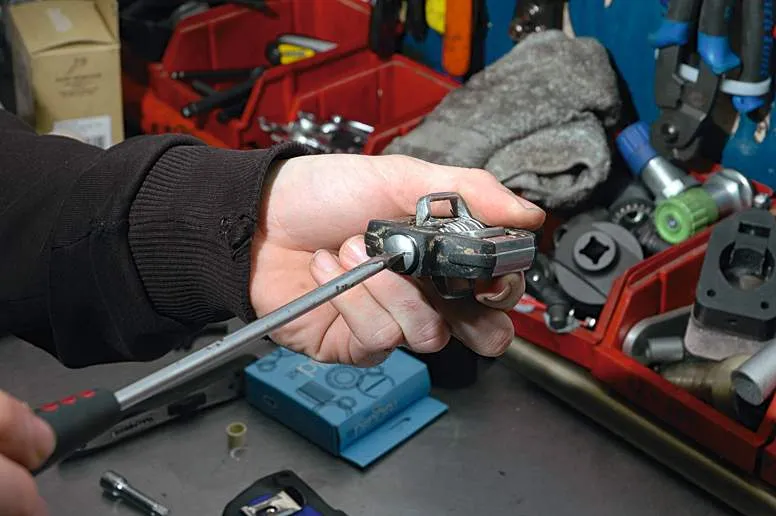
2 Gently remove the end plug of the pedal using the larger of the flat-headed screwdrivers, turning in an anti-clockwise direction. These can sometimes prove quite tricky to undo so be careful when putting pressure on the screwdriver. If you’re planning to reuse the end plug, place it somewhere safe so that you don’t lose or damage it.
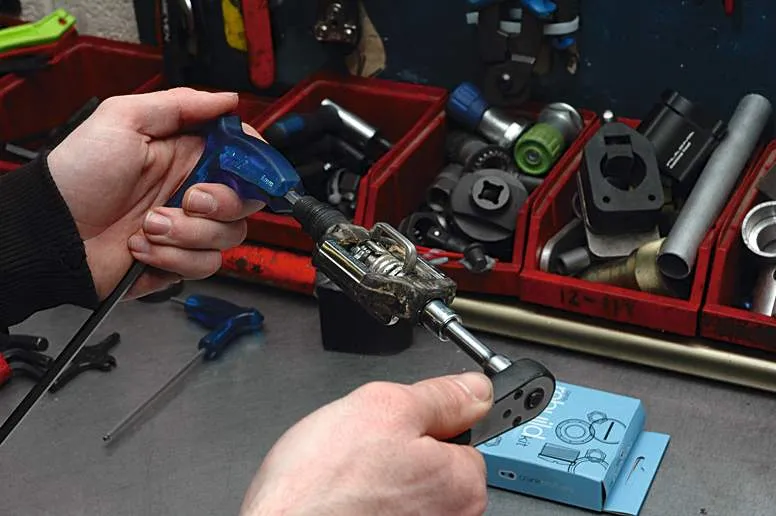
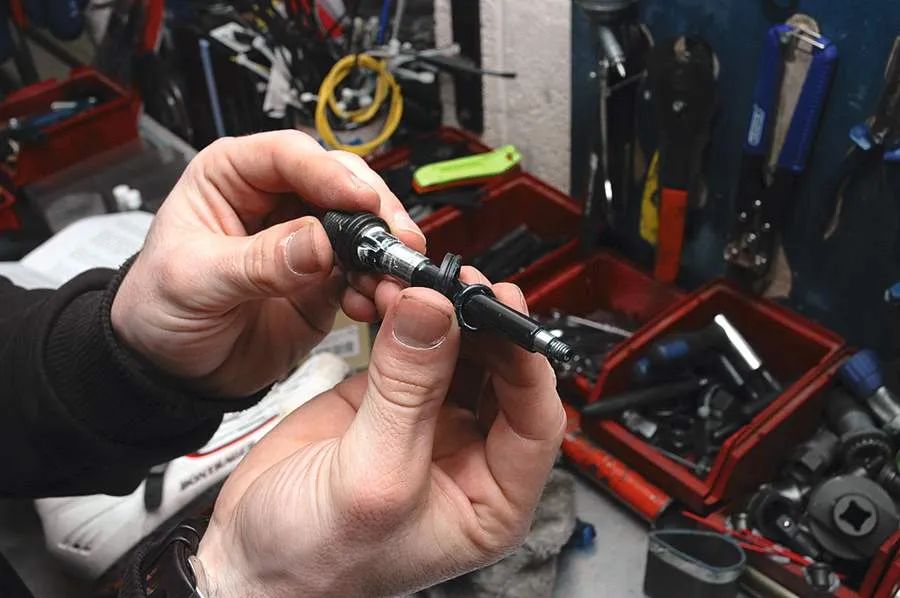
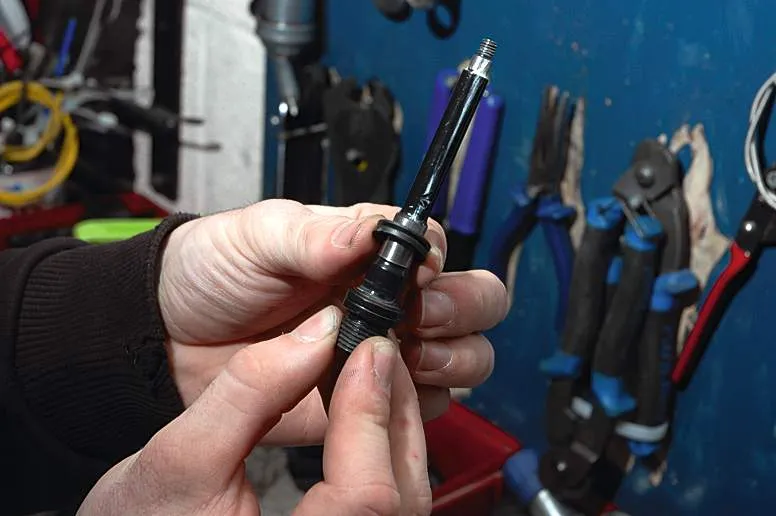
3 Under the end plug, you’ll see an 8mm nut. Undo the nut with the ratchet and 8mm bit, using the 6mm Allen key to hold the spindle in place. The 8mm nut needs to be turned in an anti-clockwise direction.
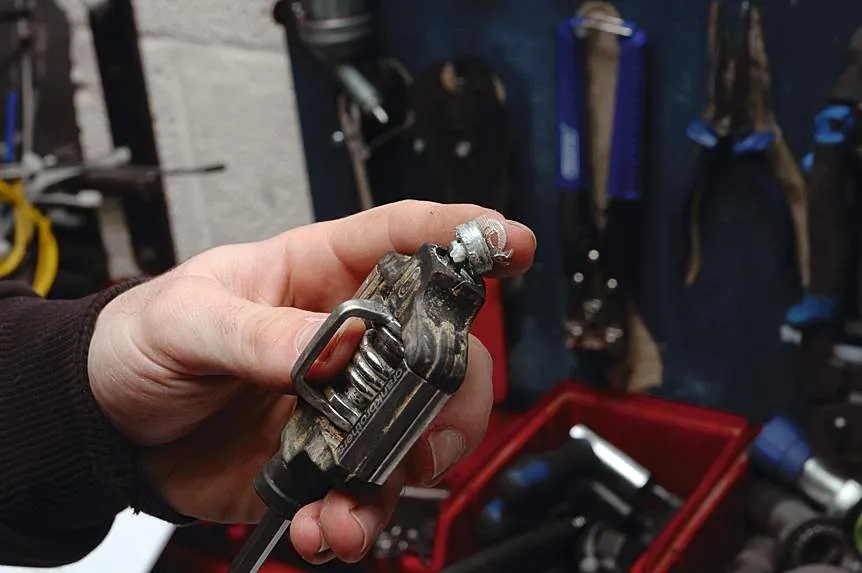
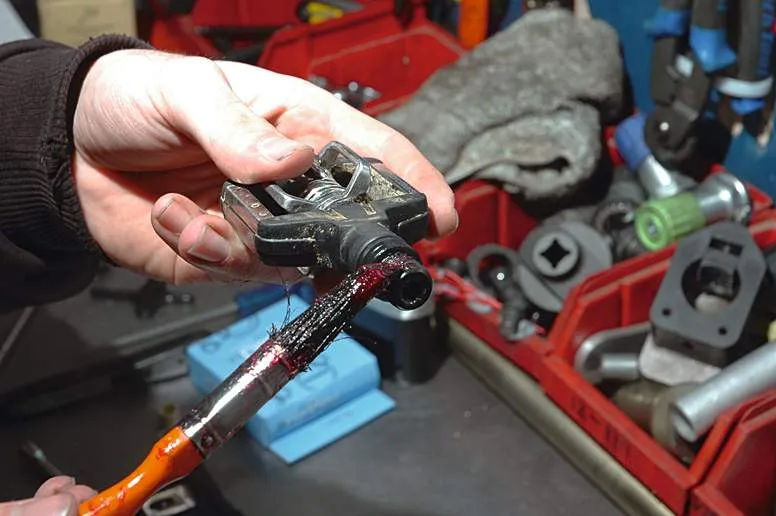
4 Remove the spindle from the pedal body and inspect it for any signs of damage. Give it a clean with the rag and put it safely to one side.
5 You now need to remove the cartridge ball bearings from the pedal body. If they are extremely worn after plenty of abuse, then it’s likely that they’ll just fall out. If they don’t, use the 6mm Allen key to gently push them out, pushing from the opposite side of the pedal body, and discard them.
6 Remove the outer seal and inner O-ring from the spindle. The outer seal will be on the spindle and can be removed easily. Generally, the O-ring or ‘bumper’ seal will roll up on to the spindle as the spindle is removed from the pedal body, just above the outer seal, and can be removed along with the outer seal. If the bumper seal remains in the pedal body, it can be extracted with the smaller flat-headed screwdriver.
7 Remove the bushing from within the pedal body using the smaller flat-headed screwdriver. This can be tricky to remove and may require digging the screwdriver into the bushing and dragging it out – it doesn’t matter if you damage the bushing because it’s going to be replaced anyway. Alternatively, you can dig the head of a nail under the bushing and pull it out with pliers. The key here is to avoid scratching the pedal housing.
8 With the pedal now in bits and the parts that are being replaced discarded, give the pedal body a thorough clean. Wipe away any old grease within the pedal housing with a rag, and, if you are using the end plugs again, give them a clean too. Examine everything for signs of wear and tear.
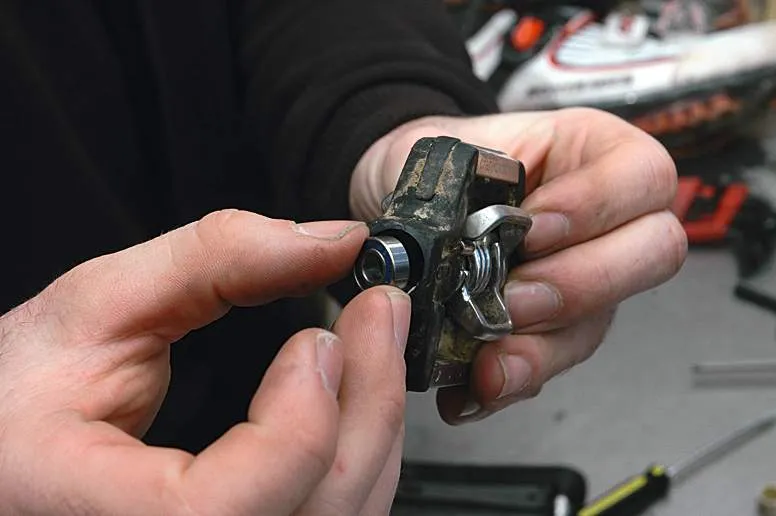
9 It’s time to rebuild the pedal. Push the new cartridge ball bearing into the pedal body. It’s essential to seat the bearing flush within the pedal body so that when the rest of the components are replaced, everything goes back together tightly and in its correct position.
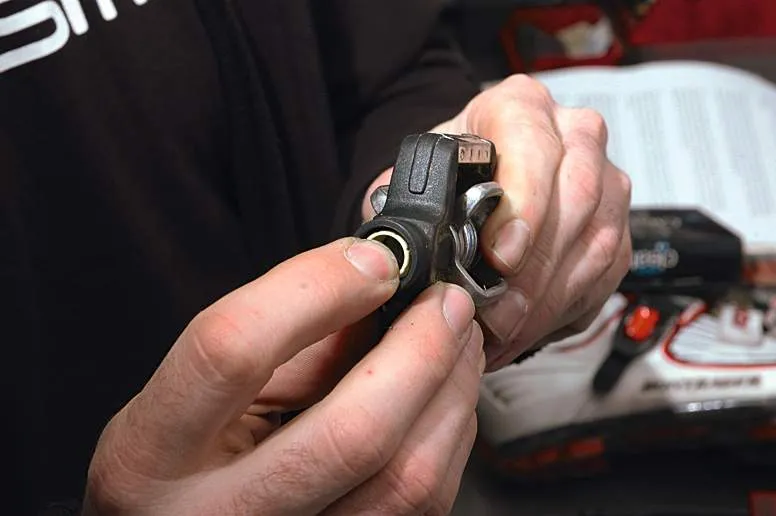
10 Flip the pedal body around and push the new bushing into place. Again, it is important that the new bushing is seated correctly and is pushed all the way into the pedal body. This can be done with your finger – it doesn’t require excessive force. It’s important not to damage the bushing.
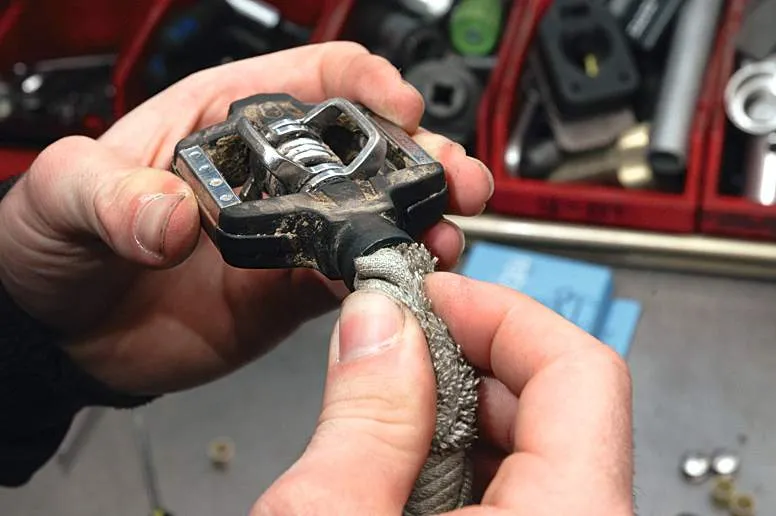
11 Install the O-ring or bumper seal into the pedal body, so it’s butted up against the bushing. Slide the outer seal on the spindle. The outer seal has an inner taper, which can be seated on the spindle to match the taper of the spindle, giving maximum contact for the best seal. Orientation is important so take the time to get it right.
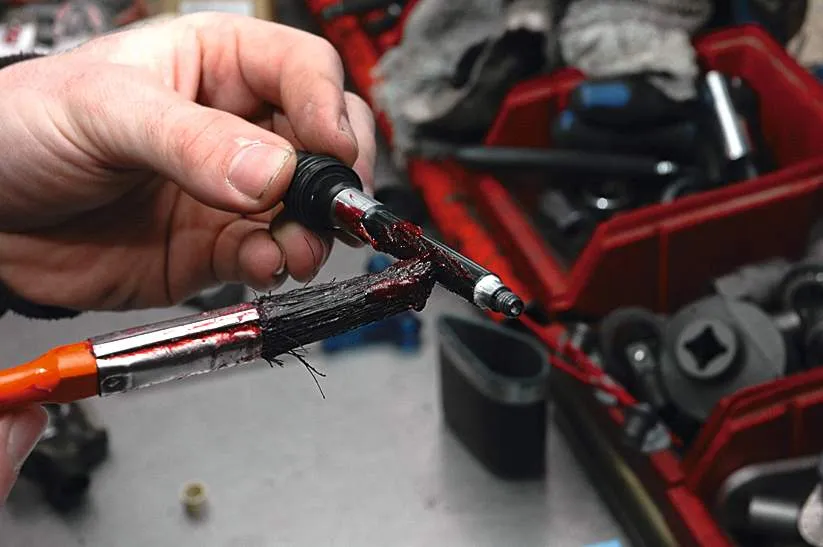
12 Either with your finger or a small, clean brush, take the spindle, holding the threaded end that goes into the crank, and apply the grease. Get an even coating around the part of the spindle that sits within the pedal body assembly but don’t get any grease on the smaller-threaded end. If you do, give them a clean with some degreaser. These threads need to be grease-free.
13 Slide the newly greased spindle into the pedal body. It’s crucial to ensure that the seals don’t get pinched or inverted when you insert the spindle, but if they do, simply remove the spindle and start again.
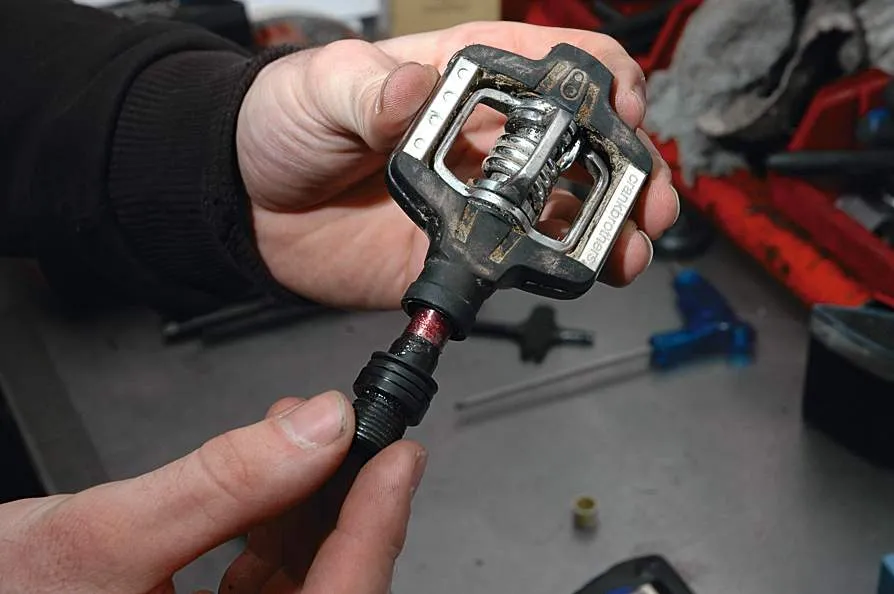
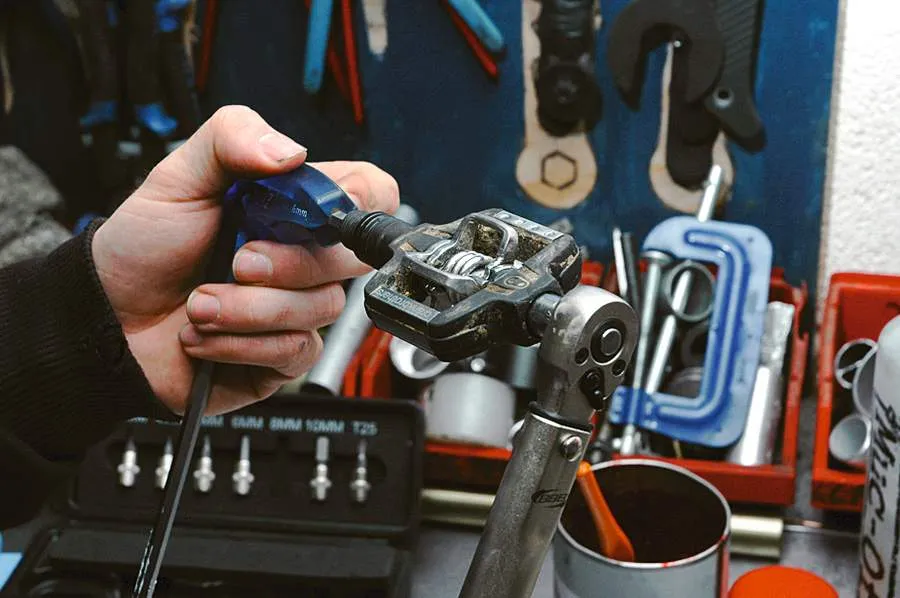
14 With the spindle in place, use the torque wrench and the 6mm Allen key to tighten it back up. Hold the spindle with the 6mm Allen key, insert the torque wrench with 8mm bit into the pedal body and tighten carefully to the specified 3.5Nm. Make sure you reach the specified torque to prevent the pedal loosening off and potentially falling off.
15 Either reinstall the old end plug or replace it with the new one. Use the large flat-headed screwdriver to tighten it into the pedal body. At the head of the end plug – at the end of the thread – you will see an O-ring that helps with sealing the pedal. It is essential that this does not get crimped between the end plug and pedal body when tightening.
16 Repeat this process for the other pedal. Once both pedals have been serviced, lightly grease the spindle threads and screw them back into your cranks. The left pedal has a small groove around the butt of the base of the pedal, just before the threads that are inserted into the crank. Tighten them to the manufacturer’s specified torque setting, then hit the trails.
Top tips
- Keeping your pedals in good working order is a great way to prolong their life and save you money. After cleaning your bike, give the mechanism a coating with some Teflon-based lubricant. This will keep them working smoothly and also helps disperse water.
- It’s a good idea to give your cleats a quick squirt after any wet and mucky rides too.
- If you’re off out and the weather looks bad, again, spray your pedals and your cleats, because mud will struggle to stick to the Teflon coating.