

With poor adjustment and harsh conditions, a chain can wear in as little as 300-500 miles, rather than the usual 1,500-2,000 (on road).
In the following 10 steps, we’ll show you how to correctly install chains and we'll also cover some of the snags and hurdles encountered when dealing with brand idiosyncrasies. However, remember to consult a professional if in any doubt.
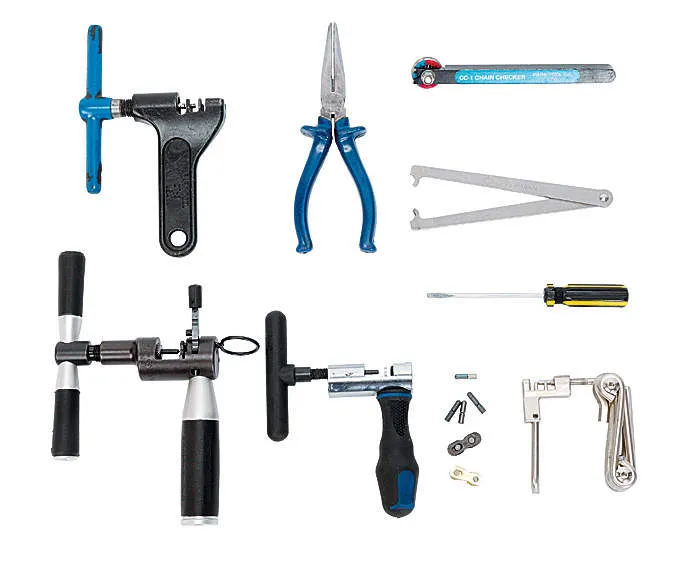
Tools
- Campagnolo: Campag 11-speed chain tool
- SRAM: Park CT-3 chain tool, KMC chain tool for Power Lock type
- Shimano: Park CT-3 chain tool, Shimano HG pins
- Chain checker (eg. Wipperman)
- Multi-tool with integrated chain tool
- Needle nose pliers
- Small screwdriver and lube
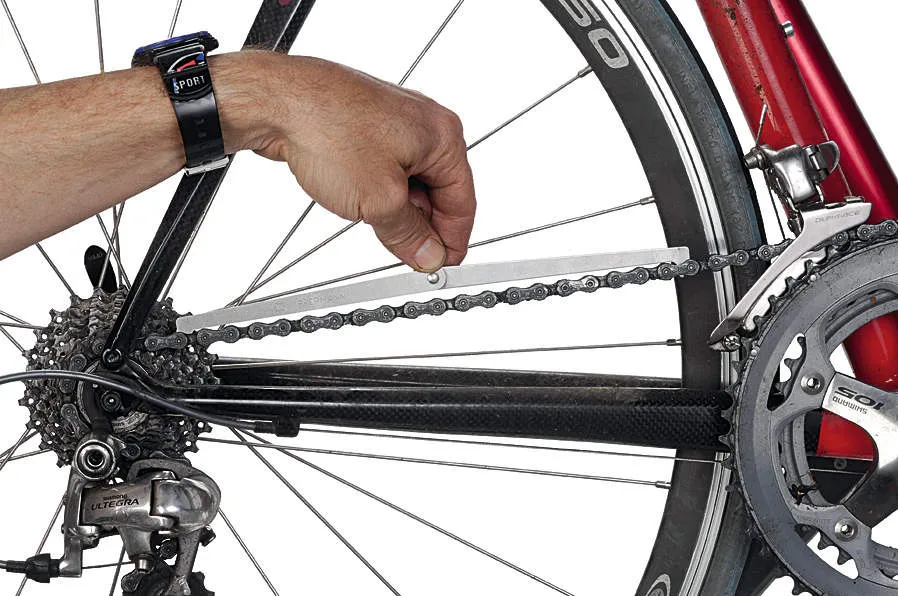
1 Check chain
If you think your chain may have stretched enough that it needs replacing, get yourself a chain checker. Press on the pedals and fit the checker to the top portion of the chain, which is under tension, to get a reading. It’s not a bad idea to replace your chain just a little before it’s completely worn. In doing so, you’ll prolong the life of your cogs and avoid having to change them every time you replace a chain. To make your chain last longer, keep it clean, lubed and correctly tensioned, and try using different gear combos to spread the wear out.
2 Master tension
Installation of the master link on 1/2 x 1/8in pitch chains requires a pair of needle nose pliers. After inserting the joining link rivet/pin, install the front plate, then the closing clip. Orientate it with the closed end towards the direction of travel of the chain when pedalling forward. Singlespeed (and hub gear) chain tension should be just enough to still see a little bit of sag (5mm). Rotate the chain slowly, observing tight and loose moments corresponding to more or less sag. Choose a tight section, then set chain tension using the dropouts or eccentric bottom bracket. The cranks and chain should rotate freely with no crunching noises.
3 SRAM power
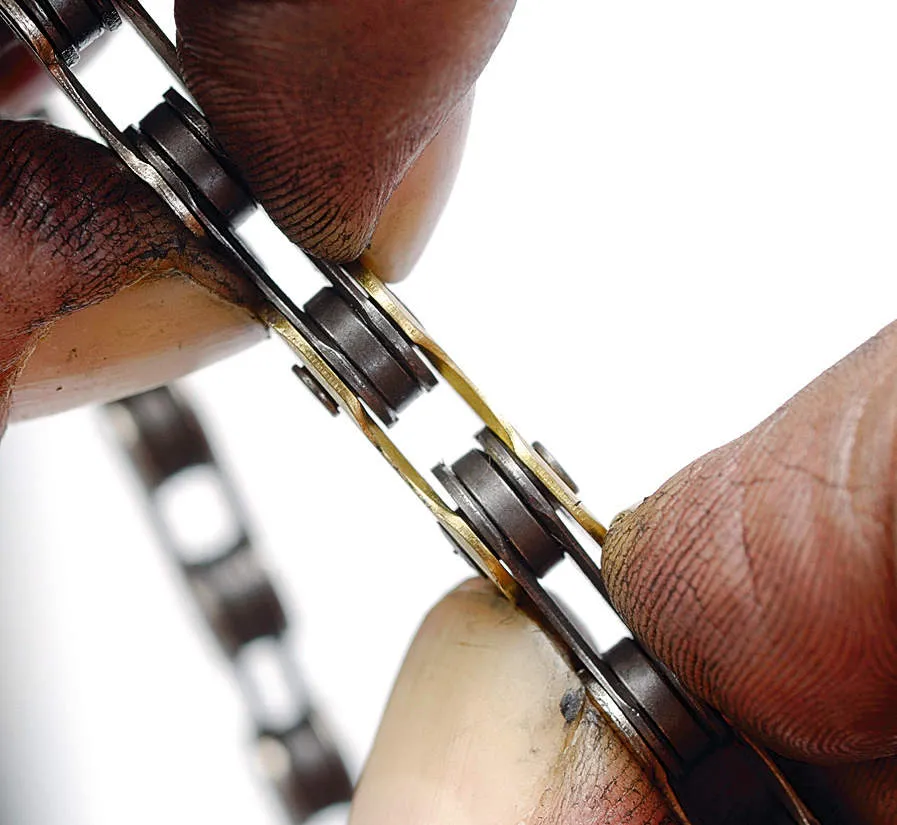
The SRAM Power Link can be pretty useful when you don’t want to mess with a rivet tool. The eight- and nine-speed links work well with other chains, including Shimano, when messing with their connector pins might seem too daunting. The correct technique for separating the plates is to pinch them together, then slide them in opposite directions. Removal can be made easier by spraying away any gunk that might have built up between the plates, then working the link back and forth a bit first. This should give you the room to allow the opposing locking heads of the rivets to be raised past their respective seats, as pictured below.
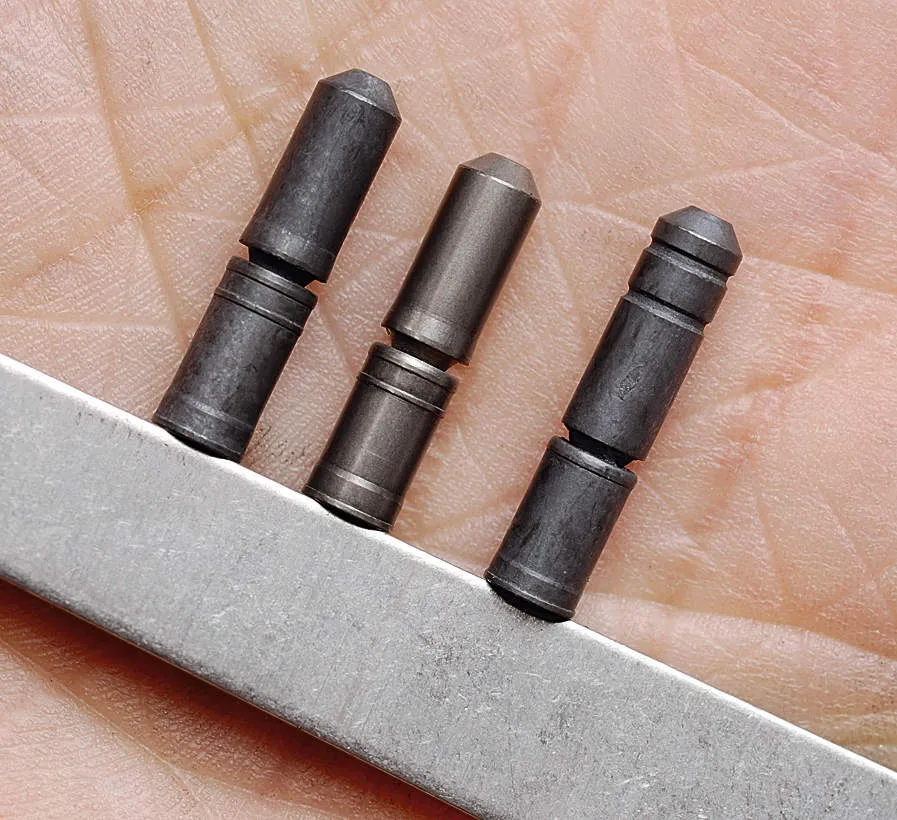
4 Nice pins
Always make sure you have the correct connector pins for Shimano chains. Pictured from left are: the eight-speed, usually dark, with a rivet/pin 7.1mm wide; the nine-speed, silvery in colour, measuring 6.5mm; and the 10-speed, identifiable by either two or three bands around the breakaway tip, usually dark bluish in colour. Regarding connecting methods, the new SRAM 10-speed Power Lock snaps and locks into place. Removal takes a squeeze using a pair of pliers, with the link held at an angle, applying opposing force to the plates. The link should snap loose, allowing it to be separated. KMC produce an excellent removal tool, but pliers will do the trick.
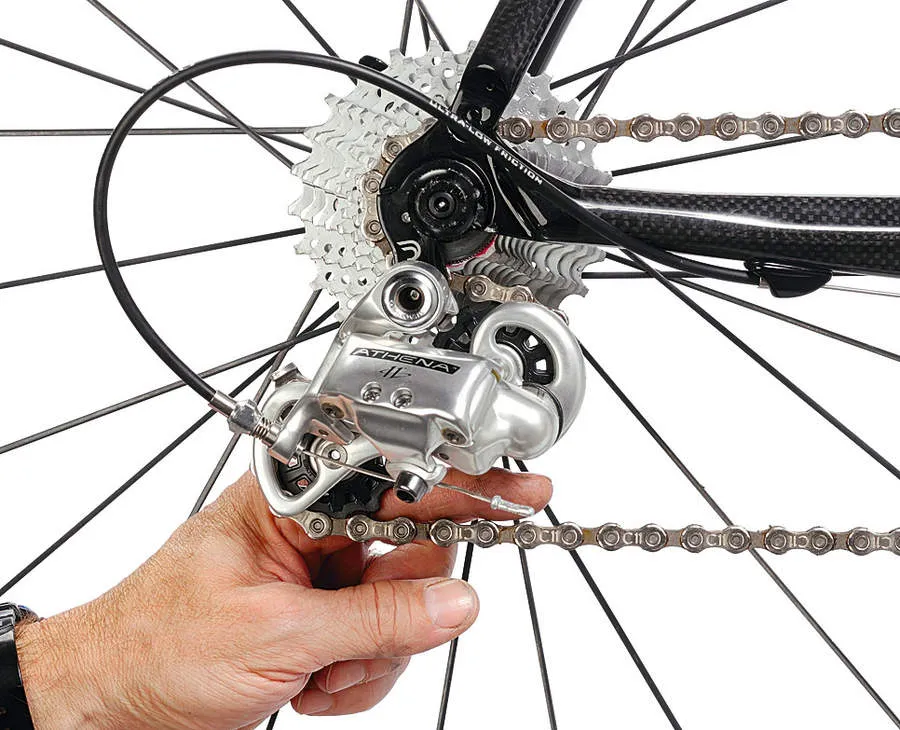
5 Small chainring/small cassette sprocket
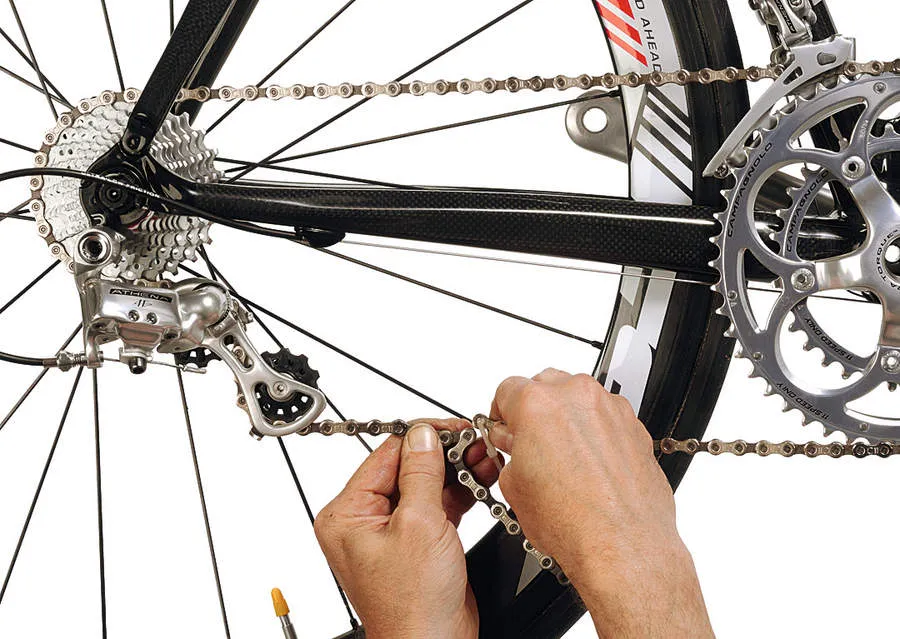
This setting is important in establishing the minimum tension of the chain, and will work with all systems. With Campagnolo, a gap of between 8mm and 15mm is required – about the width of your index finger between the top of the chain and the bottom of the pulley. Or simply, enough tension to begin winding up the derailleur springs so that the lower portion of the chain doesn’t drag against the top jockey wheel or cage. Make sure you get the length right first time, because adding links with Campag requires a kit. Manufacturers are trying to discourage multiple re-opening and closing of chains due to the risks of breakage.
6 Large chainring/large sprocket
Set the front derailleur on the large ring and the rear on the small cog. Put the chain onto those gears and offer up the opposing ends of the chain until the jockey wheels are aligned vertically, perpendicular to the ground. Note the amount of links to be removed, taking into account the joining links. Test this length on the large ring, large cog combo. This position is important to establish whether there’s enough chain length to reach the more extreme gear. You’ll want to avoid using this ratio, though you will find yourself grabbing it in the heat of battle, so leave yourself enough length to handle it without blowing up your drivetrain.
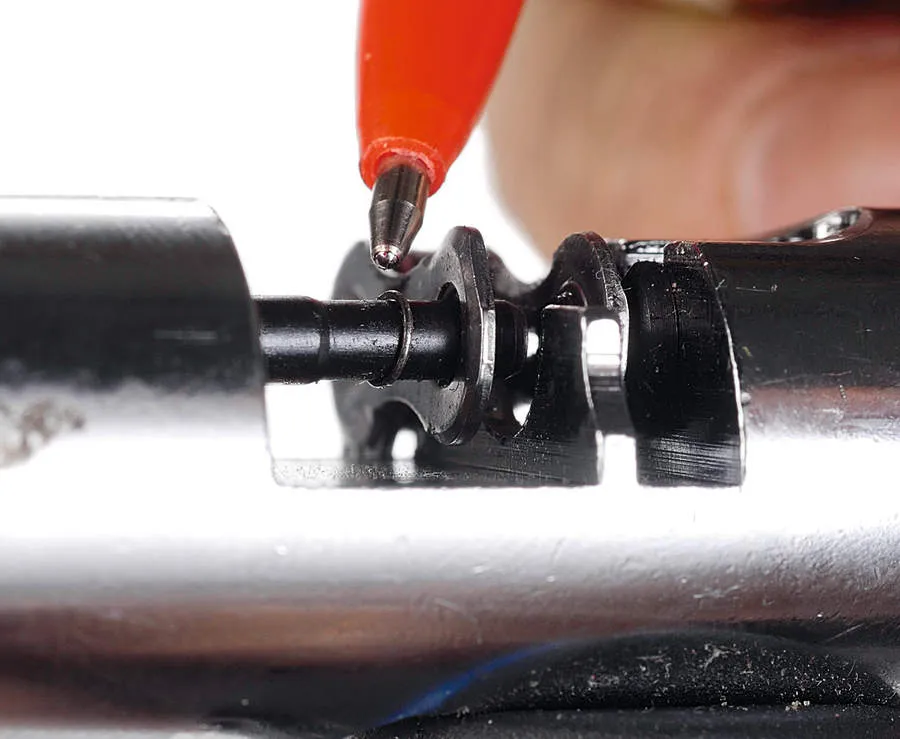
7 Swarf alert
Make sure little bits of metal don’t interfere with the insertion of the pin. This could cause it to jam and create a stiff link. Avoid tool problems by first ensuring that the tip of the tool is free of debris: dress it with a few strokes of a file or emery cloth. Stiff links will make your chain skip as the guilty link passes over the cogs and your cranks/pedals will slip forward with a clunking sound, in rhythm with about every one-and-a-half to two revolutions (but many turns are required to get the chain through one cycle). Another good way to identify a stiff link is by backpedalling, looking for skips in the jockey wheels as the link or links pass through them.
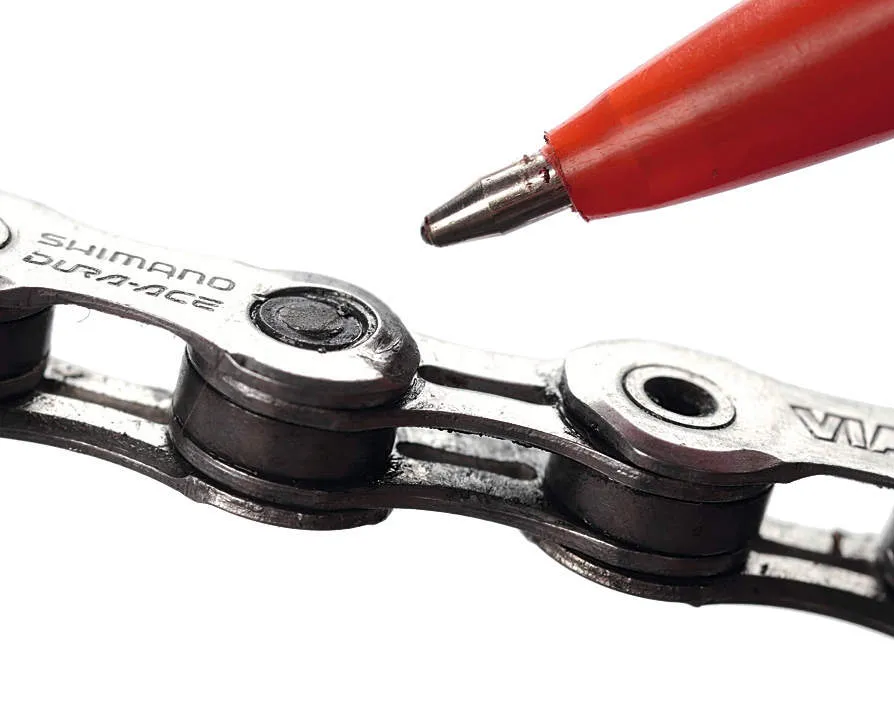
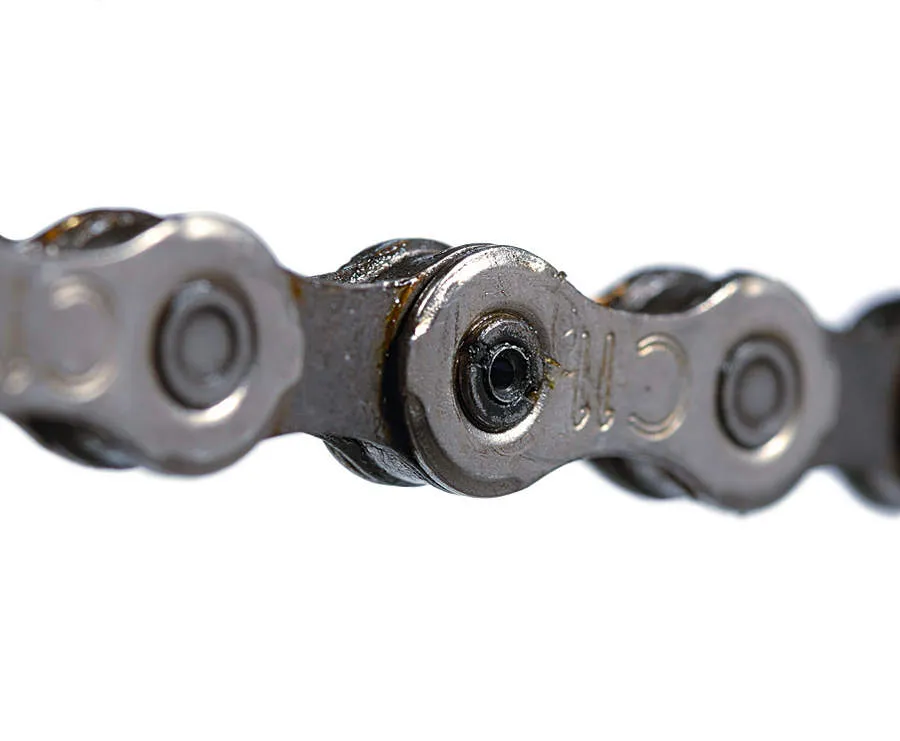
8 Risky riveting
Poorly installed pins such as the one pictured below are common enough on new bikes to be an issue, and can often slip by unnoticed during quality control. If this is the result you end up with after installation, don’t delude yourself into thinking the bike will be safe to ride. It won’t, and the chain is likely to split open, with the potential for serious injury. Look out for the Shimano pre-installed pin provided on many of their aftermarket chains, which is meant to be used to connect the chain the first time. We recommend ditching it along with the link, as it often won’t line up and enter the opposing hole cleanly. Use a separate connector pin instead.
9 On the pin
Campag’s chains require the pin/rivet to be driven from the inside to the outside of a leading external link. On 10-speed, a small guide is inserted into the hollow closing pin and simply removed once the rivet is correctly installed. On 11-speed, the guide is held in place by a tiny joining tube that enables it to be easily broken off when installation is complete. The protruding bit of metal needs to be flared out and flattened to prevent it from snagging and leading to potential accidents. This is done by positioning the chain in the opposite direction and gently winding the tool against the offending bit, using very little force.
10 Tight link removal
To loosen tight links, place the chain in the chain tool as if you were removing the pin but from the opposing direction to insertion and using the second, un-buttressed slot on the chain tool. Then gently press the pin just a little bit outward, maybe a quarter of a turn, thus dragging the offending plates apart. This technique is useful in these days of lightweight chains featuring very thin plates that can be bent easily. Namely, grab the chain on opposite sides of the stiff pin and gently bend the chain back and forth, alternating with the inner and outer plates first in line, then at an angle. Don’t overdo it and bend your chain, though.