

World Cup downhiller Chris Kovarik’s flat-out approach means he’s always one to watch through the rough, fast and drifty. Here he shows you the five techniques he uses to tame his bike through the gnarliest terrain and find the best lines.
1 Cornering
Cornering is a major weakness for many downhill riders and it’s something you can always improve on, whatever your skill level. Chances are there’s a particular style of turning that you struggle with – but don’t just avoid it. Grapple with your weaknesses and put those demons to bed for good.
Here we’re looking at four cornering elements – feet up, feet down, picking the best line for a turn and squaring a turn. Master these, and you master cornering.
Feet up
Certain turns – such as berms – work best with your feet on the pedals, because you can fully load the bike into the turn for maximum grip and make a quick getaway.
Berms can take time to learn on any bike, but a downhill bike needs more attention than a hardtail because the amount of wheel travel affects how high the bike’s bottom bracket is.
Braking is typically done before a turn – if you brake during the turn you’ll lose traction. It’s a fine line knowing how hard you can hit a berm, and you should accelerate coming out the turn as well.
Chris hits this berm hard, aiming to rail around it as much as possible. As he loads the bike into the turn he naturally pedals his outside crank forward to drop it and raises his inside pedal to stay clear of the ground.
As his outside pedal is down, he loads it with his bodyweight – forcing the tyres into the turn. In this case the rear end slides slightly and re-grips further round the turn, when Chris is ready to get on the gas and power out of the berm.
Kovarik's karving tips
- Approach the corner and spot the entry point – lean, brake and hold as much speed as possible.
- Load the bike into the ground and use the berm to bank off.
- Keep your chin up and spot the exit. If braking at all, only feather them.
- As you start straightening up, get on the power.
Feet down
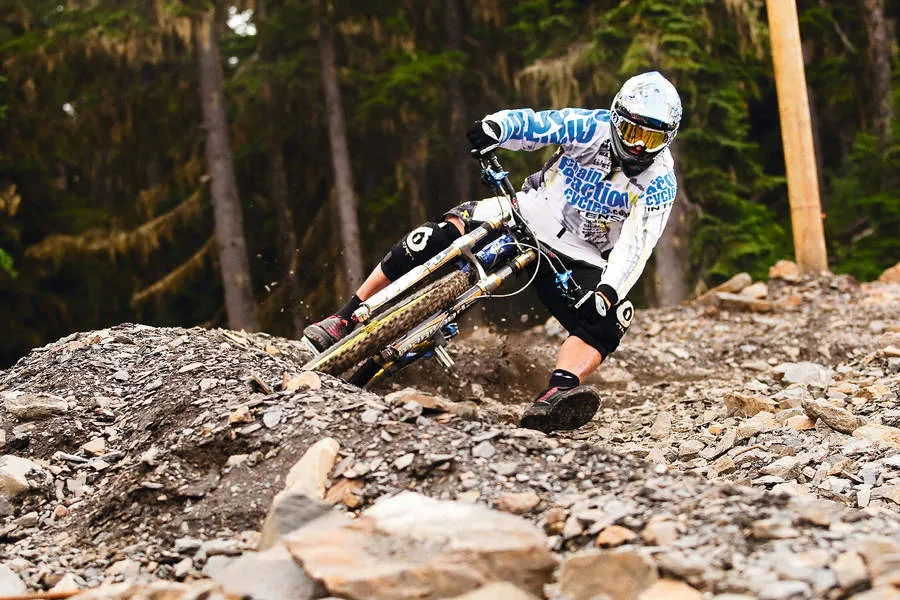
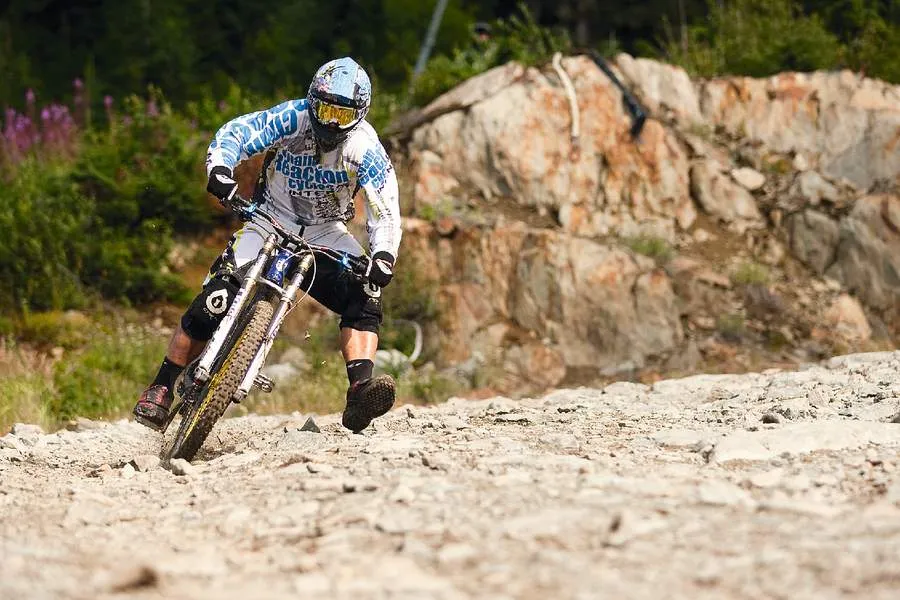
Although you sometimes need to dab a foot in technical stuff or when you get a little sideways, flat-out turns on loose surfaces require more proactive riding. Both your wheels can lose traction, so constantly adjusting your weight backwards and forwards, and using your inside leg as an out-rigger really help.
Here, Chris is riding fast as he approaches the turn and keeps his weight over the front of the bike – in order to steer, the front end must keep traction. Don’t worry about the back end – as long as you’re steering, the rear end will follow, even if it does step out a bit.
To ride a turn like this it’s important to remain loose on the bike, keep an eye on your exit point and let your instincts take over. If you panic and stiffen up, you won’t be able to move around on the bike and you’ll force the tyres to break loose.
Kovarik's karving tips
- Enter the corner on the very outside just before the corner starts to curve – then start to make your turn to the middle, inside or apex of the corner.
- Keeping your inside foot off helps for added grip and balance, and usually plays a big part in getting the most speed out of this type of corner.
- Holding – rather than fighting – a slight drift lets you use every last bit of the corner for maximum speed through and into the exit.
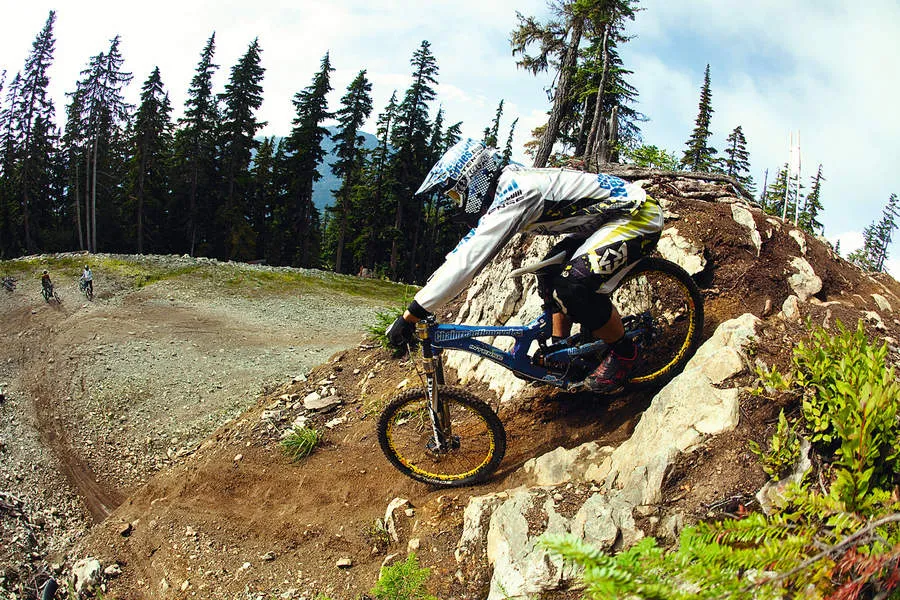
Squaring a turn
Quite often, the well beaten-in line isn’t always the best, fastest or most efficient line to take on corners. Rather, it’s just the easiest and most-used. Setting yourself up to exit the turn is the best way, even if it means your entry to the turn is a little more awkward.
In this case, Chris is taking the natural line for the way the trail falls – it encourages you to be there. It’s not a bad line, but you can’t carry much speed through it, as you can see by the way that Chris is forced to ‘square off’ the turn at the end.
He takes quite a bit of speed into the turn, but the way he has to manoeuvre the bike round at the end means the rear end is forced to step out, which makes things awkward on the exit, losing him speed and costing him valuable seconds.
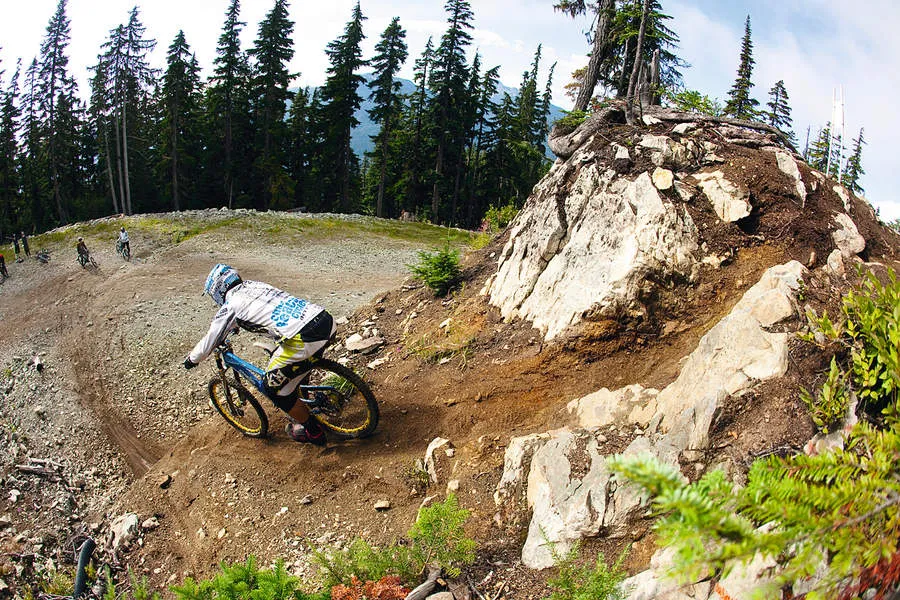
Choosing the best line on a turn
Using the same turn as above, Chris takes a high line on the way in so that he can start turning sooner, reducing the angle of the overall turn. This takes the stress off the tyres, and allows him to carry more speed. The tough thing is getting the run-in right – because it’s not the natural line in, you have to try hard to get on the line properly.
On a long downhill track, there will be several turns with time-saving options like this – and we’re sure we don’t need to remind you that Steve Peat won this year's Downhill World Champs by just 0.05 of a second. Every single bit you can save time on is crucial – so keep your eyes peeled.
The need for precision on these turns is what makes knowing your line in so vitally important. In this case, if Chris had dropped down too early, then he wouldn’t have made the turn at all, but if he dropped too late, he’d have been off the track. Once you’re in, then the exit is the important bit – carry your speed, rather than leaving the turn pedalling.
Kovarik's karving tips
- Always try to set up for the turn early. Make the turn as straight and direct as possible.
- Do your braking coming in – carrying speed through helps you grip, but you don’t want to be on the brakes mid-turn.
- Get off the brakes where possible – especially if racing against the clock.
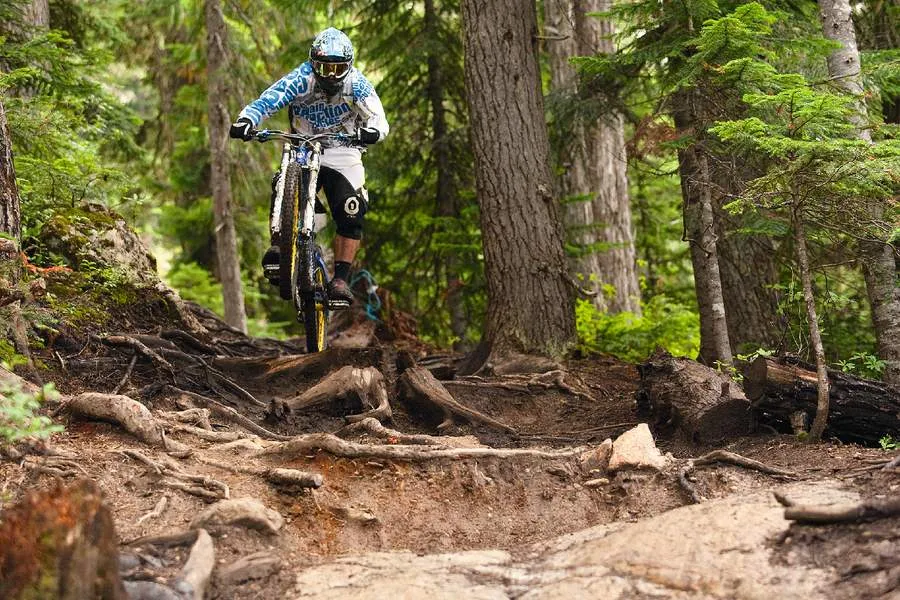
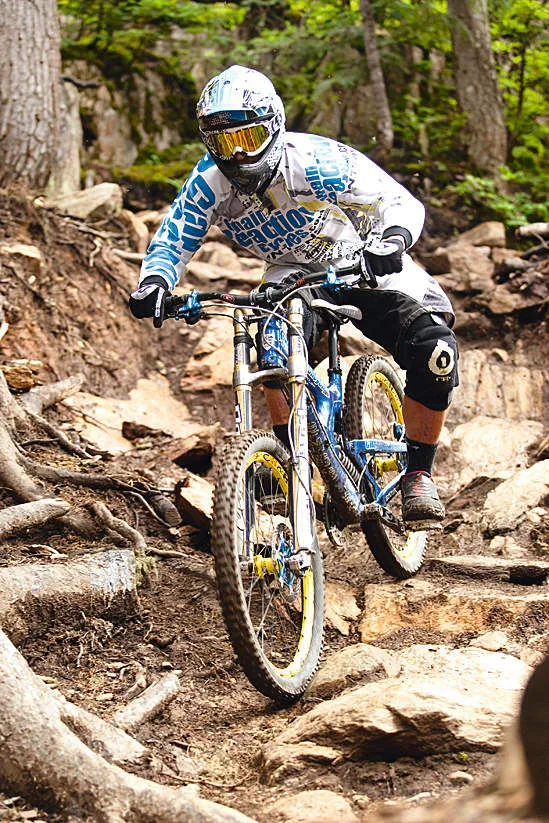
2 Attacking roots
Roots can be confusing. When you approach a section loaded with roots, the different layers and depths of them can make it hard to even see your line, but spotting it is key. If you get lost while scanning the terrain, you’ll almost certainly end up studying the geology a lot closer than you hoped. Take your time and spot a suitable section – ideally you should hit the roots as square on as possible.
In rougher sections, such as the one Chris is hitting here, there will often be speed-sapping holes or rough areas. In these cases, roots can conveniently be used as small kickers to boot you into the air.
Here Chris airs over a section that would otherwise slow him down or could even kick him off line – it allows him to maintain his speed and ride faster and safer. The important thing is to spot the line you’re going to take, and to focus on that exit point.
Kovarik's karving tips
- Hit bigger roots square on to avoid sliding out.
- Look for dry areas to use as braking patches.
- There will always be many lines, but usually only one fast one – make sure you spot it.
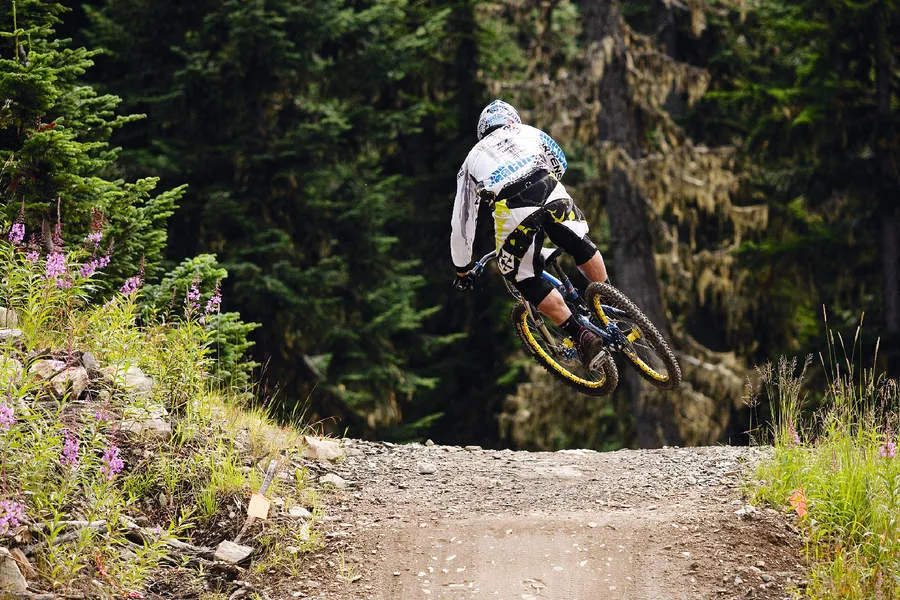
3 Jumps
Getting air is always fun, but on a big bike it’s a very different matter to doing it on a hardtail. With the speed you hit things at and the response of the suspension, you need to get to know your bike before you decide to start hitting the big stuff.
If you don’t have enough rebound damping dialled in, you could get kicked pretty badly off the lip, so be aware. There are two ways of tackling getting airborne on a big bike – one is to suck the jump up and get the bike on the ground quick for a fast getaway, and the other is to go big off the lip – whether to clear a whole section, or to get it sideways and showboat.
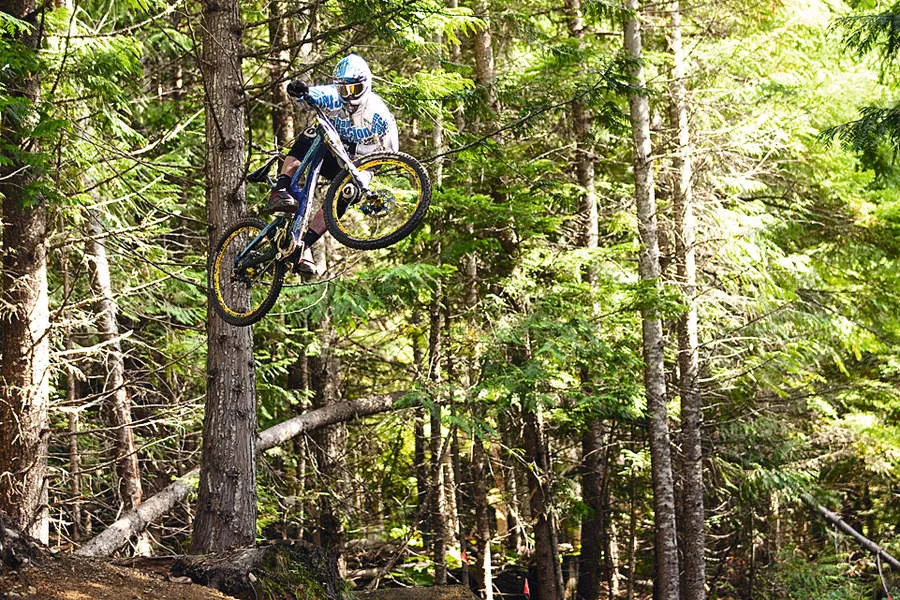
Kovarik's Karving Tips
- Approach the take-off in a centred, neutral position on the bike. As you near the lip, lean to the side, cranks flat with your outside elbow pointing to the sky and inside elbow pointing to the ground.
- You should be off the lip now, still central, but low, aggressive and over steering a little to get the front down and bike low.
- Spot your landing, pull your elbows in to your body and push the bike into the landing.
- Start small and work up little by little to increase your confidence.
- Look for the safest way to get down without catching a pedal or rear mech.
- Try dragging the brakes – with the rear tyre skidding a little like a rudder on a boat, you can guide the bike down more easily.
- Shift your knees side-to-side to help balance the bike and manoeuvre around rocks and roots. It’s important to keep your cranks flat to gain the best ground clearance and keep the bike on the ground as much as possible.
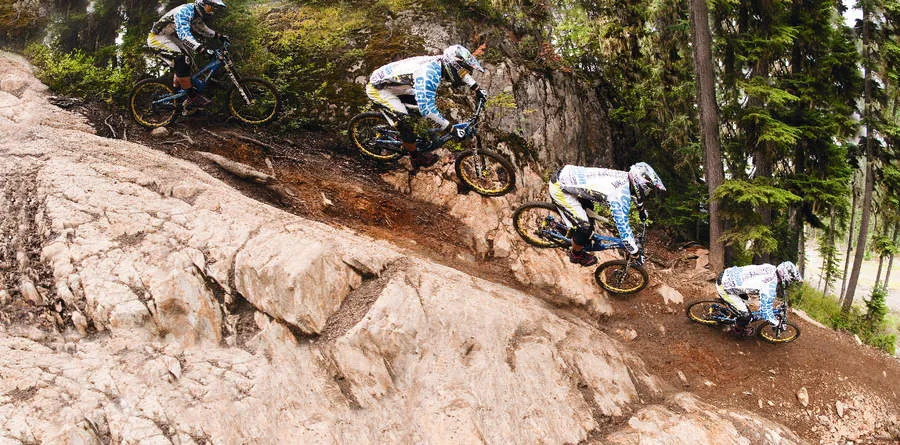
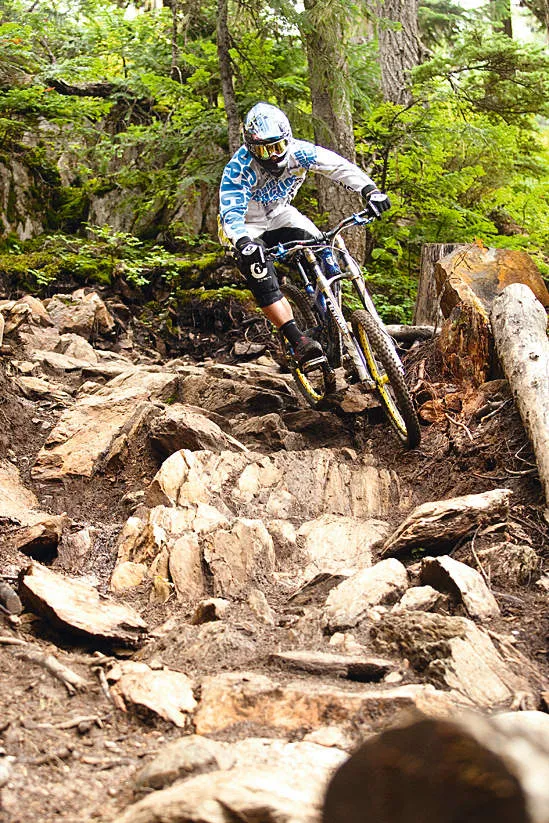
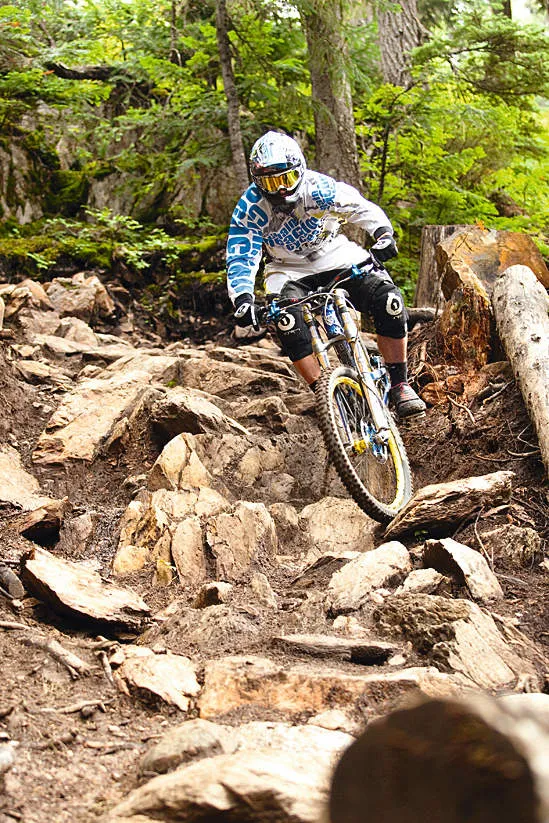
4 Gnarly stuff
It’s easy to get dizzy when approaching the rough stuff because your eyes will be darting around everywhere trying to scan for a good line. Rocks can be pretty dangerous and can damage your bike and body when you get things wrong. So if you find you clam up in the rough stuff, don’t worry – we’re here to help.
Committing and sticking to your exit point are the two most important things – even if things go wrong, you can go with the flow and roll over stuff that looks unrideable.
As Chris comes in to this section, he’s covering both his brakes and is scanning for rocks that will hit his pedals or that could pull his rear mech off. With that in mind, he takes the most direct option possible to keep his speed up.
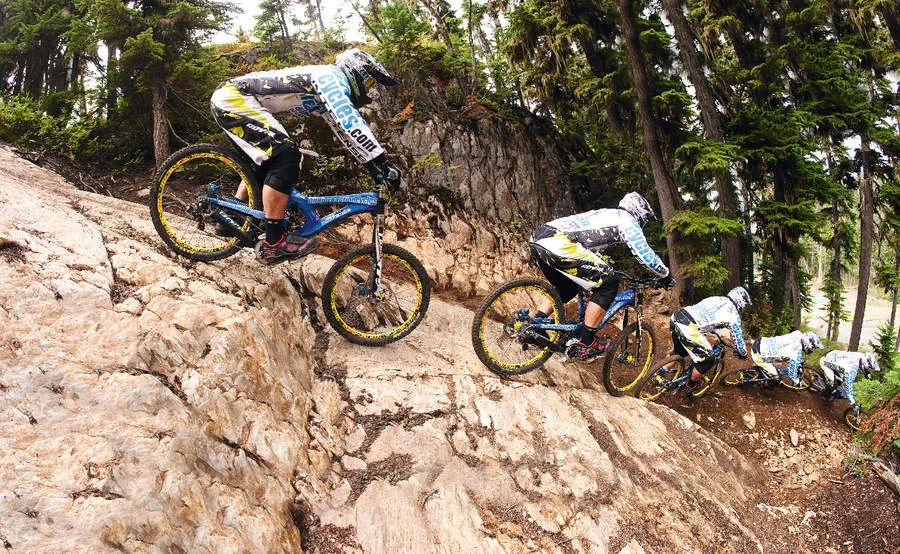
5 Braking
With massive 203mm disc brakes, downhill bikes have the potential to stop on a penny, but unless you brake in the right places, you’ll end up sliding around, losing control and, more importantly, losing time.
A double drop like the one Chris is riding here is the perfect example of when you should brake. If ridden off the brakes, Chris would have way too much speed and would fly off the second drop and land too flat, which could mean a broken bike or, even worse, a broken Chris (although, to be fair, Chris would probably just break the ground).
Instead, Chris brakes fairly heavily as he hits the first compression, then lift offs and carries his speed through the rest of the section in total control.
Kovarik's Karving Tips
- Check the drop before riding it to make sure there are no holes at the bottom and that there is a nice run out in case things get wild.
- Start the drop with reasonable speed, weight over the rear tyre for grip and cranks level for good ground clearance.
- As you near the second drop it’s important to brake a little harder, get lower on the bike and over the rear so the back tyre bites.
- Don’t go too far back or the front will slide out – it’s a fine balancing act.
- Hold on tight through the G-out – it’ll try to pull you off the back of your bike.