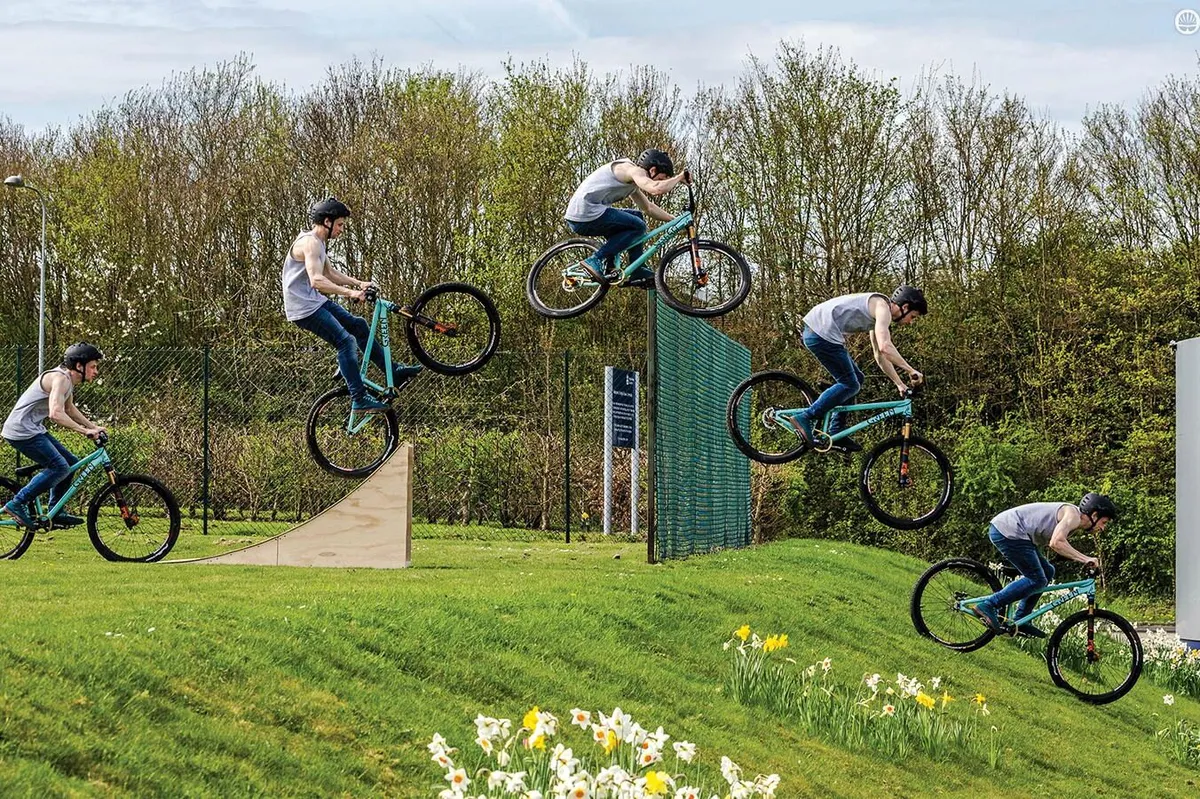
In this step-by-step guide, we talk you through how to build a mini kicker mountain bike jump to create a stepdown, and then how to jump and land it.
A word of warning…
You should never build permanent trail features without the explicit permission of a landowner or your local trail stewardship organisation.
Liability for mountain bike trails almost always falls on the shoulders of a landowner. At best, building these sorts of features without appropriate risk assessments will lead to your beloved local spot being shut down, and at worst, landowners could find themselves in a nightmare scenario if someone is seriously injured.
How to build a mini kicker

1. Materials and tools
You need two sheets each of 18mm and 9mm plywood, four to six lengths of 4x2 CLS timber and some screws.
You also need a hand saw, jigsaw, tape measure, ball of string, marker pen, square and a drill.
2. Shape the sides
Our ramp is 6ft long, 3ft tall and has a radius of 8ft.
Tie your pen to an eight-foot length of string. On the 18mm ply measure 6ft along the bottom and 3ft high so you have what looks like half a rectangle.
On the opposite side to where you marked the 3ft, put the pen on the bottom line at your 6ft mark and get someone to hold the end of the string nice and tight, then draw from the bottom of the 6ft mark to the top of the 3ft mark to create a curve on the ply.
Cut the side out and use it as a template to cut an identical one from the other sheet.
3. Bracing
Cut your 4x2 timber into lengths, say about 3ft, to determine the width of your ramp.
Screw these between the two sides, flush with the curve about 5in apart, to make the ramp nice and sturdy.
Cut a few extra ones to brace the back, too.
4. Ply and ride!
Cut your 9mm ply into sections to fit the curved front of the ramp, laying it on the braces and screwing it into the 4x2 timber. Remember to take the curve into account when measuring the ply.
Start screwing at the top and work your way down to ensure it’s flat. If there’s any ply sticking out of the top, trim it flush.
How to jump a mini kicker ramp

1. Kicker set up
Here we’re using the kicker as a stepdown, with a grass bank as the landing ramp.
Before you even think about jumping, first analyse the situation. Here the run-up is slow and bumpy because it’s grass, the landing is lower than the take-off and the run-out is quite sketchy.
2. Approach
When you’re a good distance from the ramp have one last look around to make sure it’s all clear, then commit.
Pedal at the speed you need to clear the jump – depending on the run-up you may need to give it some.
3. Out the lip
Jumping a stepdown, you want to ride the kicker like a normal tabletop jump or a double.
As you take off have your eyes on your landing point already, pull up on the bar and just nicely level out.
I like to keep it chilled and save the tricks until I get comfortable riding the setup.
4. In the air
To start with, there’s no need to go too high or styled, just keep loose, stay level and keep a close eye on your landing.
The thing with riding kickers is that most have never been ridden before and they can be sketchy, so always err on the side of caution. Once you get more confident you can add some style.
5. Landing
In this case, it’s going to be like a landing on a double, so try to land with both wheels together. As you come into the landing absorb the impact by bending your knees and elbows.
Bear in mind the grass bank may not be smooth, so hold on tight.
Tom’s tips
- Test your kicker: Before jumping, try the ramp out on flat ground first to make sure you’ve made it a good shape and you know what it’ll feel like.
- Start steady: Don’t make the gap too big to start with — you can work your way up to the Rampage canyon gap! The only things that’ll change are your speed and landing.
- Safe landings: Check your roll-out is safe and clear before you jump. If it’s a hard landing or you’re jumping to flat, drop your rear wheel slightly to lessen the impact. Brace yourself more if it’s a big gap!