Front derailleurs are a key component on many road, gravel and hybrid bikes. While it does a simple job, moving the chain between the chainrings on the crankset, there’s more to the front derailleur than meets the eye.
While mountain bikes have gravitated to a 1x setup, with a single chainring at the front of the
What is a front derailleur?
First conceived in the early 1900s, a front derailleur, as its name suggests, derails the chain from one chainring and pushes it onto another.
In comparison to a rear derailleur, which shifts through multiple sprockets on a cassette and also has to maintain chain tension, a front derailleur is a relatively unsophisticated piece of drivetrain equipment.
What’s more, unlike a rear derailleur, the front derailleur shouldn’t be in contact with the chain between shifts.
However, while the front derailleur is less complex than the rear, it’s another one of those bike components where there are a number of designs, and each does the same job a little differently.
What about 1x?
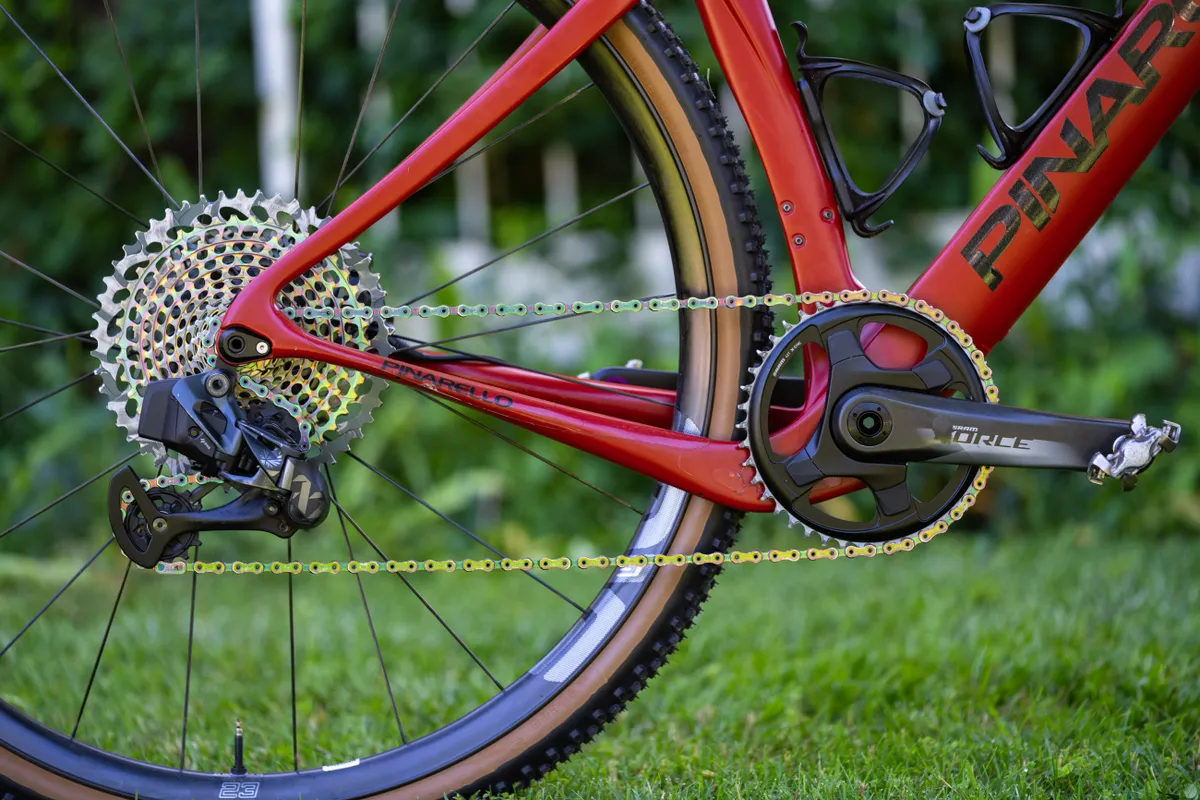
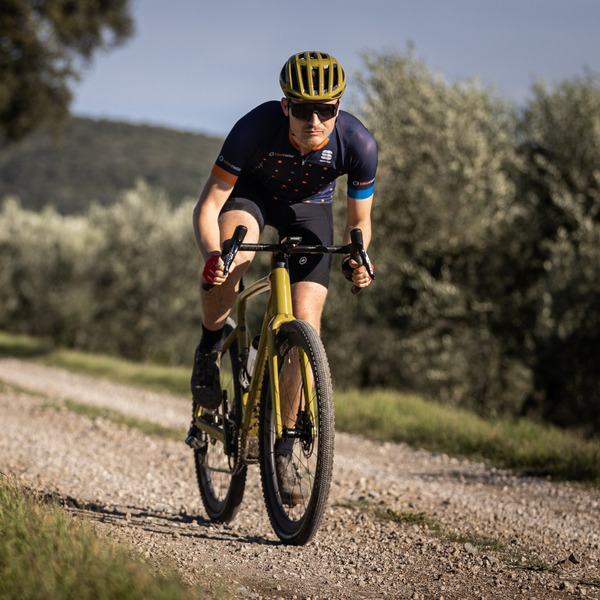
The modern trend on mountain bikes – and many of the best gravel bikes – is to have a 1x drivetrain and a very wide-range cassette to give you a similar gear spread to a multiple-chainring setup.
This means, of course, you don’t need a front derailleur. In theory, it makes for a simpler drivetrain setup because there’s less to go wrong. There’s no need to worry about front-derailleur setup, there’s nothing for mud to clog into and it also saves a bit of weight.
The teeth on a 1x crankset are typically deeper and usually alternate between wide and narrow profiles, so they mesh better with the chain. This means there’s less chance of the chain disengaging accidentally, while a chain guide attached to the bike’s frame can help here too.
Rear derailleurs will often feature a clutch mechanism to hold the chain more securely.
1x drivetrains are also quite common on cyclocross bikes, while some road riders also prefer the simplicity of a single-chainring setup. However, it can result in bigger jumps between gears, which can disrupt a rider’s cadence on the road.
Front-derailleur mounts: band-on or braze-on?
There are two different methods for attaching a front derailleur to a bike.
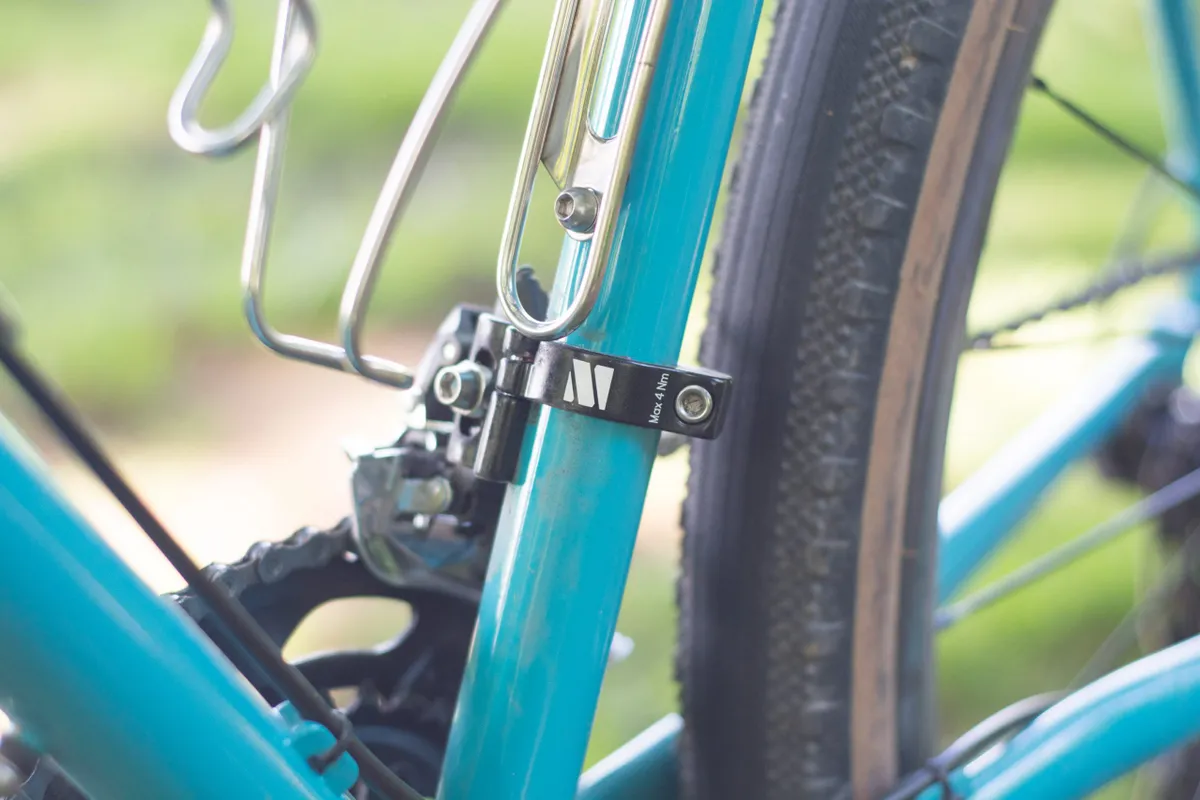
Band-on derailleurs have a hinged metal band as part of the derailleur. This fits around the frame’s seat tube, which extends from the bottom bracket to the seatpost, and is tightened by a bolt. That means that you can loosen the bolt and move the derailleur up and down easily if you need to adjust its position.
Band-on derailleurs come in a range of different sizes to suit different-diameter seat tubes, but most will have shims to suit common sizes. These include 34.9mm, 31.8mm and 28.6mm.
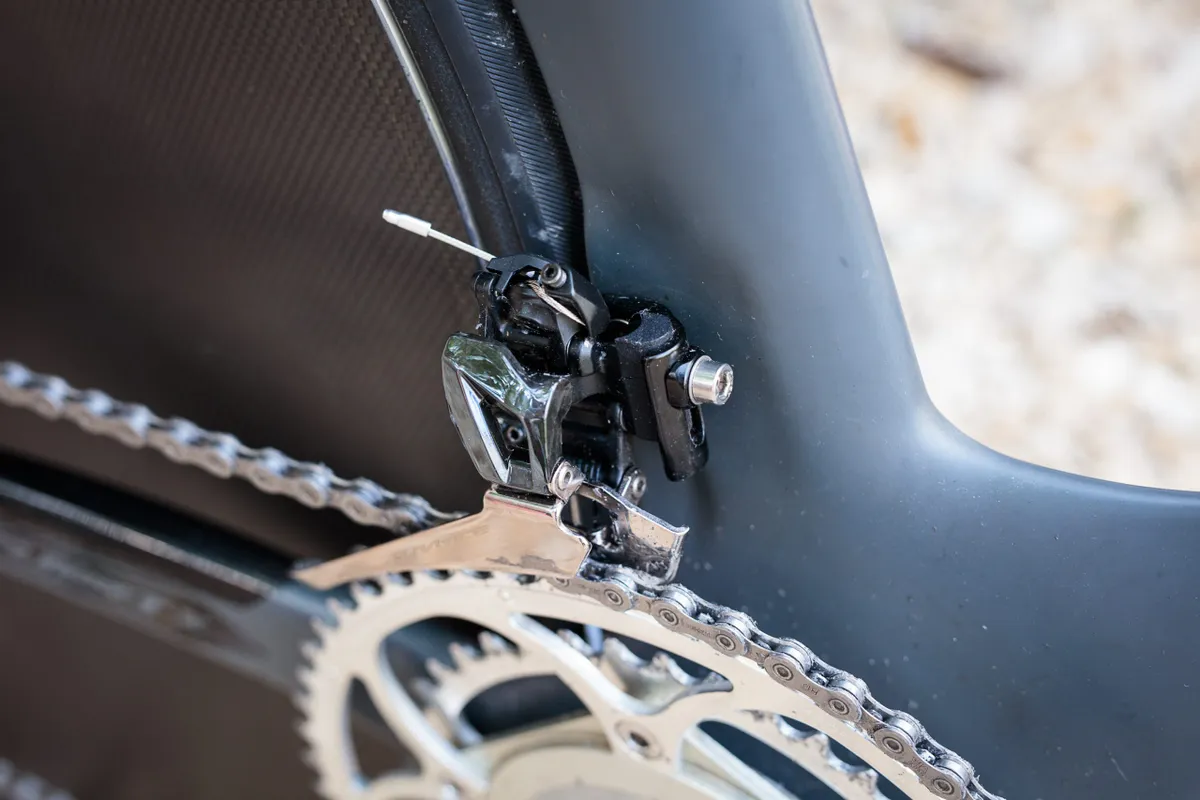
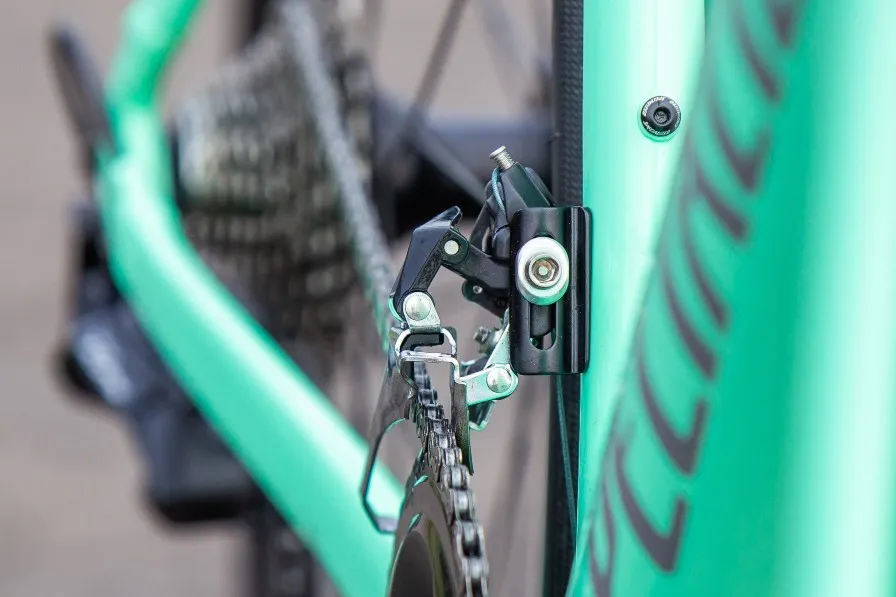
In contrast, so-called braze-on or direct-mount front derailleurs fix to a plate that’s part of the bike and is attached to the seat tube.

Some are riveted on and some are attached via hex or torx bolts using a separate front-derailleur hanger.
In practice, it’s unlikely that anyone has taken a brazing torch to your carbon or alloy frame, but the name persists from the days when bike frames were made of metal.
There’s a little up and down adjustment to a braze-on derailleur’s position by sliding it on its mount, so that it can be fine-tuned if, for example, you change the size of your chainrings.
If you wish to use a braze-on front derailleur but your frame is of a band-on standard, some manufacturers offer an adaptor.
How does a front derailleur work?
A front derailleur has two long plates, known as a cage, that sit on either side of the chain. These are connected at their top and bottom.
In most cases, they don’t touch the chain (unless you’re mid-shift) if they’re properly adjusted. They’re attached to a pair of lever arms that are fixed to your bike’s frame.
In a mechanical system, the lever arms are moved via an actuating arm that protrudes from the side of the derailleur and attaches to the shift cable, which runs from the shift lever on the bars.

When it comes to changing gear on a bike, typically the left shifter is set up to control the front derailleur, while the right shifter controls the rear derailleur. However, this can be customised on electronic groupsets. SRAM eTap AXS, in its default setting, uses both shifters to control the front derailleur.
When you pull on the front-derailleur cable by actuating a shift with the lever, the derailleur cage moves outwards. The shift mechanism is designed so that there’s a small amount of up and down movement, too.
The movement of the cage pushes the chain from the inner chainring to the outer chainring. Once the chain has been moved to its new position, the derailleur should no longer be touching the chain and you can ride in the new chainring, changing your rear gears until you need to swap back to the inner ring.
There’s a spring built into the derailleur that moves it back inboard when the cable is slackened off by the rider, which in turn moves the chain from the outer chainring to the inner.
You need to be pedalling for the front derailleur to work, but since you’re moving the part of the chain under tension, you may need to ease off a little to enable a slick change, particularly with a shift up to the larger chainring.
Front-derailleur limit screws
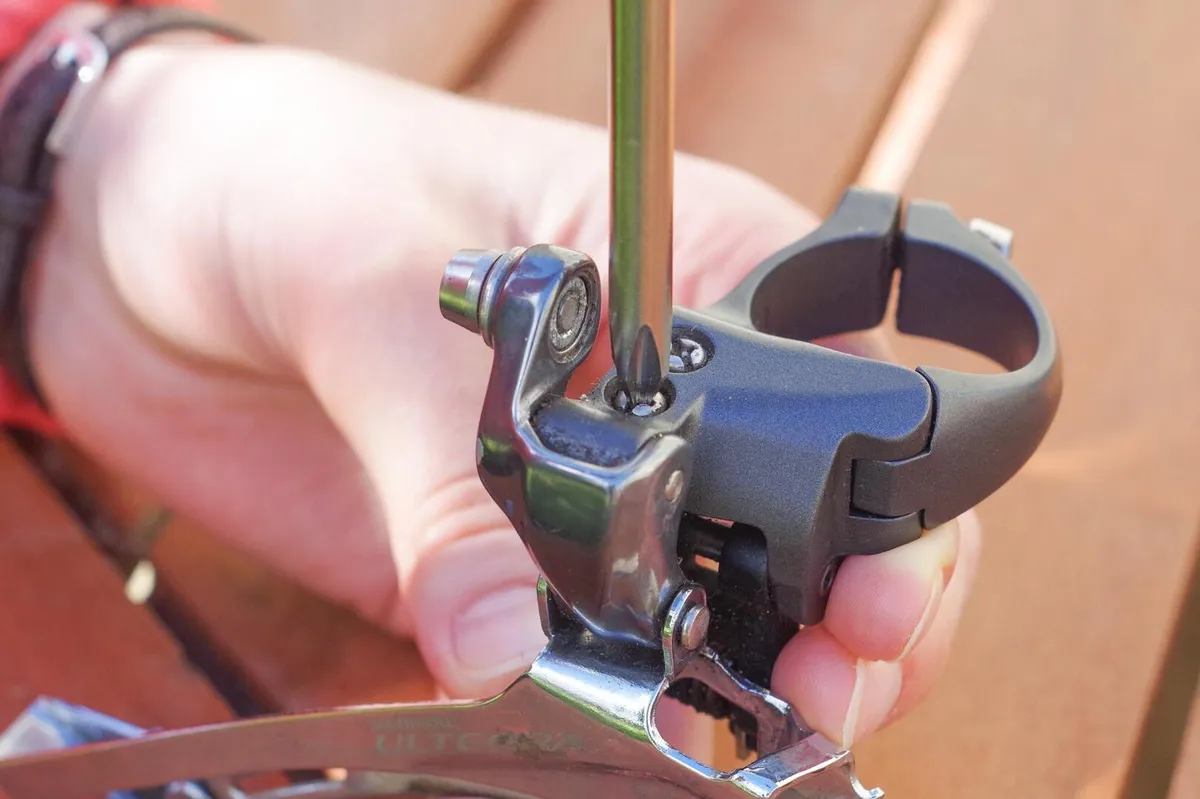
Like the rear derailleur, the front derailleur has ‘high’ and ‘low’ limit screws to restrict how far the derailleur can move at the extreme ends of its travel.
These two limit screws, marked with an ‘H’ and ‘L’, are built into the derailleur body to fine-tune how far inboard and outboard the derailleur can move. The ‘L’ screw limits the amount of inboard travel, while the ‘H’ limits the amount of outboard travel.
The limit screws play a key part in ensuring the chain is less likely to drop off the chainrings – one of the most important steps in knowing how to adjust bike gears.
Electronic groupsets
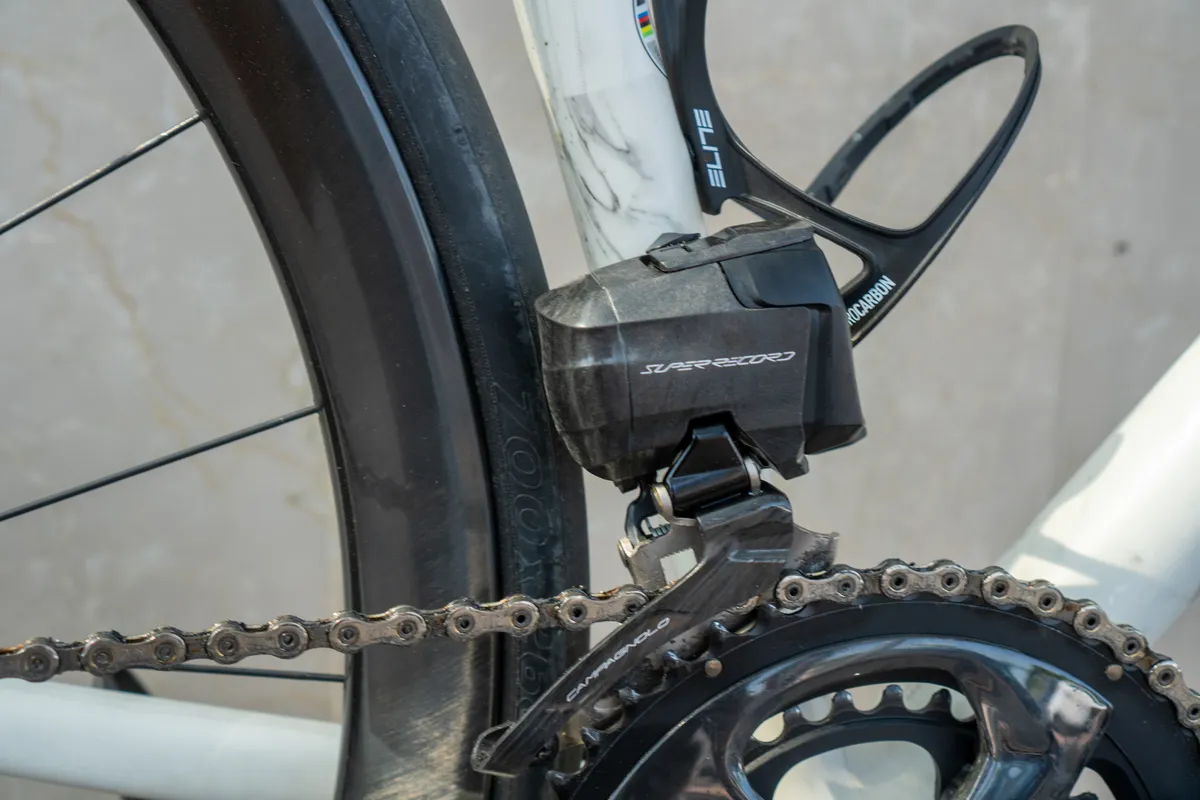
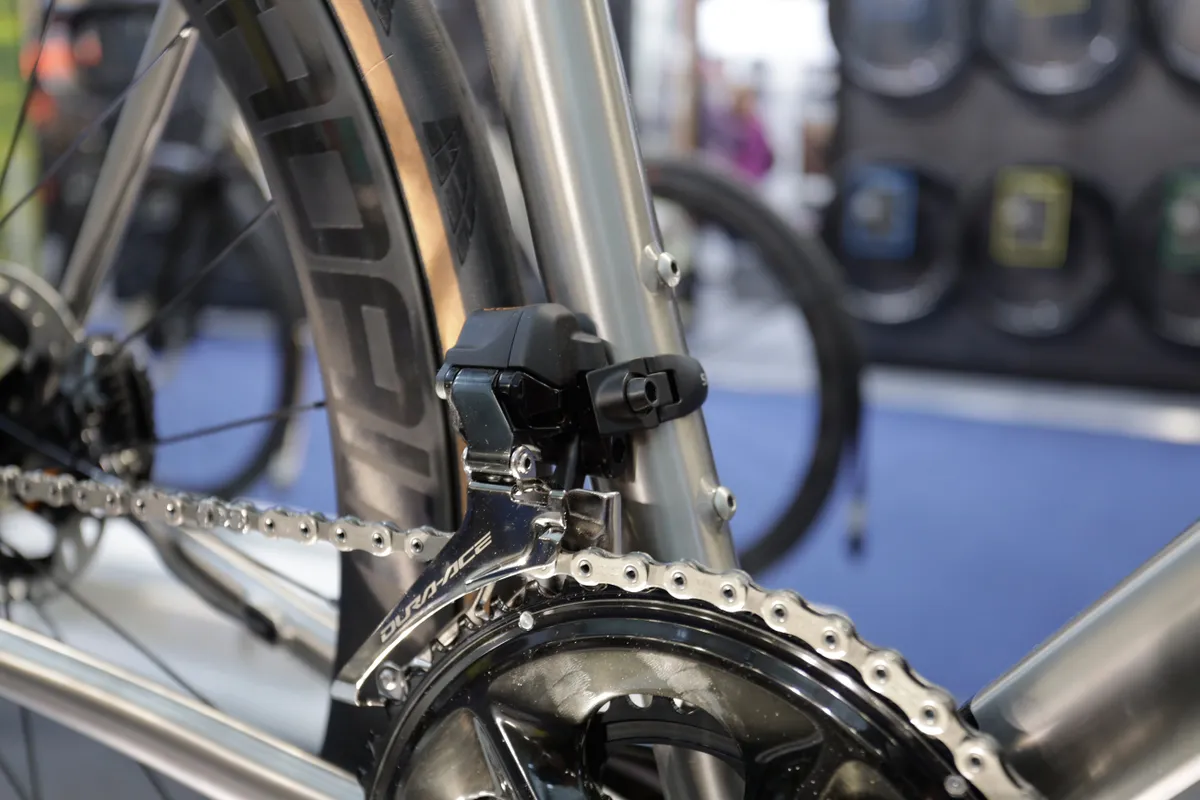
As well as cable-operated systems, you can find electronic groupsets, such as Shimano Dura-Ace Di2 R9200, SRAM Red AXS or Campagnolo Super Record Wireless, where a motor moves the front derailleur.
Electronic front derailleurs can have quite an aggressive motor, which allows you to shift under load (for example, if you need to change quickly between chainrings).
However, this can put more strain on the frame and specifically the front derailleur hanger. SRAM AXS front derailleurs come with a support brace in the box for this reason.
Chainring profiles

Chainrings are engineered to work with the front derailleur to make shifting smoother. The large ring will typically have ramps and small metal pins, along with different tooth profiles on different parts of the ring, to help the chain move more readily from the smaller ring.
Usually, the shift from the large ring to the small one is quite straightforward because the chain just drops onto the new ring.
The shift up to the larger ring is harder to achieve, and derailleurs are engineered so that you 'overshift', pushing the chain a bit further to the right, then letting the derailleur drop back once the shift has been achieved.
Electronic shifting systems have an overshifting mechanism built in too.
Front-derailleur trimming
When you shift gears at the back, the chain moves across the cassette. This alters the angle at which the chain runs between the crankset and the cassette, otherwise known as the ‘chainline’.
Using an extreme gear combination – for example, the biggest sprocket on the cassette with the big chainring on the crankset – will put the chainline at a more diagonal angle, known as ‘cross-chaining’. This can result in the chain rubbing against the side plates of the front derailleur, which you will be able to hear as you ride.
To help prevent this, modern mechanical gear systems are indexed, which means the cable moves between fixed stops when you move the shift lever.
For the front shifter, there are normally intermediate positions between shifts that allow you to move the derailleur cage slightly to one side, to avoid rubbing but without causing the chain to swap between chainrings. Known as trimming, this means that your chain should run quietly as you ride, assuming the front derailleur is set up correctly.
SRAM’s mechanical front derailleurs have a ‘yaw’ design, where the cage rotates about a vertical axis, which helps avoid chain rub. As a result, there is no trim function built into SRAM’s design. However, they often require very precise setup to work optimally.
Electronic shift systems are programmed to self-trim automatically, preventing rub, provided the height and angle of the front derailleur have been achieved correctly.
Cable pull
Cable pull refers to the direction at which the cable enters and pulls the derailleur. It’s decided by your frame design and where the routing leads the cable.
Top pull
Top-pull derailleurs refer to the cable being pulled from the top. If your cable routing follows the top tube and then drops down to the front derailleur, it’s a top pull.
Bottom pull
Bottom-pull derailleurs refer to the cable being pulled from the bottom. If your cable routing follows the down tube and then takes the cable past the bottom bracket, it’s a bottom pull.
Dual pull
Dual pull is something that came out as a solution to make front-derailleur options more universal. Simply, a dual-pull derailleur allows the cable to be routed from either the top or bottom.
Front-derailleur compatibility
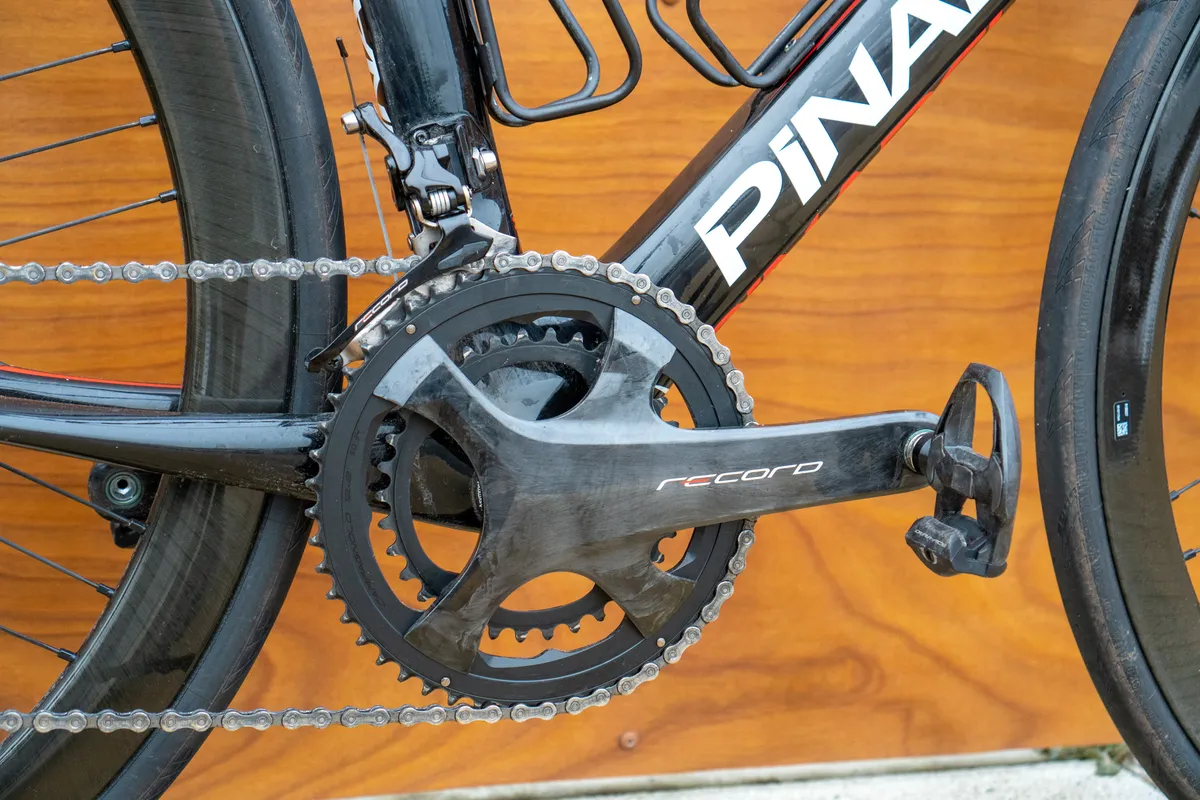
First up, a derailleur designed to work with a double crankset (with two chainrings) won’t work with a triple crankset. They have different shapes and sizes to their cages to work with the different chainring configurations.
Derailleurs from different component brands are not always inter-compatible. That’s because, as with rear derailleurs, they may use different cable-pull ratios, which shift the derailleur cage a different distance when you operate the shifter lever.
They are also speed-specific, so you can’t use a front derailleur designed for an 11-speed drivetrain with a 10-speed drivetrain, for example. That’s because chain widths differ with the number of gears, so the side plates of the front derailleur need to be the correct distance apart.
The cable-pull ratios – the distance the cable moves in response to a click in the shift lever – may also differ between brands and groupsets, and even between older and newer versions of the same groupset in some cases. This isn’t a concern with electronic front derailleurs, given there is no cable to pull.
A front derailleur will have a maximum size of chainring it can handle. There’s also a maximum number for the difference in the size of the two chainrings it can handle – this is known as a derailleur’s capacity. While it’s possible to, for example, fit a smaller inner chainring to your crankset, the difference in tooth count between this and the outer chainring cannot exceed the derailleur’s capacity.
These figures are often quite conservative, but if you want to ensure maximum performance, it’s best to stick within your manufacturer’s recommendations.
Mix-and-match compatibility
Generally, we’d suggest keeping the front derailleur in the same brand and series as your shifter. However, if for some reason you’re not fond of this, then you can generally mix and match older front derailleurs and shifters with reasonable success if they are 9-speed or below.
With the advent of 10-, 11- and 12-speed gearing, newer derailleurs and shifters have played with various cable-pull ratios (the amount of cable pulled by the shifter) to increase shift speed and lower the shift effort. Therefore on newer drivetrain models, we’d certainly recommend keeping the components matching.
As always with compatibility, there may be some wiggle room, but you’re on your own if you choose to deviate from manufacturer recommendations.
When should I replace my front derailleur?

As with any other groupset component, it is worth degreasing and cleaning any excess grit from the front derailleur on a regular basis. It’s also well worth adding a few drops of a dry lubricant to the pivots periodically to keep it performing optimally and prevent them from seizing.
As with your rear derailleur and any cable-operated brakes, make sure your cables are in good condition and replace them periodically as they attract dirt and the shifting quality will degrade as a result.
Make sure your front derailleur’s cage isn’t bent. If it is, it can rub on your chain, which is at best, mildly annoying and at worst, will lead to adverse shifting.
It's worth checking the derailleur arm periodically for play because it can loosen on the pivots. If there's a significant amount of play, the derailleur won’t shift very well and it will also likely rub on the chain.
Finally, the front derailleur and chainrings work as a pair, so it's worth keeping an eye on the condition of your chainrings to ensure optimal performance.
What types of front derailleur are there?
Road and gravel bike front derailleurs
Road bike front derailleurs remain relatively simple, with far fewer options than those historically used in mountain biking (although, as we’ll come on to, that’s much less of an issue now given the prevalence of 1x drivetrains on the latest mountain bikes).
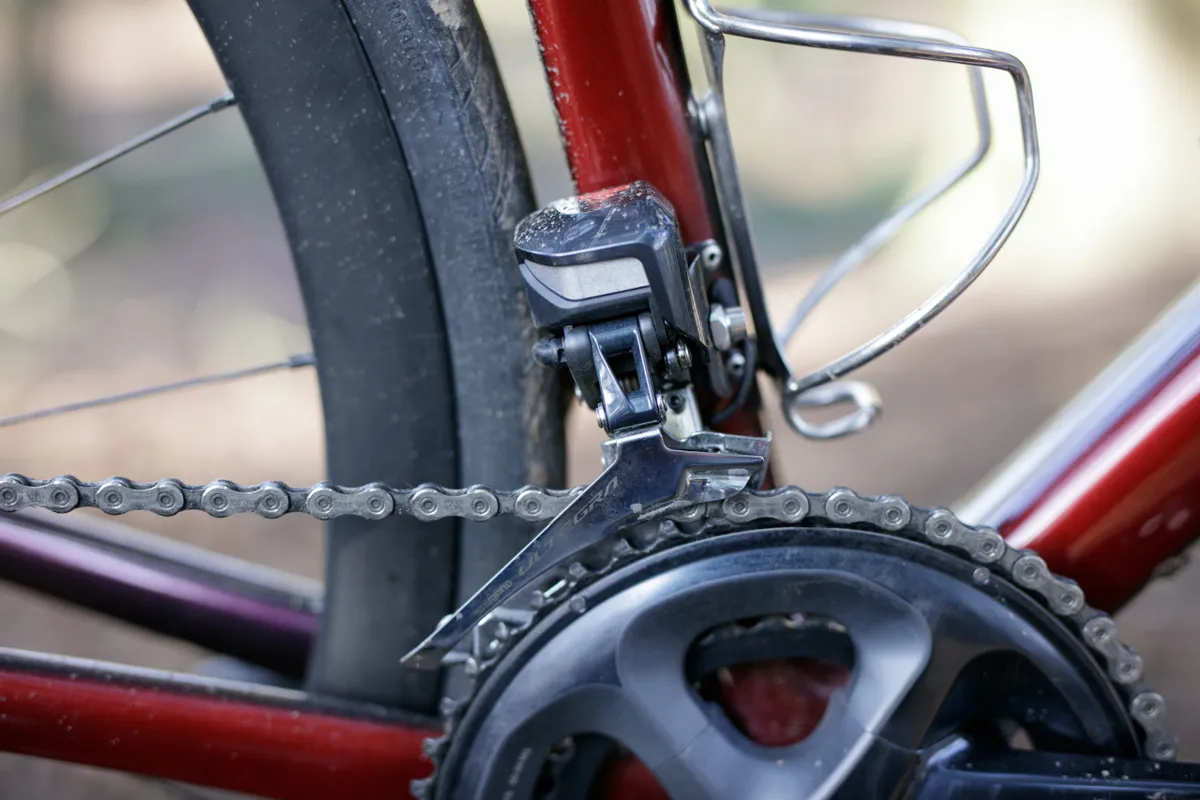
Virtually all cable-operated front derailleurs on road and gravel bikes are ‘bottom pull’, where the cable comes up from under the bike’s bottom bracket and pulls the actuating arm down.
Mountain bike front derailleurs
Where road bike front derailleur options remain simple and minimal, mountain bike suspension designs forced multiple mounting types onto the market.
That said, with 1x drivetrains now dominant across mountain biking, the confusion that came with choosing a mountain bike front derailleur is largely a thing of the past.
In fact, SRAM has ditched the front derailleur entirely from its latest line-up of mountain bike groupsets, and Shimano is the only brand to offer a front derailleur, in its current XTR M9100 and XT M8100 12-speed groupsets.
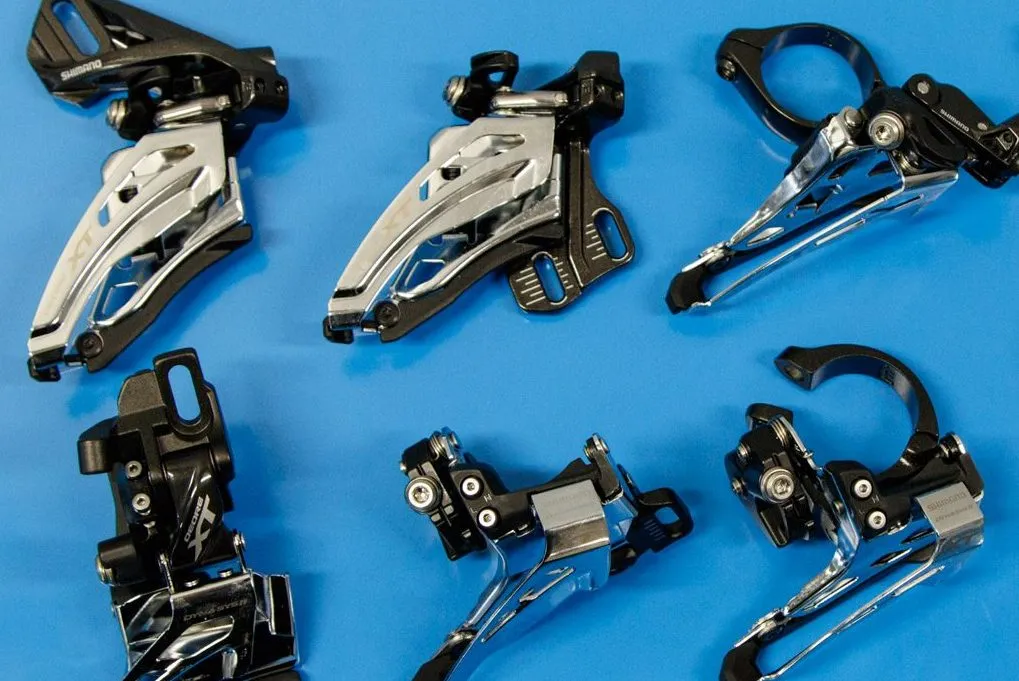
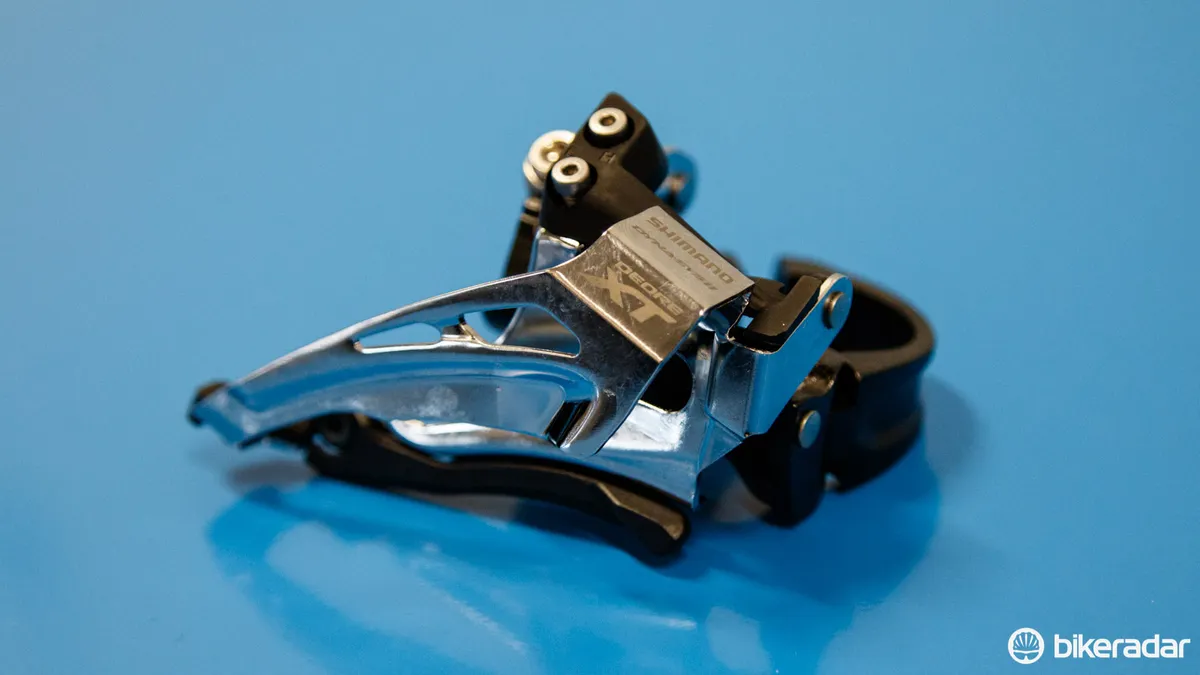
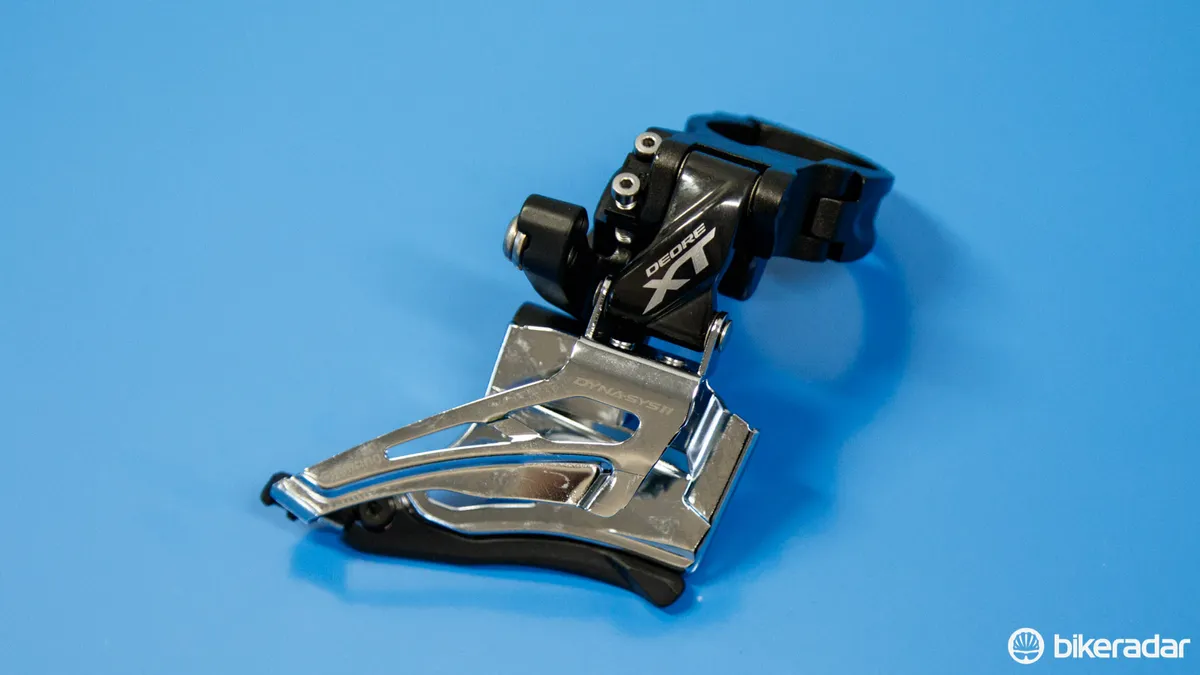
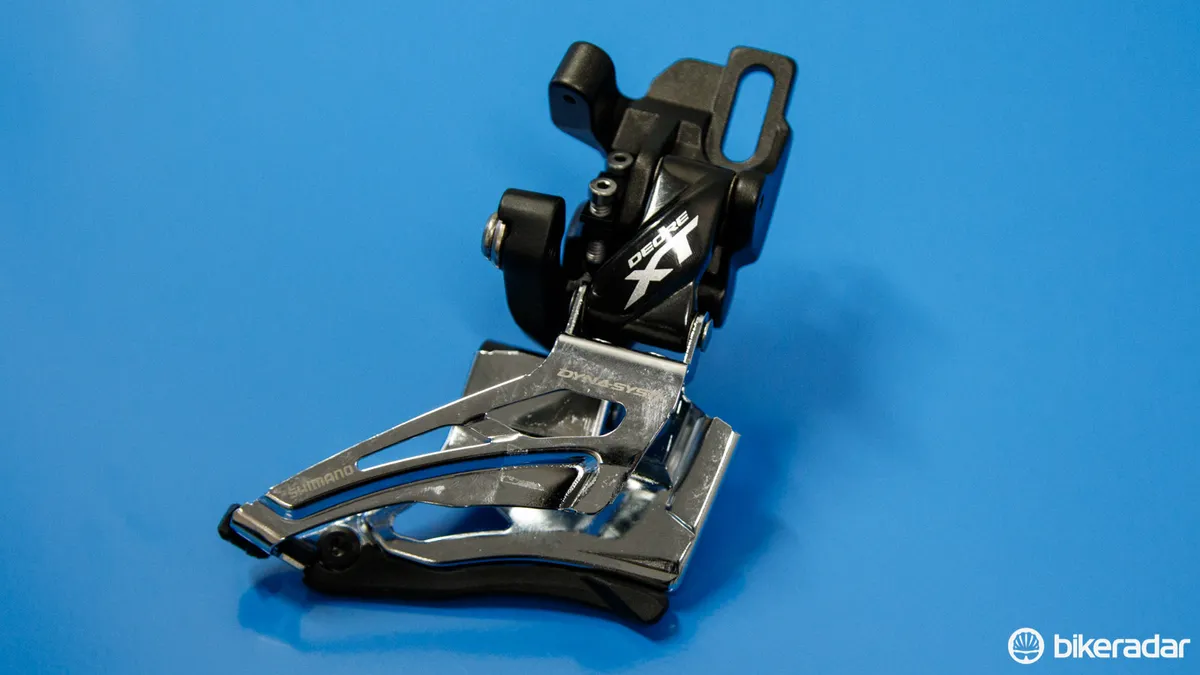
Shimano Side-Swing
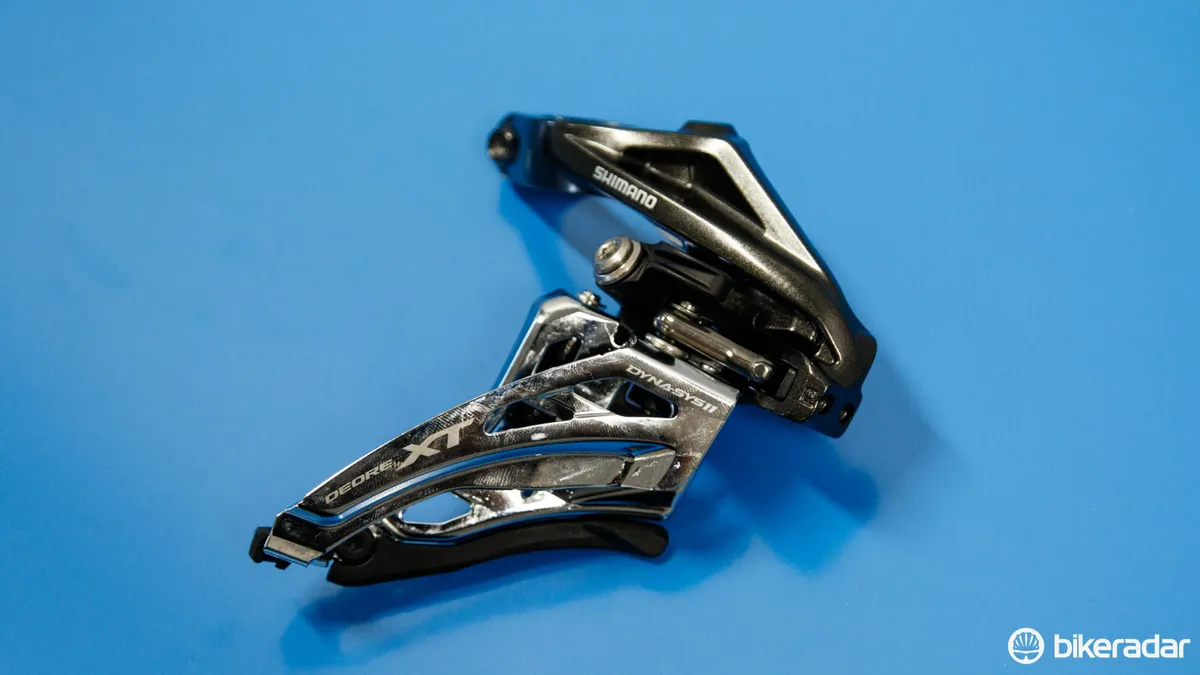
The aforementioned groupsets use Shimano’s Side-Swing design, where the cable enters from the front and pulls the actuating arm sideways, as the name suggests, rather than up and down.
The system was originally introduced on the brand’s 11-speed XTR M9000 and XT M8000. The Side-Swing derailleur was designed out of a need for increased clearance due to wheel and tyre sizes forever growing.
The derailleur standard is intended to remove compromises frame manufacturers must make to chainstay length, chainring chainline and tyre clearance in order to fit a front derailleur.
Side-Swing features its own cable routing, where the gear housing comes in from the front of the derailleur – right at the bike’s seat tube. It’s possible to achieve this on an existing bike by using zip ties to route a cable, but it’s not a recommended (or pretty) thing to do.
Shimano makes Side-Swing derailleurs in direct-mount, E-type mount and clamp-band-mount options.
Older mountain bike designs
Due to differing suspension designs, it gets more complicated on older mountain bikes equipped with a front derailleur. Some cheaper mountain or hybrid bikes may use an older design.
Let’s quickly run through the various designs out there.
Low clamp (aka top swing)
This type of front derailleur mounts low down to a round seat tube with a band clamp.
Because the clamp sits low on the frame (near the bottom-bracket junction) and the derailleur itself pivots above it, these are commonly also known as ‘top swing’ front derailleurs.
You need to be aware of your seat-tube diameter. Most commonly, these derailleurs now come in a 34.9mm diameter, with shims included to fit smaller 31.8 and 28.6mm-diameter seat tubes.
High clamp (aka bottom swing)
Wrapping around the seat tube at a much higher point than the low clamp, the high-clamp derailleur has become popular on many full-suspension frames, or where bottom-bracket clearance is limited.
With the clamp sitting above the derailleur pivots, this is also commonly referred to as a ‘bottom-swing’ derailleur.
Its mounting method is quite similar to that of the low clamp, with 34.9mm-diameter mounts the most common and smaller diameters often catered for by the use of shims.
On some frames with a consistent seat-tube diameter, the use of a high-clamp or low-clamp front derailleur is completely interchangeable. Generally speaking, the low-clamp type offers greater water bottle cage clearance, a cleaner look, and is a lighter option if it fits your bike.
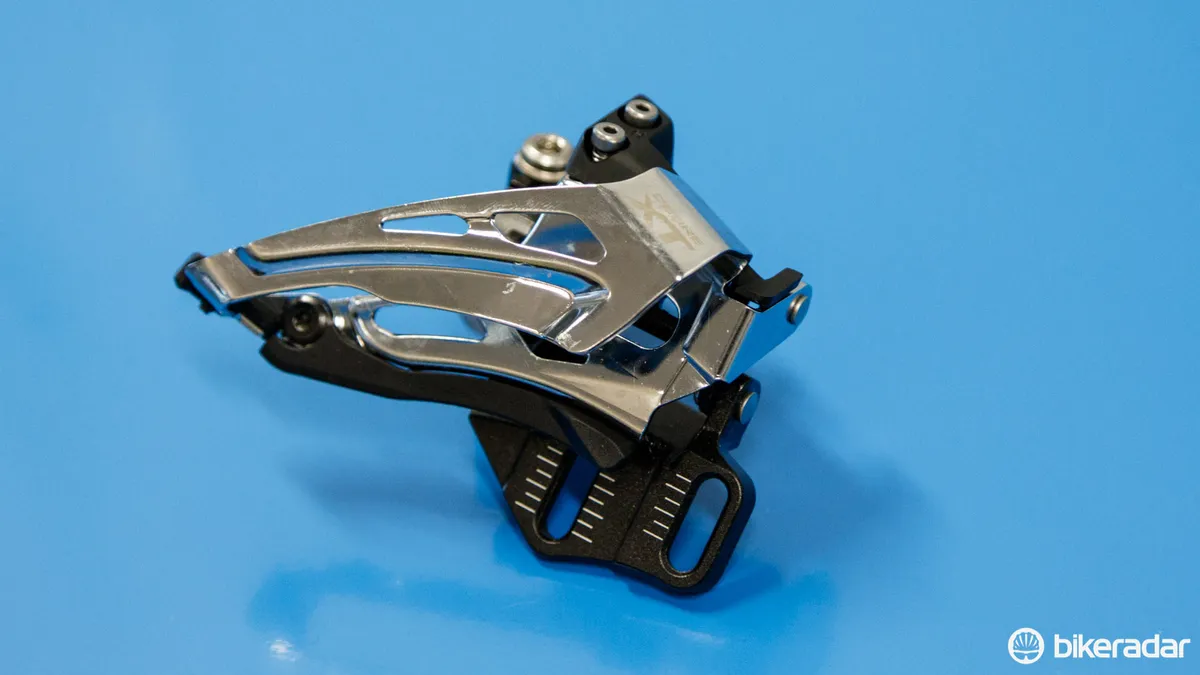
Direct mount (aka DM, high direct mount or H0)
These became a popular choice shortly before 1x started to really take off. The direct-mount derailleur features a single attaching bolt and a groove on its back to keep it aligned with the frame mount.
In order to fit one of these derailleurs, the frame must feature an appropriate mount. SRAM called these ‘high direct mount’, whereas Shimano referred to them as 'direct mount'.
E-type (aka low direct mount, E2-type, S3)
Shimano’s E-type front derailleur traditionally included a backplate that was held behind a threaded bottom bracket. This pre-dated direct-mount designs and was filler for when brands started to move away from traditional band-clamp derailleurs.
‘E-type’ is more commonly available now without this backing plate and is sometimes referred to as a ‘low direct mount’ or ‘E2-type’ front derailleur.
Following the direct mount above, this is the next most common form of direct-mount derailleur and features two bolts 22.1mm apart, with the right-side hole of the derailleur 5mm forward offset from the left one.
SRAM also offered compatible derailleurs with this mount type, referred to as ‘S3’ or ‘Spec 3’.
This mount style became popular because it was easier to conceal if running a 1x setup.
Direct mount S2
Beyond the common E-type/S3 low direct-mount derailleur, SRAM offered a further two options that look extremely similar, but are not cross-compatible.
The SRAM S2 (or Spec 2) is perhaps the one most easily confused with the S3 (or E-type). It shares the same 22.1mm hole spacing, but instead sits far further outward and doesn’t offer the 5mm hole offset. S2 derailleurs are not commonly used.
Direct mount S1
Finally, SRAM offers the low direct-mount ‘S1’ (Spec 1) derailleur. This is characterised by a 42.7mm distance between the two bolt holes. This far wider bolt placement makes it rather specific, and something – to our knowledge – only Specialized has used in the past.