


You know the feeling – you’re flying down your local trail behind one of your riding buddies, rail the next turn and then they disappear off into the distance after bunnyhopping that annoying log that’s blocked the trail for the past few weeks. So you’re faced with either a dismount or a chainring to log interface, neither of which looks cool or keeps your flow going.
Here top UK freerider Chris Smith will teach you some basic trails skills that can all be learnt without loading your bike in the car and disappearing off into the woods for an hour or two. They’re all easy to learn when you have a spare five or 10 minutes out your front door or even on your commute to work. Spend a few minutes learning these techniques and you will soon reap the rewards when you hit the trails.
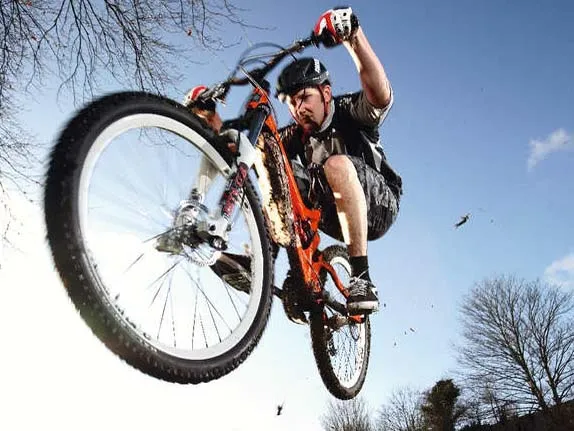
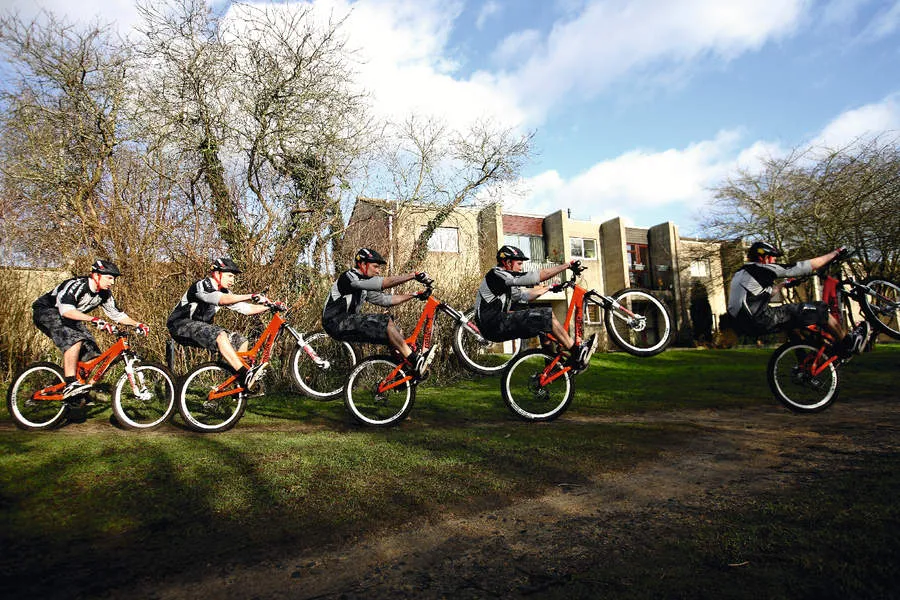
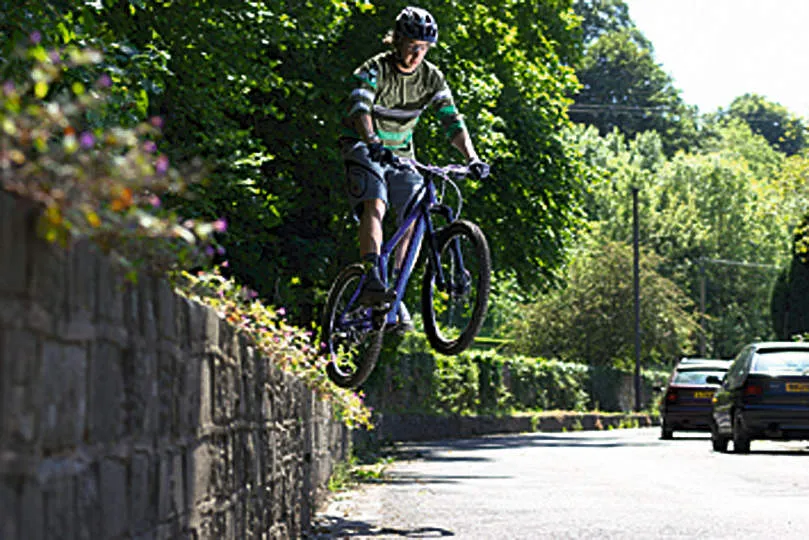
Bunnyhops
Learning to bunnyhop is an essential skill to tackle logs out on a trail.
1 The approach
Approach the object at the required speed to clear it easily. Then get your pedals level, good foot forward, freewheeling into your approach. A good way to practise this and judge distance is trying to take off on the white lines of car parking spaces. Place something that won’t wreck your wheels to gauge the height.
2 Prepare for take-off
As you near the object, start shifting your weight away from your front wheel while compressing your body using your arms legs and back – practise this by compressing your suspension and getting used to the rebound and the bike’s ‘light’ spot. This is where the magic happens.
3 Take-off
Once you have found your bike's ‘light’ spot you explode this movement upwards, by squatting down with your arms, legs and back, and uncoiling yourself like a spring by pulling hard upwards on the handlebars. At the same time scoop down, back and upwards on your pedals to lift the rear wheel. Pointing your toes towards the ground helps with this.
4 Flight
Once you’re airborne focus on keeping the bike level in the air and looking at your landing for any hazards. Keep the bike level by adjusting your weight fore and aft, keeping a tucked position on the bike. Now you want to start thinking about touch-down, adjusting your weight accordingly.
5 Touch-down
As you come into land try to get both wheels to match whatever transition you’re landing on. Slightly back wheel first helps if you are landing on flat ground. Absorb the landing with your arms and legs then lastly your bike’s suspension, focusing on the run-out.
Manuals
The manual forms an important part of riding, be it over a puddle, roots, rocks and more. Learn it at different speeds and add it to you trail riding. Once it’s dialled you can manual for as long as you want given the right hill.
1 Approach
Approach the manual at a medium speed, freewheeling, good foot forward, pedals level, fingers covering the rear brake. The ideal place to learn the manual is an empty car park with a slight downhill slope as it makes the move easier once you’ve got yourself in the right position.
2 Prepare
When you feel you are at a comfortable speed focus ahead and give the front suspension a little bounce as you shift your weight back, while pulling up and back hard on the handlebars. Aim to nearly sit on the rear tyre. The rear axle is your pivot point, so get behind that. Remember the back brake is your best friend in this manoeuvre.
3 Weight movement/brake
The most important part of the manual is weight position and brake modulation – it’s a very fine balance. When I manual I tend to have my hands in line with my shoulders and my feet always pushing forwards while balancing it out with the pull of my arms. pointing my feet up at 45 degrees.
4 Brake
The rear brake will always save you from looping out and lying on your back. Don’t grab at your brake – learn to feather it and only use it if you feel like you are going to loop out. Sit on your bike stationary and put it on the rear wheel, raise the front end until you feel the back wheel wanting to roll out from underneath you – this is the sweet spot that your bike needs to be in to do the manual.
5 Pump, riding out of the manual
Once you have the bike sat in the manual get used to pumping it along with your arms and legs, pushing the bike forwards and learning when to lay off the brake to increase your speed, and when to add some brake if it all starts getting out of shape.
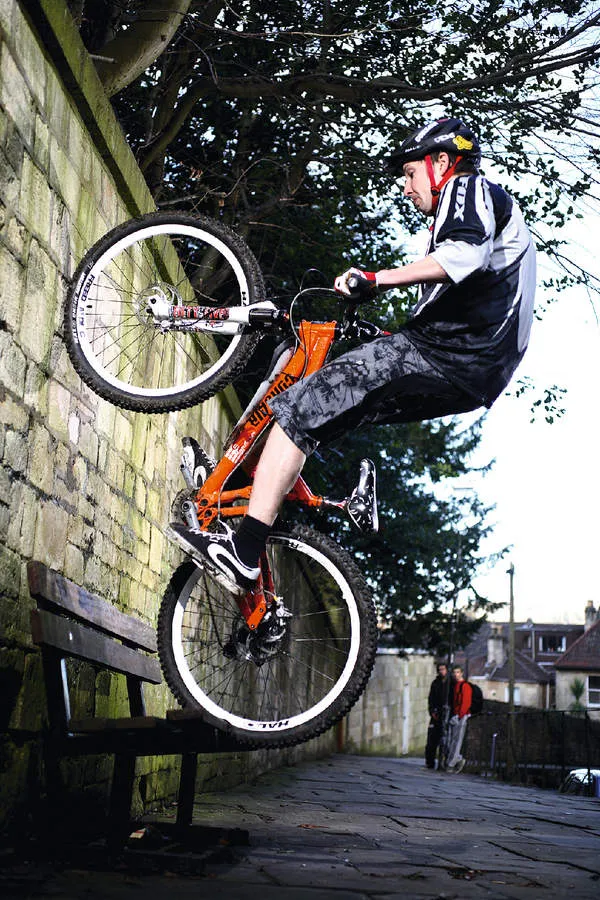
Wall/bank rides
The wall ride is an excellent trick to learn with more and more wallrides being added to bike parks across the UK. Once you have the technique push yourself to try steeper walls. Ninety-degree steep, even 180 wallrides are all possible once you have the technique down.
1 Approach
Approach the wall or bank at a moderate speed – you may need a couple of test runs to make sure you get that right. Set your pedals level, get your good foot forward, covering the brakes, as you freewheel. Focus on the wall and visualise your line.
2 Prepare
As you come into the wall shift your weight centrally, slightly biased towards the rear. Lift the front wheel slightly by pulling back on the bars and start moving your weight away from the wall and concentrate on getting the tyres to get as much bite as possible.
3 Angle/lean
As you’re on the wall, you want your bike wheels to be at least 45 degrees on it. While you are pushing into the wall, concentrate on riding along it rather than coming off of it at this stage. The most important thing is the angle of the bike. Really commit to it or you’ll be faced with a wall slide.
4 Wallride
Try to make a smooth arc onto and along the wall. Smoothness is the key here. It’s also important to learn which way you naturally wallride as opposite wallrides are fairly hard to learn. As a rule of thumb, if you ride right foot forward you wall ride to the right and vice versa for left foot forward.
5 Landing
As you exit the wallride look at your landing and adjust the bike accordingly, with weight shifts fore and aft. Sometimes you may have to pop a small hop off the wall to get the bike in the right position for landing, again touching down with both wheels for the smoothest landing. Absorb the shock with your arms, legs and lastly the bike’s suspension. Sorted!
Skills tips
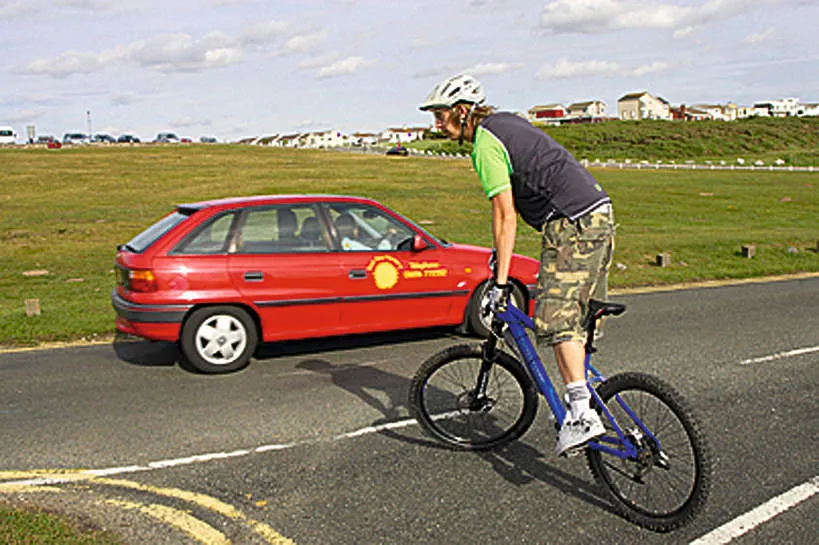
Trackstands
The trackstand can come in handy on tight switchbacks or simply when letting other riders pass you on the trail. Practise on your commute by imagining you’re in a race while waiting for the traffic lights. Get your balance, hold it… and go!
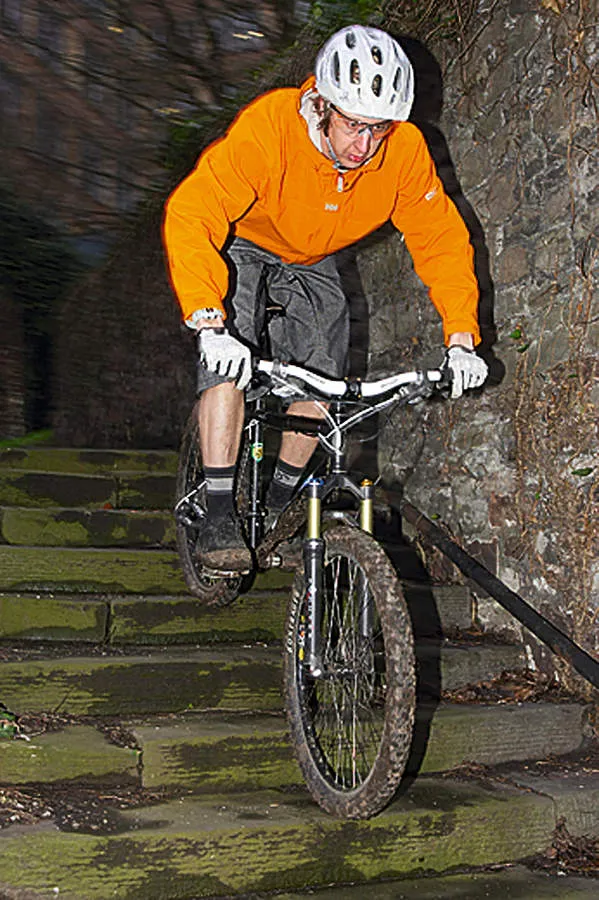
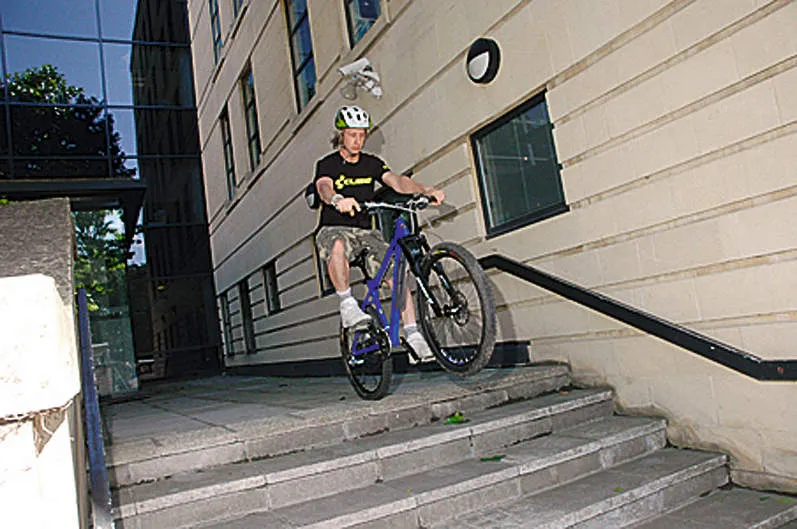
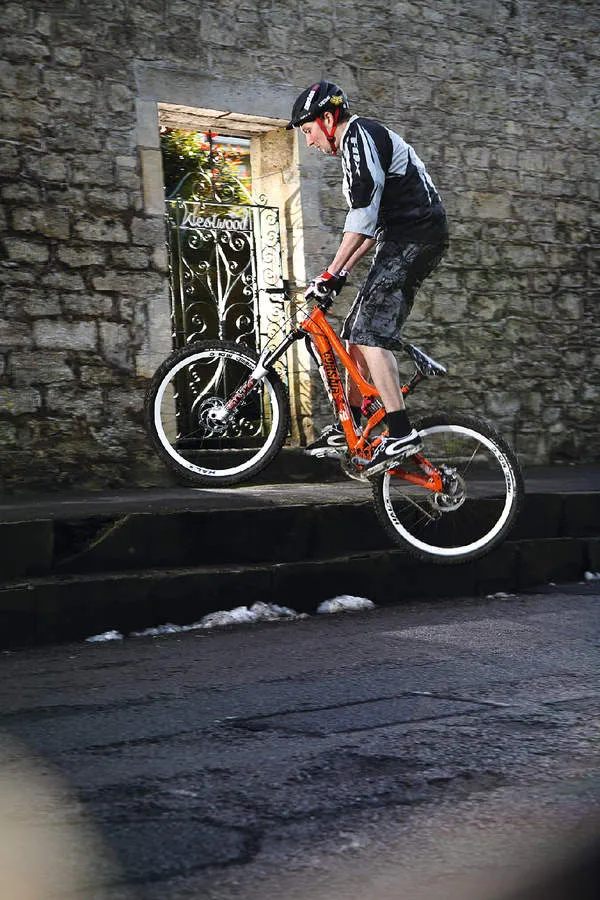
Riding steps
In the urban jungle stairs make a great substitute for roots so try to practise on as many as possible. Stairs generally have square edges that attract pinch punctures, so make sure you’re running fairly hard tyre pressures before you give this a go.
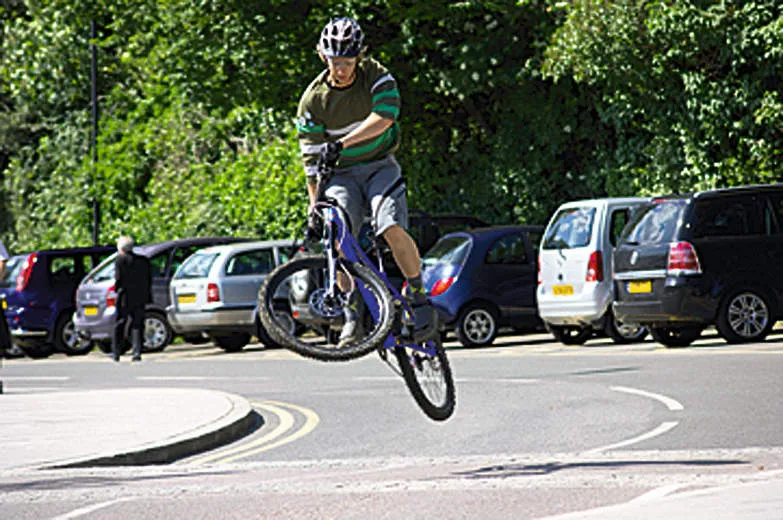
Speed bumps
To practise your distance judging, go and find some decent-sized speed bumps. Treat them as doubles or tabletops and jump them. There’s an ever-increasing number of them around town centres now, so you shouldn’t find it too hard to locate some to jump.
Big kerbs
You can find some pretty cool stuff to jump off if you’re prepared to look for it on your way to work. Big kerbs can feel like drop-offs when you simply pull-up off them, but hit them flat-out and you’ll meet the ground a lot smoother.
Unweighting
This is something that will help you when you ride on roots and wet rock. It’s easy to practise in an urban setting on drain covers and that shiny black stuff used to join tarmac. These have the grip of ice when wet so go as light as possible when you roll over them.
Cornering
If you’re weak at cornering seek out the twisty back roads on your commute or just outside your work. Practising these regularly will help get your cornering sorted ready for when you next tackle those switchbacks on the trail! Mix up fast, slow and tight turns.
Skinnies
Getting your head round these obstacles when out on the trail is a big deal. But they’re dead easy to practise anywhere. Try zipping along a straight kerb to boost your confidence. Curved kerbs are perfect for getting used to where your rear wheel is on the obstacle.
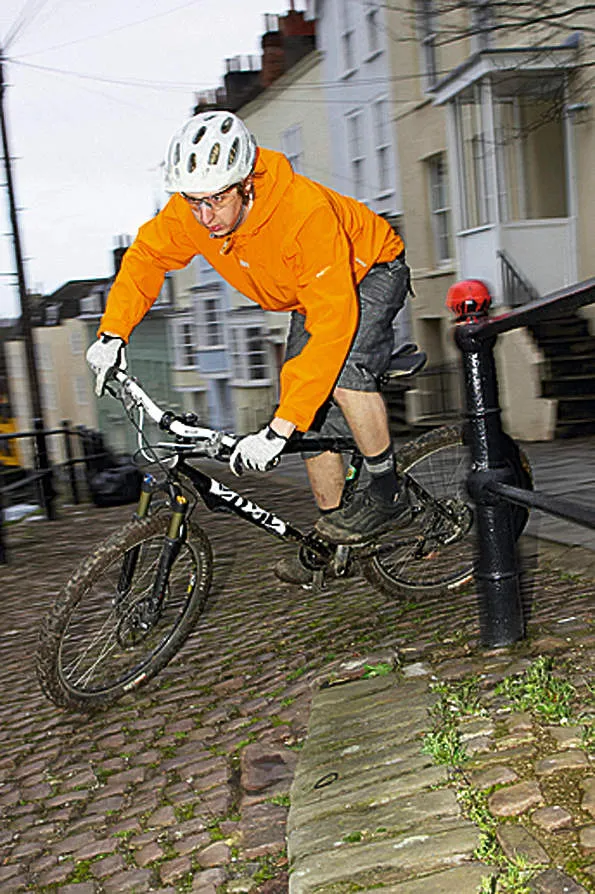
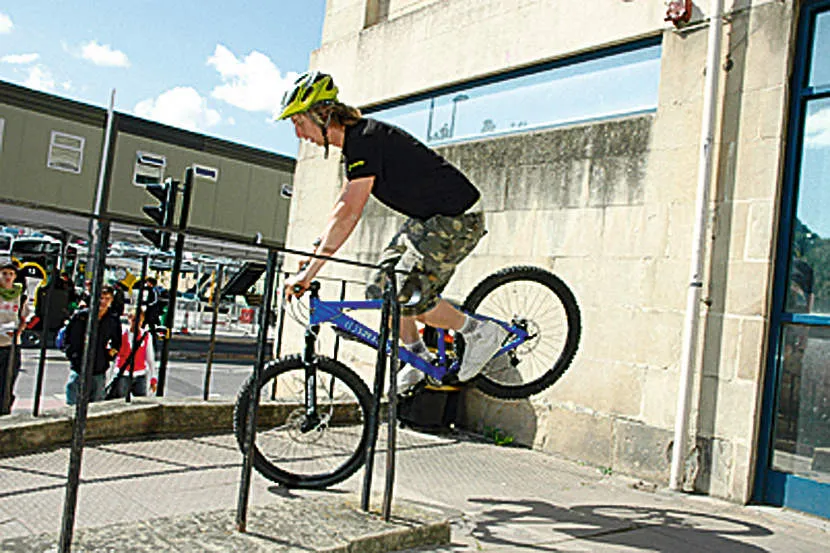
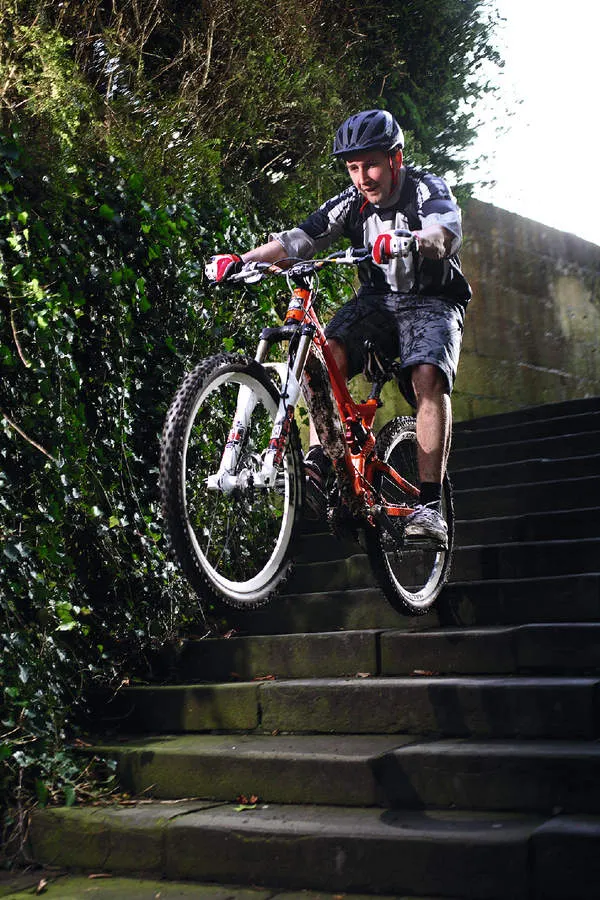
Wheelie drops
Find yourself a small flight of stairs outside your work, college, home, wherever. Start practising your wheelie drops safe in the knowledge that you can ride them out if it goes wrong and you end up dropping the front wheel by mistake.
Endo turn
Squeeze the front brake and bring your weight over the front of the bike. Use your hips to initiate rear end movement. With the rear end off the ground, release pressure on the brake to keep the front wheel rolling. Release completely when nearing the point of exit.
Got those dialled? Then try these...
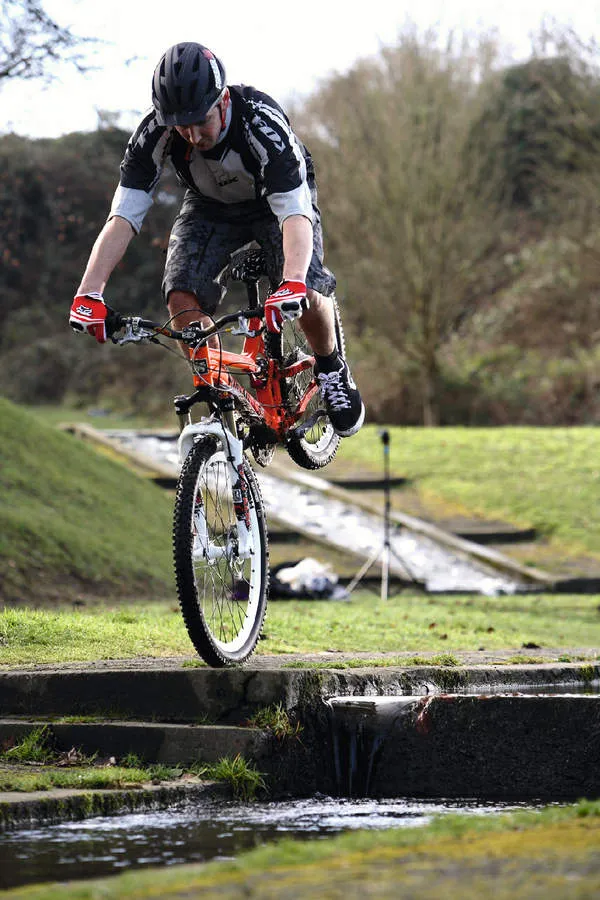
Drop-offs
Start small and work up. The basic drop-off technique is to approach at a medium speed, pedals level, freewheeling, good foot forward. As you near the drop compress your forks a little while shifting your weight back all in one motion – almost a small manual off the edge. Aim to keep the bike level by shifting your weight forwards or backwards and pulling up or relaxing with your arms.
Try to land both wheels together and match the transition you are landing in. Absorb the landing using your arms and legs. Try adding tricks once you’ve nailed it, to spice it up a little.
Front wheel touch-ups
Start this technique on something small like a kerb. To go up something higher is the same technique but with more explosive movement.
Approach the object, freewheeling, good foot forward. Focus on the top of the object. As you near it shift your weight back while lifting the front wheel high on to the object as close to the edge as you can. Shift your weight quickly on to the front wheel while scooping the back end up with your feet. Keep your weight slightly towards the front to lessen the chances of damaging your rear wheel.
Wall blunt
Approach the wall at enough speed to place your rear wheel on it, pedals level, freewheeling, good foot forward. The technique is similar to the bunnyhop but with more focus on pulling the bars into your chest, pushing your weight back and placing the back wheel onto the edge of the object with your rear brake locked on. As soon as your wheels make contact use the rebound of your bike to fire you backwards off the object. Land, pedal backwards and turn out of the rollback and pedal away.
Stair manual
This appears quite daunting but is actually easier the faster you approach, with your pedals level and good foot forward. As you’re about a foot away from the start of the steps lean back into the manual position, cover your rear brake and give the front wheel a good pull up. Manual the steps and ride away. Start on small sets and work up. Remember your rear brake will save you if it all gets out of shape.
Stoppies
Approach the stoppy at a medium/fast speed, weight centered. As you pull the front brake, shift your weight forward and lock your arms straight. Keep your weight over the front wheel, try to stay balanced, rolling on your front wheel as long as possible by scrubbing your front brake on and off. Try different speeds and balance points. If it all goes wrong keep hold of the front brake if you’re going over the bars – it will save on the dentist bill!
Fakies
Find a small grass bank or similar. Approach at walking pace. As you near the top of the bank give the front brake a squeeze while shifting your weight forward. Do a small endo, let the bike return to both wheels and release your brakes. You will feel the bike wants to go backwards. Let it go.
Control the backwards speed by putting weight on your cranks while pedalling backwards. Look to turn the front wheel out in a smooth arc with your weight over the back of the bike to return to riding out forwards.
So there you have it. Basic skills can be dialled anywhere, any time so there is no excuse for not learning them. Instead of watching EastEnders get over the road and dial in those bunny hops and wallrides. Take it in small steps, link it all together and see what you get. You’ll be ruling the trails and leaving your mates green with envy in no time.