

So you’re back for more! Or maybe you didn’t catch part one last week? Either way, this is your one-stop-shop for improving your skills and your fun out on the trails.
It can take years to improve from car park novice to trail centre boss, unless you get a little help along the way. Hopefully I can save you a bit of time and pain by passing on some useful tips that will see you smiling at the front of the bike wash queue rather than sitting licking your wounds at the back!
With a few tips and tricks up your sleeve, you’ll be surprised how much more fun you can have out on the trails, carrying speed through rocky sections, braking more effectively and putting you in the driver’s seat for real.
The difference between passenger and pilot means having a lot more fun and many of the techniques aren’t all that difficult to pick up. It basically comes down to knowing how to make those improvements and putting in a little practice on the trails.
So read on and give these tips a try, be the envy of your mates out on the trail, then pass on ‘your’ skills back at the cafe and another perfect weekend will be complete!
Un-weighting the bike
Some forms of cycling allow us to be lazy, almost becoming just the engine rather than the bike rider. Off-road, this just doesn’t cut it. A mountain bike rider needs to be lively. Like a boxer dancing on his feet, you need to be constantly moving around on the bike, shifting your weight in all directions – and that includes up and down, the two directions novice riders often forget about the second they get on a bike.
Park your bike and jump up and down on the spot. Notice how your body becomes light then heavy? This is what you need to do at times on the pedals to carry the bike along when you’re riding. It’s the beginnings of how to bunnyhop the bike and the first step to becoming a much better rider.
Okay, get back on the bike and find yourself a rough spot. As you approach it squat down slightly over the bike, then just as you get to the rough patch stand up on the pedals, like you’re jumping up – this will un-weight the bike enough to help it rattle through the rough stuff and not slow you down or give you a rodeo ride! Make this a lively motion rather than just squat lifting your body weight on the pedals because this will have the exact opposite effect to what you’re after.
Pre-jumping and pumping
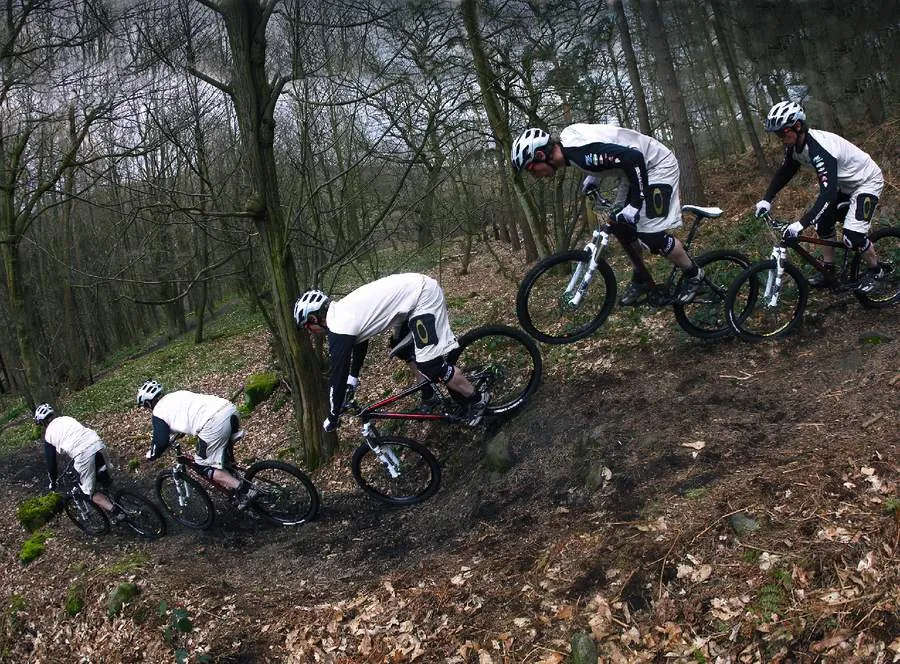
Pre-jumping a big mound or the top of a drop allows you to keep your wheels on the ground and the bike in control as you go down the face of it. The bike will naturally want to take off, which may be a bad thing if you need to slow down or turn straight after. Again, it’s all about weighting and un-weighting yourself on the bike to get it to go where you want at the right time – working with or against gravity.
As you come to the top of a drop in the trail you need to hop the bike enough so that you can land it into the very top of the downside – this is effectively making the bike go in the air early, so now you’re on the ground pushing down through the pedals and in control looking ahead.
The next step as you come to the bottom of the drop is to pump the bike through the transition back to flat. This gives you a boost of speed without having to pedal, a technique used by BMX, 4X and downhill riders all the time.
To do this you need to bend your arms and legs then push forward slightly with them at the same time, so as the back wheel rolls out of the drop you get a boost forwards.
This can take a fair bit of practice and is easiest to learn at a BMX track or similar, where you can repeat the motion over and over again until it clicks.
Loading the bike
Gravity is pushing you down on the bike but sometimes you need to exaggerate that to give yourself a little more grip, like in cornering for example. Loading the bike is a term used to force the bike down into the ground, pushing the tyres hard into the floor.
As you approach the corner at speed you need to slightly un-weight yourself on the bike. Imagine standing up fast from a chair – this motion coming out of the seat and light on the pedals will then be reversed as you hit the apex of the turn, bringing your weight back down heavily through the outside pedal with your body centred over the bottom bracket.
On a full-suspension bike this will cause the forks and shock to almost fully compress, ‘loading' the bike and lowering your centre of gravity, again increasing your grip and helping you speed through the turn.
This method works the same on a hardtail bike but may take more time to master, as it may not hold the ground as well on loose or bumpy corners. Practice and good technique are key.
Squashing jumps
No doubt many of you will have come across those little jumps at trail centres that can buck you down the trail nose heavy, into a flat landing, leaving you a bit out of shape. Okay, a lot out of shape! Well, the best way to avoid this is to ride like a mogul skier going down a fast descent and soaking up the jumps.
If you’re not sure what a mogul is, check it out on Wikipedia. Allow the bike to come up underneath you, bending your arms and legs at the same time. Don’t keep your body rigid, but soak up the motion of the bike trying to take off.
As you come to the jump, bend your arms and legs then stand up tall on the bike. As the bike starts to go up the jump, allow your arms and legs to bend again, letting the bike move up but almost keeping your head at the same level. Now as the front wheel passes the lip, push the bike down again into the floor by straightening out first your arms, then your legs.
If you’re getting this right, your arms are moving up and down in time with the bike and your head will stay at a fairly constant level as you pass over the hump or jump.
Changing lanes at speed using a side-hop (getting out of ruts, etc)
Sometimes you choose a rut or a line that turns into the roughest ride further down the trail. Being able to switch to the fastest or smoothest line is the best way out of this. For example, if you’re stuck in a muddy rut and there’s a pile of rocks ahead, you need to switch lanes ASAP. The good old bunnyhop is the way out but instead of just doing it forwards, you need to add in a sideways motion as well to transfer you across.
Just at the instant you want to make the move, you need to lean the bike over to the direction you want to go and steer the bike slightly that way. If you do all this as you’re weighting the bike ready for the hop, you will already be on your way.
Then as you pull up on the bars the whole bike begins to move sideways. At this point you need to shift your weight back over to the other side of the bike so as you land you regain your balance and control, hopefully in the good rut, not the ditch at the side of the trail!
As with all the skills here, practice is the key to being able to do this accurately at all speeds and distances, which will save you time and increase your smile out on the ride.
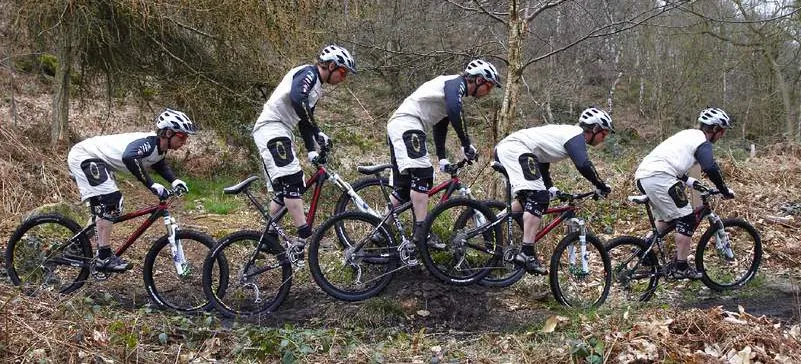
Power wheelies to avoid catching pedals
Sometimes you need to keep momentum or accelerate, out of a turn for example, but the ground is littered with rocks, roots or both. If you pedal here you risk smacking a pedal and coming to a halt or worse, getting chucked over the bars. To avoid this you need to lift the pedals up above the rocks.
Getting the front wheel in the air lifts the bottom bracket height, usually enough to clear the trail debris even with your pedal on the downward stroke. So in simple terms, pop a wheelie and pedal!
As you approach the section of trail and begin to loose speed, look ahead, shift your weight to the back of your seat and use the downward stroke of your leading pedal, combined with pulling up and back on the bars, to lift your bike into a wheelie. Often if you can manage a full rotation of the pedals with the wheel in the air that will be enough to carry you through the rough spot or help power you out of the turn.
Once you’ve mastered this you’ll probably end up powering out of even smooth turns in this way – just try to avoid making motorbike noises!
Manualing through hazards (puddles, etc)
Have you ever come to a muddy spot or puddle and ridden straight into it, only to get bucked straight over the bars, or at best come to a halt with your err, privates ‘resting’ on the stem?
This usually happens because mud and puddles slow you down and if you’re not prepared, suddenly slowing shifts your weight forward. This can compress the suspension, throwing you even further forward, putting all your weight on the front wheel. The bike digs in and pitches you off or maybe just sends you off in the wrong direction with a big wiggle on.
To avoid this I find it’s best to take that front wheel and doubt right out of the equation. If you get the front wheel in the air and all your weight through the back wheel, it should keep you going straight and safe through the hazard. Unless it’s a peat bog, in which case you’ll be up to your neck in it and probably have at least one of your mates on top of you for good measure!
The word manual may have you thinking of guys coasting on for miles on their back wheel. All you need on the trail is enough lift to clear the puddle of mud, usually a bike length or so. As you ride towards it, bend your arms and legs then pull up and back on the bars, and straighten out your legs while pushing slightly forwards with them – not too much or you’ll be off the back, not too little or the front wheel will land heavily in the mud, making things even worse.
Good timing and practice somewhere safe are again key – that way you know just how far you can manual at different speeds. A little speed and courage can go a long way here.
Braking ‘pools’ of safety
When the going is slippery or very rocky and loose, it’s difficult to get the bike to slow down effectively on descents. A common error is to squeeze the levers until they put a dent in your bars, scream and lock up both wheels, putting your bike into a slide, which will probably speed up rather than slow down. We’ve all been there.
The solution is to choose your braking times wisely and not to get in a panic. If the wheels lock up, release the brakes a little and allow the tyres to regain grip before reapplying a little pressure on the brakes – a bit like ABS on a car but in slow motion.
On rocky descents it’s important to look well ahead. This way you can navigate a safe way through and scope out those little flat areas or smooth spots – just enough space for a wheel to do some effective braking and slow you to a speed that you’re comfortable with. So, weight back (the amount depending on the severity of the slope) and with your eyes forward, head for those braking ‘pools of safety’ to keep you in complete control.