

Freeride pro Chris Smith gets paid to put two wheels in places they have no right to be. Behind these extraordinary feats are ordinary techniques that thousands of riders use every day … just stepped up a notch or two. Whatever your riding style or preferred terrain, here’s how to supersize your riding.
Whether it’s tumbling down a near-vertical rock face or staying airborne over a jump long enough to pull off a feat of acrobatics, moves like these are crowd-pleasers – they look impressive, they stick two fingers up at the laws of physics and they help riders like Chris earn their crust.
You're probably already happily railing berms, riding off dubious drops, jumps, onto walls and respectable roll-ins. It's now just a question of going larger.
Successful execution would not be possible without some crucial perusal preparation first, and careful selection of your weapon of choice.
Tools for the job
You can pull basic moves on just about any bike, but as the size of your attempts increase it pays to have the right gear for the job.
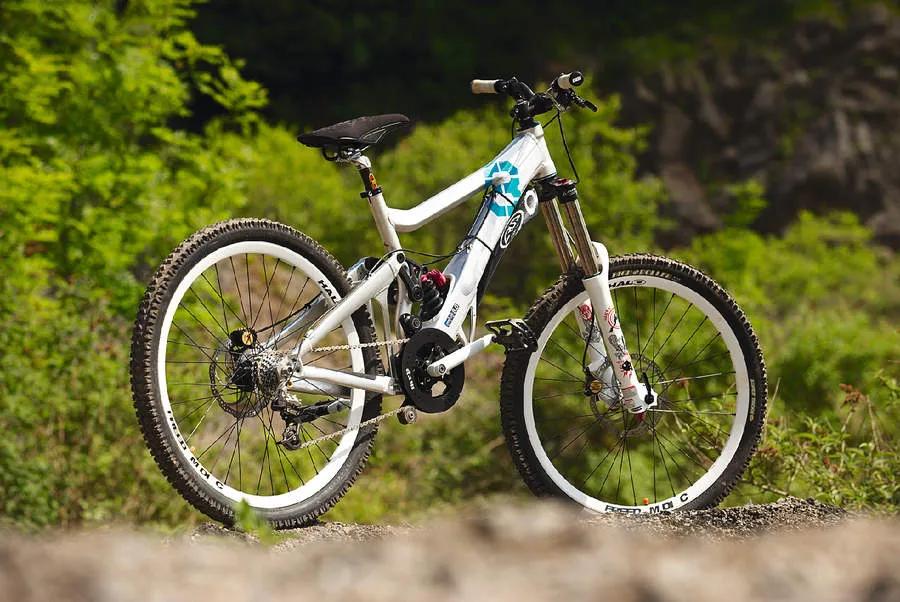
For drops and roll-ins: A full-suspension rig with at least 6in of travel and a slackish head angle will keep your wheels planted on the ground and pointing in the right direction.
Invest in the strongest contact points that you can afford that you can afford: Bars, stem, pedals, cranks. It also helps to run thicker-walled tyres to reduce the risk of pinch flats.
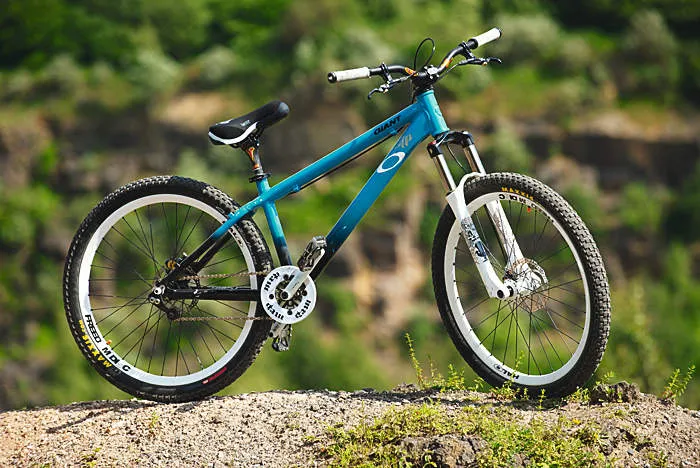
For wallrides and jumps: Best tackled with a hardtail – run the fork stiff and the tyres hard to keep that ‘connected’ feel. A big saddle helps with tricks by giving plenty of area for your knees to grip, while running the chain a bit over-tight will prevent the cranks from spinning mid-jump.
Suit up suitably: Don’t forget your own set-up, either. On a big bike, go for full face helmets and body armour whenever possible. A pisspot helmet and kneepads should be the bare minimum you wear on a hardtail.
Drops and looking before you leap
The bigger you’re riding, the more important it is to check everything carefully before you go for it flat out. While good riding skills will get you over some unexpected jumps, down pretty large roll-ins and off fairly sizeable drops without snapping limbs, any time you’re planning to push yourself to the limit it pays to check the lie of the land first.
So, get off the bike and check the run-in and run-out for obstacles, loose rocks or stray lamp posts. Clear anything that looks particularly problematic, making sure you’re not lobbing rocks onto the heads of unsuspecting riders down below. Happy now? Have a final check, visualise your line and go for it.
The bare essentials for riding drops
1. Prepare for launch
Pick a middle gear, so that you can put a final jab in to lift the front wheel at the last moment if you have to. Pedal in at a speed appropriate to the distance you need to clear – remember that judging this comes with practice.
2. Lift off!
As the front wheel leaves the ground, pull the handlebars up and shift your weight back to keep the bike level. If you’ve rolled in too slowly, this is the point at which you can correct it by putting in an extra pedal stroke to lift the front of the bike.
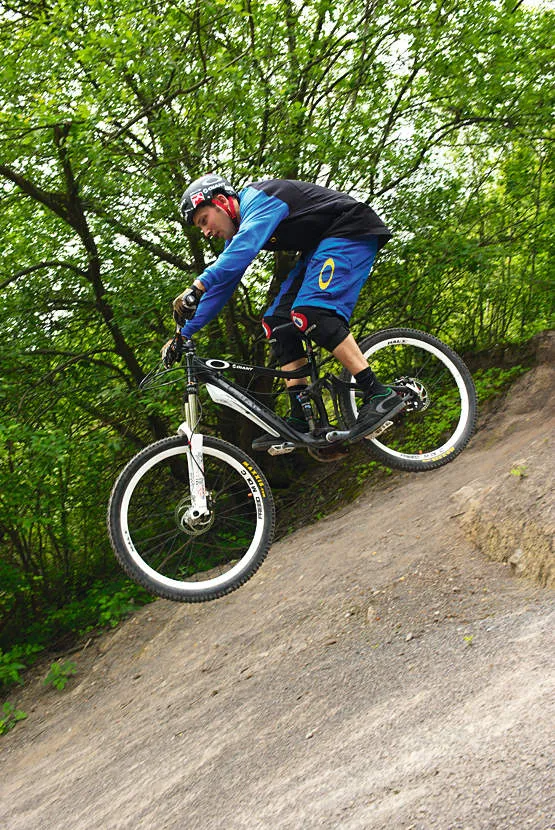
3. Touch down
Once you’re airborne you can let the front drop to match the angle of the downslope. For flat landings, you’ll need to pull up on the bars a lot harder as you leave the lip. Try to hit the run-out with both wheels at the same time, absorbing the impact by bending your elbows and knees.
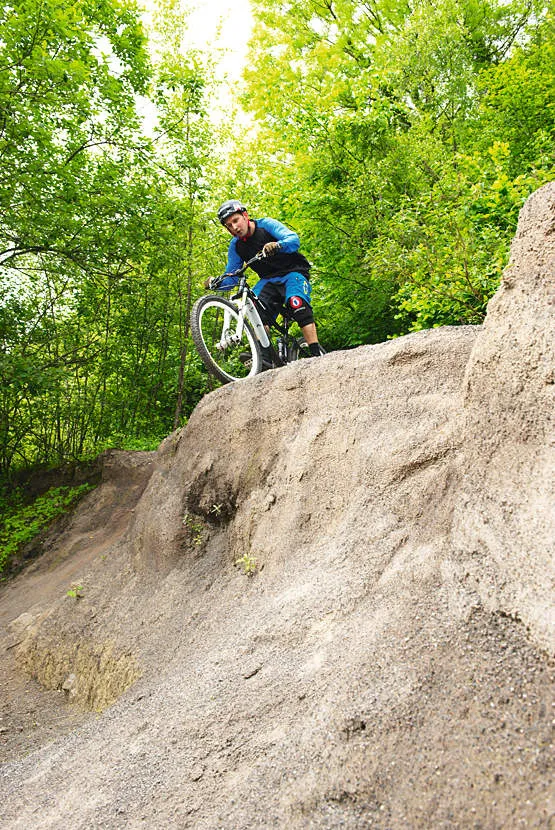
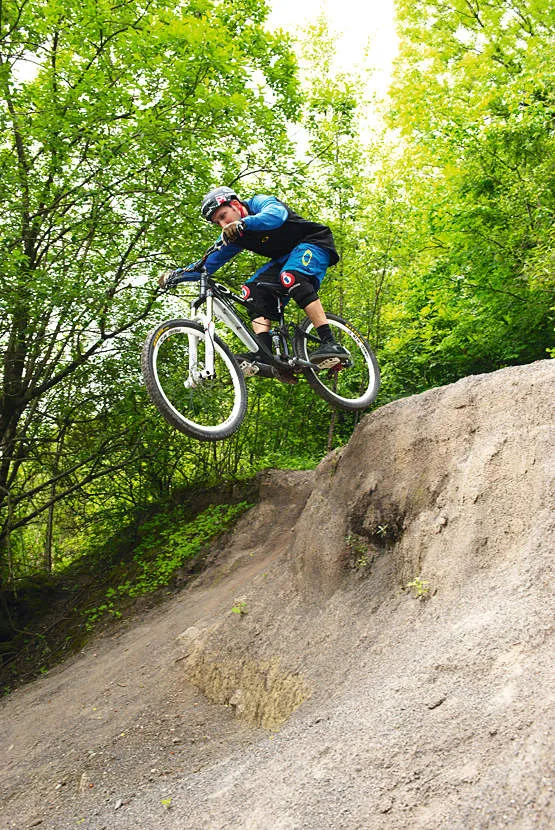
Go large: How to move your drops technique up a level
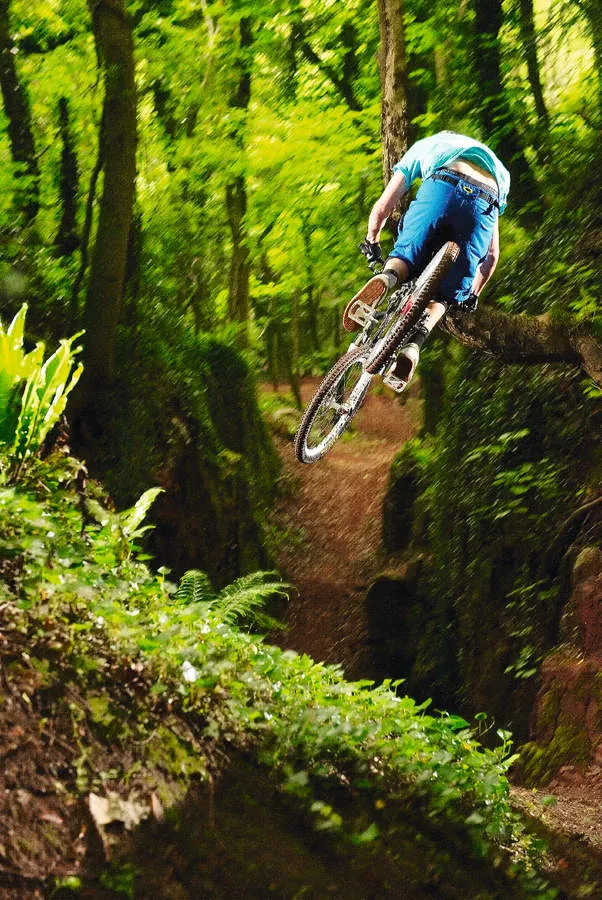
This ladder drop into a downslope between two rock walls isn’t huge in freeride terms. But the narrow approach between two trees and the need to turn into the landing or risk heading straight for the wall, makes it tricky to pull off. Chris clears it on the first attempt, adding a dose of style with a whip.
Most riders’ natural instinct is to lift the front wheel high for big drops, but if you overdo the lift you’ll land heavily on the rear wheel, bottom the suspension out and whip the front down too hard. It’s far better to keep the wheels parallel to your landing.
Don’t set your rebound up too fast and add in a bit of preload for the bigger drops. It’s a fine balance between bogging yourself down with lots of rebound damping and bouncing yourself over the bars.
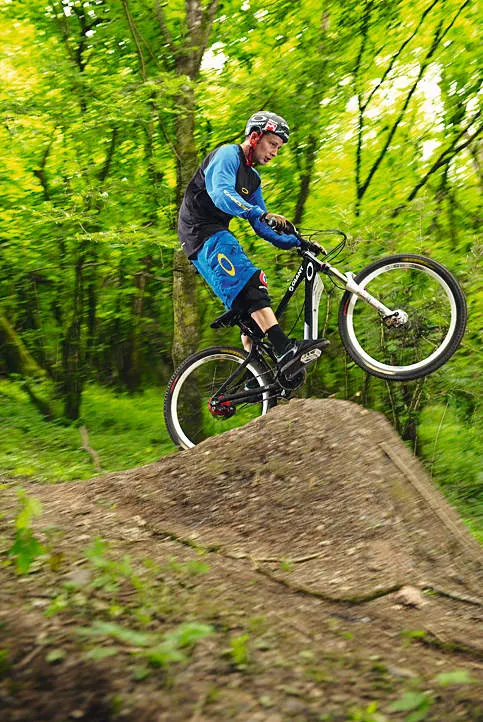
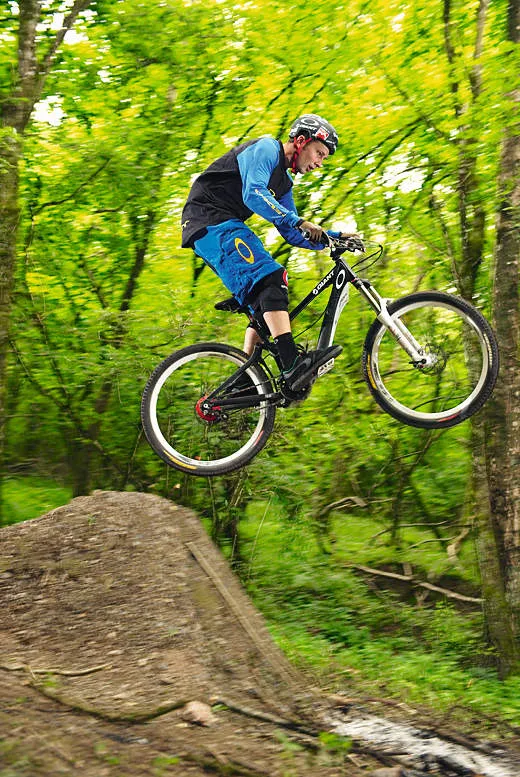
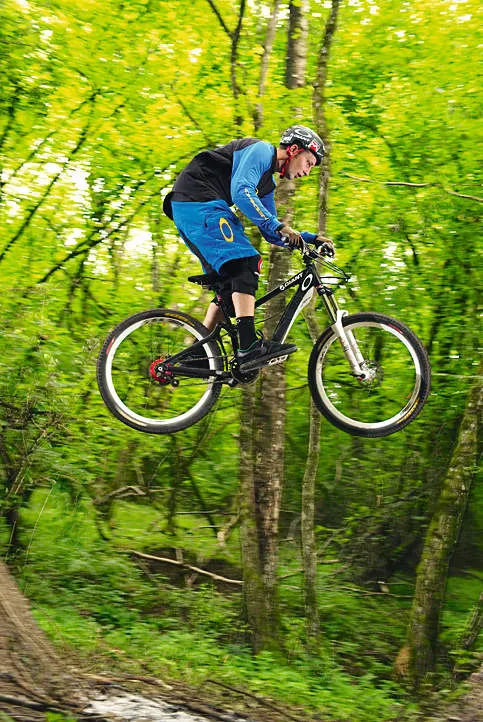
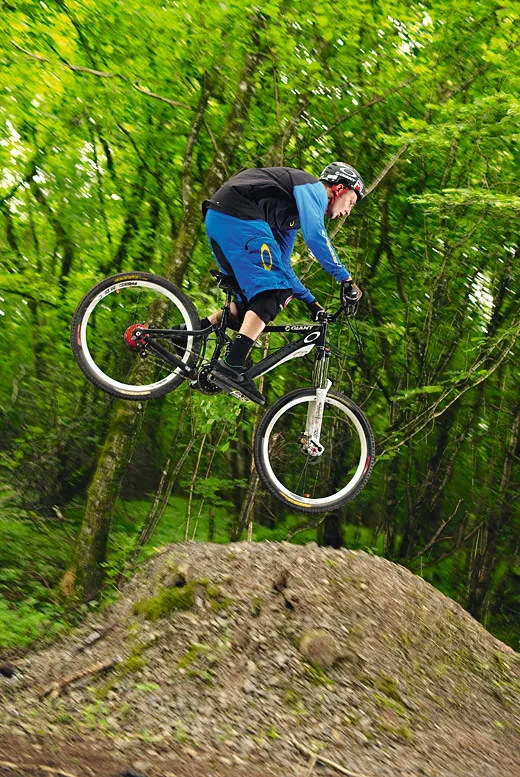
Jumps
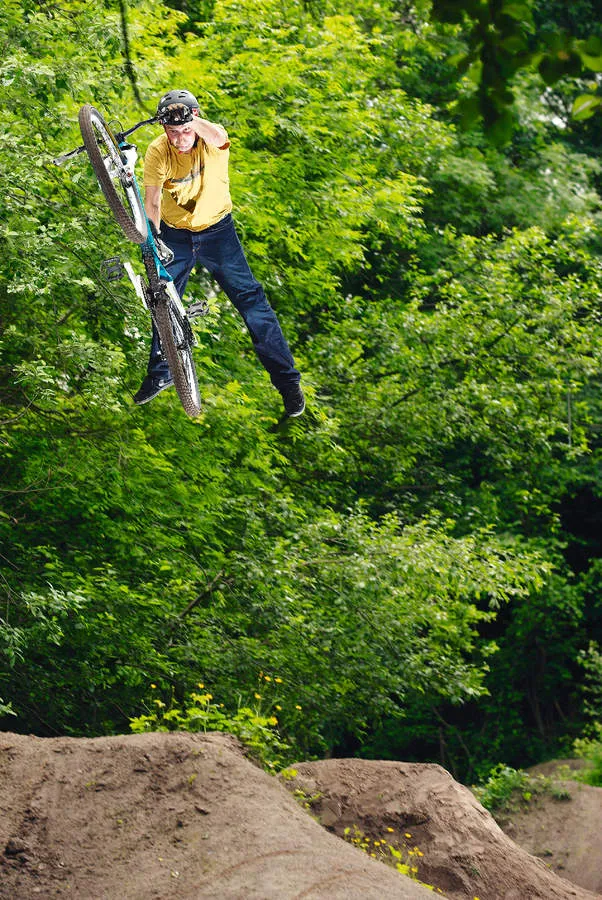
No one actually needs to perform a mini circus act mid-jump, but it’s certainly entertaining. Height, distance, time in the air and impeccable coordination are all essential ingredients for a successful trick.
Here, Chris demonstrates a textbook superman seatgrab, reaching full extension with his legs for a split second before landing smoothly.
The bare essentials for jumps
1. Prepare for take-off
Build up some speed, but don’t pedal all the way into the ramp. You need to be coasting with your pedals level, hovering over the saddle with your elbows and knees relaxed.
2. Pump it up
Pump the bike with your arms and legs into the bottom of the ramp. Then, just as you hit the lip, spring upwards by straightening your arms and legs. This lifts the bike, using the combination of your forward momentum and the upward slope of the ramp to get you airborne.
3. Air traffic control
Keep things straight and level in the air – shift your weight forward or back if necessary.
4. Cleared for landing
Rear wheel-first landings are relatively safe, but the smoothest way back to earth is to touch both wheels down at the same time. As you come in to land, push or pull on the bars to match the bike with the angle of the landing slope.
Go large: How to move your jump technique up a level
As you spend more time in the air you can borrow a tip from motocross. If you find yourself approaching the landing with the front wheel too high, a quick dab on the rear brake will correct it. Don’t overdo it, though, or you’ll end up coming in front wheel first…
Style is something that comes naturally. The more you jump, the more you’ll improve. If you practice regularly, before you know it you’ll be styling it up like the pros.
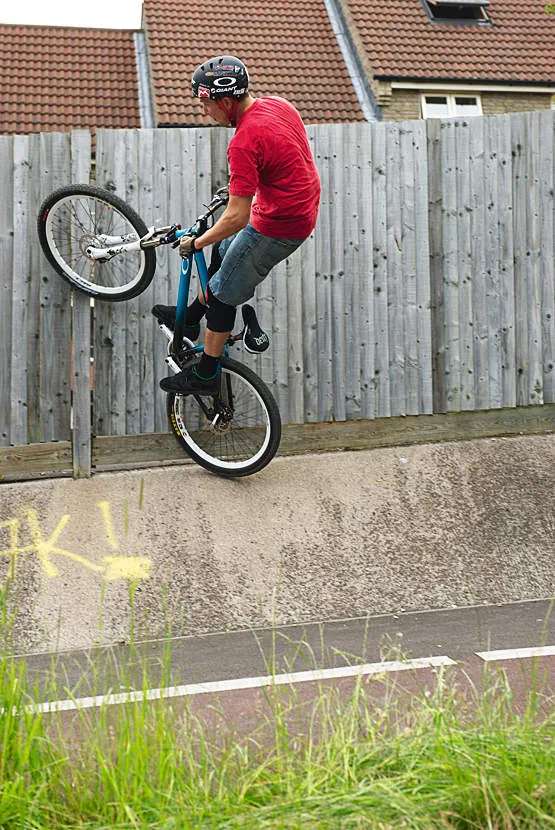
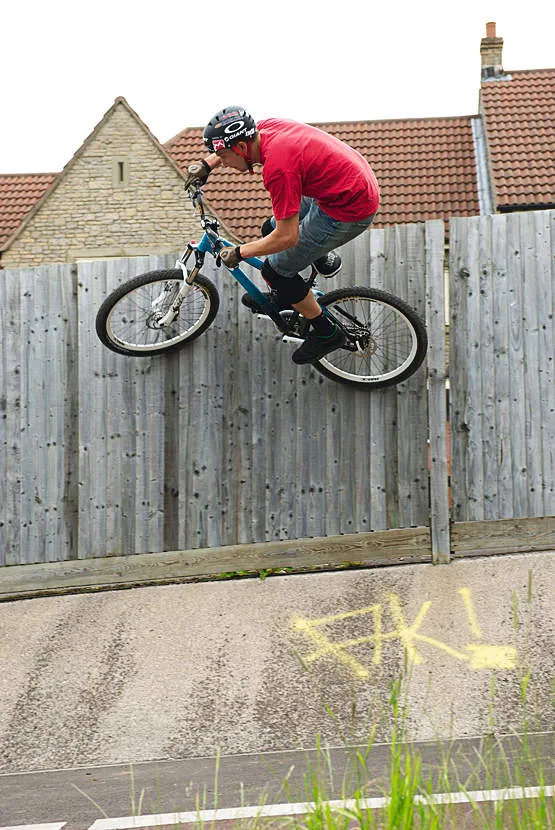
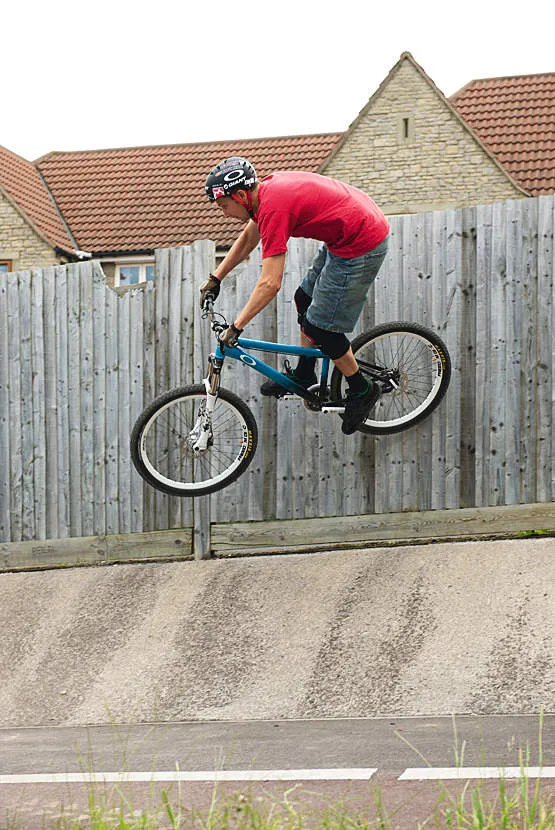
Wallrides
Wall riding doubles as a showboating party trick and a useful way to turn a trail feature into a natural berm.
Chris goes for the first approach here, using a purpose-built dirt ramp to launch high onto a nearly vertical rock face and staying high for as long as possible before turning and dropping out.
The bare essentials for wallriding
1. Line it up
Approach the wall at a fair speed. Right-footed riders will tend to find wallrides on the right easier and vice versa for left-footers.
2. Kick it
Use the kick of the take-off to get you up onto the wall, laying the bike over so that the tyres make contact with the wall at around 45 degrees. The speed you carry through at this point is crucial, so if you find yourself sliding down the wall it’s probably because you’re rolling too slow or the bike’s not tilted over enough.
Steer a course along the wall and be aware that, depending on your take-off, you may need to turn quite sharply into it to begin with.
3. Get outta there
Eye up the run-out, lining it up as though you’re riding a drop. Land both wheels together if there’s a sloping transition, or your rear wheel first if it’s a flat landing.
Go large: How to move your wallride technique up a level
With a bigger wall you’ll need a bigger kicker, more speed and more commitment. More of everything, in other words…
To build the height and length of your wallrides, find a flat wall and build a take-off ramp as high as you feel comfortable with. Chances are you’ll need a landing ramp as well, although you may luck out and find a wallride that comes with one already.
If you’re feeling really fly you can pull a trick onto or off the wall, but you’ll need to have the basic wallride technique dialled first. Barspin on and barspin off, anyone?
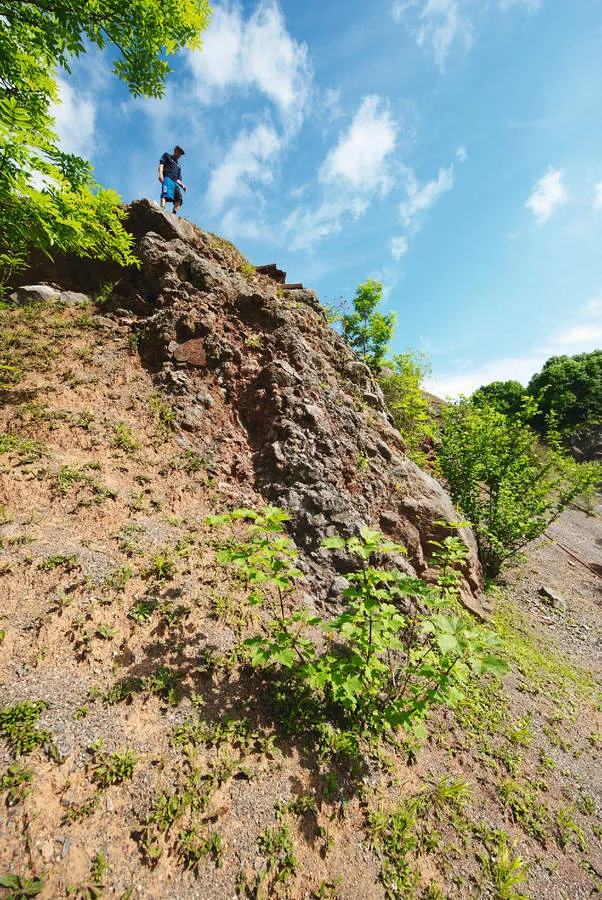
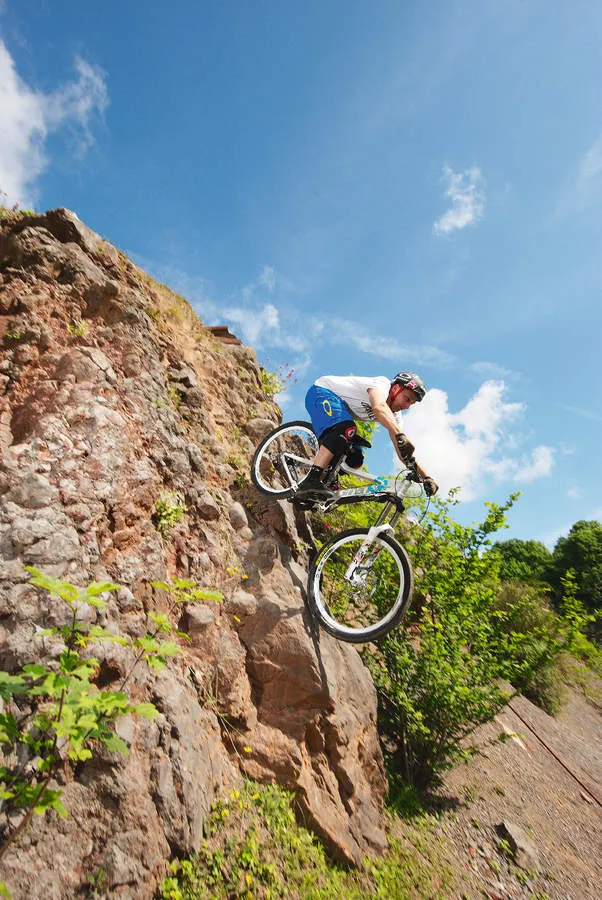
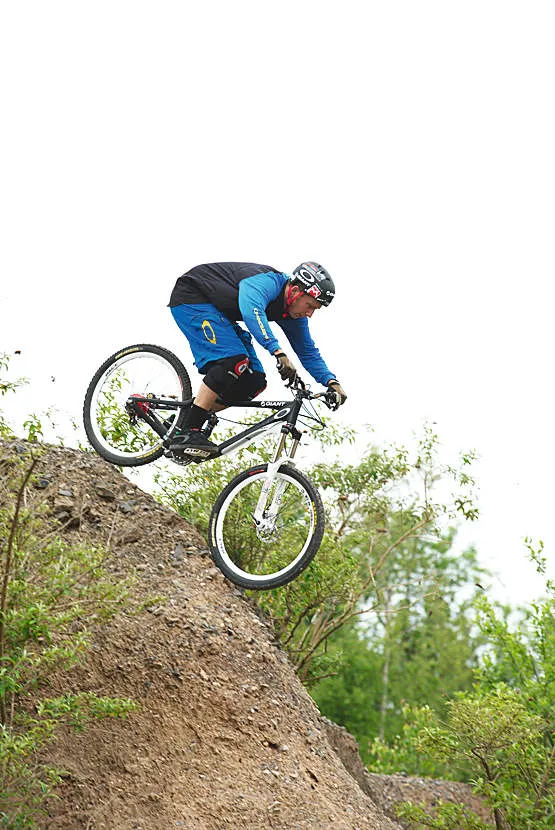
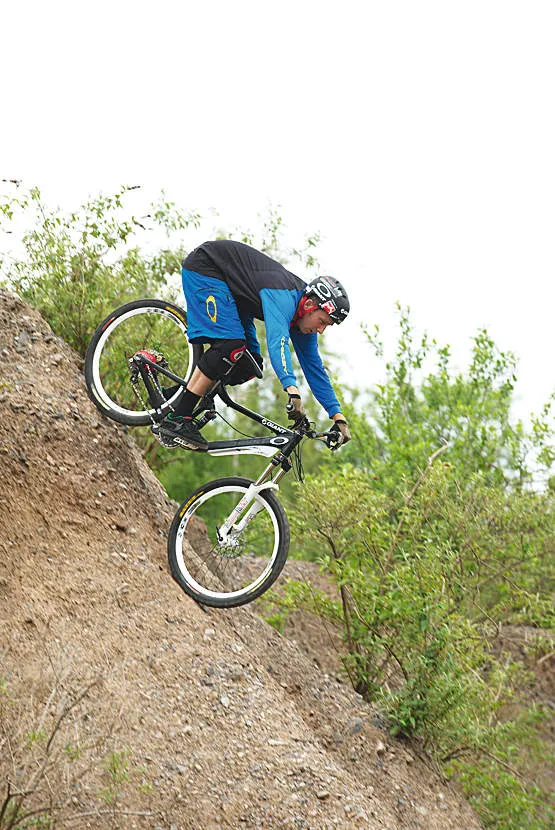
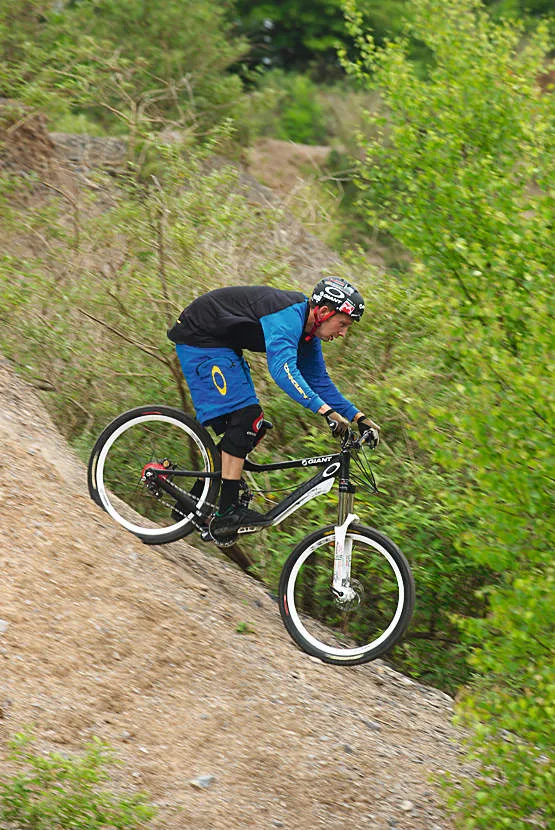
Roll-ins
Faced with a roll-in that’s too steep to walk down, you could find another route, or you could just go for it. This rocky ridge combines hardpacked dirt and gravel with random rocks jutting out from the surface. It also throws in a loose, off-camber run-out for good measure. By staying relaxed and focused, Chris makes it look easy.
The bare essentials for riding roll-ins
1. Keep your weight back
As you roll over the edge, straighten your arms and push the bars away from you, sliding your weight over the back of the saddle. Keeping your weight low and towards the rear of the bike, shift your centre of gravity behind the front wheel to prevent an unscheduled trip over the bars.
2. Lay off the anchors
Anything more than gentle feathering on the brakes is more likely to get you into trouble than out of it – a handful of front braking will dump you over the bars and the rear will just lock up. Oh, and keep those pedals level.
3. Reaching the end
As you approach the bottom of the drop your speed will have picked up and everything comes down to remaining smooth and confident. As the ground levels out, move your weight back and forward over the bike (being careful with those baggy shorts), keep looking ahead and just ride away.
Go large: How to move your roll-ins technique up a level
It’s important to check everything out before you ride it, but don’t stare over the edge for too long – it’ll just freak you out.
For large stuff it really helps to have a long travel on your bike – the bigger the better. It’s not just the springs that give you an edge, but the slack head angle as well. Running soft suspension and tyres really helps to keep things rolling and your wheels on the ground.
Riding large roll-ins is all about line choice. Visualise your line first, then focus on the exit…