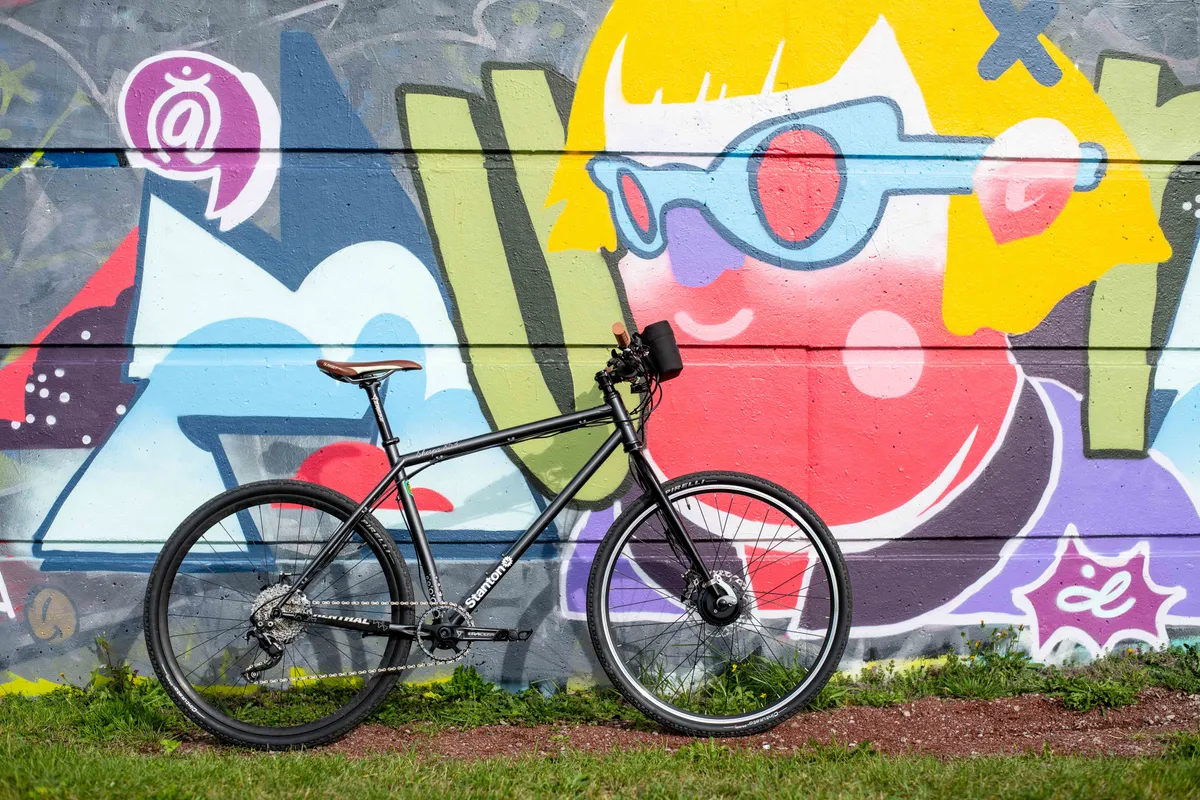
If you’ve got an old mountain bike or frame sitting unloved in the shed, then it could provide the perfect base to create a super-commuter build.
With a few carefully chosen components, you can breathe new life into a bike otherwise consigned to gathering dust.
And that's exactly what we've done here, converting an old hardtail into a well-thought-out commuting bike for the ride to work.
1. Frame
Let's start with the frame.
You can convert any hardtail into a decent commuting bike, although the older it is, the more issues you may encounter due to outdated ‘standards’.
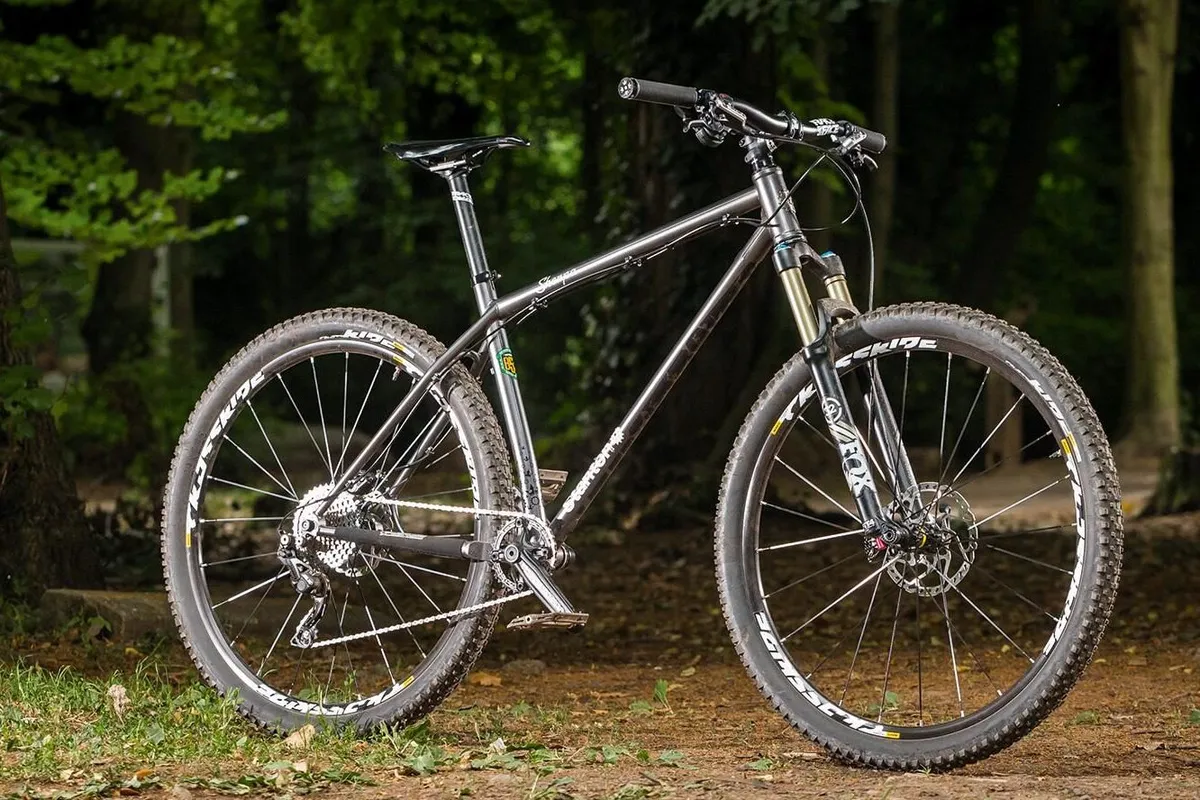
We've used a Stanton Sherpa 853 29er as the basis for this build.
Originally reviewed on BikeRadar in 2016, it's still a perfectly good frame but, with its non-Boost hub spacing, quick-release dropouts, lack of internal dropper post routing and relatively short reach, is no longer primed for trail duties.
Before planning your build, you’ll need to check whether your frame’s head tube is sized for a tapered- or straight-steerer fork and what rear-axle standard it requires (QR or bolt-through, Boost or non-Boost).
2. Fork
There’s no need for front suspension on most commutes. Instead, a rigid fork will save weight and require zero maintenance.
If it has a slightly shorter axle-to-crown height than the fork originally fitted to your frame (taking sag into account), it’ll steepen up the geometry a tad – no bad thing for road climbs – without lowering the bottom bracket too much.
Most steel forks, like this one from Identiti, have straight steerer tubes, so will require a new lower headset cup or a crown race adaptor to fit into modern frames. If you have the money, the likes of Kinesis, Ritchey and ENVE offer tapered carbon fibre models.
At the more affordable end of the market, Carbon Cycles offers tapered eXotic forks in alloy or carbon, starting from under £100.
- Fork: Identiti XC fork
3. Drivetrain and brakes
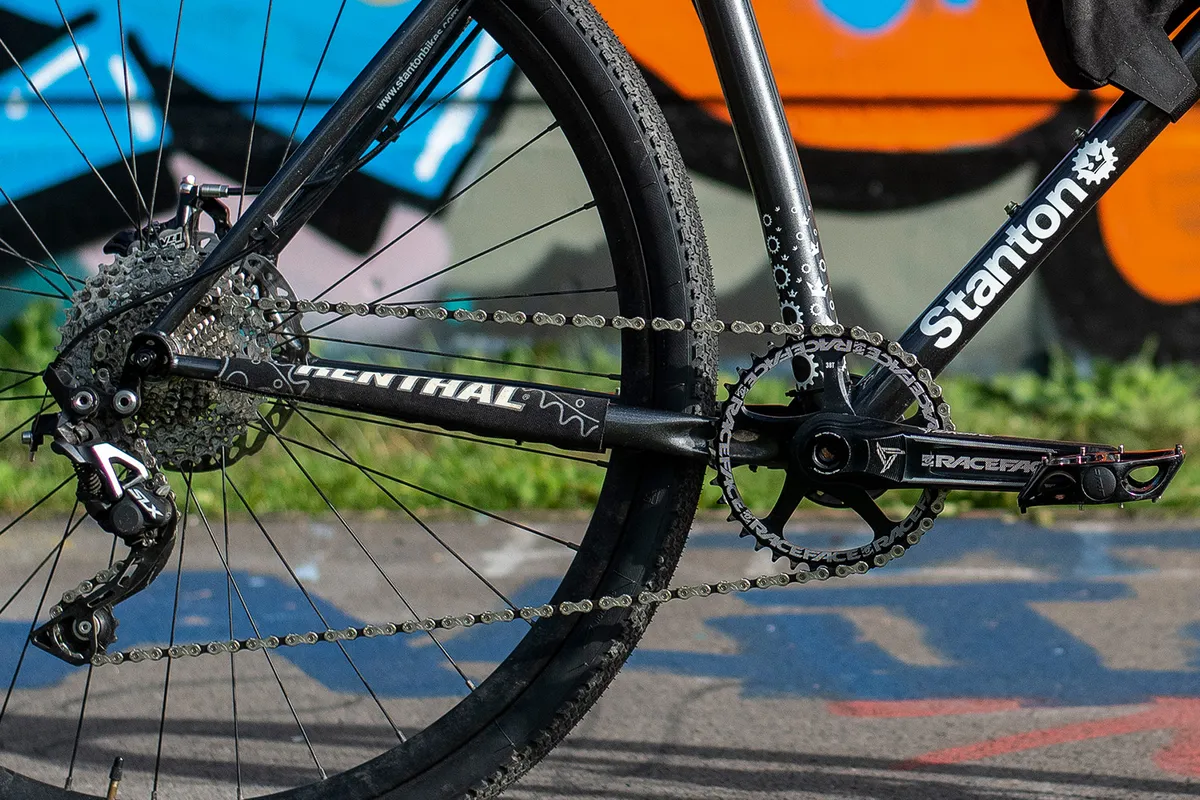
The beauty of a build like this is that you can use up old bits you’ve got going spare – in this case, a 10-speed Shimano transmission and some Hope stoppers.
Unless they're worn out and need replacing, the current bits on your bike should be up to the job. MTB brakes and gears will work fine for commuting, although you’ll probably want to fit a bigger chainring.
Flat pedals are a good choice for a bike that’s going to be a general runaround, with clip-in pedals a better bet for longer commutes.
- Chainring: Race Face Narrow/Wide chainring, 38t
4. Finishing kit
As for finishing kit, a rigid seatpost will suffice, and requires less maintenance than a dropper, so no change is required here.
Any old handlebar is fine, but consider trimming it for weaving through traffic. You may want a longer stem than usual to slow the handling, with most commutes having higher speeds and fewer tight turns than MTB rides.
Don’t forget a bell – the Knog Oi here is nice and discreet, and is a godsend on shared paths, where a gentle ‘ting’ gets a better reaction than a holler or cough.
We went for a brown saddle and grips to add a bit of urban class.
- Bell: Knog Oi Classic bell
- Saddle: Gusset R-Series saddle
- Grips: Deity Knuckleduster grips
5. Wheels
Most commutes don’t require fat tyres on wide rims – they’ll only slow you down. You can fit an old set of cross-country hoops or – on a 29er like this – some lighter, faster road bike wheels (700c and 29in rims are the same diameter), if you find some going cheap.
Watch the hub spacing, though – newer road wheels may have MTB-compatible 10x135mm (QR) or 12x142mm (non-Boost, bolt-through) axles, but older ones can be 10x130mm or 12x135mm.
Also, check whether they have Center Lock or six-bolt rotor mounts (an issue we ran into, solved with the use of an adaptor). You can still run an MTB cassette on a road hub, with a spacer.
- Adaptor: Aztec Center-Lock Adapter
6. Tyres
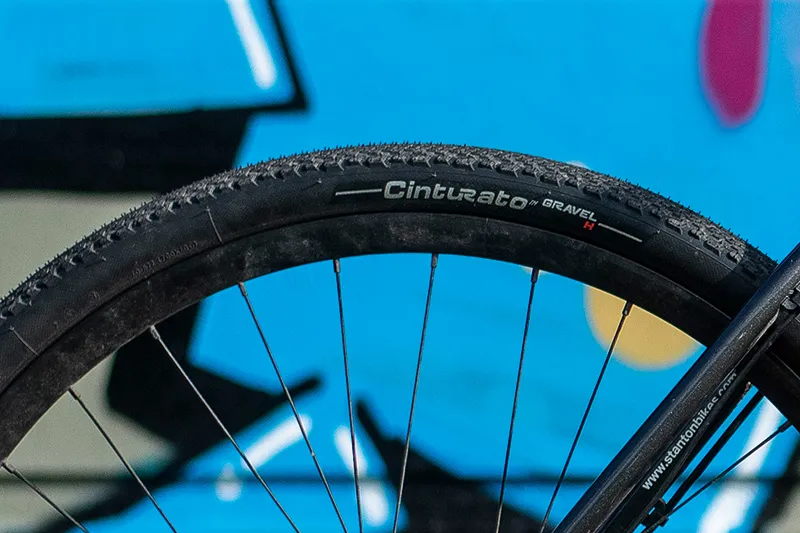
If the rims are narrow enough, you’ll have the choice of running road, gravel or slick/semi-slick MTB tyres – just make sure that the tyre size and internal rim width are compatible (WTB has a good guide).
For a short commute, you can run any rubber you have going spare, even semi-bald MTB treads.
If you’re going further or riding every day, faster tyres will get you there quicker and with less effort. We plumped for the balance of speed and grip provided by some Pirelli gravel tyres. A tubeless setup is a good way to reduce punctures.
- Tyres: Pirelli Cinturato Gravel H 700x40c tyres
7. Lights
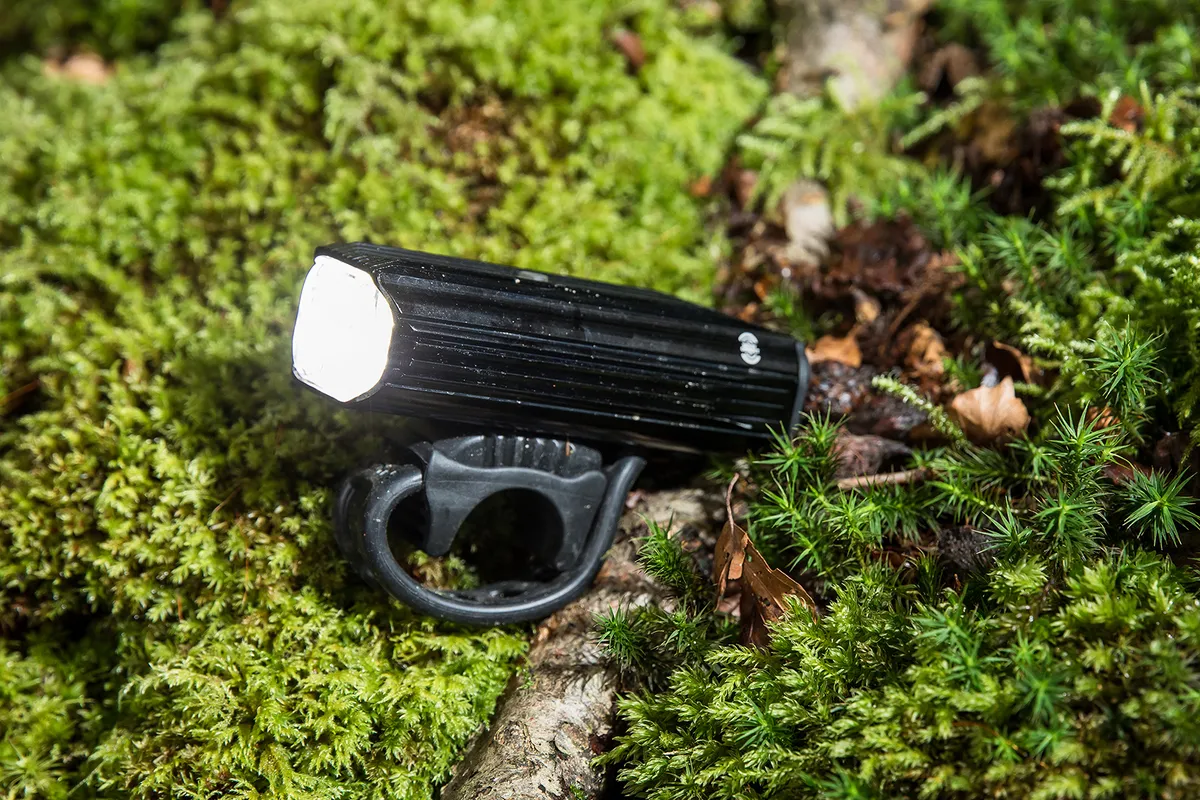
UK law requires you to run a white front light and red rear light between sunset and sunrise on public roads – fitted to your bike, not your helmet – plus a red rear reflector and amber pedal reflectors (not pictured).
We've fitted an ex-test set of Lezyne lights. The front Mega Drive 1800i is a mountain bike light and gives plenty of power for off-road sections, if you do still want to venture away from traffic, but can be dipped to 250 lumens on the road.
The rear can be synced to change modes simultaneously (from flashing in traffic to solid on an unlit cycle path, for example).
BikeRadar's round-up of the best bike lights contains options at a range of budgets.
- Front light: Lezyne Mega Drive 1800i
- Rear Light: Lezyne KTV Pro Smart 75
8. Accessories
Mudguards (not pictured) are essential for winter riding – and in the UK, at plenty of other times through the rest of the year, too. What you can run will depend on the fixtures your frame has.
At worst, you should be able to fit a front fender to keep muck out of your eyes and a seatpost-mounted rear guard to stop road spray soaking your shorts.
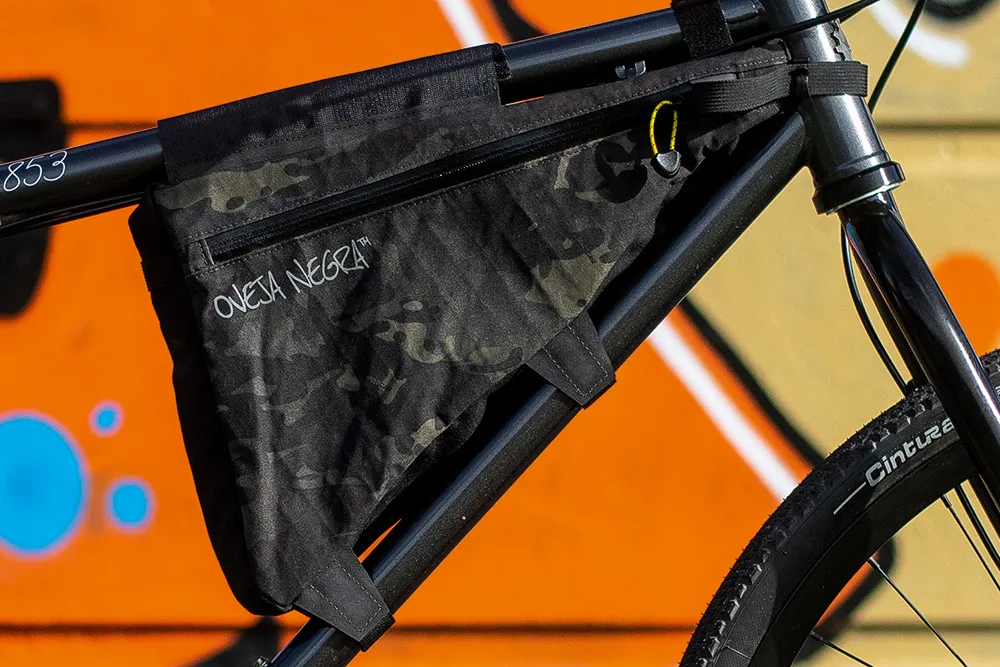
It’s worth thinking about luggage, too. While it’s easy enough to stuff your kit in a rucksack, panniers (if your bike has rack mounts) or frame bags will help you avoid a sweaty back.
Always carry the essential spares – a bike pump, spare inner tube (or tyre plugs, if you're running tubeless tyres) and multi-tool – just in case.
- Luggage: Oveja Negra Superwedgie frame bag
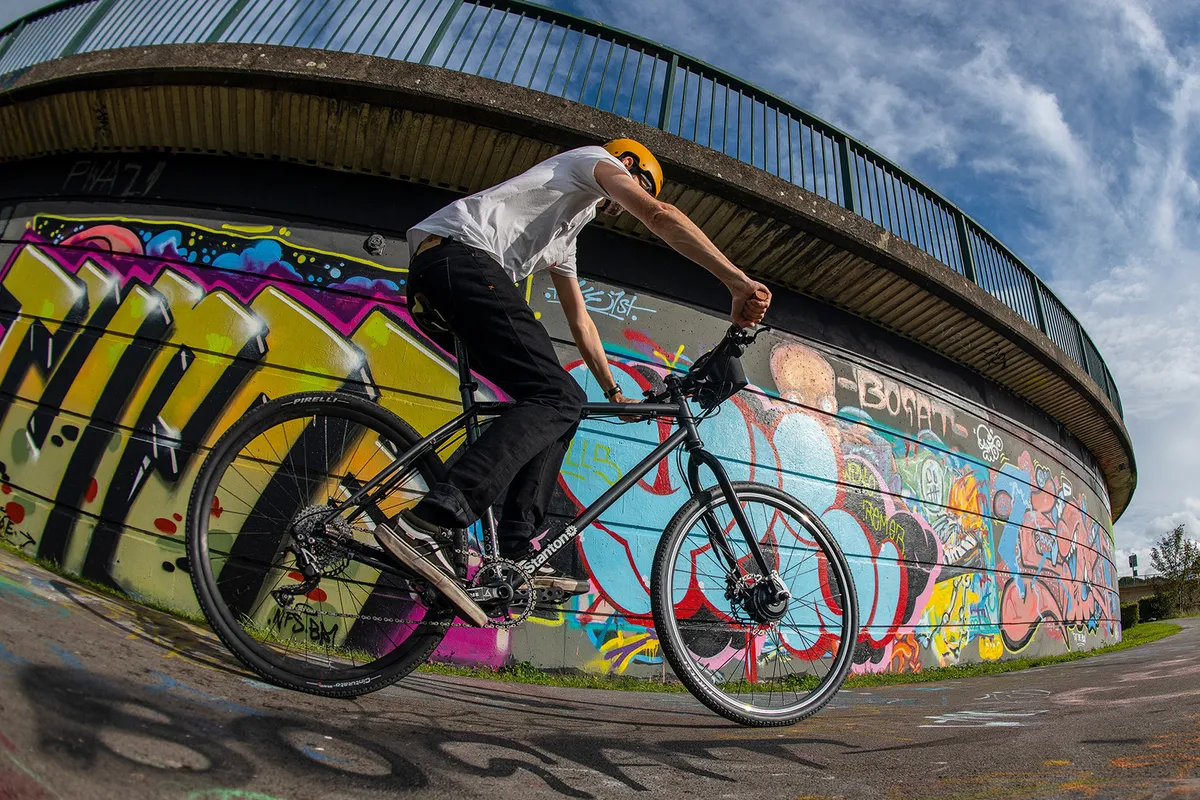
How to electrify your ride
The latest ebike conversion kits even allow you to electrify your machine, if you want to go the whole hog.
For this build, we've used the Swytch kit, which contains a handlebar-mounted battery, motor mounted into the front wheel and a pedalling sensor.
1. Power pack
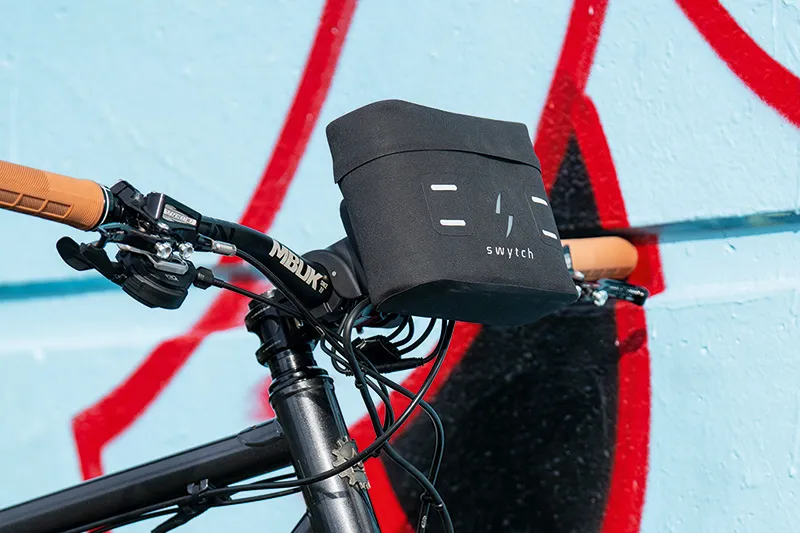
Many ebike kits require you to surrender your bottle bosses or fit a rear rack to attach the battery.
Swytch uses a bar-mounted bag instead, which also houses the ‘brains’ of the system and the mode selector.
The standard Eco kit has a 180Wh power pack, but pictured here is the 250Wh Pro version, which has a greater range (50km, claimed, on half power) and a built-in front light.
Swytch has also recently unveiled a smaller, pocket-sized battery, which will be available to pre-order from May for delivery in late summer 2022.
2. Drive unit
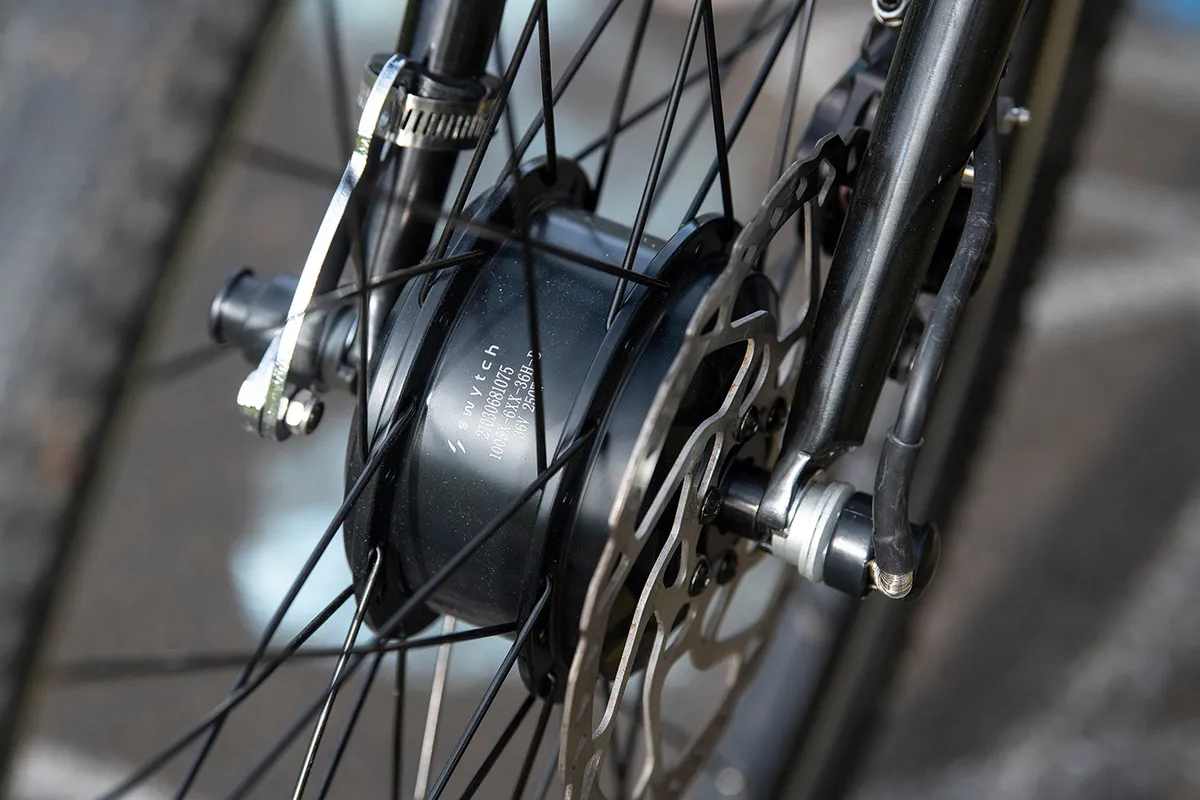
Here, a 250W brushless DC geared hub motor provides the pedalling assistance. Swytch supplies this as part of a complete front wheel.
With 40Nm of max torque, it has half the grunt of many electric mountain bike drive units, but on a faster, lighter bike (the kit only adds 3.3kg or so) feels surprisingly sprightly – although all-wheel drive does take some getting used to on looser surfaces (for mountain biking, we’d go for a crank-based system instead).
The bolt-on hub fitted into the fork’s dropouts just fine and we had no issues getting the brake caliper lined up. It’s advisable to fit a torque arm for extra security.
3. Pedalling sensor
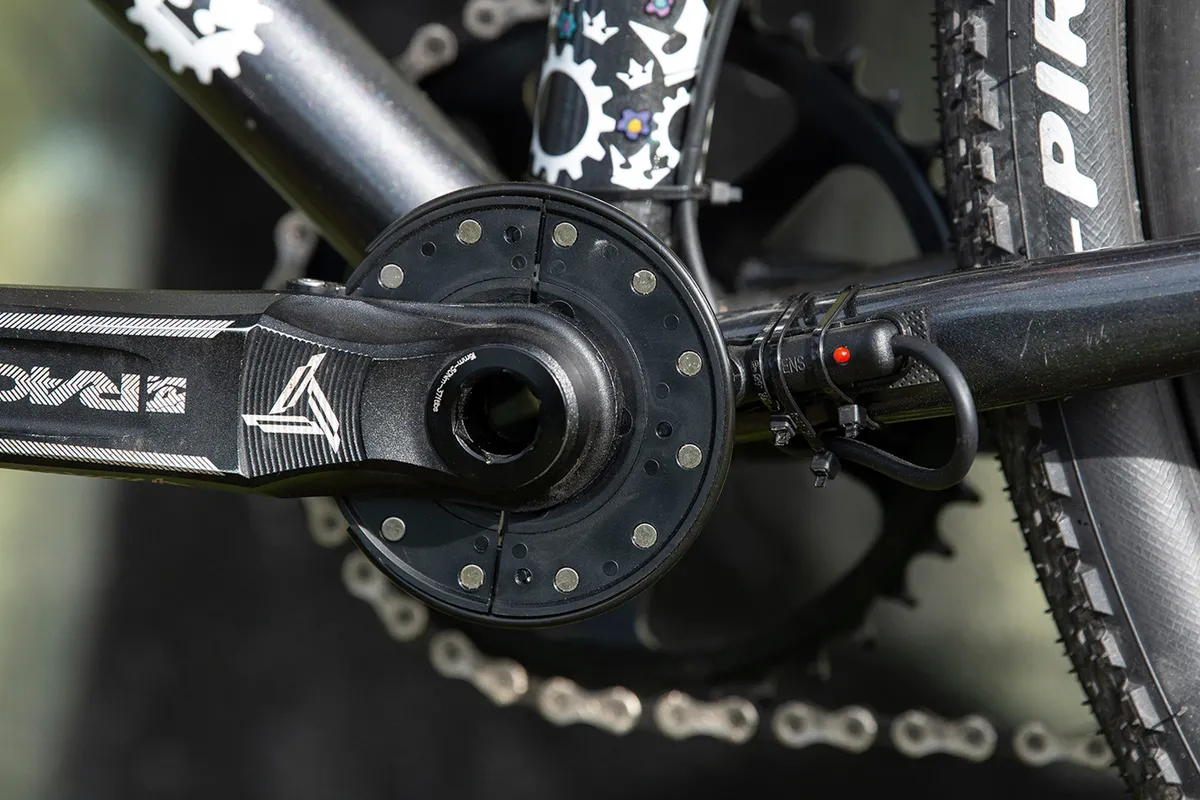
This is the fiddliest part of most kits to fit, especially if you want a neat finish.
Swytch provides various mounts for the magnet ring. We could have used the universal one that zip-ties to the crank arm, but opted to take a Stanley knife to one of the clip-on options instead.
The frame shape meant we had to snap off the base of the sensor itself to get things lined up. We also added an extension cable to route the sensor wire via the Sherpa’s top tube guides.
Choosing an ebike kit
There are plenty of kits on the market, differing in price, compatibility, ease of fitting and whether they use a hub or mid-drive (crank-based) motor.
They’re not going to give the same performance as a purpose-built electric road bike, but will make all the stop-starting at junctions less draining and lend a helping hand up the hills.
Just be sure to pick one that’s road legal – the assistance must only be provided when you’re pedalling and should cut out at 25kph/15mph. Here, we’ve gone for the hub-based Swytch kit, which has the advantage of UK-based customer support. It’s well-packaged and simple to fit, but only works with QR forks.
We’ve been impressed so far – acceleration from traffic lights is excellent and while it doesn’t rocket you up the hills, it makes steep climbs less sweaty and arduous.
