Replacing a press-fit bottom bracket may seem like an advanced skill but it doesn’t need to be with the correct know-how and suitable tools.
A press-fit bottom bracket forgoes threads and the interface relies on a bore that is slightly smaller in diameter to accept the unit.
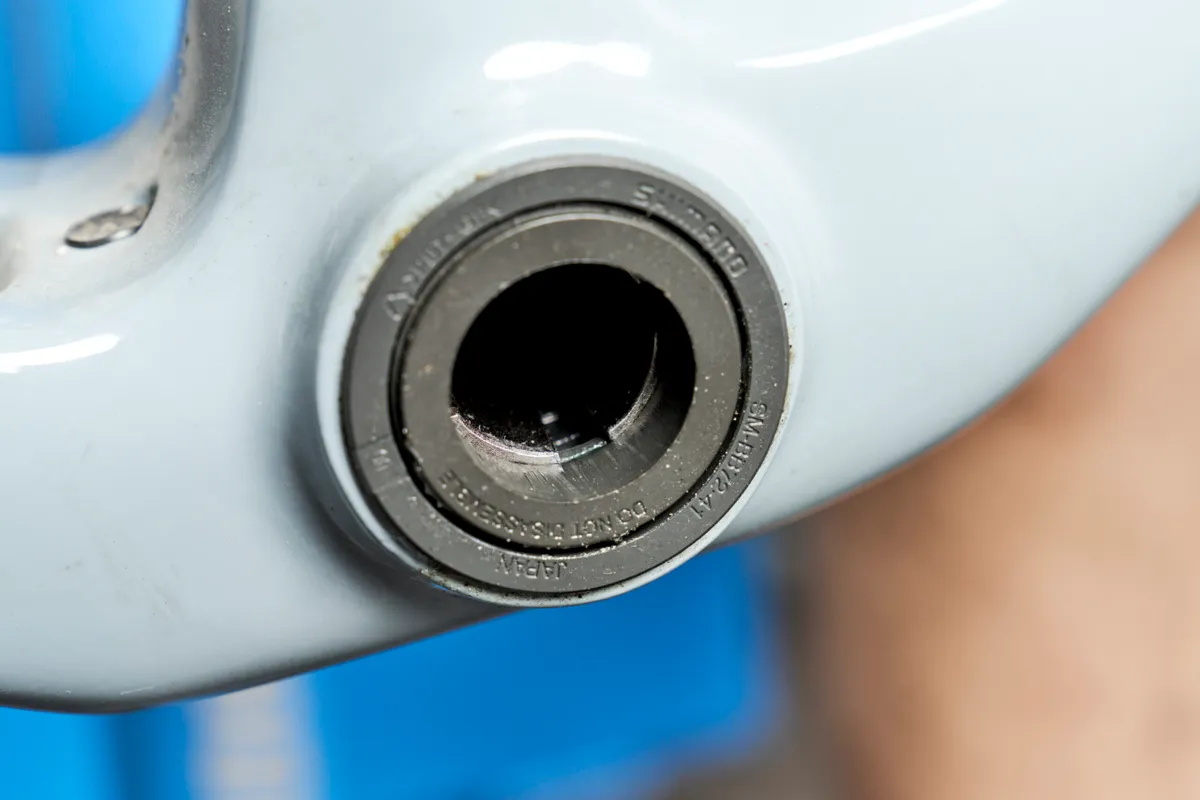
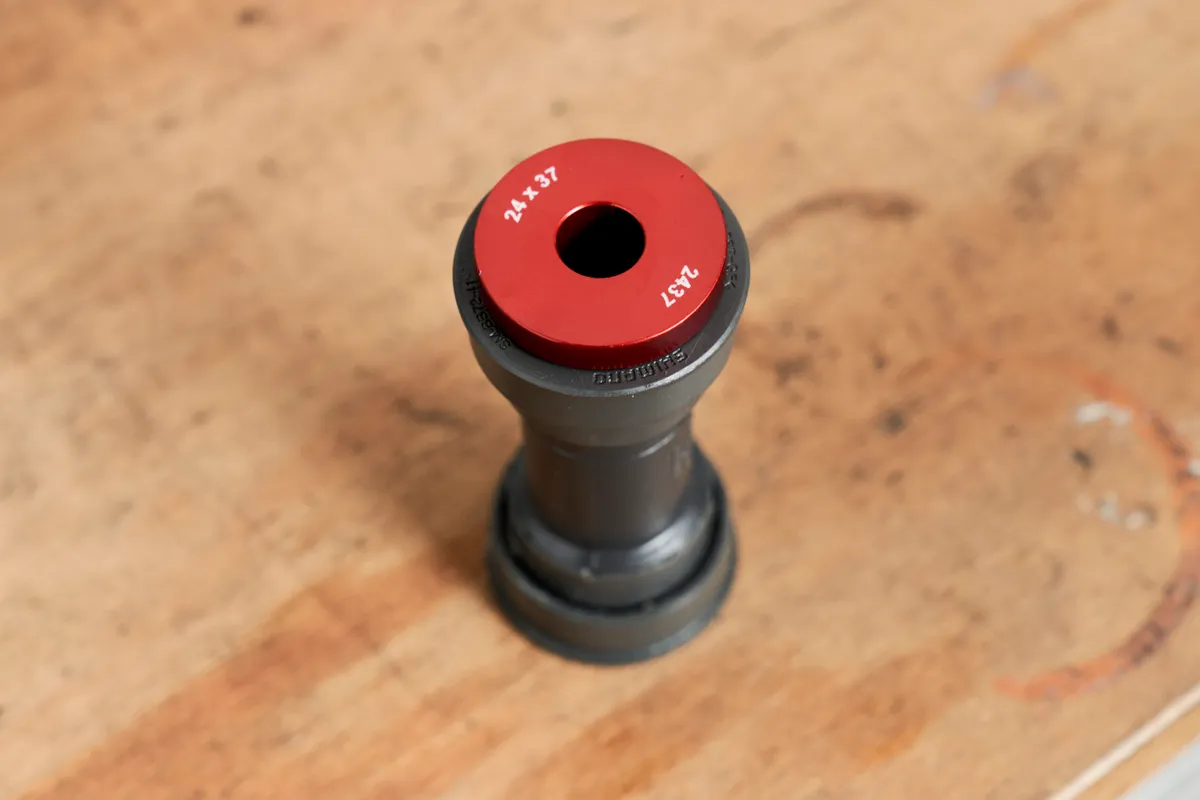
In this guide, we’ll take you through the process – we’ll be installing a Shimano BB86 press-fit bottom bracket.
There are a mind-boggling number of bottom bracket standards (and different names for the same standard), so make sure you have the correct replacement that will be compatible with your crankset.
Tools required
- Tools to remove your crankset
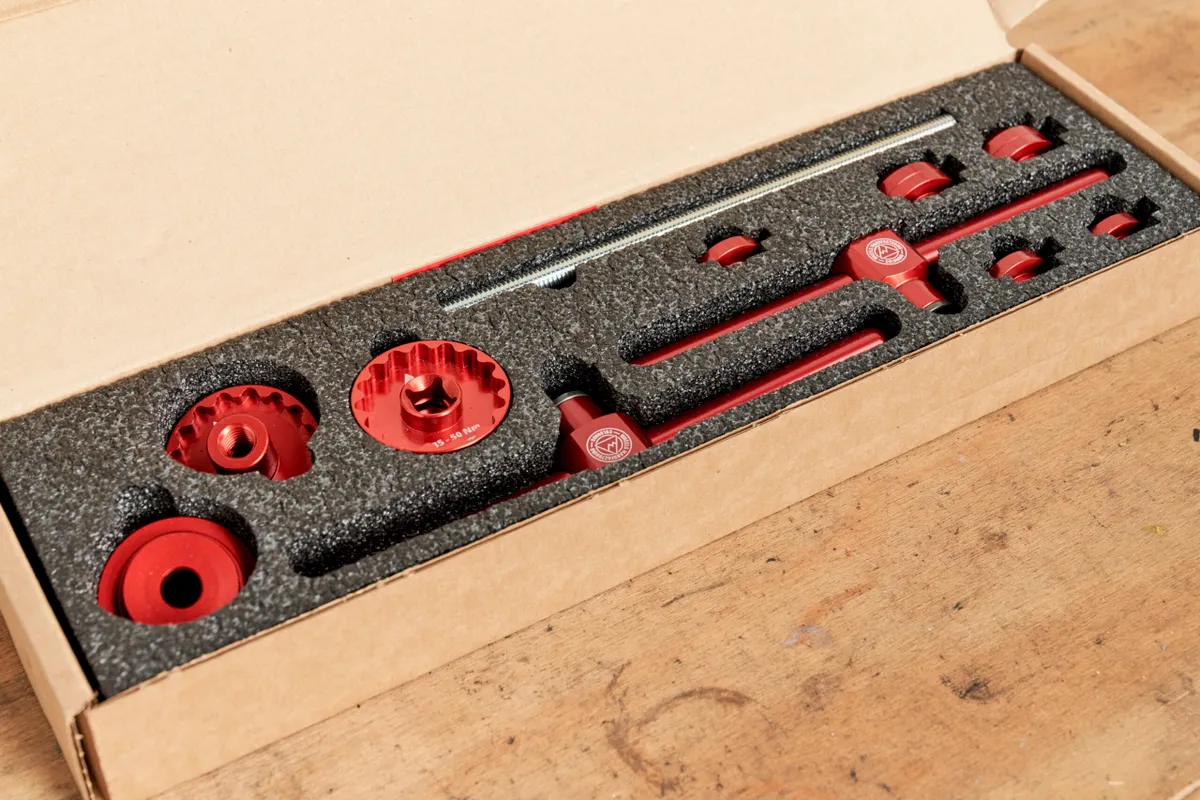
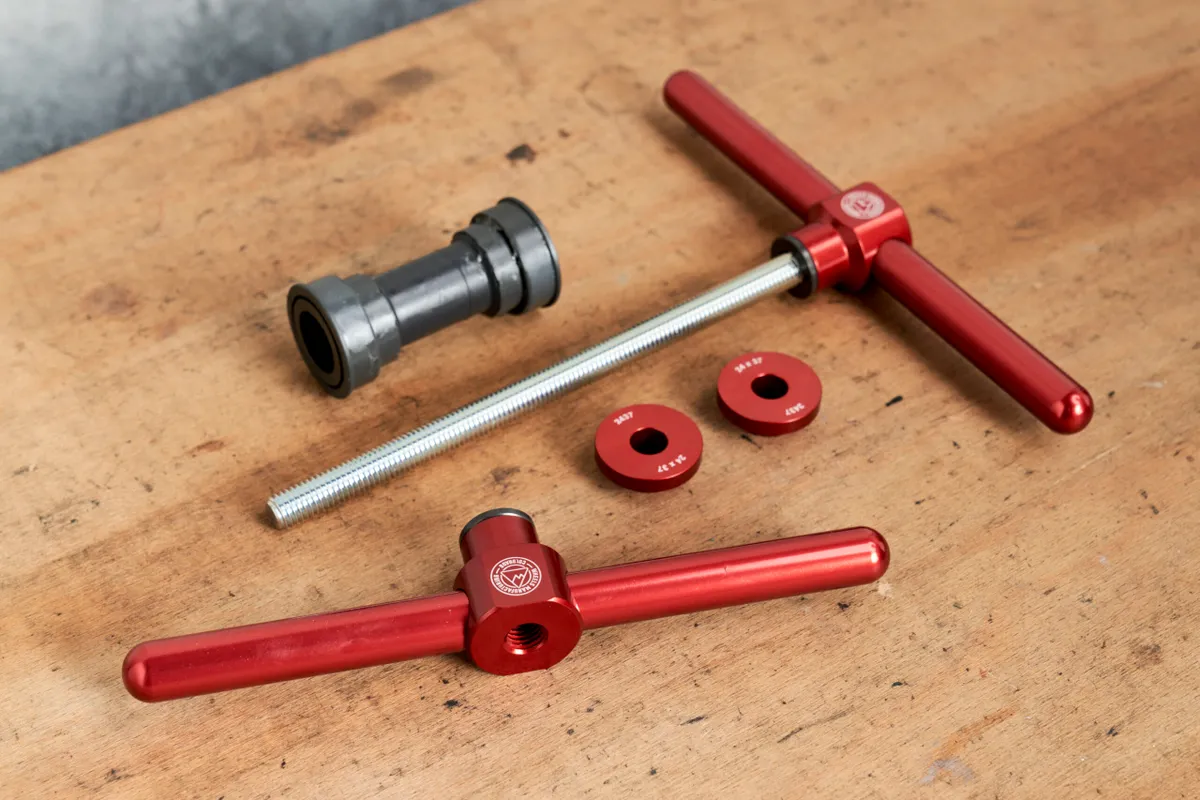
- Bottom bracket removal tool
- Bearing press and drifts
- Isopropyl alcohol
- Shop towel / rags
- Grease or other preparation, if recommended by the bottom bracket or frame manufacturer
- Retaining compound and adhesive primer (only recommended if you have had issues with creaking, and the manufacturer of your frame and bottom bracket approves it)
Although you don’t need many tools to replace a press-fit bottom bracket, some specialist pieces are required.
A bearing removal tool, press and drifts are all essential tools for this job. They ensure the bearing is removed without causing frame damage and enable the bearings to be pressed in straight when installed.
These tools can be expensive, so it is worth considering how often you are likely to carry out this job compared to delegating it to a local bike shop.
Do not be tempted to use a block of wood and a hammer to press in the bearings. It is a false economy considering the cost of a new frame.
All-in-one options, that both remove and press in new bearings also exist, from manufacturers such as Enduro Bearings, Wheels Manufacturing and BBB.
Step 1
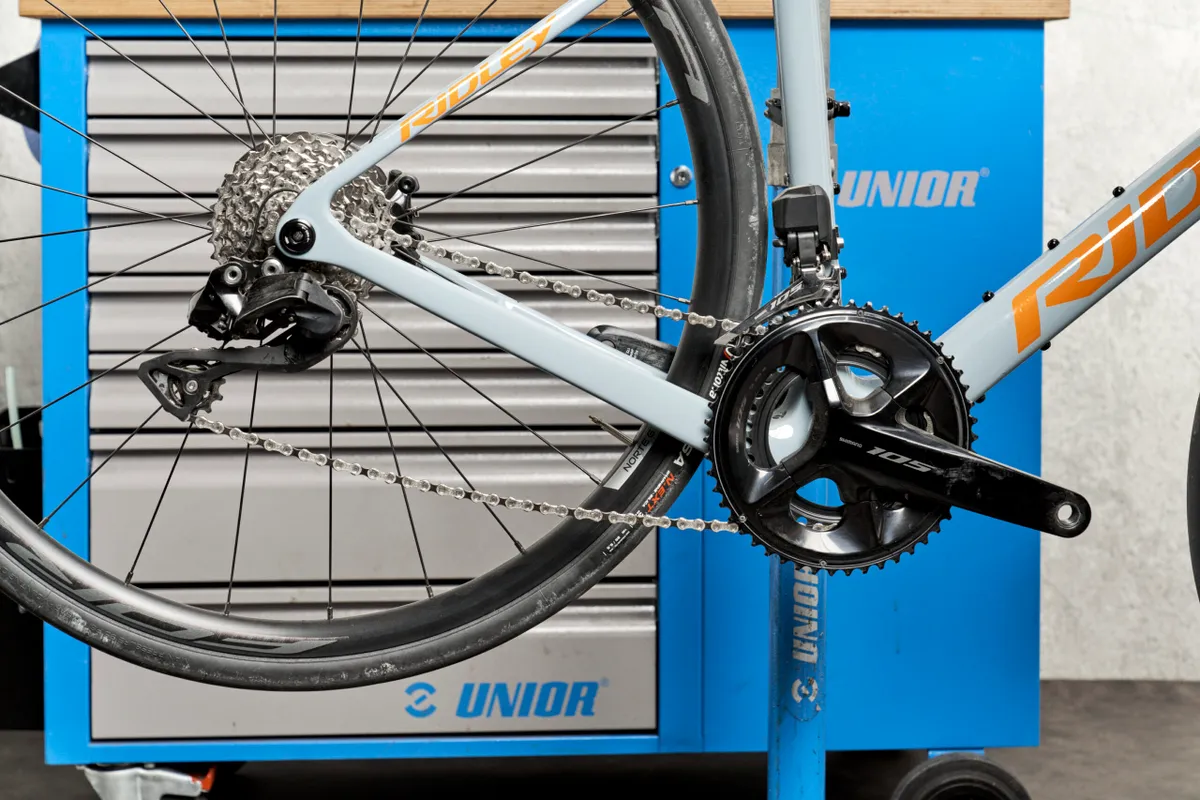
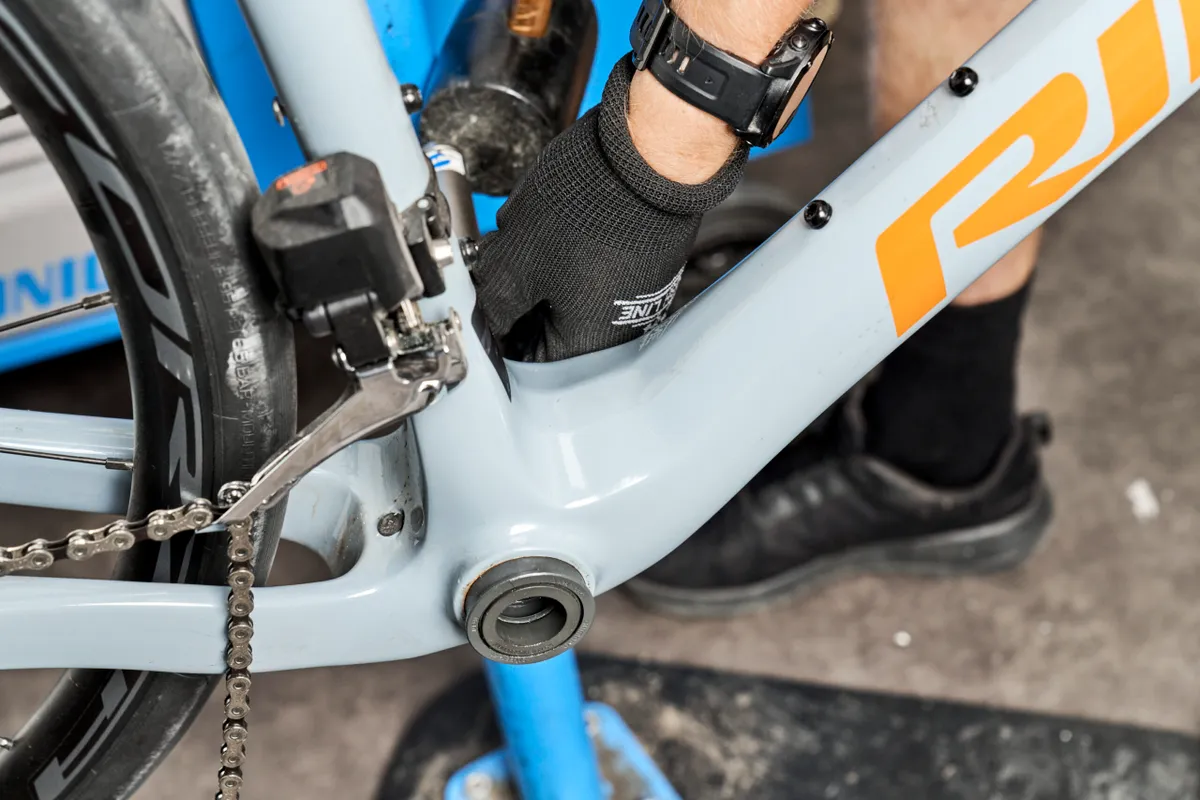
Remove the crankset and unship the chain from the chainring. The bottom bracket will now be exposed.
Step 2
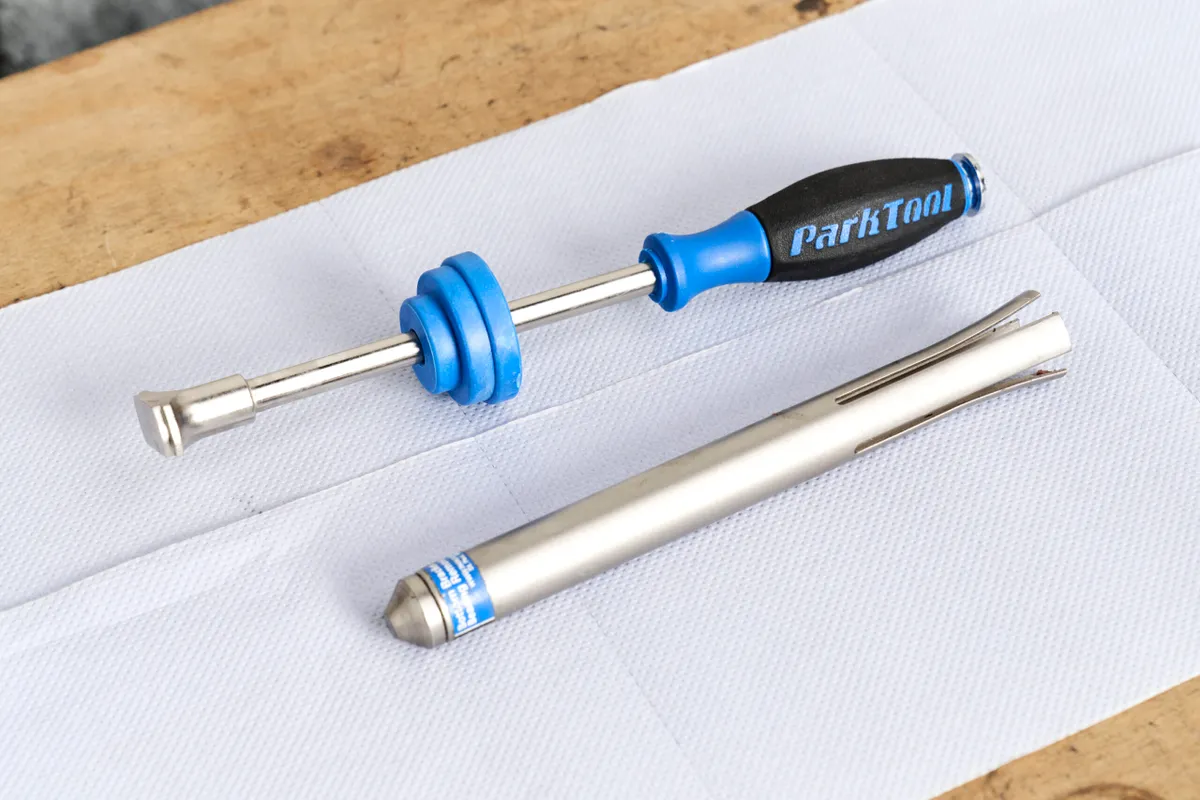
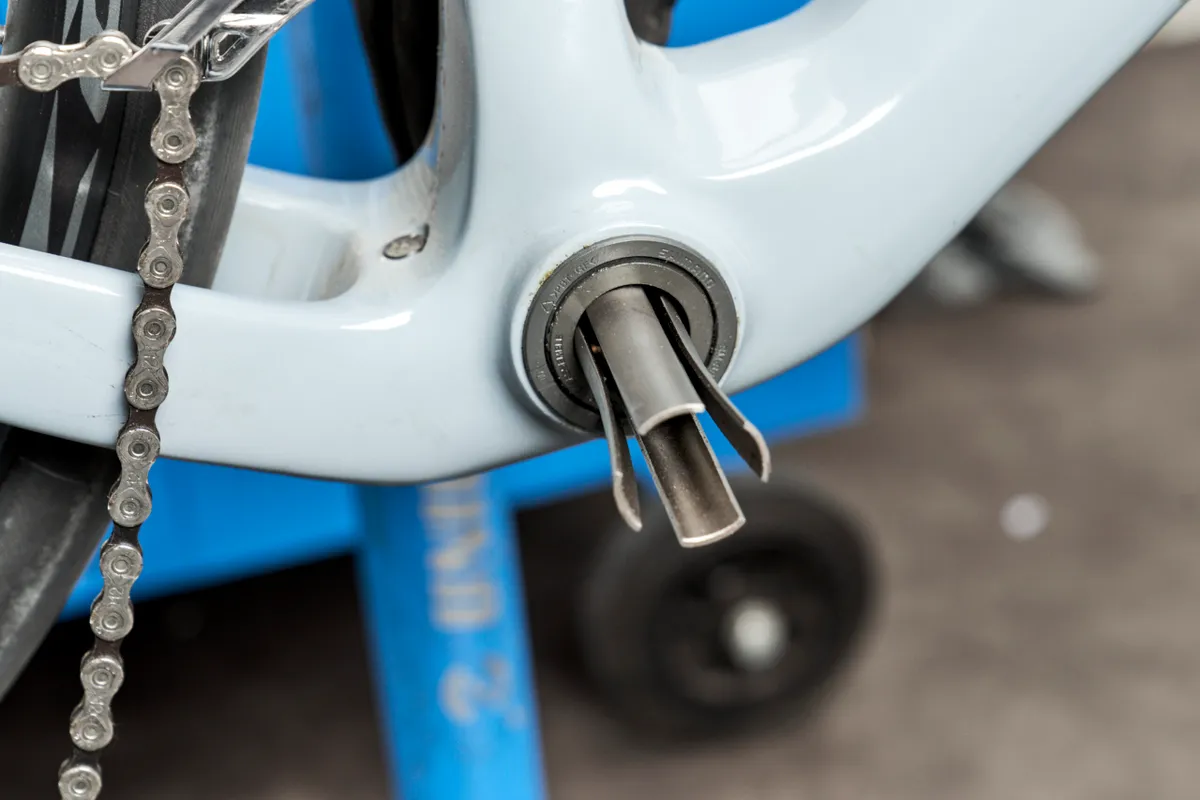
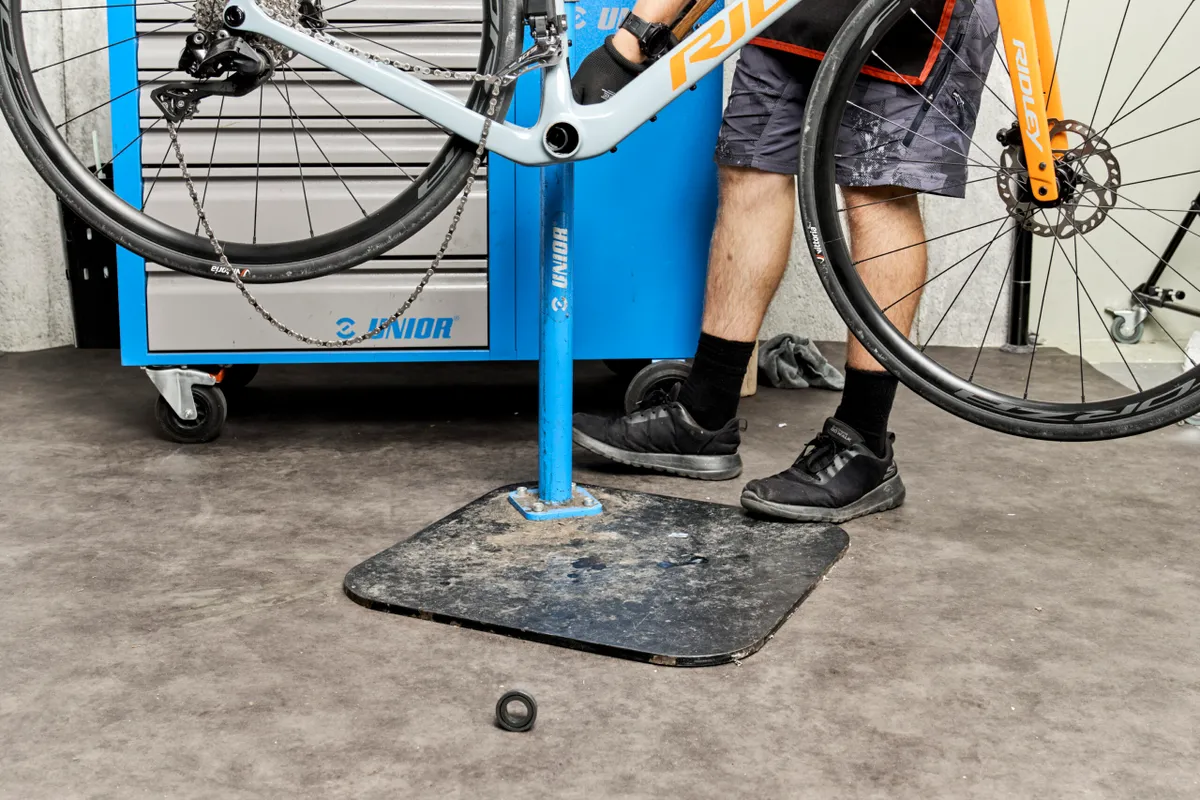
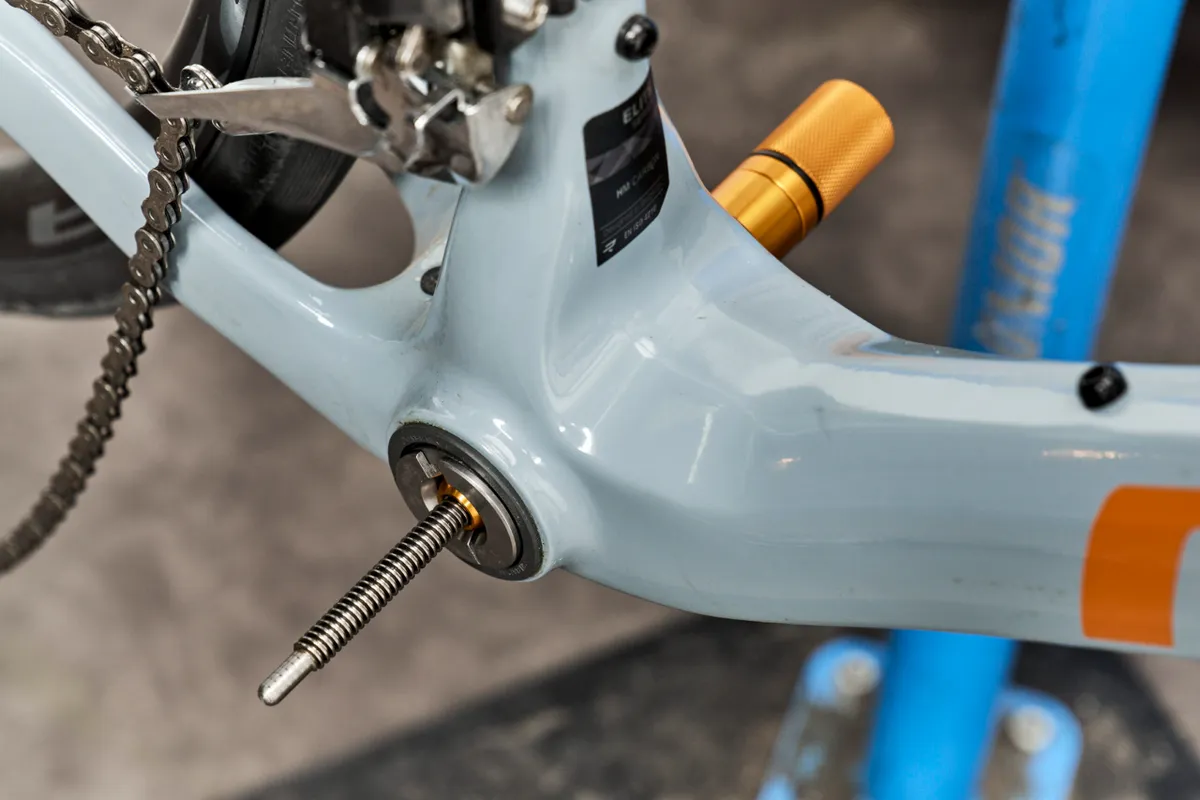
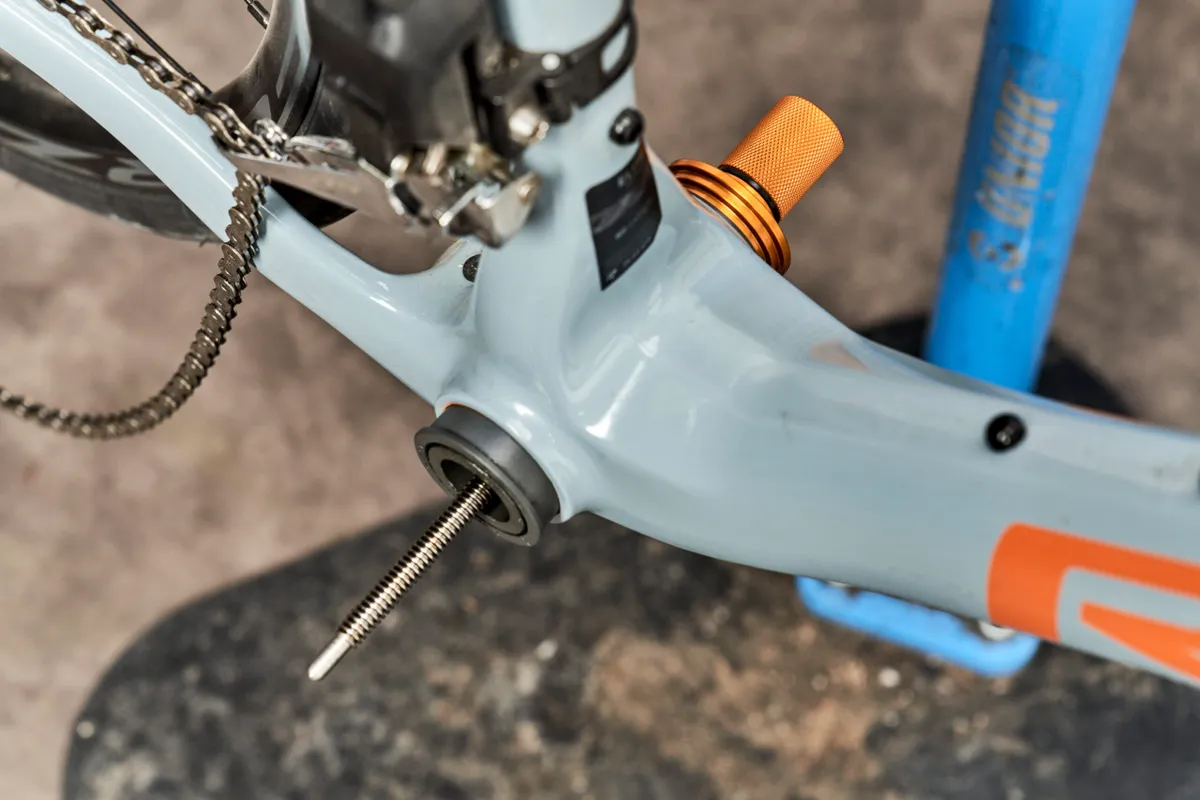
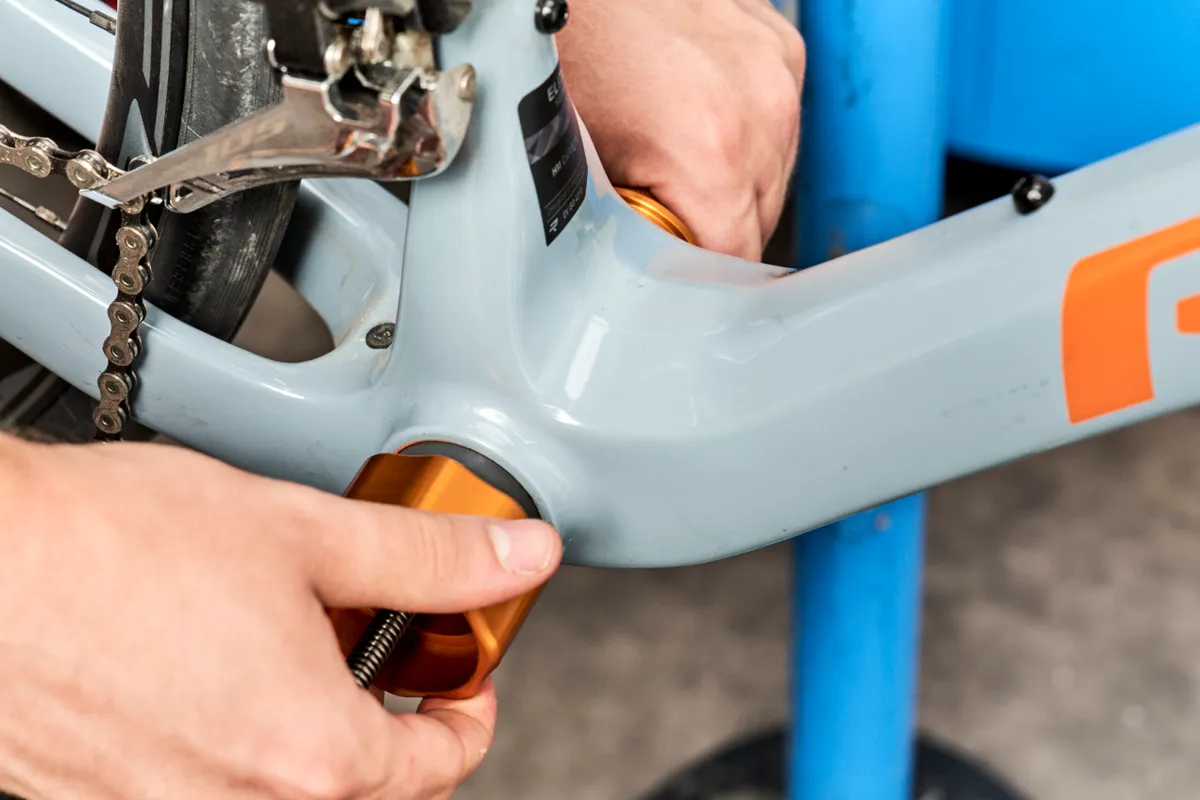
Using a bottom bracket removal tool, remove one of the bearings.
If you are using a rocket-style tool, it’s worth getting a friend to brace the frame. It’s also important to understand that striking the bearings almost always results in damaging them. If you are removing unworn bearings as part of a service, for example, expect to replace the unit.
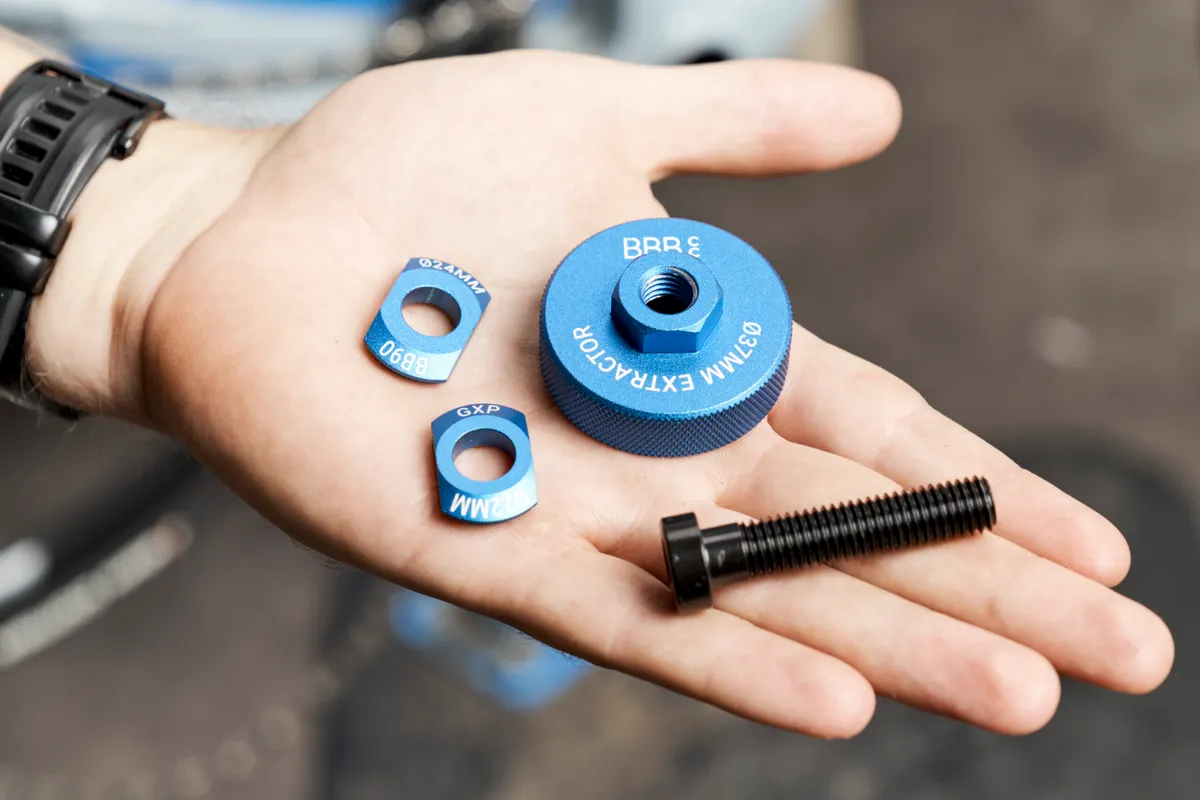
For bottom brackets compatible with 24mm cranksets (BB86 / BB92), you’ll want to use a remover such as Park Tool’s BBT-90.3. For SRAM DUB (which is 28.99mm), Park’s RT-1 is the tool for the job.
Insert the rocket tool until you hear the expanding ends click behind the bearing you want to remove.
For 30mm bearings (BB30 / PF30), you’ll need to use Park’s BBT-30.4. It features stepped ends that are positioned over the bearing you want to remove.
If the frame uses circlips to retain the bearings, make sure the stepped end of the tool is not positioned on the ears of the circlip.
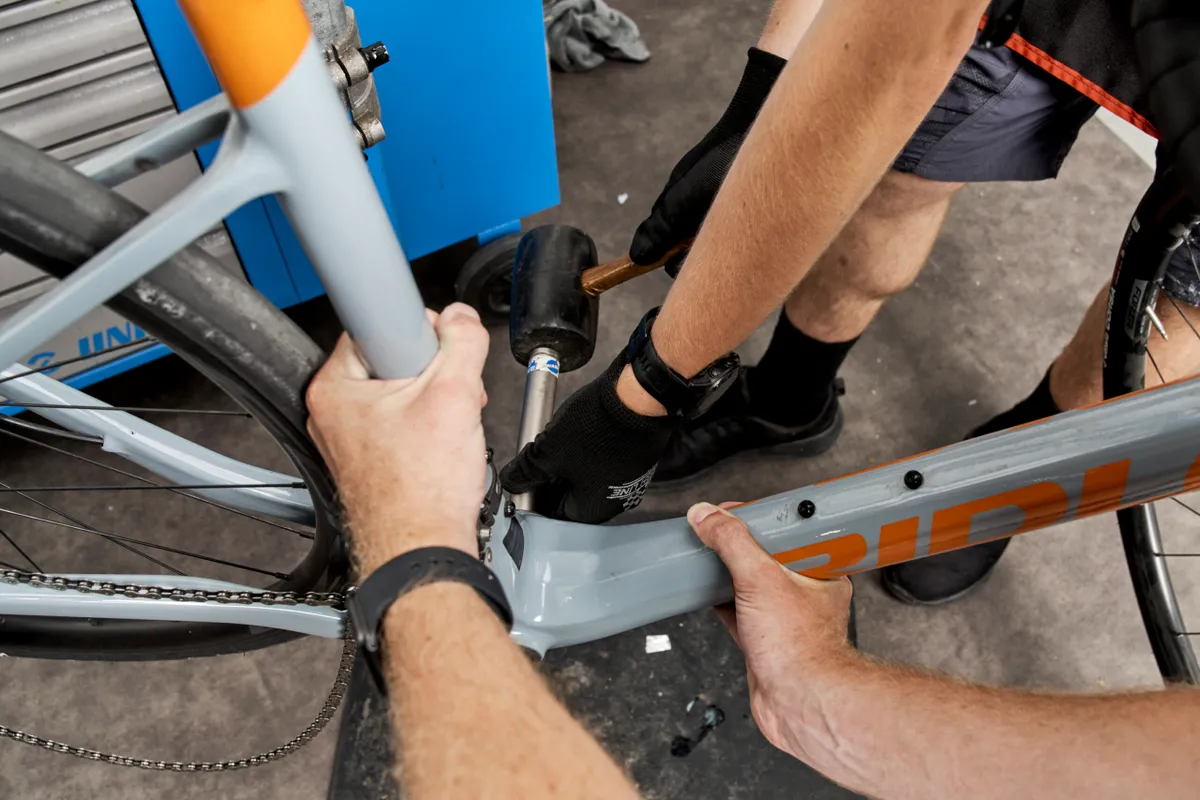
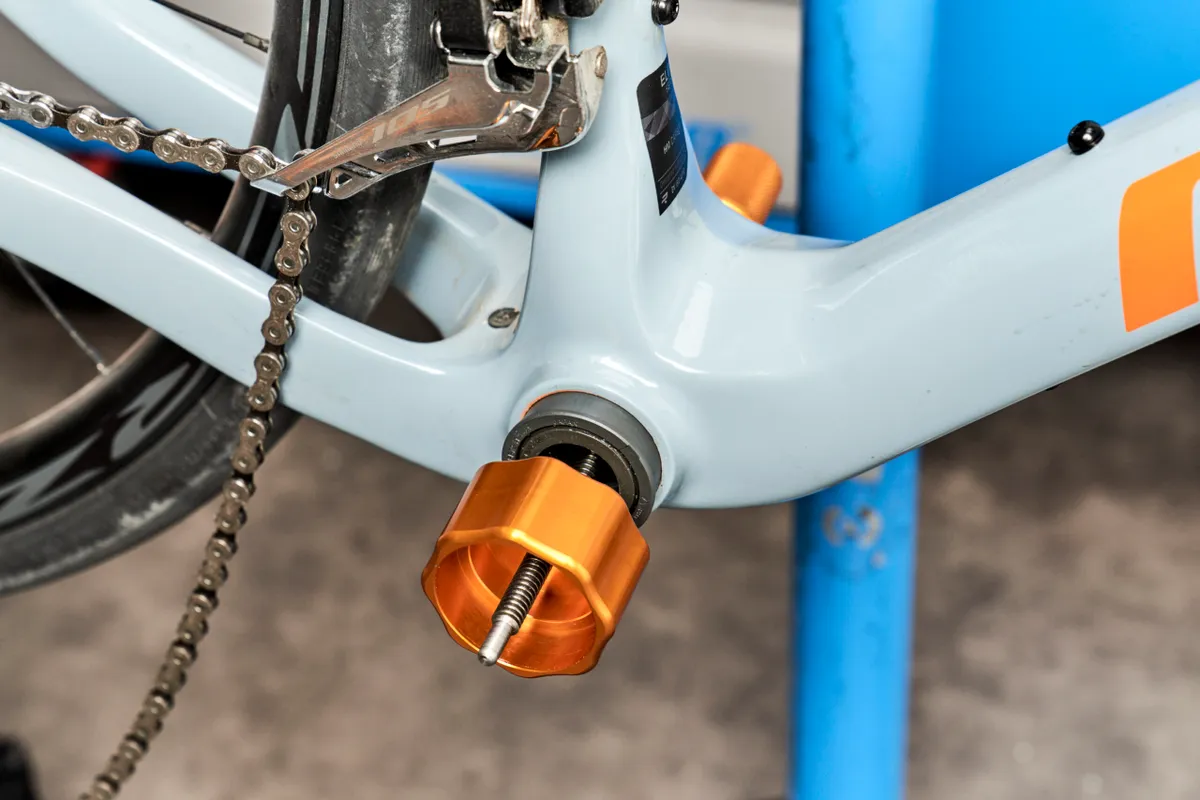
Position the sliding centring guide to ensure you are hitting the bearing squarely. Once the bearing is out, remove the opposite side.
With the correct tool in place, hit the end with a steel-faced hammer. Use strong, single blows rather than repeatedly hitting the tool.
If the bottom bracket has been installed for a long time, it may take some encouragement to remove. You should be able to see the unit begin to move the more you hit it.
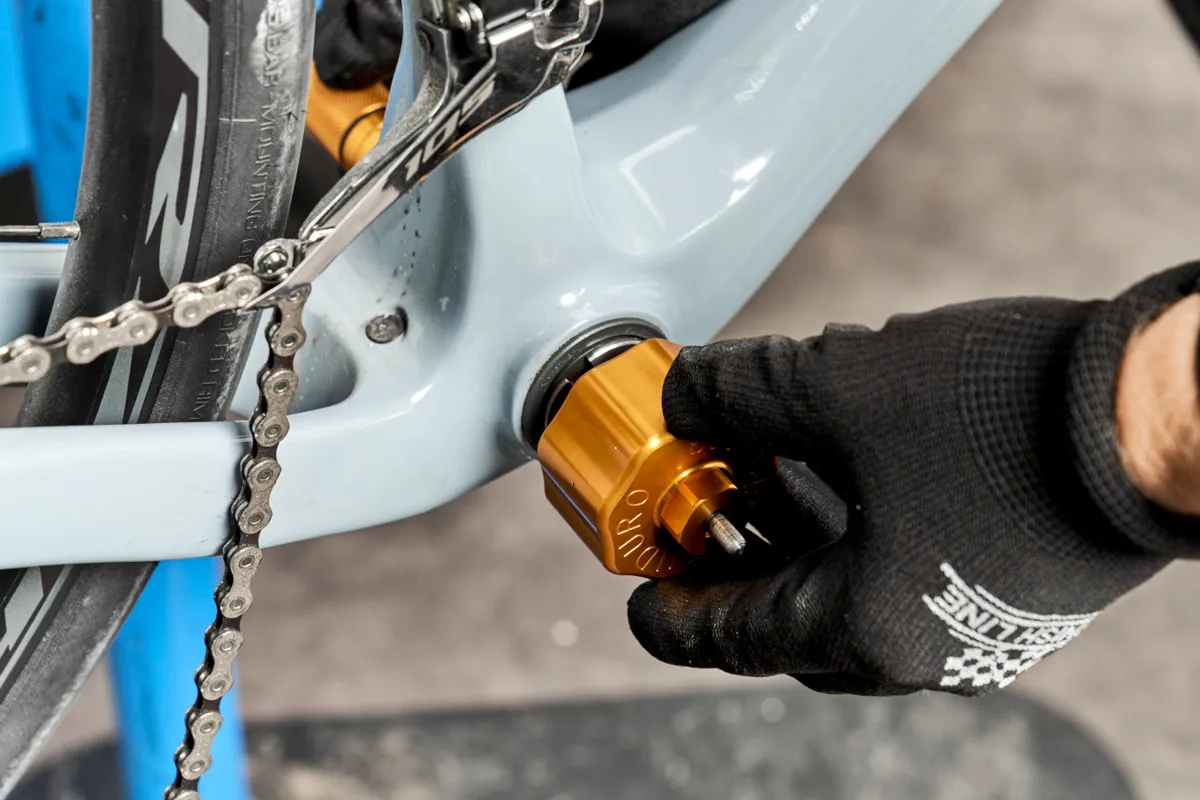
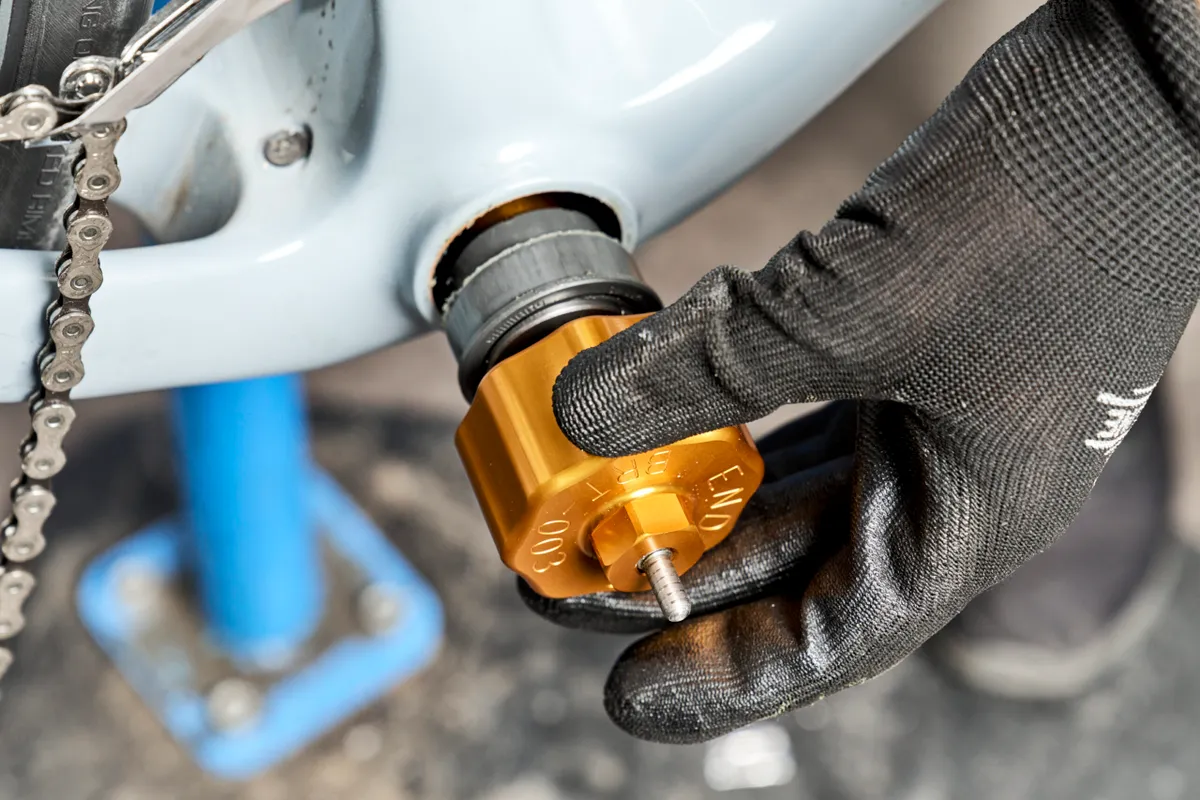
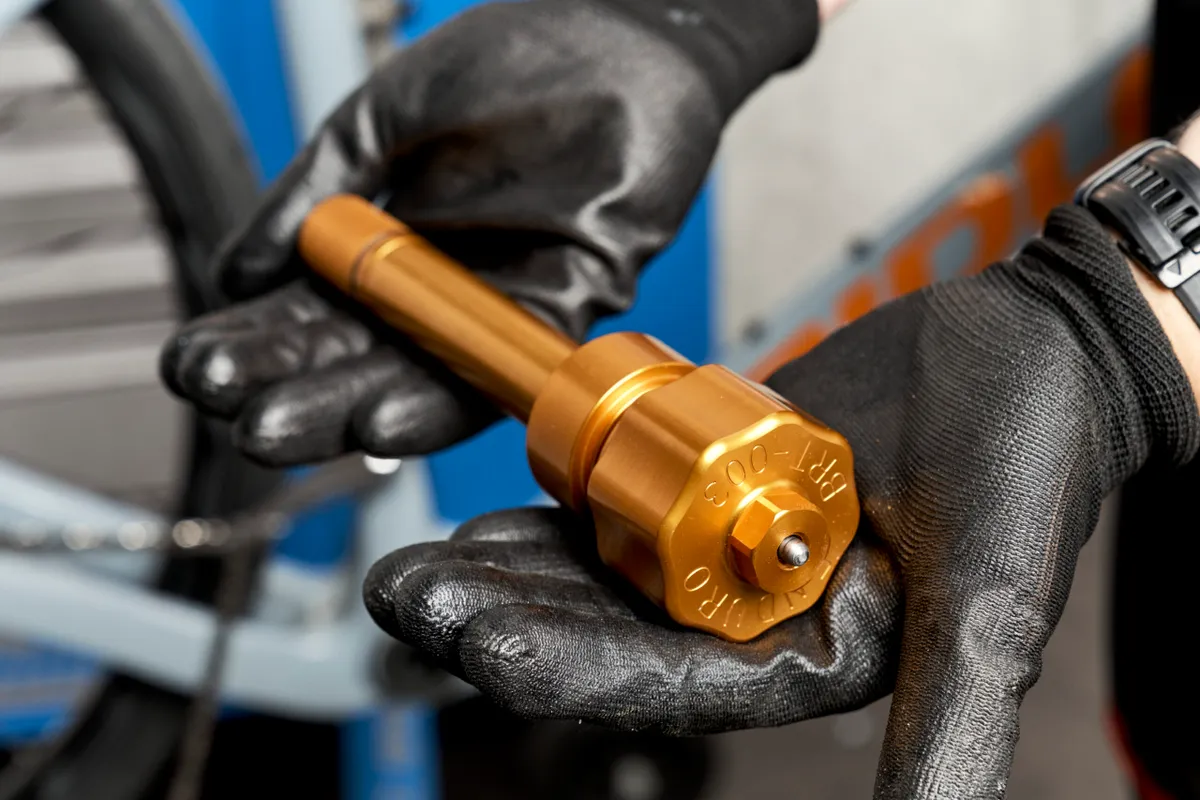
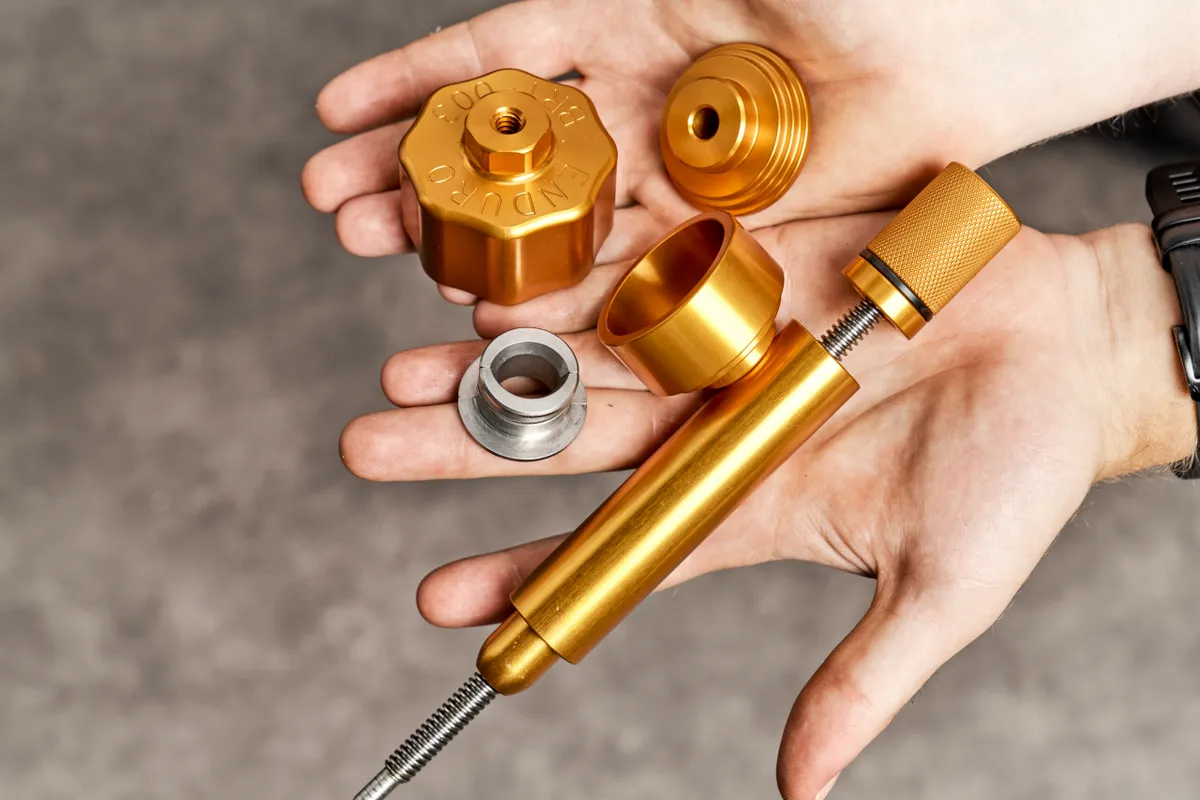
Hammer-free solutions such as the Enduro BRT-002 and BRT-003 also exist. Insert the cup over one of the bearings and then, using an 8mm hex key, turn until it releases.
If the idea of taking a hammer to your pride and joy fills you with dread, tools such as these offer a gentler solution.
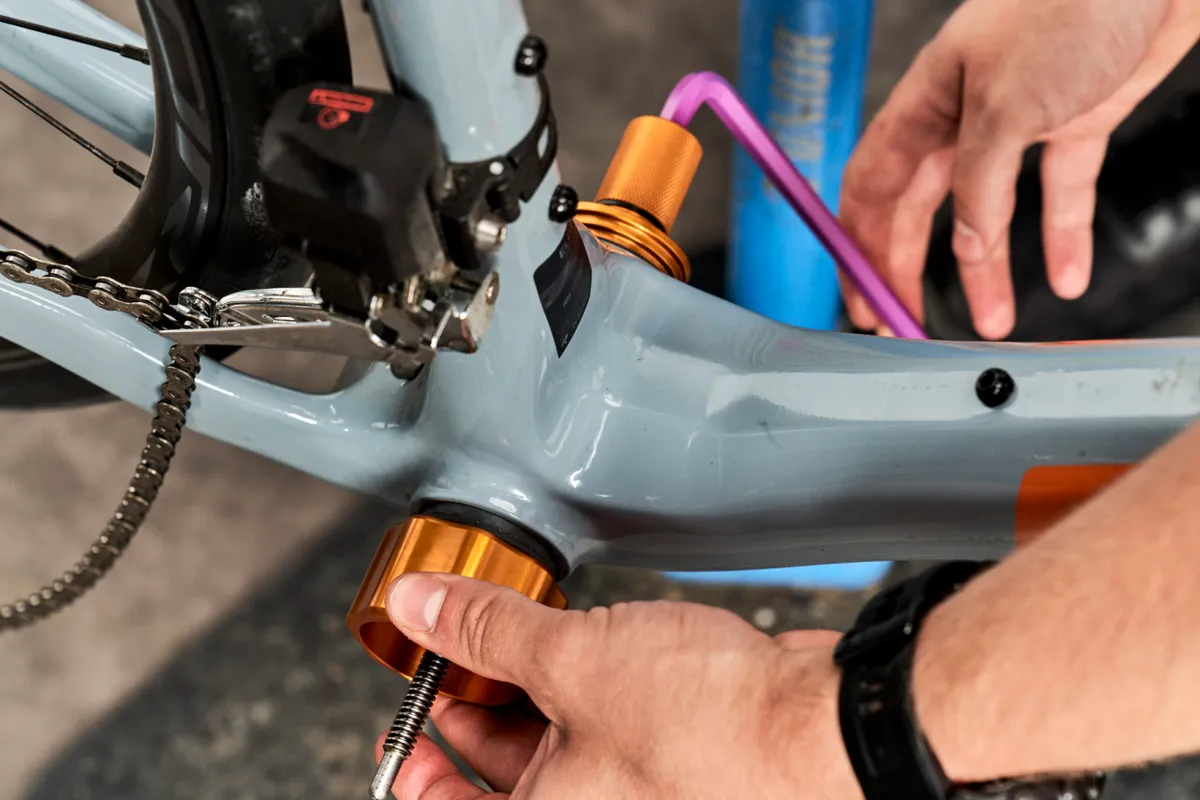
Step 3
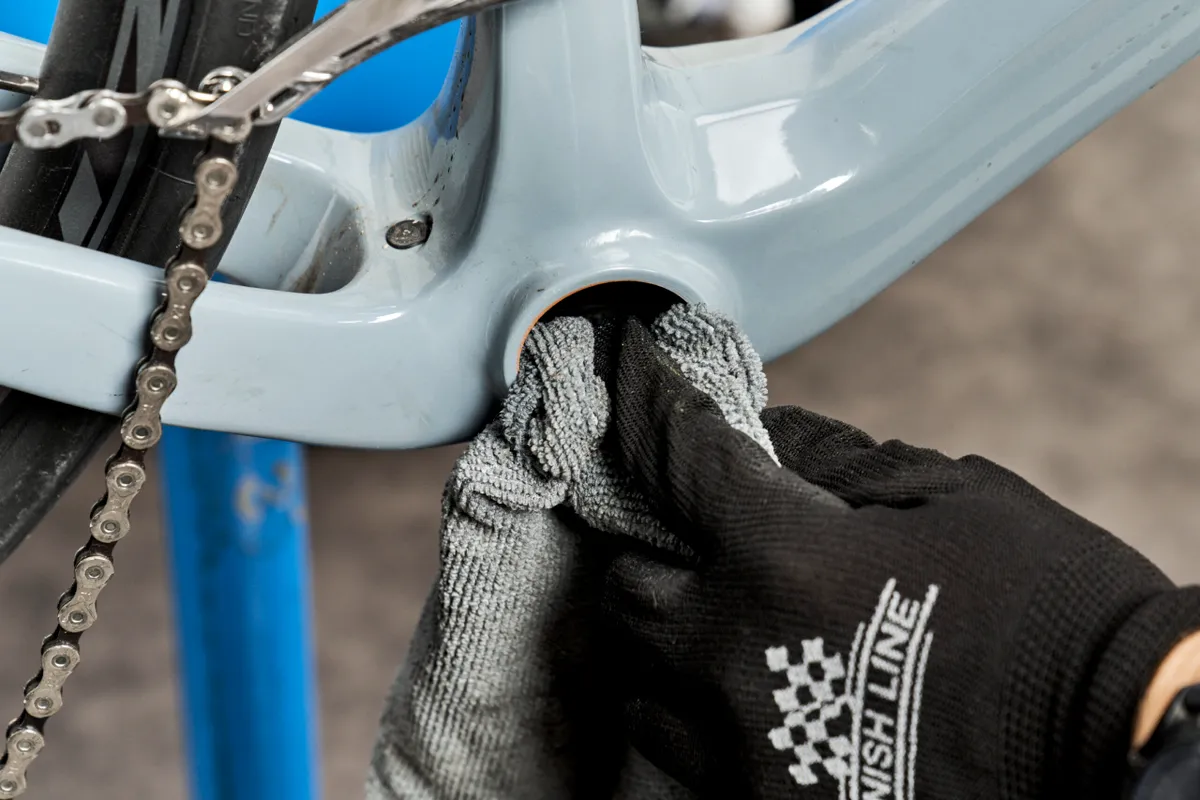
Clean the bottom bracket shell thoroughly with a clean rag and isopropyl alcohol.
Manufacturers or mechanics may recommend grease or anti-seize, or even just a clean and dry surface. Some advocate the use of a retaining compound to prevent the bearings from creaking.
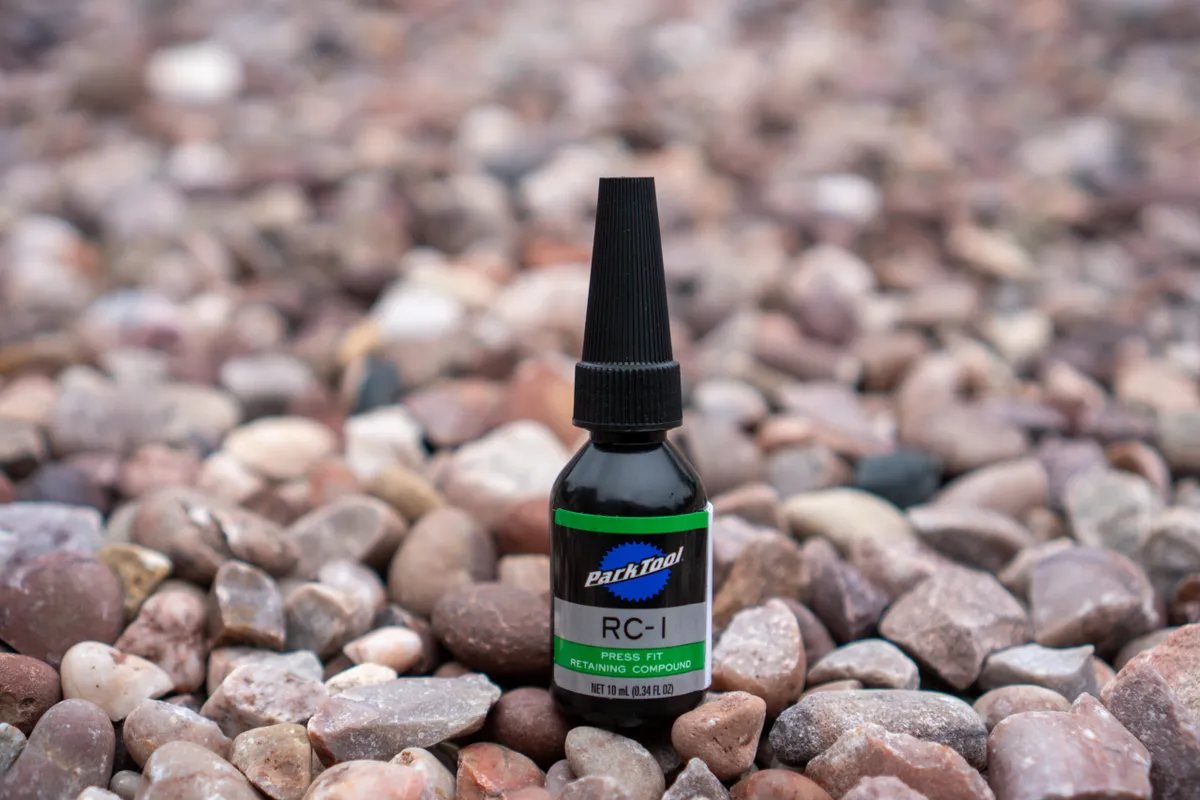
This is an adhesive that hardens and expands once applied, effectively gluing the bottom bracket in place, filling in any gaps. Bear in mind it will take more effort to remove in the future though.
Loctite 641 (a medium-strength threadlocker) or Park Tool’s RC-1 are popular products.
In our experience, we would typically advise against the use of retaining compound, unless you have previous experience of the frame or bottom bracket creaking.
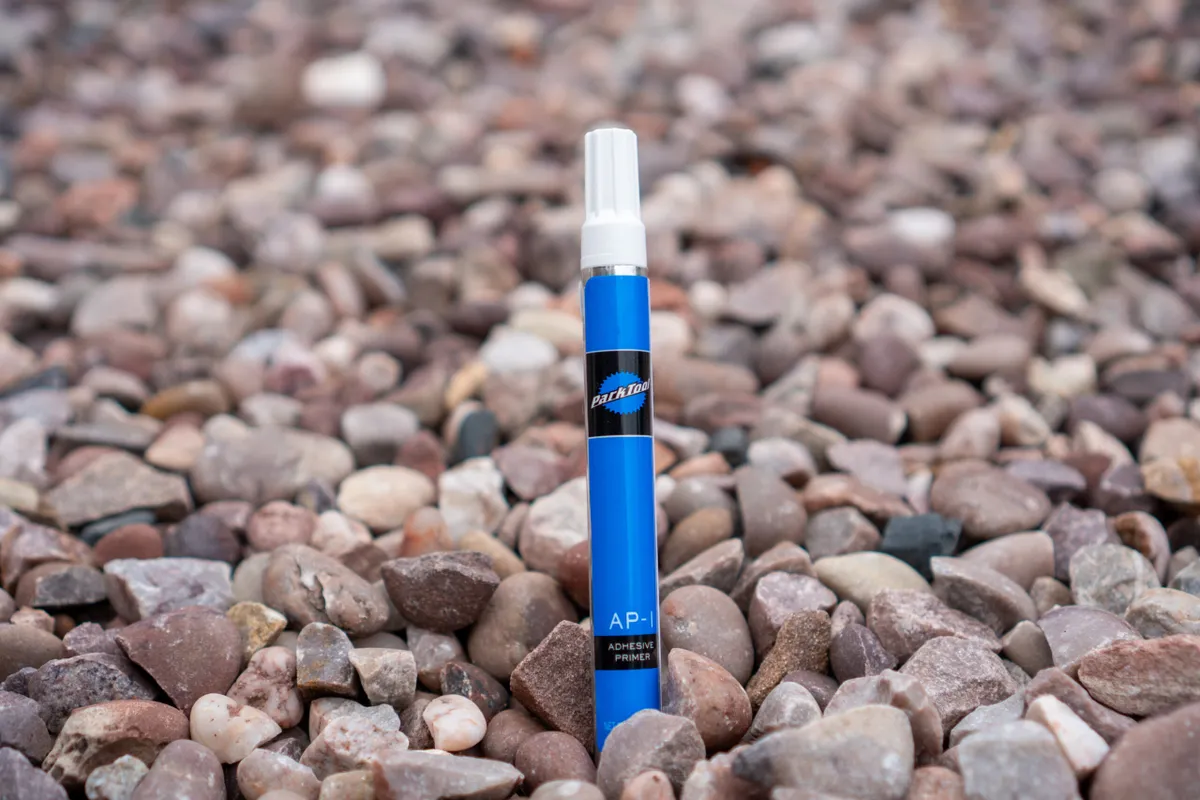
If you are going to use a retaining compound on a carbon fibre frame, make sure you use an adhesive primer first to prepare the area and then allow it to dry (typically 5-10 mins), otherwise the bearing won’t stick.
In all cases, we would advise following the guidelines from the frame and bottom bracket manufacturer, with a leaning towards installing the unit dry if there are no specific recommendations.
We would use grease if installing a metal press-fit unit into an aluminium frame to prevent any potential galling, or anti-seize if you’re working with a steel or titanium frame.
Some people say you shouldn’t use grease on a carbon fibre frame because they believe the grease can attack the resin inside the composite. This is a myth on modern carbon fibre frames.
Step 4
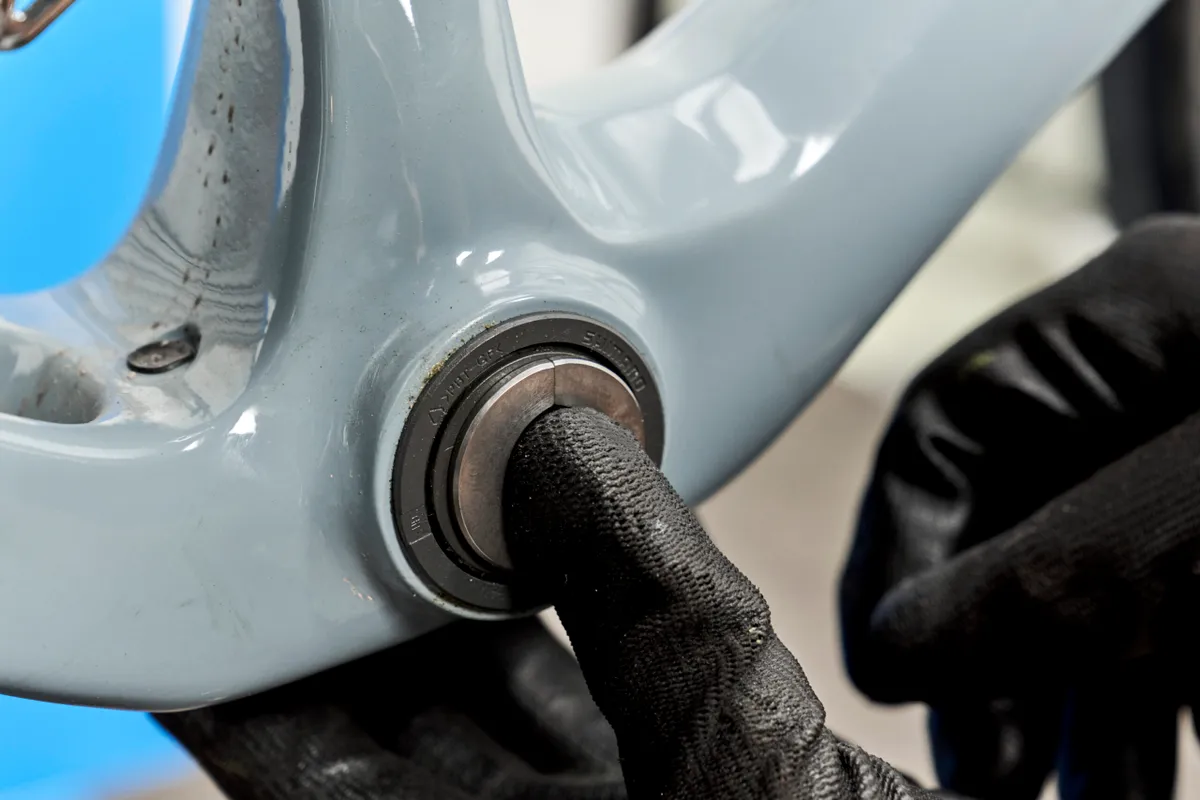
It’s now time to install the new bearings.
Make sure any obstructions, such as Shimano Di2 wires, hydraulic hoses or any bolts holding a cable guide, clear the installed bearings.
The Shimano Dura-Ace bottom bracket we're installing presses in on both sides, although thread-together options exist too and are increasingly popular.
A thread-together press-fit bottom bracket usually entails one bottom bracket cup that is pressed into the frame. The other then screws into the threads of the pressed-in bearing and is torqued to a recommended figure.
There are several schools of thought over whether it’s best to press one or both in at a time. We’re going to go one at a time because it’s easier to watch if one cup is pressing in perfectly straight rather than both. If your press doesn’t use drifts, we’d also recommend going one at a time.
If you’re going to install some protection on the bearing, now’s the time to do it.

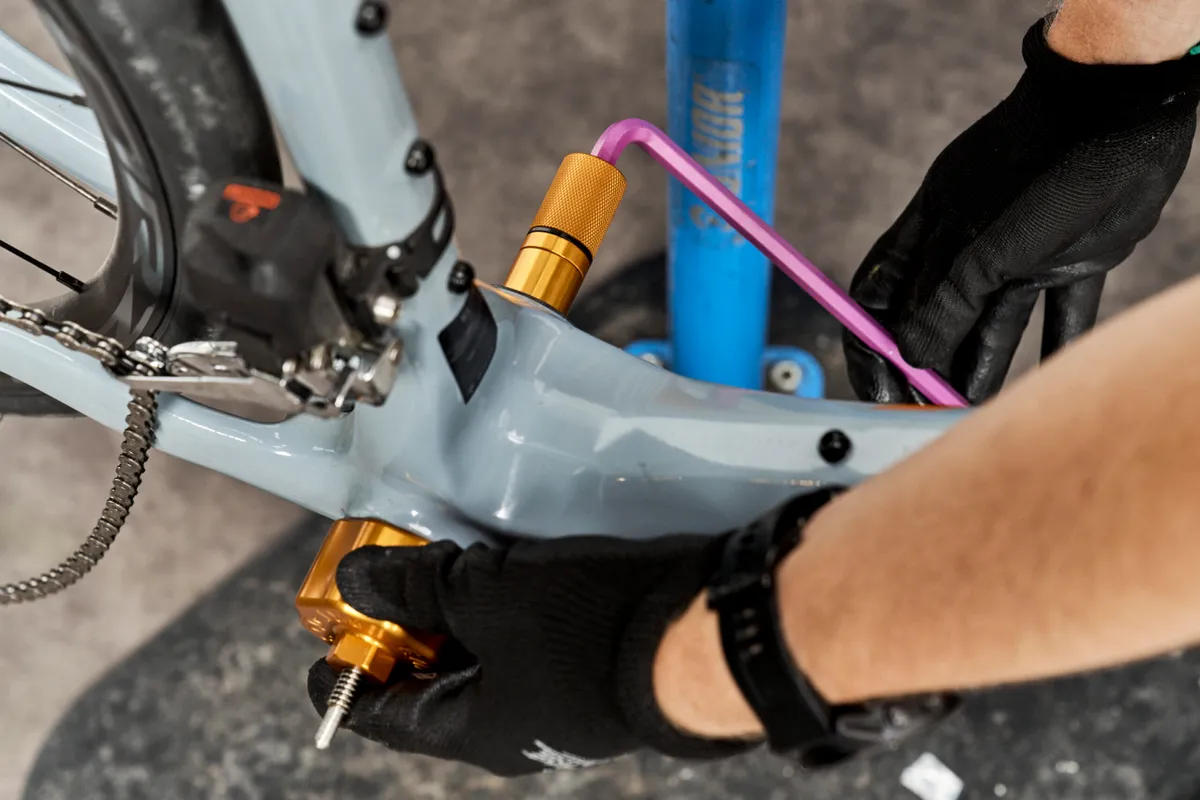
Install the bearing loosely into the frame.
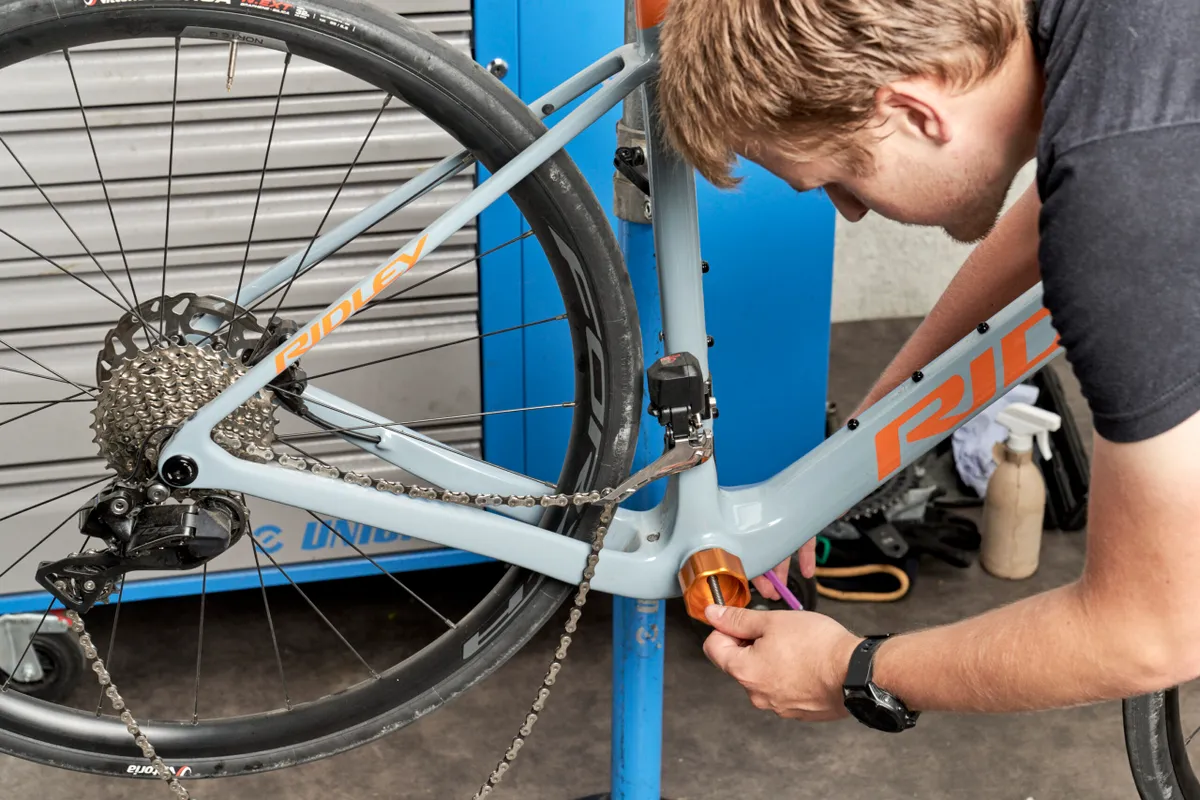
Set up your press and drifts. Begin to press the bearing in. Press it in slowly and make sure the press is installing it straight.


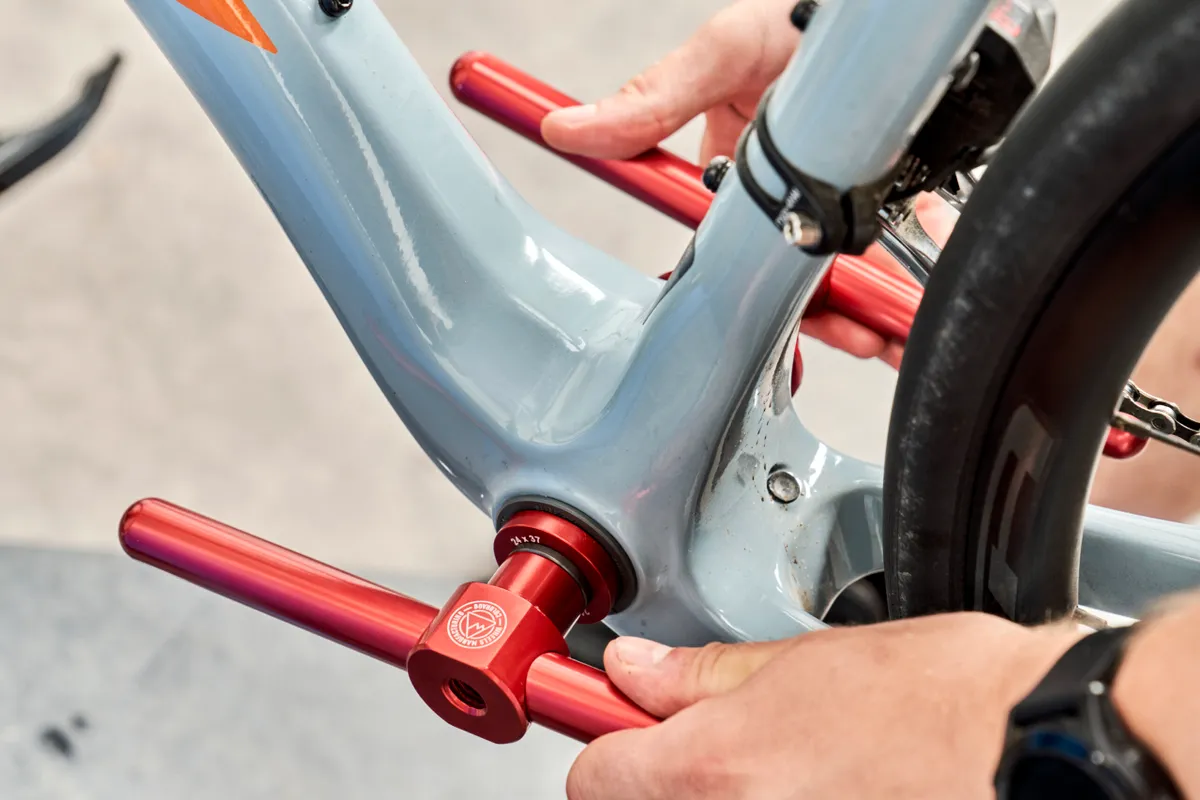

It’s normal to hear some slight creaks or popping noises as the bearing seats into place but if at any time the bearing becomes excessively tight to install, stop and reassess the situation.
You should feel the press tighten up once the bearing’s fully seated. Do not over-tighten the bearing, because you risk damaging the bearings or fracturing the frame.
Step 5
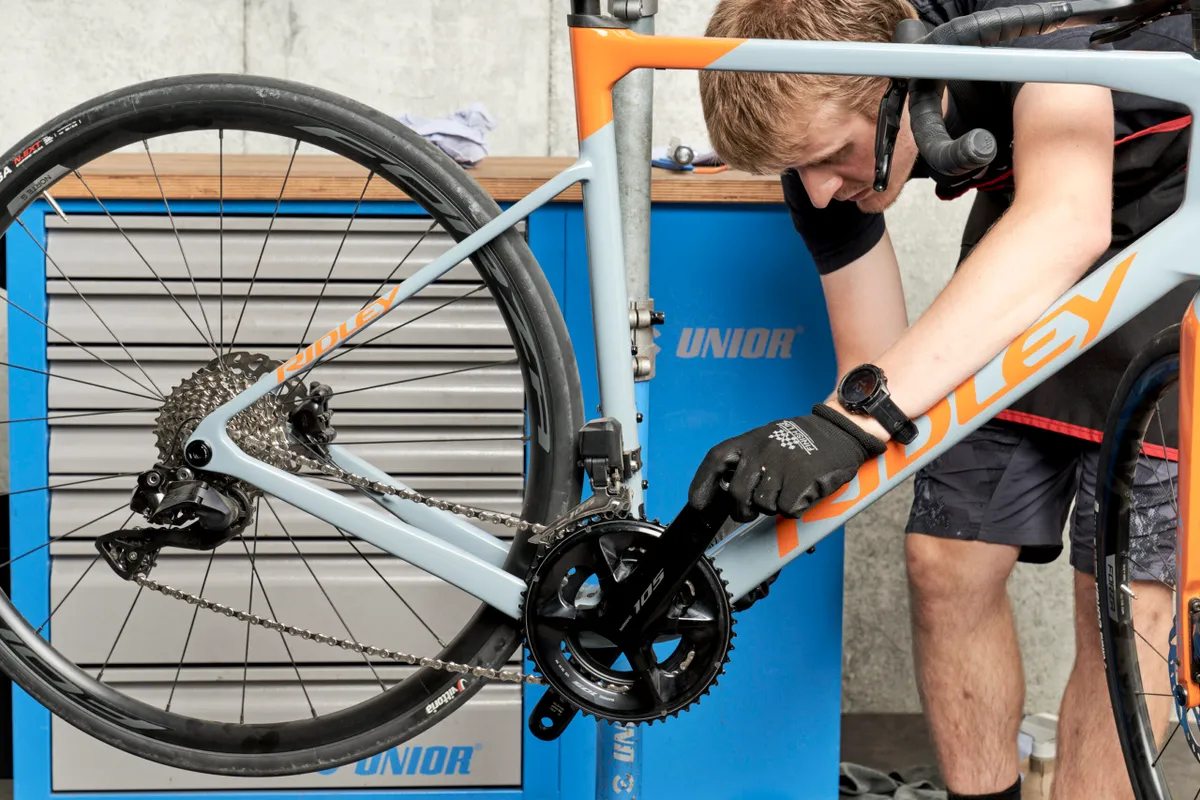
Visually inspect the bearing has been correctly pressed in and the bearings spin freely. Reinstall your crankset and check for smooth operation.