Disc brakes offer confidence-inspiring and consistent braking, even in wet weather.
They’re generally very reliable and durable components, but disc brakes can make a lot of noise if they’re not set up correctly or contaminated. That noise can sound like a ‘ting-ting-ting’ as you ride, or a squeal/squeak as you stop.
Do you want quiet disc brakes? In this guide, we'll take you through the different reasons your disc brakes may be squeaking and how to silence them.
Why are my disc brakes noisy?

Disc brake noise can occur for a number of reasons. We’ll explain some of the common causes of squeaky disc brakes and provide some suggestions on how to resolve the problem.
When working with disc brakes, it's always worth wearing a fresh pair of mechanic’s gloves or using a lint-free rag because the oils in your skin can contaminate the pads and disc brake rotor.
If you have any doubts as to your mechanical ability, take your bike to a reputable mechanic.
9 ways to stop disc brake squeaking
1. Poor alignment of the brake caliper
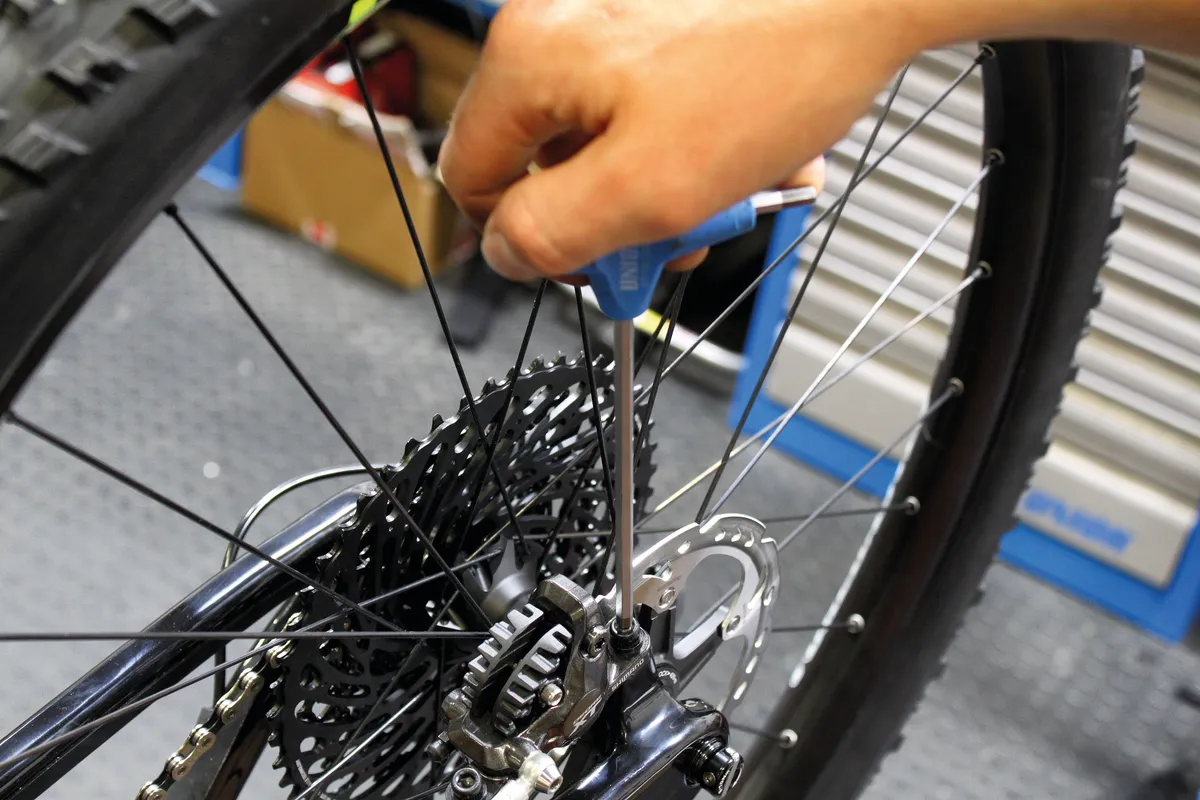
One of the most common reasons a disc brake is rubbing is the brake caliper is misaligned with the disc rotor.
It is imperative the caliper is centered properly. If it isn’t, the disc will scrape against either the brake pad or on the inside of the caliper body.
Admittedly, the tolerances on many disc brake systems have grown very fine and it can sometimes be a tricky task.
If your frame uses open dropouts, make sure the wheel is installed correctly before making any adjustments to the brake. It is best to install the wheel on the floor rather than on a stand to allow gravity to centre it in place. If your bike uses thru-axles, you don't need to worry about this step.
The easiest way to resolve the issue is to slightly loosen the two bolts that hold the caliper to the frame. There’s no need to undo them fully, just enough so the caliper is free to move. These are often 4 or 5mm hex bolts, or sometimes a T25 torx bolt.
Once you have loosened the bolts, spin the wheel and pull on the respective brake lever. Then, without releasing the brake lever, equally tighten the two bolts back up to the relevant torque spec and, fingers crossed, the problem will be solved.
This process repositions the caliper over the rotor and by holding the brake on, should cause the caliper to self-align.
It’s important you tighten the caliper to its full torque spec before releasing the lever. If you torque the bolt after releasing the lever, the effect of any final tightening can minutely move the caliper and then you’re back to square one.
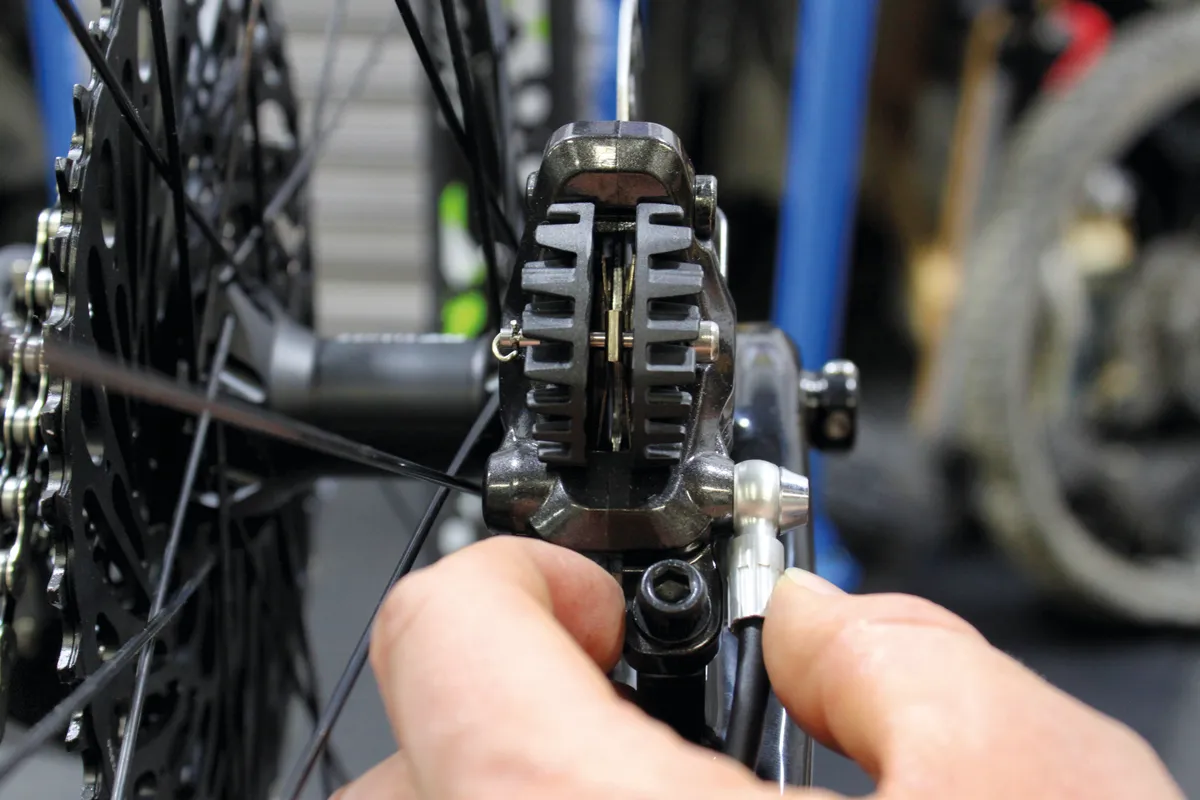
If this technique hasn’t solved the issue, you can try to align the caliper by eye. If you’re working somewhere with little light, try putting a piece of white paper on the floor behind the caliper. The white paper will make it easier to align the caliper because it will make the space between the pads and rotor more visible.
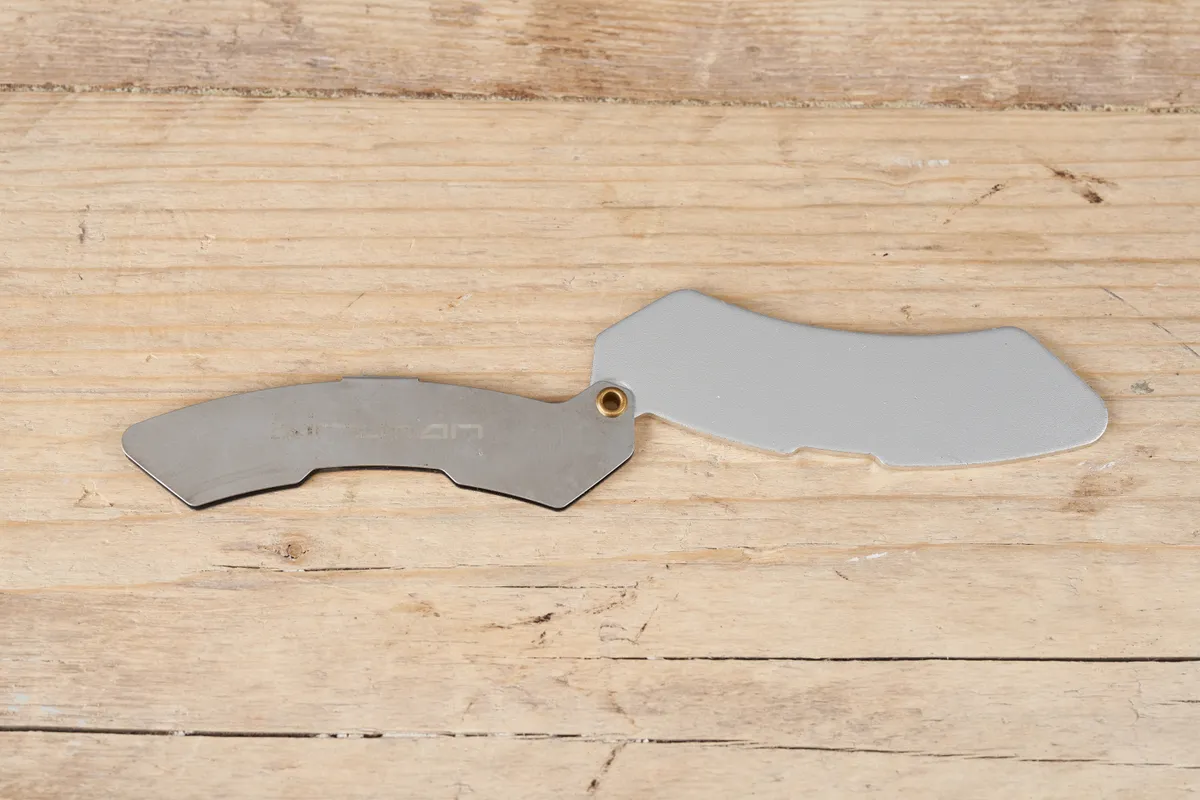
If your disc brake still isn’t aligned after trying these steps, some manufacturers such as Birzman or Hayes have caliper-alignment tools in their range. These are essentially feeler gauges with metal either side of the same width, to create an equal space between the disc brake pads.
You fit caliper-alignment tools over the disc rotor in the loosened caliper. Once installed, pull on the brake lever and tighten the two bolts to the relevant torque spec. As long as the disc rotor isn’t bent, this often solves the problem.
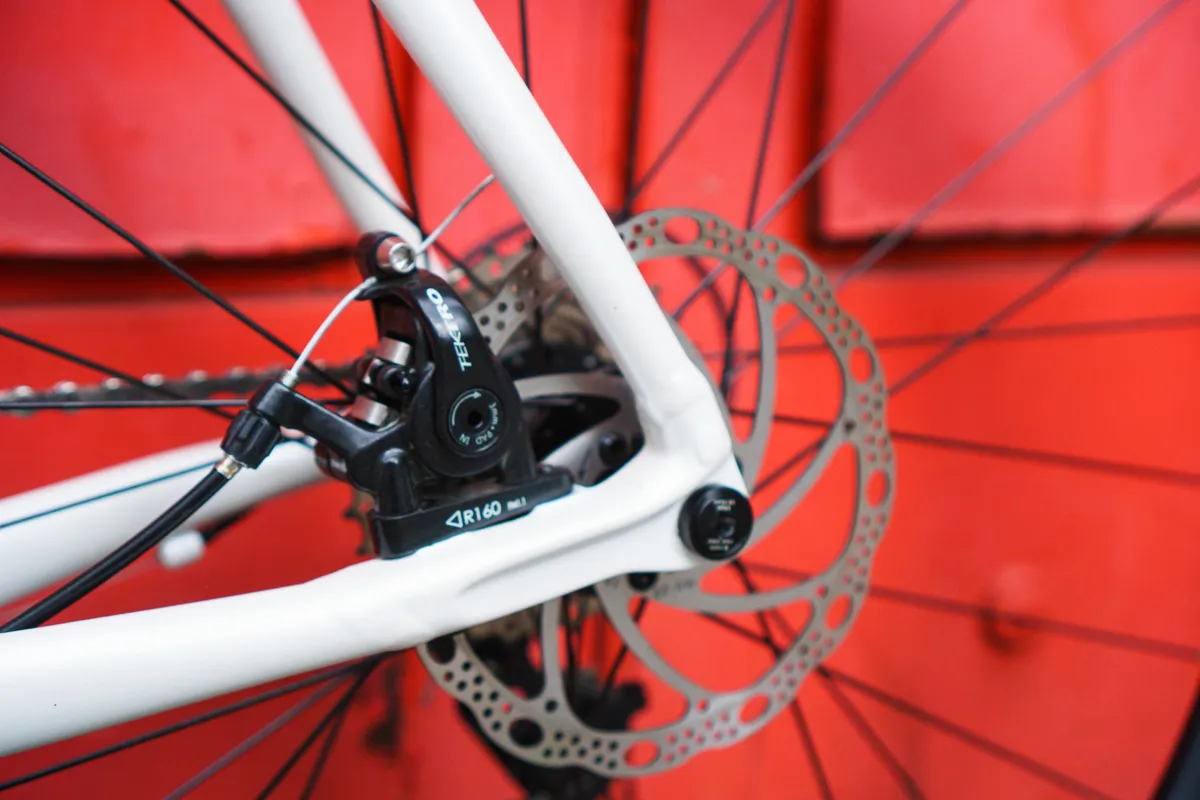
If you own mechanical disc brakes, the setup procedure can be a little different. Most systems comprise of one moving disc brake pad and one static pad. You want to set the static pad as close to the disc rotor as possible and then fine tune the cable tension to ensure an optimal lever feel.
If the mechanical disc brakes are of a dual-piston design, such as the Tektro Spyre, then setup is largely the same as with hydraulic systems, in conjunction with setting the correct cable tension.
2. Pads contaminated
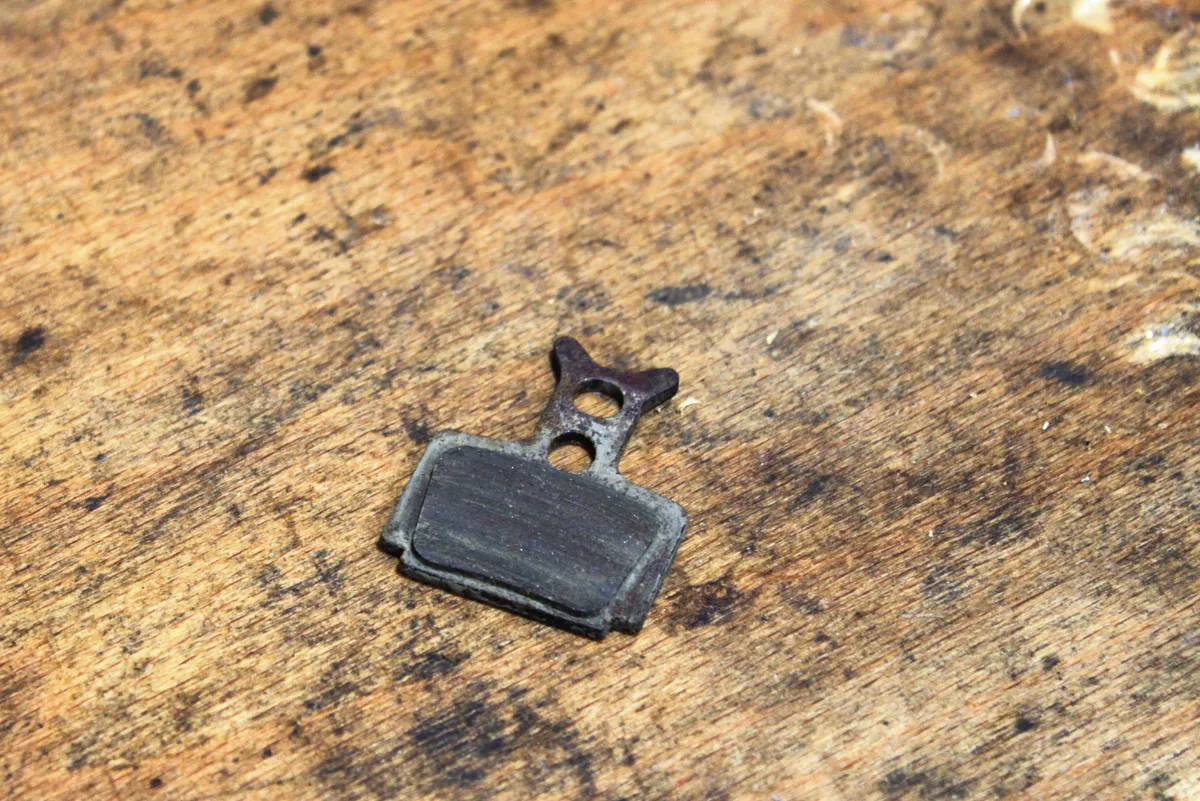
Your disc brakes will certainly be noisy if your brake pads are contaminated. Brake pads can be contaminated if you ride through oil on the roads, or if you accidentally get any degreaser or lubricant on them.
When you’re cleaning your bike, make sure you either cover your disc rotor and caliper or spray degreaser on the chain in a way that means it won’t get onto the rotor.
Providing the wind isn’t blowing in the rotor’s direction, you can spray degreaser on the chain just as it meets the crankset underneath the driveside chainstay, because this is the furthest point away from the disc brake system. In terms of cleaning disc brakes, it's always best to use specific disc brake cleaner or isopropyl alcohol.
You can alternatively use a chain-cleaning device to virtually eliminate the risk of pad contamination.
You’ll know if your pads are contaminated because when you come to a stop you’ll hear a squealing noise and the braking power will be reduced considerably.
The easiest way to resolve the problem is to scrupulously clean the disc rotor and brake caliper, and replace the pads.
If there is a lot of pad material left, you can burn off the contaminants using a blow torch or sand some material away. However, this doesn’t always work and is almost always more trouble than it’s worth.
3. Pad material
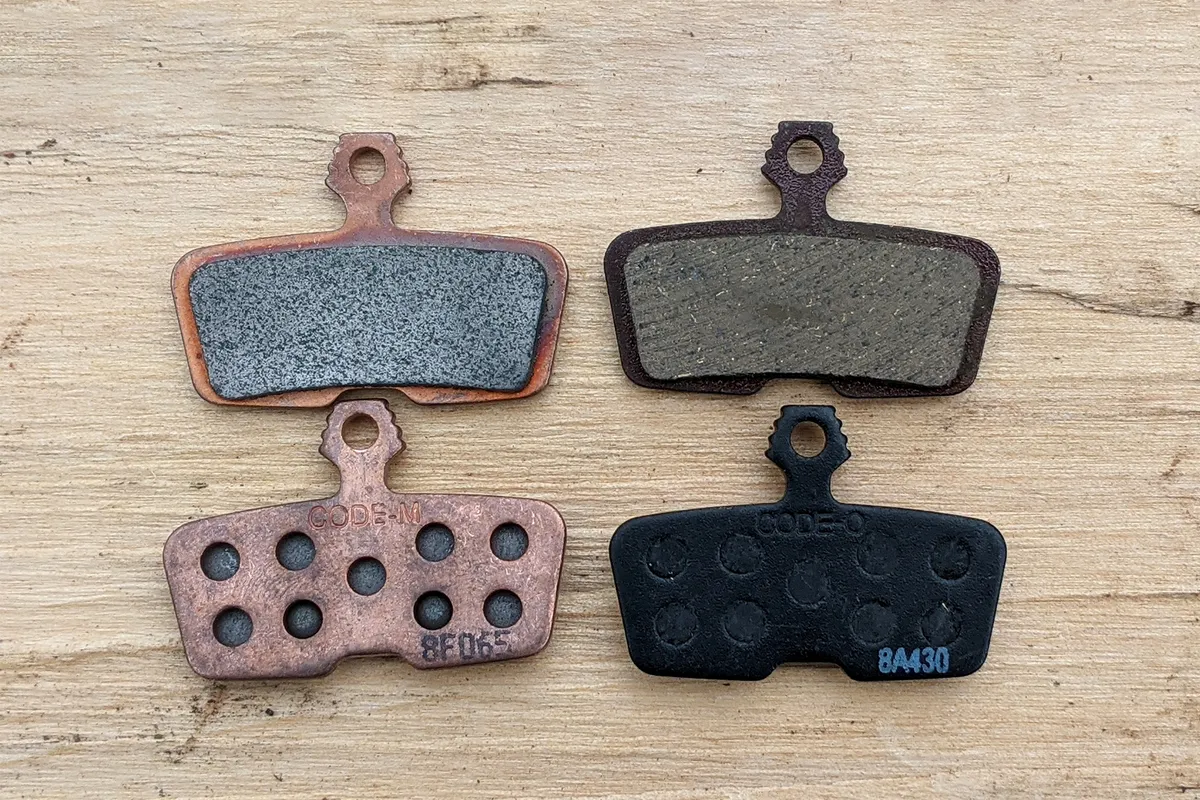
Disc brake pad material can have an effect on noise. Organic pads tend to run quieter than metallic pads.
If you decide to change your disc brakes pads from one material to another, make sure you use a new disc rotor that's compatible with the pad material to ensure optimum performance.
It’s important to add that you should use the correct disc brake pad for the overall braking system.
4. Disc brakes aren't bedded in

If disc brakes aren’t bedded in correctly, they can vibrate and cause noise.
Bedding in disc brakes is essential whenever you have bought a new bike or fitted new pads. The process transfers some of the pads’ material to the rotor, which allows the pad and rotor to ‘mate’ better and avoid any noise-inducing vibrations.
To bed your disc brake pads in, find a quiet area and ride at a walking pace and then apply both brakes evenly until you almost come to a stop. Then, release the brakes and repeat the process 10 to 15 times. You’ll feel braking power increase as you go through the cycle.
When you’re bedding in disc brakes, make sure you don’t pull on the brake levers too forcefully. This will lead to the brake stopping the wheel from turning and material won’t be transferred from the pad to the rotor evenly.
5. Pads are worn
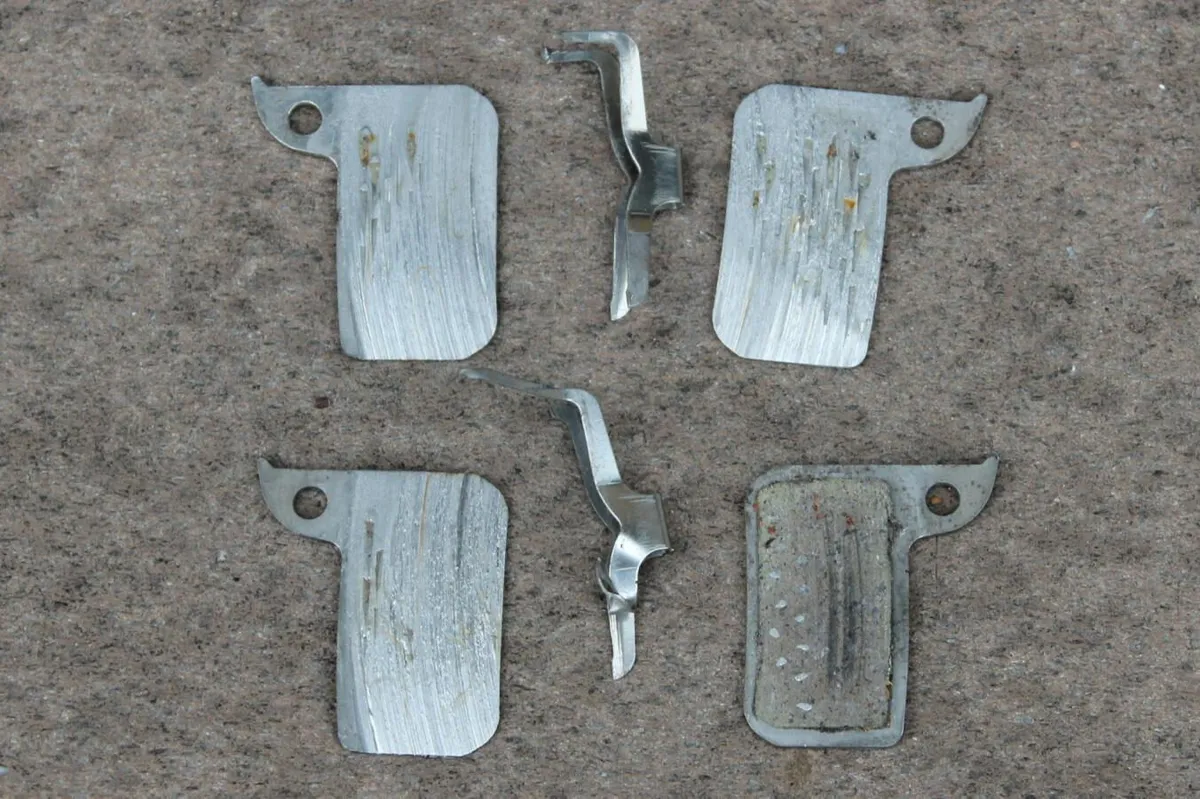
Noise can be generated if your pads are worn.
If the pads are worn down to the bare metal, you’ll hear the sound of metal rubbing on the disc rotor.
You can generally check the condition of your pads by looking at the back of the brake caliper or by removing the wheel and checking how much pad material is left.
Campagnolo disc brake pads feature a visible wear indicator. These give an audible warning when reached, too.
When fitting new disc brake pads, make sure you scrupulously clean the disc rotor and caliper to stop any old contaminants making their way onto the new pads and to allow for the best bed-in procedure.
6. Disc rotor or brake caliper not torqued correctly
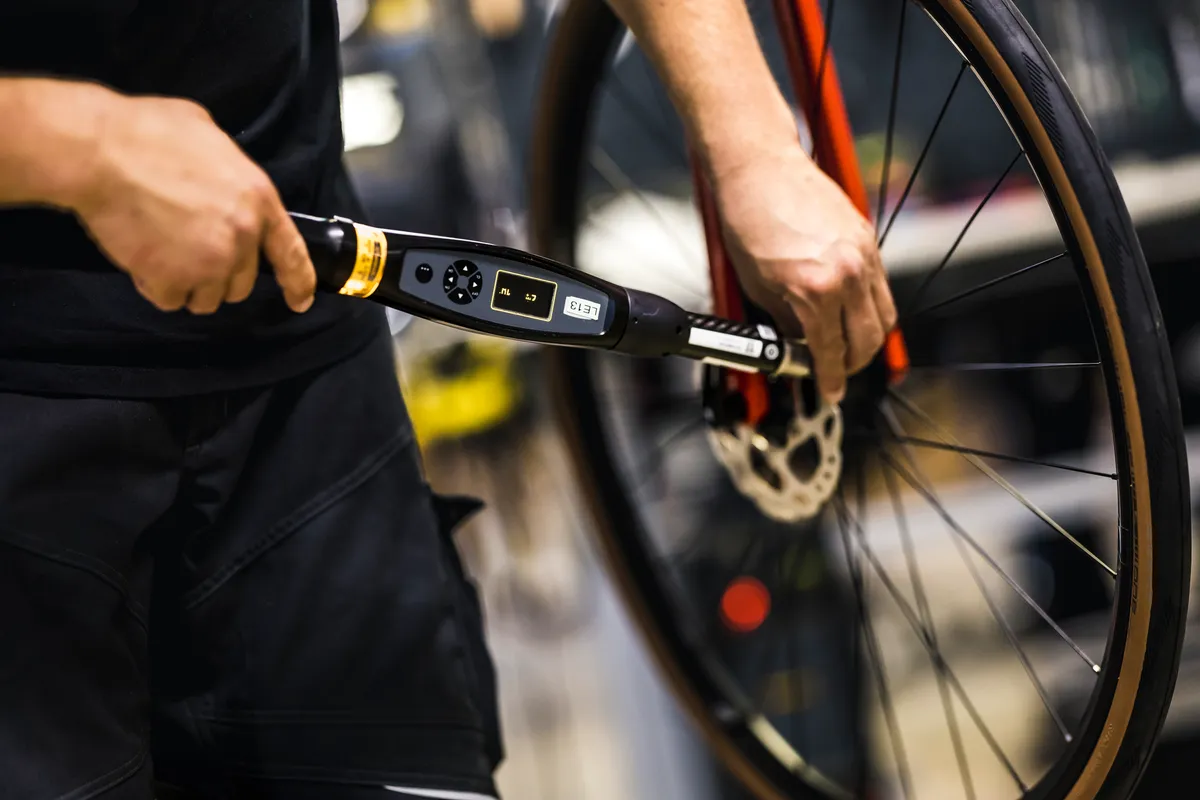
If your disc rotor or brake caliper aren’t correctly torqued, you’ll often hear a metallic clanging. You’ll likely find disc brake pad alignment impossible, too, because there will be play at the caliper or rotor from where they haven’t been securely fastened.
Make sure the disc rotor and brake caliper are tightened correctly. There will generally be a torque reading next to the component.
Centrelock rotors are typically torqued to around 40Nm using a cassette lockring tool.
To tighten a six-bolt disc rotor, it’s best to work in a star-shaped pattern. Start by tightening one bolt slightly, then move to the one opposite and tighten evenly. Next, evenly tighten the bolt next to the first bolt you started to tighten and then opposite and so on.
7. Bent disc rotor
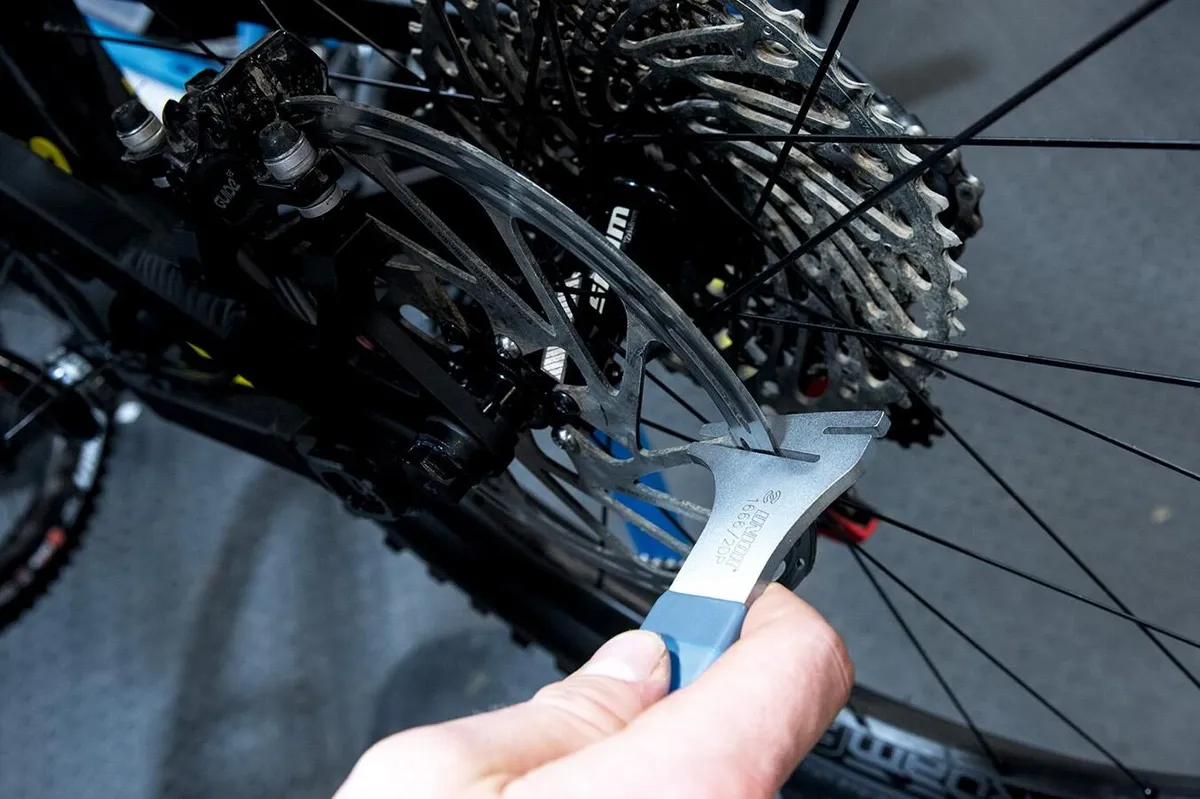
A bent disc rotor is a common cause of noisy disc brakes.
To avoid this problem, make sure you don’t lean your bike by its disc rotor. This might sound simple, but it’s easy to accidentally bend disc rotors when you’re loading your bike into the car, for example.
To fix a bent disc rotor, carefully sight where the bend is in the rotor and simply bend it back with an appropriate rotor-bending tool. Avoid applying too much force because it’s easy to bend a rotor too far back the other way. It’s also important to avoid touching the disc rotor with your fingers because the oils on your skin can contaminate the disc rotor.
Some mechanics prefer to bend a rotor back by hand. This is because you are applying less force to the rotor compared to using a dedicated tool. If you decide to do this, hold the disc rotor with a lint-free cloth to avoid contamination.
If your rotor is bent in multiple places, it’s unlikely you’ll be able to make it straight again – or straight enough not to rub on the brake pads in the caliper. If this is the case, it’s best to replace the rotor.
8. Poor or overfilled bleed
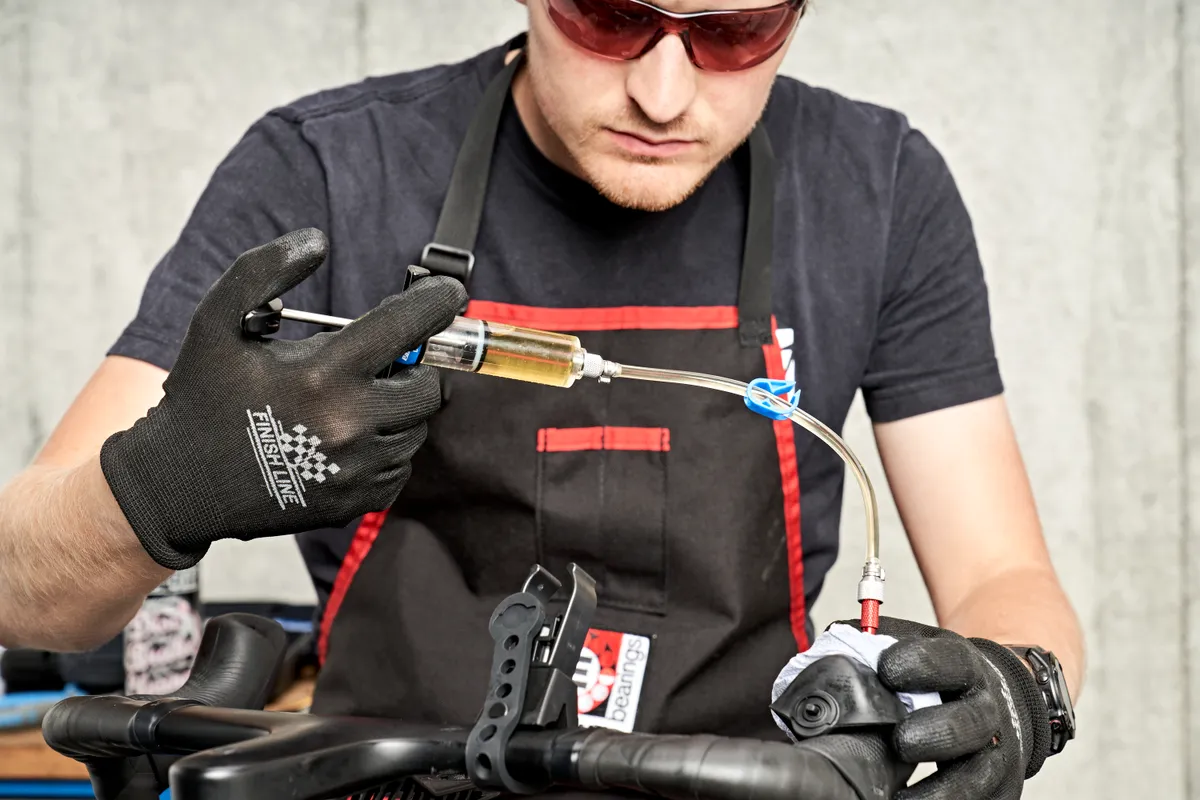
If the brake fluid has been overfilled on a bleed, this can cause the caliper pistons to advance further, resulting in less clearance between the pads and rotor, and potential rubbing.
You can identify the issue by trying to push the pistons back into the bores of the caliper with a dedicated piston press or a plastic tyre lever. If the fluid has been overfilled, you will struggle to fully push the pistons back into the bores of the caliper.
To avoid this issue, use the correct caliper spacers when bleeding your brakes.
Shimano and SRAM include caliper spacers with their bleed kits, whereas Campagnolo sells an ‘Oil Level Tool’ that you fit in place of the pads.
9. Poor facing of frame
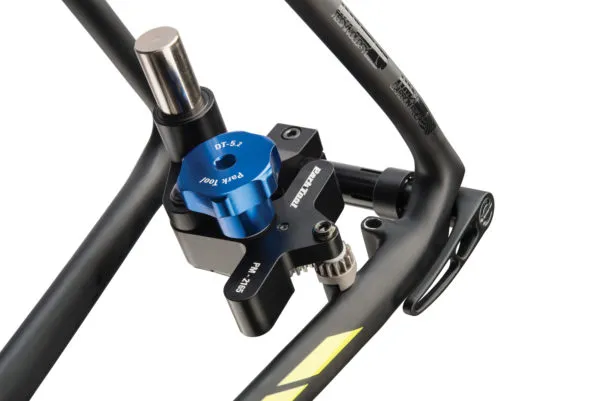
In order to perform optimally and avoid creating any noise, a brake caliper needs to be centered in its mounts. If the mounts aren’t properly prepared in the factory, you’ll never be able to align the caliper correctly.
You may also struggle to centre a caliper in its mounts if there's excess paint around the mounting points from when the frame was sprayed. If you suspect this to be the case, the best solution is to take your frame to a bike shop that has a facing tool, which will allow them to remove the excess material and for your calipers to be centred correctly.
But remember, some noise is inevitable...

Unfortunately, we live in far from a perfect world. Even when your brakes are aligned optimally, you can still experience some noise from them if you’ve ridden through water, grit or mud and it finds its way onto the pads.
The tolerances of road bike disc brakes are much tighter than their mountain bike counterparts. There is far less margin for error and sometimes, try as you might, you may still experience some noise.
